One of Bloodhound's unlockable quips goes, "A bad beginning draws a bad end," and it's easy to take that little gem of conventional wisdom for granted. Making it to the endgame in a match of Apex Legends is a journey that you really want to start off on the right foot, and the drop is the first step towards it.
A good or bad landing is what sets those initial odds for or against your team, respectively, so it probably goes without saying that you want to put some planning into it. I know I've had my fair share of disasters and triumphs when it comes to skydiving over Kings Canyon, anyway. In fact, I've managed to have enough of both to feel dangerously close to having a few thoughts on the matter.
Actually, why stop at a few? Why don't I have... I don't know, exactly twenty of them? Then I could organize them into some sort of itemized list and share them with strangers via the internet! Capital idea, if I don't say so myself. Anyway, let's quit wasting all this valuable time that we should be spending bringing home the wins and get into it. As always, share your own thoughts in the comments below!
20 The Angle Of Approach Matters

The dropship will start from a different side of the map every game. While this doesn't drastically alter the gameplay, it does impact which drop sites are easily accessible, and which ones aren't.
It may not be a conclusively determining factor when it comes to how the match will play out, it does mean that plans are going to change concerning where and when you'll make the jump, so leave the solid decisions off the table until you've got an idea of what you'll be working with.
19 Most Overlooked Location: The Pit

If there's one thing I've noticed so far, it's that the Pit is probably one of the most underutilized drop locations in the game. This probably has to do with the fact that it looks more like scenery than a point of interest, being tucked away into a mountain towards the northeast of the map.
It's also a high tier loot location, but the loot on-site isn't necessarily what makes it valuable.
The Pit's value is its central location, as practically every locale you'd rotate into from there is at least mid-tier, with all of them being very close by and easily accessible. You get a lot of options landing here and it's usually not too highly contested, making it a pretty solid call for teams with a "big picture" mentality.
18 Spreading Out & Keeping Together

You don't want to spread out too far from your mates, but getting a little breathing room is a step towards success regardless of drop conditions. Dropping clustered too close together isn't advantageous for anyone, causing you to compete for loot within your squad, thus delaying everyone from getting totally kitted out. More importantly, it slows you from covering the area and moving on.
If you've managed an ideal, peaceful drop, then spreading out a little wider over a zone will allow your squad to cover an area much faster, expediting your rotation to the next loot area or ring.
17 Guns Blazing: The Hot Zone

The "Hot Zone" is a randomly selected point of interest that has its loot upgraded, easily recognized by a big, blue beacon and carrying a strong potential to find weapons that are already fully kitted out with maximum tier attachments.
Obviously, it's going to be a hotly contested area. So if that's your goal, expect heavy and immediate resistance. Hit it as early as humanly possible, keep your squad together despite the temptation to run wild, and consider the idea of looting and running over sticking around for the madness.
16 Landing On The Supply Ship

The supply ship is essentially a mobile hot zone minus the fully kitted weapons. It's loaded with all sorts of goodies, making it a tempting target as a drop location. It spawns randomly on the map, but its path will almost always intersect the dropship's at some point.
Keep in mind that while it's slow, it is still a moving target, so adjust your drop angle accordingly and make sure to keep it high enough.
This one's going to be hit or miss. It's either going to be really hot and confined to very tight quarters, or it's going to be a breeze that leaves your squad with a lot of advantageous equipment. The thing to keep in mind is that you can bail at any time if it looks like the situation is going sideways, and you're unlikely to be followed.
15 Location, Location, Location

Naturally, every possible location is going to come with a set of advantages and disadvantages. The primary consideration is going to be loot, of course, and there's a handy reference guide for location loot tiers right here.
In terms of popularity, you can usually expect more resistance in areas near the dropship's starting point and any location towards the centralized area of any quadrant on the map. Skulltown and Cascades, for instance, are almost always a guaranteed fight from the second you touch down. The hot zone and supply ship come with their own considerations, which are addressed in their own entries.
14 Plan Ahead

Don't just choose a drop location - choose a path to victory. If you're spreading out, ping your individual locations before you land. Talk about and choose your rotation options, preferably two. One as a primary, the other as a secondary if you're short on time or things go wrong.
Maybe even talk weapon preferences so your team has an idea of what to ping for one another – just don't get too caught up on that during the loot scramble.
If your location's going to be hot, pick a rally point where your team can consolidate and cover one another after the initial loot scramble. One of the most common problems you'll experience in a hot zone is being able to get your team together during the chaos.
13 The Need For Speed

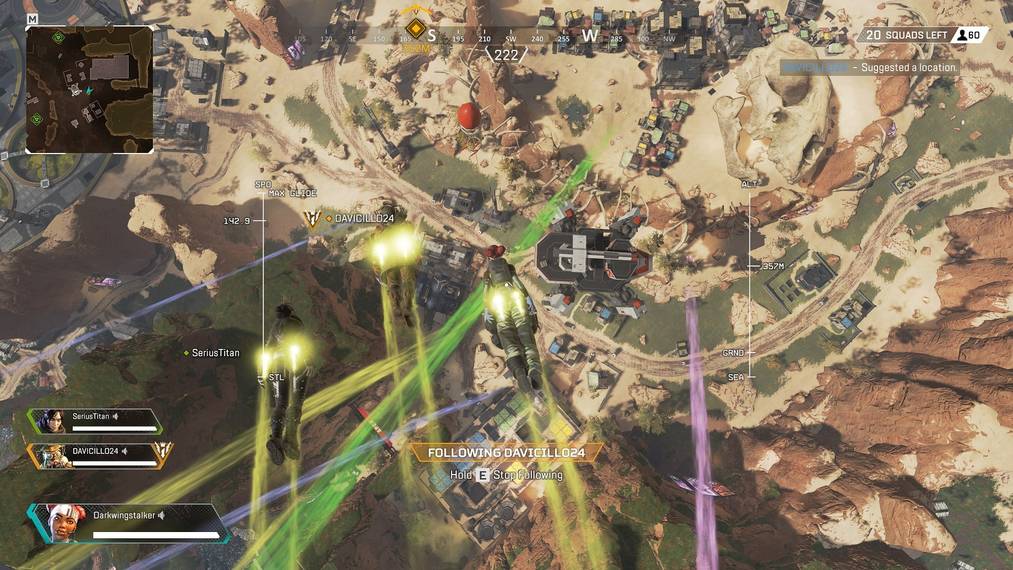
When dropping, there are a couple of gauges on either side of your screen. The one on the left-hand side tracks your velocity. You'll notice that it increases as you drop straight down, and slows down as you level out.
Getting onto the ground as soon as possible after jumping is of critical importance, so you'll want to pay attention to it. When dropping nearby, this isn't much of an issue, as dropping straight down easily hits the maximum speed rating of 150. If your destination is a little further out, alternate between leveling out towards your location and dropping straight down in a "stair step" pattern, with practice you should be able to maintain at least 140 comfortably.
12 Mind The Mountains

Approaching an area of incredibly high elevation could cause you to drop out of jump mode, so they're best given a pretty wide berth when closing in. Landing on them isn't likely to provide any real lasting advantage, as the greater majority of them are so tall that they count as "out of bounds."
It's obviously best to choose a path that won't put you at risk of an unexpected and risky shortfall, but if it's necessary, take great care to give yourself enough room to maneuver around those obstructions. The game will detect you as "landing" from an annoyingly generous distance away.
11 Notice Tactical Advantages

You'll eventually learn the layout of the map and all of the relevant points of interest, but until then it helps to study the location as you're hurtling towards it. This is of particular importance if you're expecting a messy bout of fighting shortly after you've touched down.
Dropping onto high ground or choice bits of cover in a contested location can give you the edge when it comes to making it out of there alive, and dropping onto the bigger piles of loot will give you more options to defend yourself with during the ensuing melee.
10 Preparing For A Rough Landing

Sometimes, despite our best efforts, securing a prime landing spot all to ourselves just isn't in the cards. Or maybe you're just into making a high octane entrance to the party, preferring a hot zone or the supply ship. In either case, it's going to be a rough landing and you need to hit the ground running.
This generally boils down to making a "fight or flight" call as soon as your feet touch the ground, and being honest, "flight" is the option to go with if you're looking to maximize your chances to win. If there are multiple enemy squads in the locale, make a few quick grabs and let them fight it out while you upgrade your team's equipment in the next area over.
9 Emergency Detour

If you're starting to get cold feet over a drop location that looks like it's getting too hot, you can always reroute to another location. If you're coming up short of a solid landing spot, keep an eye out for smaller, unmarked clusters of buildings and supply crates that are still within your jump's reach.
They may not be the most loot-heavy starting spots, but they definitely beat dropping on top of a team that's armed and waiting for you and should afford you enough equipment to get to the next area.
8 Avoid The Crowd

I'm sure that this will draw no end of contention given how I see most players performing their drops, but if you're looking to make it to the end of the game, dropping into a hot or crowded zone is just plain counter-intuitive.
Sure, if you make it out, you'll likely have a nice pile of loot to show for it. But that's a big "if" with a long list of variables. The more of those variables you keep from entering the equation, the higher your odds of success are.
7 Communication Is Key

Apex doesn't leave you many excuses when it comes to communicating with your team. While a microphone is definitely desirable, you can keep up well enough utilizing pings and callouts.
That said, listen and respond! Ping your target location, suggest alternatives, and go over the plan with your squadmates. The more prepared and in sync everyone is before hitting the ground, the smoother those crucial opening moments will go for everyone involved.
6 When You Are The Jumpmaster...

The coolest things that you can do are listen, inform, and interact. Seriously, nothing's worse than being at the mercy of a stubborn and inexperienced or non-communicative player, and more often than not it'll get your squad completely annihilated in the match's opening minutes.
Ping locations before you leap for them, or even better, ask your squadmates for input and ideas. And if you're still unsure, you can pass the responsibility to one of your buddies just as easily.
5 When You're Not The Jumpmaster...

Make suggestions if you've got them, and keep watch for enemy teams since you don't need to worry about navigation. Make sure to split a short distance from the pack just before impact to give everyone a little breathing room.
What you should definitely never do is decide to go rogue and drop solo elsewhere. This leaves your squadmates vulnerable, and you even more so. You might get your pick of whatever loot you stumble upon in the secondary location, but really you're just turning yourself into a delicious little loot pinata, begging to be cracked open by the first squad to find you.
4 Patience Is A Virtue

You don't need to rush the decision-making process here, and there are a lot of benefits to waiting it out. Firstly, you'll have a pretty good idea of where everyone else is dropping if you hold off for a bit, allowing you to make a more informed decision.
You're told how many players are still in the dropship at the top of the screen while you're still on board. A lower number means fewer potential competitors with fewer players knowing where you've landed, and those are both deeply underrated advantages to have in your corner.
3 Choosing When To Drop

Once you've got your heart set on a spot, all that's left is to decide when it's time. While usually I'd advocate waiting as long as possible, there are a few things to consider before defaulting to that.
If you're hitting hotter, more contested areas, every second you wait is a second the enemy will spend getting equipped, so get there as soon as you're able. But remember that dropping too early may put you too far from the target, causing you to fall short. As a rule, I'd recommend at least getting within 800m to drop until you're really, really comfortable with how drop momentum works.
2 The Loot Scramble

Even if you didn't drop into a messy hot zone, efficiency is key. Just before hitting the ground, spread out to cover the area quickly and ping pretty much any loot you're passing up for your comrades, but make sure to be thorough. The whole point of a quiet drop is to get prepared to survive, so make full use of your advantage.
If you did drop into a hot zone, weapons take priority over everything and maintaining squad cohesion is very important. Once everyone is armed, your priority should be tightening up with your squad to eliminate outstanding enemies and secure all the sweet, sweet loot that brought you there.
1 In-Flight Bamboozle

When playing Mirage, one often overlooked little trick is the fact that he can use his tactical ability during a drop, creating holographic decoys before he even touches down.
It might be a long shot, but the pay off is worth it.
There are a lot of utility options here, like fooling opponents into believing a landing site is going to be a little more crowded than it really is, or trying to target it at specific loot spots to discourage competitors away from loot-heavy areas.