Assassin’s Creed: Odyssey truly embraced the fantasy element that the series has always delved into. The AC games have always been based in historical fiction, but with a heavy dosage of science fiction. Pieces of Eden, ancient civilizations, and gods are among the many ridiculous things the franchise has introduced.
Since Odyssey takes place in Ancient Greece, it’s only fitting that they introduce boss fights rooted in Greek Mythology. As part of the “Two Worlds: A Family’s Legacy” questline, you will eventually find Kassandra’s father. He will tell you that you need to hunt down various ancient artifacts which will help close the gates to Atlantis.
Since this is a video game, the artifacts can only be obtained by defeating various bosses through different side missions. The Sphinx, Minotaur, Cyclops, and Medusa. The Sphinx actually isn’t a traditional boss fight. It’s mainly a sequence of riddles. The remaining three bosses are going to take some time and preparation.
Each of these bosses offers a different experience that gets more difficult than the last. This guide will give you an idea of what attacks to look out for which each boss, as well as some tips, to make the fights as painless as possible. It’s recommended that you beat the main story before taking them on. They are considered part of Odyssey’s endgame activities. Plus, finishing this quest line unlocks the true ending of the game that will make your jaw drop.
RELATED: 10 Best Armor Sets in Assassin's Creed: Odyssey, Ranked
3 Cyclops aka Brontes, The Thunderer

Brontes is definitely the easiest of all the mythical bosses. His attacks may pack a punch, but he’s super slow and all of his moves are easy to figure out. To access this boss, take a trip to Kythera and start the side mission titled "A God Among Men." Follow the story of this quest and at the end of a couple of quests, you will find Brontes.
Attacks

As previously stated, Brontes is very slow. All of his moves can be telegraphed. Even if you totally forget what move he is about to do, you will still have plenty of time to react. He does have a stomp attack AoE attack when you’re near him. You’ll notice this once he lifts his leg up. Once he does this, immediately dodge away from him to avoid the impact radius.
He does have another stomp attack that has a similar effect. He only utilizes this when you’re at a distance. You’ll see him lifting his leg once again. Only this time, when he stomps the ground, pillars and rocks from the arena will begin to crumble and fall, damaging you in the process if you get caught in it. Instead of dodging, you can just keep running to the left to avoid the falling debris.
The other major attack that you’ll need to avoid is his charging attack. Once again, he’s not that fast so you can easily dodge this. Just know that it will do massive damage if you get hit. Midway through the fight, a cutscene will happen where Brontes gets even angrier. He will then grab a pillar to use a melee weapon. Don’t worry though, his attacks remain relatively the same.
Strategy and Tips

If you want this fight to be as quick as possible, you should equip gear that has a mix of Assassin and Warrior damage. One amazing Engraving you can use is the 100% Damage Increase (25% Health Cap) perk. However, this is optional. Using it will make the fight go by much faster, so long as you dodge all of his attacks. Obviously, if you’re not a quick player, then don’t use that Engraving or you’ll be dead in seconds.
As for the fight itself, you’ll want to always get behind him and attack. If you have the Slow Time, this will make the fight a complete cakewalk. Daggers and swords are great since they do fast and constant hits. The more attacks you can do at a time, the more Adrenaline you can build up. That’s another perk you should look for. If you can find armor or weapons that have a high Adrenaline Per Hit (or CRIT) perk, all the more power to you.
Once you have built up your Adrenaline, you can do a mix of either your Overpower Warrior or Hero Strike abilities. These two skills will apply the most amount of damage. The only downside for Hero Strike is the cooldown. Luckily, the Overpower skill does not have a cooldown. Another recommended Engraving is the -1 Adrenaline Cost for Overpower Abilities perk. If you have 8 Adrenaline Bars filled up, you can easily do 4 Overpower attacks in a row and his health will be massively decreased.
Then just repeat this process over and over again with your daggers or swords being used to build up your Adrenaline. The fight will be over before you know it. Even faster if you choose to use that 100% Damage (25% Health Cap) perk.
2 The Minotaur

The Minotaur in Odyssey does not mess around! This boss fight is an excellent test of speed and accuracy. One wrong step and you’re minced meat. He can be found when you follow the Myths & Minotaurs questline, which is on the Messara island. This will introduce a few quests, where the Minotaur will be waiting for you at the end.
Attacks

The fight consists of two stages. In the first stage, he’s fairly tolerable. While he is quick, his attacks aren’t as dangerous. He will mainly swing his ax down on you, with a few pounce attacks that you need to be ready for. He also has one lunging attack where he will hold his ax in his right hand, and he will sweep it around to you.
Once you get his health about halfway down, the real fight begins! A cutscene will happen and you can see the Minotaur is frustrated. Once gameplay commences, you’ll notice two things. The arena is now much smaller, giving you less room to work with. To top it all off, his attacks are quicker and unrelenting. Instead of one ax hit, he will do three. The first two swings are sweep attacks and the last one will come straight down on you. If you’re caught in all three attacks, be prepared for a game over.
The last attack you need to be ready for is his charge attack during the second stage. He will sprint towards you and then swing his ax. If it hits you, you will first take damage from the force of his ax. Then he will throw you backward, which will also make you take damage. If you don’t have a high armor rating, this can one-shot you. So be careful.
Strategy and Tips

Since the Minotaur is extremely quick, your build should be heavily reliant on the Slow Time ability. You should also make sure your gear has a good mix of Assassin and Warrior damage boosts.
In this first stage, you’ll be able to get past most of his moves. Luckily, he tends to pause between attacks, giving you plenty of time to get his health down. At this time, you’ll want to refrain from using your abilities too often. This is because you should have a full Adrenaline bar by the second stage starts. So it’s recommended that you use Slow Time a sparingly. You’ll want to use your daggers and swords to get multiple hits and build up that Adrenaline. You can use your Hero Strike here and there, but just make sure to not get carried away. Otherwise, you might start the second stage with little to no Adrenaline.
Once the second stage starts, immediately jump into Slow Time and run up to him. You can use any combination of abilities, but we recommend using Hero Strike first, then unleash 1-2 Overpower Attacks on him. These attacks bring his health down significantly at the start of the second stage.
The key to this fight is making sure you spend little time in the second stage since it’s so easy to make a mistake. Specifically, getting caught in his charging attack, which will most likely kill you if you don’t have high armor. Speaking of this charging attack, make sure you dodge to the right when he’s directly running towards you. If you dodge to the left, you will jump right into his ax. You’ll also need to avoid his three-hit combo. Your best bet is not even to engage him when he’s doing this. They are all hard to dodge and time. So just wait until he does his third strike, then go in for a few hits. You can also activate your Battlecry of Ares occasionally if you’re getting overwhelmed. The damage boost given is good, but you mainly want since it prevents all fatal damage while active.
Since you started this stage with 3 to 4 powerful attacks, he shouldn't have too much health. So just keep hitting from behind and build up that Adrenaline. To assist you in the second fight, it’s recommended that you find the -25% Cooldown For Abilities Legendary Engraving. Apply this to one of your weapons so you can use Slow Time as often as possible. All that’s left is to get another few Hero Strikes or Overpower Attacks in and you’re good to go!
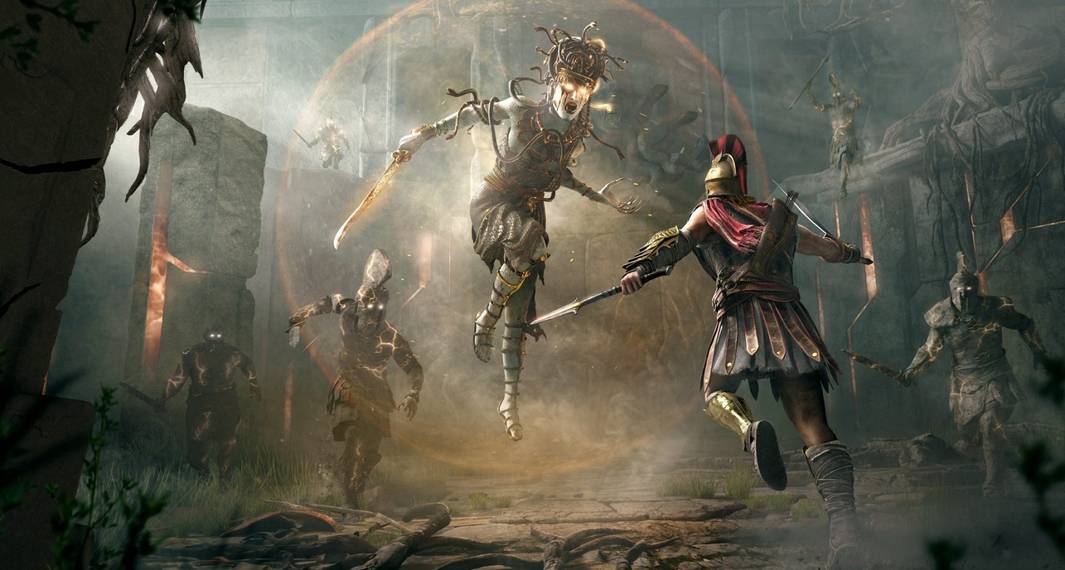
1 Medusa

Medusa is considered by most to be the most difficult of all the mythical creatures. The biggest challenge is that Medusa is often difficult to hit since she constantly teleports around the arena, which increases the length of this fight. The longer the fight, the more chances you have for making an error and losing altogether. Frustration will kick in high gear after you’ve spent a good ten minutes on her, only to die from one little mistake. She will be found during the Romancing The Stone questline found on the Lesbos island.
Attacks

When the fight starts, she will create an impenetrable shield around her. Then she will summon three stone minions that will start attacking you. Be sure to keep an eye on Medusa as you fight the minions because she will start unleashing her two main attacks. The first is a beam of light that can slow you down (petrifying you). Her second attack is an AoE attack in which she stabs her blade into the ground, which summons lightning from the ground wherever you are standing. Once all the minions are killed, she will come out of her forcefield.
From here, you can start attacking her. The one thing to look out for while you’re up close is her grab attack. You will see her lift her arm to grab you. Make sure to avoid this as it can easily one-shot you. Other than her ranged attacks and grab, most of her attacks are simple slashes that you can easily avoid.
After a certain amount of damage is taken, she will then bring back her forcefield and summon four minions this time. Once you kill them and then damage her enough, she will do one last shield and summon five minions. There are essentially three stages to this fight.
Strategy and Tips

During the fight, Medusa is constantly teleporting around the arena, which shortens the window of opportunity to attack her. This is why it’s best to specialize in a Hunter build with high CRIT chance and damage. Make sure you have a Bow that is up to your level and has the Basic Arrows Become Fire Arrows engraving. For your armor and weapons, you can use any sort of Epic Gear you have, but almost all of them should have a Hunter Damage boost on them.
The hardest part of this fight is dealing with her minions since you can get overwhelmed very quickly. Your best strategy is to keep your distance around all three of them, while simultaneously finding cover behind pillars for her beam. The best skill you can utilize is your Multi-Shot ability. If they’re all within your view, you should be able to hit all three of them. This will make crowd control much easier. If you run out of Adrenaline, headshots will do the track. They may be able to swarm you, but they are very weak and can go down with 4-5 headshots.
Her ranged attacks are pretty easy to dodge. Once you see her stab her sword into the ground, just start dodging in one direction. The lightning strikes will follow, so keep dodging until they are done. The next dangerous attack is her petrifying beam of light. When she shoots out the beam, you should immediately look for a pillar to hide behind. If you are behind a pillar, you won’t get hit by her beam of light.
Since Medusa is quick, you’ll want to use the Slow Time (Slow Time is seriously the best skill in the game if you haven't noticed). When time is slowed, you can come up behind her with your daggers to build up Adrenaline. Generally, Medusa will teleport away after she’s taken a few hits, so you can keep attacking and she will most likely teleport away. Don't worry about too greedy with your attacks. Once enough Adrenaline is built up, you can start using the Devastating Shot and Ghost Arrow of Artemis abilities.
Your secret weapon in this fight is the Ghost Arrow of Artemis. Even though this skill is mainly used for stealth sections, the Ghost Arrow can be quite effective on Medusa since you have a great window of opportunity to use it. When you see Medusa charging up her beam of light, quickly get behind a pillar. You now have a good 5-6 seconds to aim your Ghost Arrow at the pillar where Medusa is directly lined up with. She won’t be highlighted like guards are in stealth. So you simply need to aim your bow at the pillar until the reticle turns red, and then shoot. A CRIT Chance engraving is essential for the Ghost Arrow as most of your hits will do a critical no matter where you hit her. Also, you can sometimes get some good basic arrows shots on when she's using her beam attack. Just slowly creep to the side of the pillar, and then you can aim your bow to get her in your crosshairs.
Keep up this pattern for the whole fight as the stages are the same throughout. The only real challenge is dealing with her minions in-between stages. The high damage critical hits from Devastating Shot and Ghost Arrow will bring down her health quickly. Your arrows will be great for building up your fire damage on Medusa as she will constantly be taking damage. If you have a high CRIT chance, some of those fire damage over time effects may even be critical hits (doesn’t make sense I know).