A Fury from the Sea is the next main quest in Assassin's Creed Valhalla after Raising Iron. It tasks you with finally taking down Rued's clan once and for all in order to restore peace in East Anglia.
This is a relatively long quest with a lot of combat and a pretty difficult boss fight, which is why we've put together this full A Fury from the Sea guide as part of our complete Assassin's Creed Valhalla walkthrough. Here's how to storm Castle Burgh in Assassin's Creed Valhalla, as well as how to find and defeat Rued.
Assassin's Creed Valhalla A Fury From The Sea Guide
This guide picks up directly where our Raising Iron guide left off. After speaking to Theotford at King's Bury and convincing him to join your cause, you will need to head to the forward camp in order to reconvene with your allies. The camp will be highlighted by a quest marker, so making your way there shouldn't be too much of an issue.
The fastest route is to fast travel back to Northwic docks before auto-sailing your way to the quest marker via longship. Once you arrive at your destination, hope out of the boat and climb the cliff in front of you. If you auto-sailed, you will automatically be brought to the correct area.

Finnr will be waiting for you at the top of the cliff. Speak to him to trigger a cutscene, during which Eivor will deliver an emotional speech to all of your allies. By the time you resume control of your character, you will already be well on your way to Castle Burgh. As you approach the castle, the enemy will start bombarding you with flaming arrows, forcing you to pull up your shield in order to protect yourself and your crew from them. Once you get close to the outer wall, a new cutscene will play in which Finnr's boat — which is loaded with oil jars — is sent forward towards the seemingly impenetrable gate. When it reaches the outer wall it will explode, blowing a hole in the side of the castle's battlements and allowing you to pour inside with all of your allies.
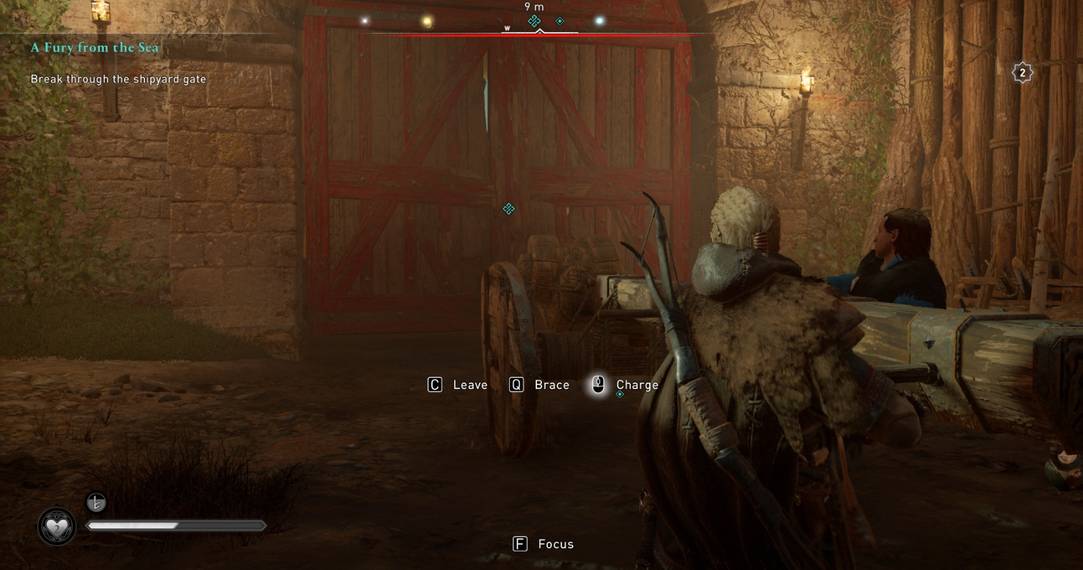
When you resume control of Eivor again, your first objective is to kill all of the enemies around you. You're supposed to interact with the battering ram at this stage, but there's really no point in using it if your enemies are just going to kill you while you're locked into the charge animation, so clear yourself a path before joining your crewmates (who will attack the gate with or without you, meaning you don't even need to interact with the battering ram if you don't want to). If you do decide to use the ram, remember that you need to go back until the button glows gold, at which point you are far enough way to generate enough power to charge at the gate. To break through the gate, you'll need to hit it with three or four fully-charged knocks.
Once you breach the first gate, your next task will be to smash through the second. Be sure to kill all of the enemies around you, but don’t push forward with the ram just yet. There are enemies up to your right raining fire arrows down onto the oil-laden ground, meaning that you can easily get caught in a massive blaze if you're too hasty. To prevent this, look directly above the archers and you will see a huge object hanging from a rope. Shoot the red part at the top of the string keeping it suspended and it will drop on the enemies, killing all of them. Once you've done that, shoot the two flammable barrels directly above the gate to use your opponents’ own oil against them and trigger a huge explosion. Now it's far safer to return to the battering ram and smash through the second gate.

Like last time, the first thing you need to do is kill everyone around you. There are more archers here, too, so you'll need to shoot the barrels above and to the left of the gate blocking you from pressing onward, before once again using the battering ram to break through it. A cutscene will play as soon as you breach the third gate, during which it will be revealed that both Oswald and Rued survived the fall earlier on. Kill the enemies around you, climb the wall in front of you up to the quest marker, and prepare to face off against Rued and his pet wolf once and for all.
This fight isn't quite as tough as it might initially seem, although it's certainly not easy either. First of all, Rued's wolf isn't actually that aggressive, despite being very mobile — you don't need to take it out first like you usually would in a boss fight where the boss has additional allies on their side. That being said, having space to use your bow instead of melee weapon works wonders here, meaning that targeting the wolf with melee attacks and saving your arrows for Rued once you've made some room for yourself is a solid tactic. I personally found that a headshot does quite a lot of damage, especially if you're using powerful adrenaline abilities. On top of that, Rued's mug is massive, meaning that you don't need to be the most accurate archer in East Anglia to crack him right in the noggin.
Rued's healing ability is a bit of a nuisance, although it also provides you with an easy opportunity for headshot, which will interrupt the animation and prevent him from restoring his health while simultaneously dealing massive damage. For this headshot-based strategy to work properly, you'll need to take down the wolf first, then focus on dodging Rued's heavy attacks before landing a headshot on him with adrenaline abilities while he's locked in a recovery animation. Alternatively you can use melee attacks on the wolf to farm adrenaline, intentionally keeping it alive throughout the fight to keep your aggression towards Rued up.
Once you beat Rued, a cutscene will start. Here you'll be given the option to kill or spare Rued, before moving on to the next quest: Wedding Horns.