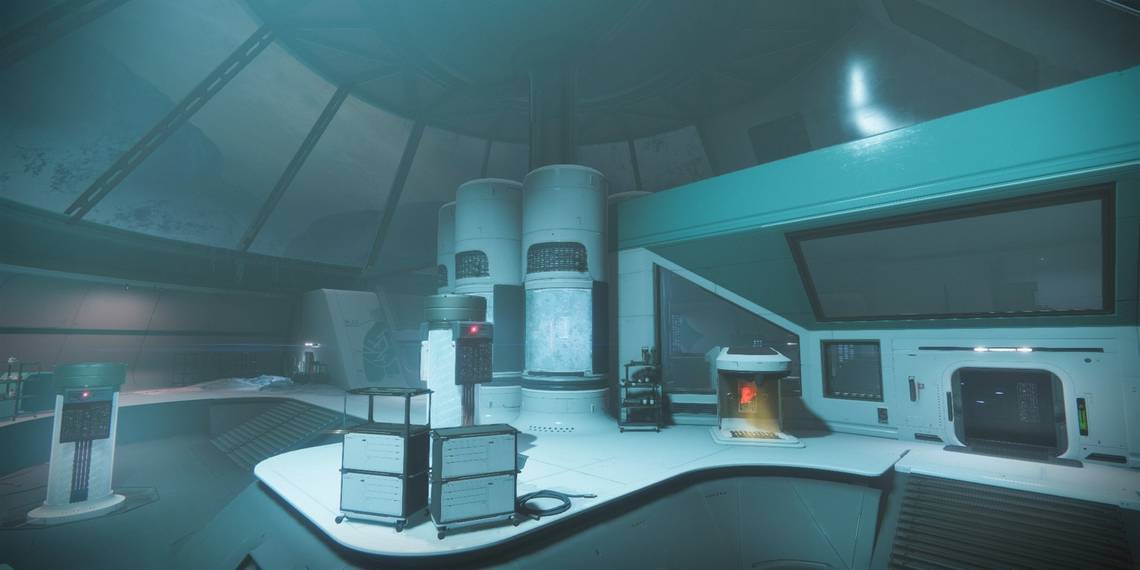
Destiny 2: Beyond Light brought with it the Deep Stone Crypt raid, a highly anticipated setting that has mainly been referenced in external lore. The birthplace of Exos certainly lives up to its name in this raid, offering some of the most unique mechanics and jaw-dropping visuals out of any raid in the franchise.
Guardians will start this raid in a blizzard just outside of the crypt. After your fireteam makes it inside, the Crypt Security will serve as the raid's first proper encounter. With a new set of mechanics and a rather strange arena to fight in, this encounter can be somewhat confusing for newer raiders. Fortunately, it becomes easy once you understand the mechanics. Here is a complete guide on how to conquer it.
A Quick Rundown Of The Fight, Mechanics, And Roles

The first encounter of the Deep Stone Crypt raid requires your fireteam to destroy six fuses in the center of the room in a certain sequence. To make the fuses vulnerable, players must obtain the Scanner augment and look under the glass floor to find out which four terminals are glowing. A player with the Operator augment will then go downstairs and shoot all four terminals the Scanner calls out. The Operator and Scanner swap augments, and the new Scanner calls out the vulnerable fuses in the center of the basement. Repeat this process until every fuse is destroyed.
Mechanics:
- Augments: These are permanent buffs that drop from certain Vandals. An augment terminal has the Operator augment pre-installed for players to grab. You can only have one augment equipped at a time. If you die with one equipped, a Vandal will spawn with the lost augment after a short period.
- Augment Terminal: Effectively a mailbox, this device allows Guardians to store augments that can be received from any other augment terminal. There are three in this encounter: one in the left-hand room, one in the right-hand room, and the final one is underground.
- Servitors: Servitors will periodically spawn and disable an augment terminal's functionality. Destroy Servitors to reenable augment terminals.
- Terminals: Small buttons that are stuck to walls or pipes. Operators can shoot red-glowing terminals to progress the encounter or open doors. Scanners call out which terminals underground are glowing yellow.
Augment Roles:
- Scanner: Call out which terminals are glowing yellow under the main floor. There are two on each side. Once a side finds two, pass the augment via an augment terminal.
- Operator: Shoot terminals that the Scanner calls out. When the DPS phase begins, pass the Operator augment up via the augment terminal and take the Scanner augment. Call out which fuses are glowing yellow.
How To Destroy The Crypt Security

This encounter is divided into three sections: left/dark, right/light, and underground. Split your team up so that two players are on left, two are on right, one is assigned underground, and the sixth assists either left or right. Take note of the augment terminal in every section of the arena. Assign the Scanner role to someone on the left and right sides of the arena. Whoever is going underground will be the Operator for this encounter. Before starting, make sure that players have a means of countering Overload Champions as they will spawn throughout the encounter.
Start the encounter by having the Operator player take the Operator augment from either the left or right augment terminal — grabbing it from the underground will kill you. Have the Operator work their way underground as the left side waits for their Scanner Vandal to spawn. The left side will kill their Vandal, grab the Scanner augment, then call out which two terminals are glowing yellow. There are five on each side. Once the terminals have been identified, the Scanner will pass their augment to the other side by using an augment terminal. The right side will then call out their two terminals.
Here is where all of the terminals are located (credit to Reddit user u/vmworks for this image):
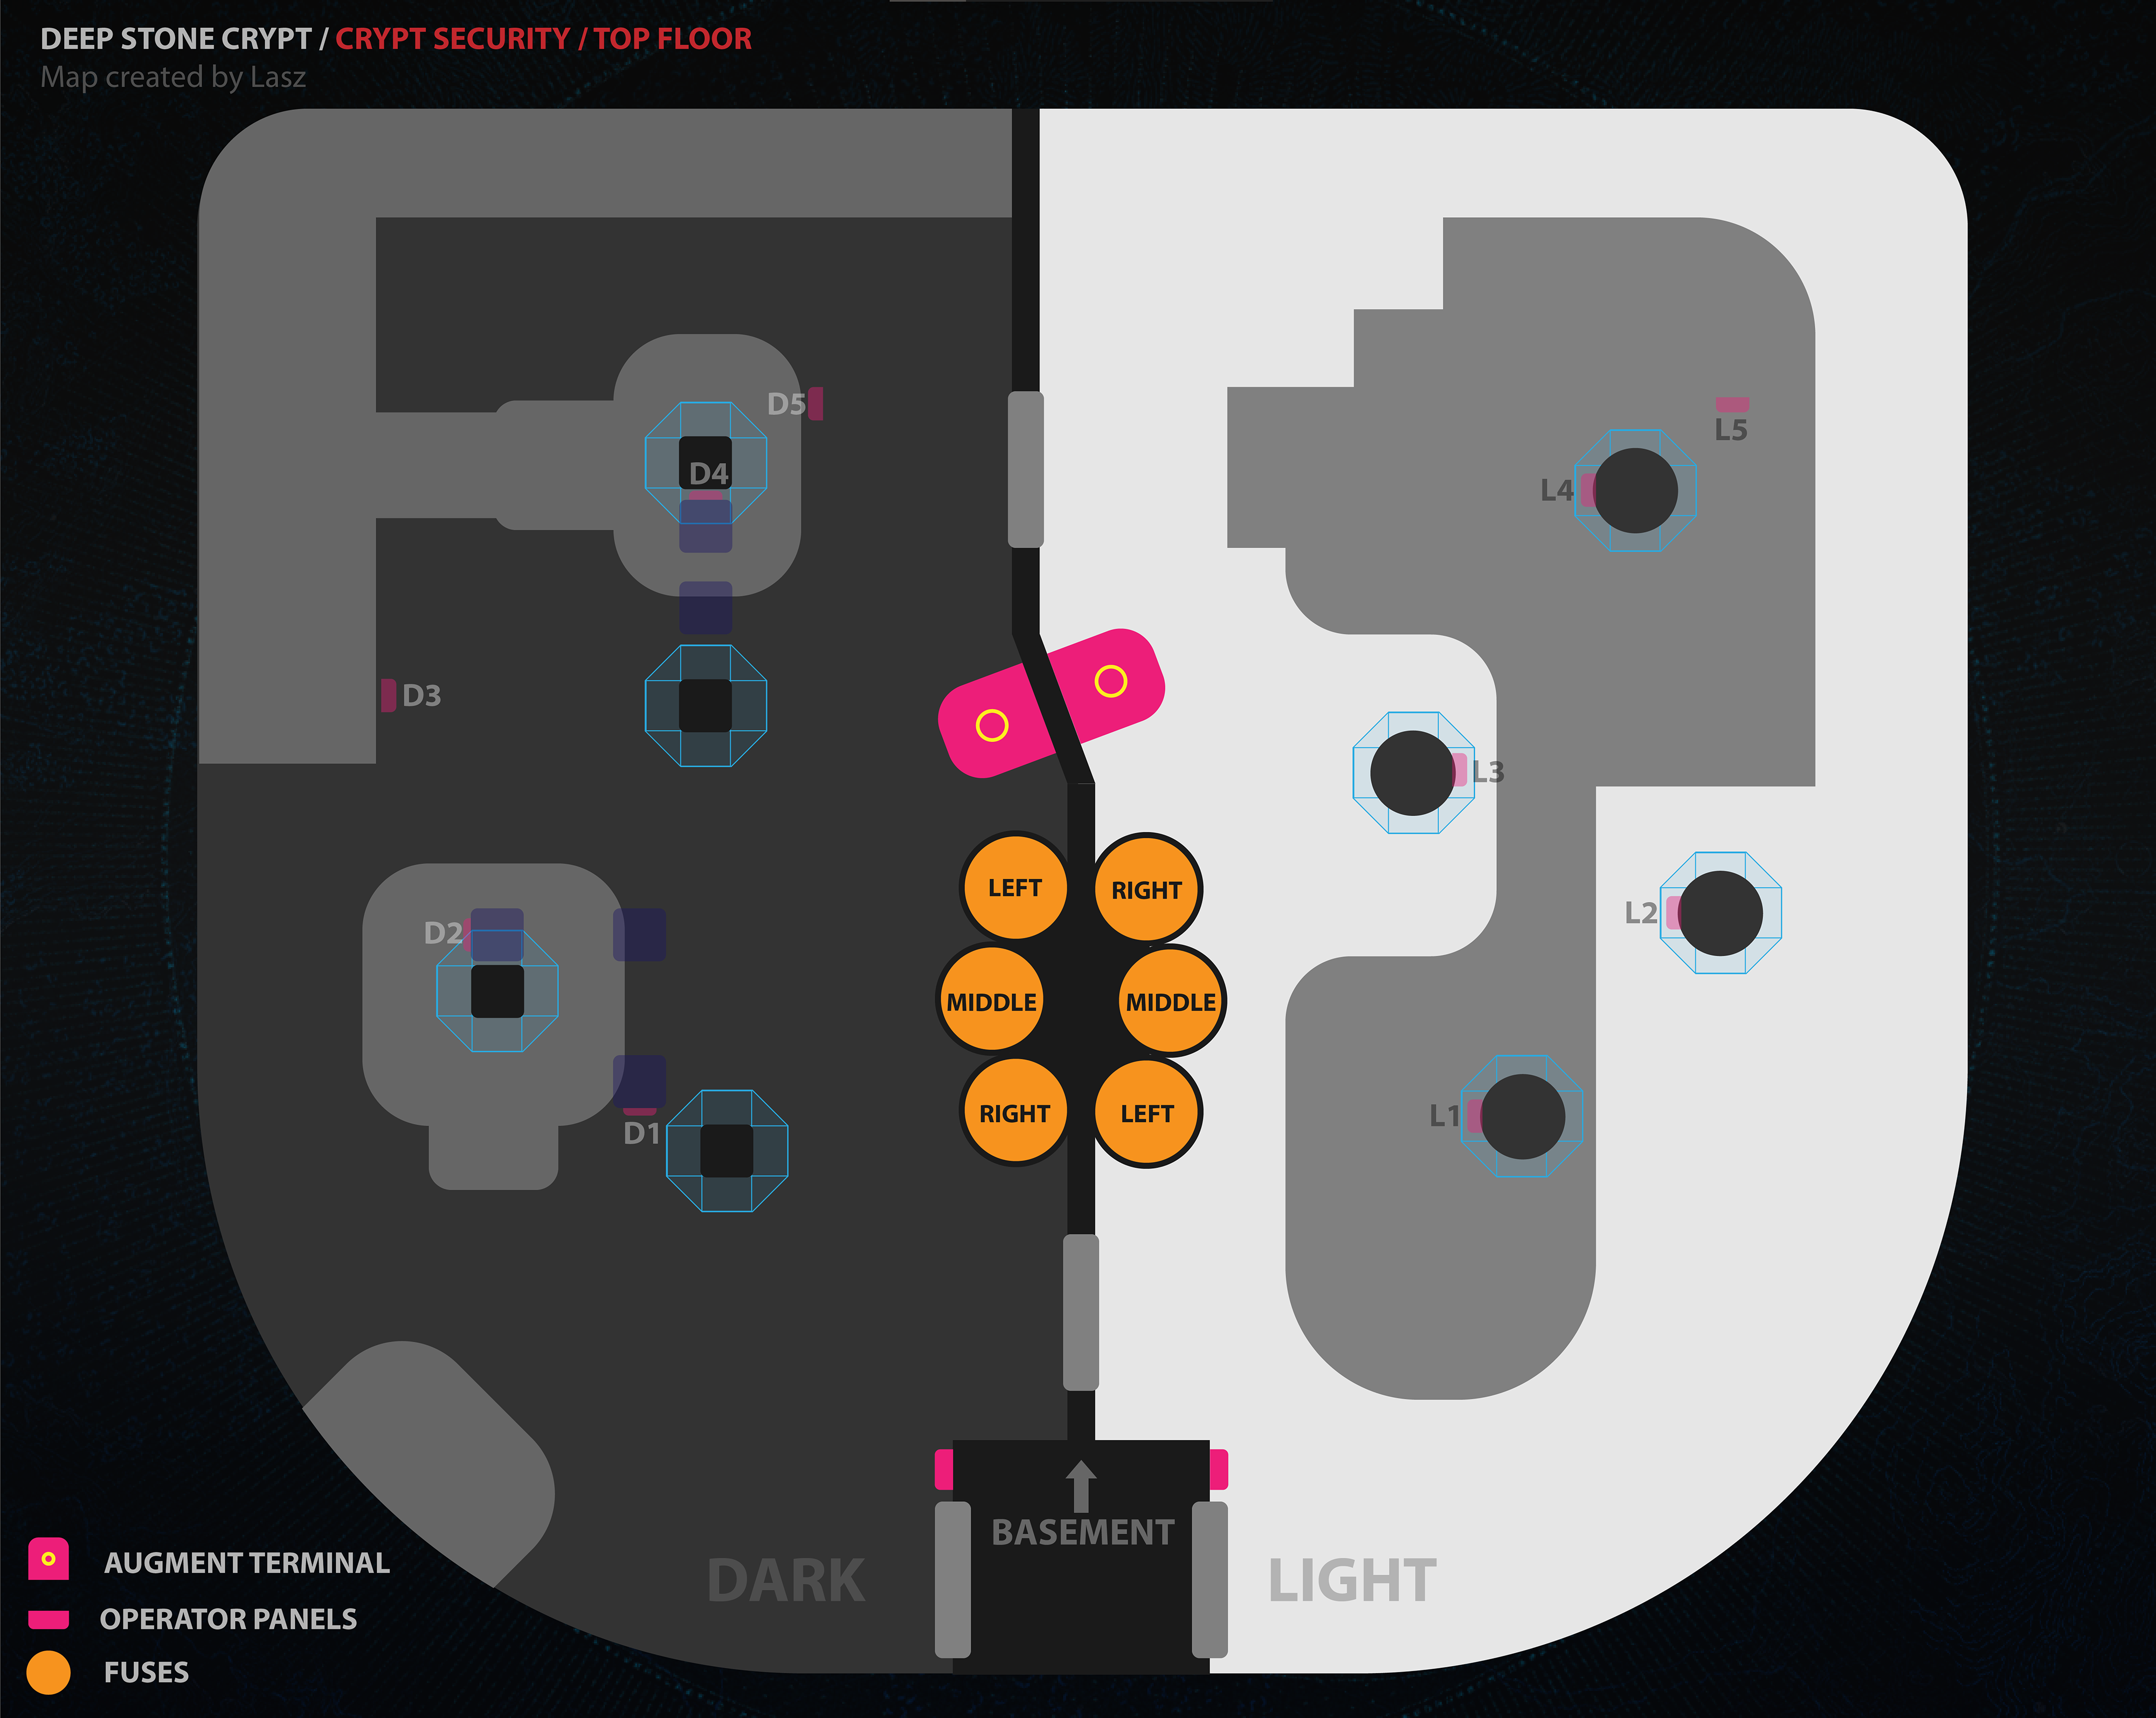
Each terminal that is glowing yellow must be shot by an Operator that is stationed underground. They have one minute after entering the underground room to shoot all four, else the Operator will be incinerated. Shooting the wrong terminal will also light the room on fire. If the Scanners are having a hard time doing this quickly, have the Operator enter the underground room after all four terminals have been identified.

After all four terminals have been successfully shot, the DPS phase will begin. The Operator stationed underground must receive the Scanner augment to call out which fuses are vulnerable. To do this, have the Operator deposit their augment into the augment terminal, then have a player without an augment grab it. Whoever has the Scanner augment will then deposit the augment, which should then allow the underground player to receive the Scanner augment.
The new Scanner will look at the central pillar adjacent to the augment terminal and call out which fuse is glowing. For example, if the left set of fuses has its right-most fuse glowing, they would call out "dark right" or "left room, right fuse." Players positioned topside will stay in their respective sections of the arena and destroy any fuse the underground Scanner calls out. Your team has around a minute to destroy all six fuses. If someone damages the wrong fuse, your fireteam wipes.
Should you not destroy all six fuses, have the underground player swap the Scanner augment for the Operator augment as before. If your underground Operator keeps dying during this transition period, have the Operator topside swap places with the underground Guardian, effectively swapping roles. Repeat every encounter step as many times as needed to complete the encounter.
Encounter Synopsis:
- The team splits between the left and right sides of the arena. The Operator player grabs the Operator augment and heads underground.
- Left side kills the Scanner Vandal and calls out both glowing terminals. They pass the augment to the right side.
- Right side calls out their two terminals. The Operator shoots all four terminals underground.
- The Operator places their augment in the underground's augment terminal. Topside grabs the augment and places Scanner in a terminal. The underground player grabs Scanner.
- The underground player calls out which fuse is glowing in the central pillar of the room. Topside damages whichever fuse the Scanner calls out. With enough damage, the encounter will end on this step.
- Have the underground player deposit Scanner. Topside grabs the augment and gives Operator to the underground member.
- Repeat steps two through six until the Crypt Security health bar reaches zero.
Recommended Loadouts

Nearly anything will work for this encounter. The fuses have a small health bar but require a considerable amount of burst DPS to break. Grenade Launchers, Xenophage, and full-auto Shotguns are recommended.
Subclasses
- Hunter: Way of the Sharpshooter for the Golden Gun Super, although anything works here.
- Warlock: Attunement of Grace for the Well of Radiance Super.
- Titan: Code of the Defender for the Ward of Dawn Super.
Weapons
- Heavy Grenade Launchers: Great burst damage potential and are quick to reload.
- Xenophage: A few shots take down a fuse from any position. Xenophage is also great for taking down Servitors and Champions.
- Full-Auto Shotguns: Perfect Paradox, the IKELOS Shotgun, and similar weapons are solid for damaging the fuses if you're positioned close to them.
Mods
- Global Reach: Allows your Seventh Seraph weapons to generate Warmind Cells, an explosive orb that clears entire rooms worth of enemies. Keep this Mod in mind if contest modifier ever returns.
Don't worry if you don't have the above-listed items; virtually anything works for this encounter. Just make sure you have either Special or Heavy ammo for the fuses.
Completing The Red Rover Challenge

Crypt Security's Red Rover Challenge requires all six players to shoot two underground terminals as the Operator. Note that you need a full team of six people to complete the challenge. Since a DPS phase begins after four terminals have been shot, this means that your team will need to reach three DPS phases to complete the encounter. Should a player die underground that has the Operator augment, the challenge will automatically fail.
Create a sequential list of when players will get the Operator augment. The first Operator goes to the underground section as normal, firing at the left side's terminals. When that is finished, have the Operator pass their augment topside after Scanner has been passed. The second player grabs the Operator augment and bails the underground player out. They then shoot the right side's terminals and act as the DPS Scanner. At the end of the DPS phase, the player that grabbed Operator will head downstairs, bail their underground teammate out, then repeat the process as the first two players did.
The order should look something like this:
- The first Operator grabs their augment and shoots the first two terminals underground.
- The Operator augment gets passed topside after Scanner. The second Operator grabs the augment and swaps places with the first Operator.
- The second Operator shoots the two right panels and scans for topside during the DPS phase. Make sure the third Operator grabs the augment.
- Repeat steps one through three twice more, making sure to bail out the underground player after the DPS phase so they don't burn to death.
That's it. As long as your team has strong communication skills, this challenge shouldn't take more than a few attempts.
Resource Contention Triumph

Resource Contention: Shut down Crypt security while only using 2 of the 3 augmentation terminals.
Completing the Resource Contention Triumph is much easier than most would think. This Triumph asks your fireteam to avoid using one augment terminal during the encounter. Since the Operator underground needs the Scanner augment at the start of the DPS phase, that means one of the augment terminals topside needs to be avoided.
Start the encounter as usual but don't have the Operator head underground just yet — have the Operator start on the left/dark side of the room. When the Scanner augment drops and the two terminals have been identified, have the Operator shoot the door terminals at the end of the room to let the Scanner through. The Scanner will then call out the other two terminals. After this, the Operator can then head underground and start the DPS phase. The rest of the encounter plays out as normal.
Make sure the Scanner deposits their buff in the dark room terminal to prevent failing the Triumph. If you cannot one-phase the boss, whoever grabs the Operator augment will need to bail the underground player out and fulfill the Operator role.