Getting through the main story of Cyberpunk 2077 is one thing, but actually completing all gigs and NCPD scanner hustles is entirely another ordeal. There are so many different types of missions in Night City that it might feel overwhelming initially to look at the map.
One of the NCPD scanner hustles is the Assault In Progress, which is marked with a blue club icon. Assaults will usually involve almost any type of enemy, from Scavs to gang groups to even Arasaka Corporation assassins. Here's everything you need to know about it.
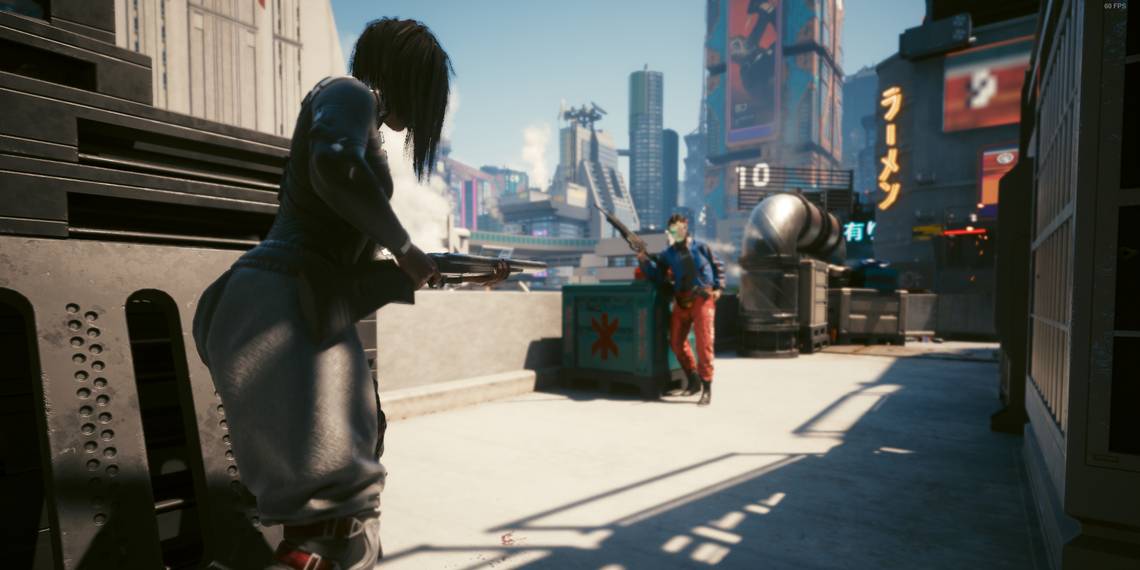
Scope Out The Area

Once you arrive at the scene of the Assault In Progress, don't approach the area just yet. Take your time and walk around for a bit, see what's nearby. The good thing about this game is that there's never one location from which you can approach your opponents, nor is there one simple way to defeat them.
You could try to find high ground if you have the right Cyberware to get there or an alternate entrance into the area which gives you a bit more cover. Either way, always check what's nearby and decide how you want to approach the scene.
Assess The Situation

While you're still far away from the perps, activate your Kiroshi scanners and take a look at who it is you're actually going to be fighting. The scanner reveals a surprising amount of information on your enemies, including their affiliation and the special skills they have available to defeat you.
Scanning your enemies is priority number one, but if you really want to set yourself up for success, you should also scan the environment that you previously scoped out. There's a ton of information to be derived from most of the scenes where assaults can take place, including devices and security cameras.
Security cameras in particular should be tapped into since it allows you to know exactly how many enemies are inside a specific area. Assaults In Progress won't usually have that many devices, but you can use hacks to distract the enemy or even detect explosive tanks that you can use to your advantage once you engage in combat.
Do Not Bait The Cops

Before you jump straight in guns blazing, keep in mind that Assaults In Progress usually involve civilians. Typically, a group of gang members will be bullying innocent civilians who will be cowering nearby or begging for help. You need to be mindful of these people and do not confuse them with your targets.
If you shoot a civilian during an Assault, the police will be called on you, and that could make your battle ten times more difficult, so make sure you know where the civilians are by scanning around for a bit. They'll usually be crouched and covering their heads in a panicked manner.
Keep also in mind that attacking the Assault enemies before you've entered the vicinity can sometimes result in the police getting involved, so make sure you don't piss off the NCPD and walk towards the scene until the blue "Assault In Progress" status appears on your screen. This is usually the point at which you can start attacking freely.
Always Stay Mobile

Not all assault scenes will have a lot of covers, but even if they do, it's never a good idea to camp in a specific location. Enemies will always try to run at you, and some of them might have Cyberware that make easy for them to catch you. They can also throw grenades or flank you by moving to different covers around the scene.
Keep an eye on your mini-map to see where the closest enemy is. Avoid having enemies flanking or gaining a side angle on you, because that would put you in hot water. The best way to fight in Cyberpunk 2077 is to remain mobile and try to move quicker than your enemies, who will usually prefer sticking to cover for as long as possible.
Use Explosives To Close The Distance

In the event that your enemies will try to hide behind cover for a long time, you might want to find other ways of attacking them. Quickhacks are great to catch peeking enemies off-guard, but if you're no Netrunner or long-range sniper, you'll want to use explosives.
Depending on the Resistances of your enemies, you could pick a specific type of grenade to chuck at them while they're grouped up or behind cover. Use the environment you scanned earlier to your advantage too, and aim at any explosive tanks or pipes enemies might be standing next to.
Don't Be Stingy With The Meds

Armed confrontations in Cyberpunk 2077 can be extremely volatile. Whether it's because the weaponry on the enemy side, or because you misjudged a situation, things can go south very fast and very badly, so do not save your health meds "for later" or one of those excuses we all love to make up.
If you get hurt you must heal yourself immediately, or an unfortunate headshot could finish the job before you get to reload. There is no shame in taking a pause for healing if that gives you the upper hand.
Scavenge For Ammo And Consumables

Most assault scenes will have tons of loot nearby, which includes food and ammo, typically placed on the ground or on top of various crates and tanks. If you find yourself in a pinch, do not hesitate to check if there are any ammo or consumables nearby.
While bullets will be helpful depending on what weapons you're using, even finding just a few food items or meds can be enough to keep you sustained through your fight, so keep your eyes peeled for stuff on the floor that can keep you going.
Don't Forget About The Evidence

The NCPD won't actually send you a reward for a job well done until all perps are dead and you've secured evidence. The evidence location doesn't usually appear on the map but rather will glow faintly in yellow and have a yellow exclamation point above it.
Evidence can be found on corpses of your dead enemies, pouches or crates and so forth, so look around properly. Make sure to take everything from the evidence box. Otherwise, the glowing marker will remain there forever.