For better or worse, Dark Souls becomes a considerably different game after defeating Ornstein & Smough in Anor Londo. The Lordvessel is an extremely useful quality of life item that lets Chosen Undead warp from Bonfire to Bonfire, but this has a direct consequence on Dark Souls’ level design. The back half is far more divided than everything before Anor Londo, with all four Lord Souls attached to some of the weakest areas in the Soulsborne franchise.
Of all of Dark Souls’ late-game areas, Lost Izalith is arguably the most controversial of the lot. Not only does the area feel profoundly unfinished compared to everything else in the game, Lost Izalith almost doesn’t play fair – forcing players to trek to lava while taking damage before fighting the single most challenging boss in the game (and for all the wrong reasons, at that).
The first Dark Souls is excellent, but Lost Izalith is just not representative of the game at its best. For what it’s worth, though, Lost Izalith is deceptively short and savvy players will be able to cut through the area quickly – giving them plenty of opportunities to fight the Bed of Chaos and die trying. For simplicity’s sake, keep in mind that the goal here is to just get through Lost Izalith in one piece and quickly: don’t expect to run into Solaire or Siegmeyer of Catarina.
Getting The Orange Charred Ring

Lost Izalith doesn’t require too much prep work before entering, but players will at least need the Orange Charred Ring to wade through all the lava without dropping dead in just a few seconds. The Orange Charred Ring is automatically dropped by the Centipede Demon – a boss stationed exactly between the Demon Ruins and Lost Izalith.
The Centipede Demon isn’t particularly difficult to beat, thankfully. Solaire can be summoned for the battle (but has a bad habit of drowning himself in lava) and the Centipede Demon is fairly weak to Magic damage. Hook right to lure the Centipede Demon to a patch of land where it can be easily dodged and pick up the Orange Charred Ring once dropped.
When equipped, the Orange Charred Ring significantly reduces the amount of damage players take while in lava. That said, lava still does armor damage so make sure not to idle in manga for too long. With the Orange Charred Ring equipped, find the nearby Bonfire and march into the depths of Lost Izalith.
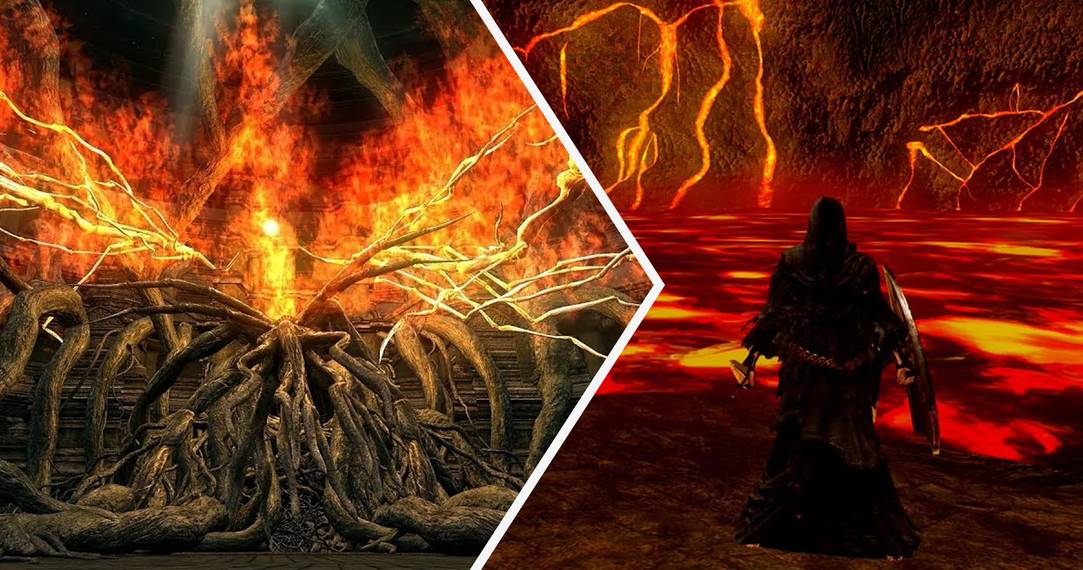
The Lava Lake

Lost Izalith is absolutely flooded with lava and there are very few areas of safe ground to step on for the first half. Without the Orange Charred Ring, players are certain to die before they even run into their first enemy. On that note, Lost Izalith is also teeming with gigantic Bounding Demons. There’s little reason to actually engage with them, but they won’t respawn if killed.
From the Bonfire, head north through the lava to reach a root sticking out the ground. There are several roots stretching up from Lost Izalith’s lava, allowing players to take a brief respite. Make note of the sea of Bounding Demons to the right, but stick on the root until it cuts off. Walk up the next root up ahead and follow it to find a strip of land past more lava.
There’s a chest inside of the central tower, but more importantly, players can spot another island in the distance with a second tower. Run through the lava while avoiding any Bounding Demons until reaching the island. Strike each wall of the tower to find an illusory wall with a Bonfire hidden inside and rest up. From here, players will be able to run up a nearby root to finally be done with the lava lake.
Izalith Ruins

Players won’t have to deal with lava once up the ruins, but there will be considerably more enemies on the path to the boss gate. Be wary of Stone Demons ready to spray fire and any pits in the flooring. Heading up the staircase, be ready to dodge any of the Chaos Eater’s attacks. One wrong move can result in a massive loss of durability. Make sure to be healed up when approaching the Fog Gate, since a Daughter of Chaos will aggro on sight. Her pyromancy is especially deadly so try to gain the advantage and kill her quickly.
If in human form, players will be invaded by Knight Kirk as well. Taking on either one can prove challenging as is – it’s better to take on each one at a time, preferably killing the Daughter of Chaos before triggering Kirk’s summoning. Neither will respawn when killed, allowing for a quick run back to the Fog Gate should the worst happen fighting the Bed of Chaos.
Bed Of Chaos

The Bed of Chaos is incredibly simple conceptually, but its execution results in the single most frustrating boss in Dark Souls. All players need to do is break the two orbs the Bed of Chaos is guarding with her roots in order to expose a hidden root where the actual boss is hidden beneath the boss arena.
Unfortunately, the Bed of Chaos’ attacks are sporadic, random, and the arena’s crumbling nature means players are liable to plummet to their death at no fault of their own. Worse, the Bed of Chaos starts to spawn pillars of fire as she’s near death, making it even more frustrating to actually kill her. Survival is less up to skill and more down to luck. So long as you can avoid falling into any pits, the Bed of Chaos is not a hard boss – but she certainly is the worst.