The Man At Arms is one of the default characters that you'll have unlocked at the beginning of your campaign in Darkest Dungeon 2. He is a frontline fighter with plenty of moves that revolve around protecting your allies while also being able to smash up your enemies.
He is a great boon in the early stages of the game while you are still getting to grips with how the game works - his extra HP and defensive abilities will serve you incredible well if you use them correctly, and he only becomes stronger once you have unlocked more of his abilities.
Updated on May 31, 2023: The Man-At-Arms is still the premiere tank in Darkest Dungeon 2 post-launch, but his Paths offer some alternate builds that advanced players will find useful. Check out our completely revamped guide below!
Man-At-Arms Skills

The Man-At-Arms is DD2's consummate tank. While he's capable of dishing out damage when necessary, his primary focus should always be on protecting the other party members or setting them up for later turns.
|
Skill |
Man-At-Arms Rank |
Enemy Rank |
Effects |
Mastery Ability |
|---|---|---|---|---|
|
Crush |
1 or 2 |
1, 2, or 3 |
|
|
|
Rampart |
1, 2, or 3 |
1 or 2 |
|
|
|
Defender |
Any |
N/A |
|
|
|
Bolster |
Any |
N/A |
|
|
|
Hold The Line |
2, 3, or 4 |
1 or 2 |
|
|
|
Bellow |
Any |
All |
|
|
|
Retribution |
Any |
N/A |
|
|
|
Command |
Any |
N/A |
|
|
|
Stand Fast |
1 or 2 |
N/A |
|
|
|
Courageous Abandon |
1 |
1 |
|
|
|
Strategic Withdrawal |
1 or 2 |
1 or 2 |
|
|
Man-At-Arms Shrine Battles

The Man At Arms currently has two Shrine of Reflection battles that he must complete alone to unlock some skills, and they reflect his muddled past.
Second Shrine Visit: A Leader Of Men
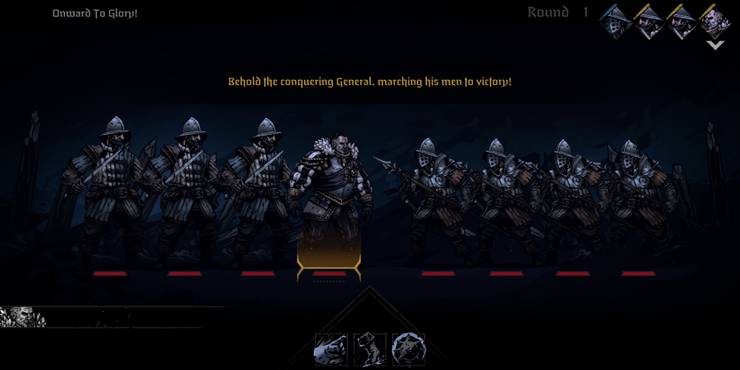
This battle shows the Man At Arms' initial difficulties in being a leader. This encounter has you buffing your soldiers and sending them to their deaths against an army of soldiers who won't actually try to attack you. Simply play out the turns as best you can to appreciate the dramatic moments.
Once your Stress meter is maxed out, the battle should end in some sort of victory. For you, that is, not the Man At Arms.
Fourth Shrine Visit: Ghosts Of The Past

This is where things get a little grim and a little more complex. This battle involves putting to rest both the spirits of your fallen comrades and your guilt at leading them to their deaths.
Every round, one of the spectral soldiers will buff themselves - you must remove this buff with Pour One Out. This will Stun them. Prioritize this - the Crits they buff themselves with will kill you.
Use Rest In Peace to deal a large amount of damage to an enemy, but watch your Stress - use Honor the Dead to heal up to avoid losing the fight.
Once you have defeated every ghost, you will win the battle.
Best Builds For Each Man-At-Arms Path

LIke the other starting Heroes, the Man-At-Arms is just fine on the default Wanderer Path. Advanced builds tend to like a little more specialization, though, so as you unlock more Heroes you'll likely find yourself focusing the MAA's efforts toward tanking or support, rather than a little of both.
|
Path |
Effects |
Recommended Skills |
Recommended Trinkets |
|---|---|---|---|
|
Wanderer |
|
|
|
|
Sergeant |
|
|
|
|
Bulwark |
|
|
|
|
Vanguard |
|
|
|
Wanderer
From the front rank, the Man-At-Arms can draw enemy fire with Retribution - ideally upgraded for its Block tokens - and punishing them with his Riposte attacks. His Strategic Withdrawal is excellent for setting up Combos, and deals a respectable amount of damage on its own. Once it's Mastered, Strategic Withdrawal also has the benefit of rescuing the Man-At-Arms from Death's Door, letting your healers focus on patching up other Heroes.
Sergeant
The Sergeant Path is fantastic when used alongside a heavy damage Hero, particularly the Leper. Command sets up the Sergeant's partner with a Strength token and removes Blind, ensuring that their next attack will count. Between Command cooldowns, Strategic Withdrawal, Bolster, and Bellow help remove enemy buffs and debuffs, keeping your team in peak shape.
Bulwark
The Bulwark sacrifices offense for a robust frontline defense. Defender and Stand Fast ensure that the Bulwark can handle even the mightiest boss attacks, and Hold The Line keeps him from being shuffled.
If you have your Guarded tokens in place and the Bulwark has some extra time on his hands, use Strategic Withdrawal followed by Rampart to inflict Daze (or even Stun!) on troublesome foes. Be sure to check their Resistances first!
Vanguard
Fighting from the front, the Vanguard takes the Man-At-Arms into a damage-dealing role. He's still plenty tanky, but his focus should be on converting Block tokens into more damage from Courageous Abandon. You'll want to have a Ranged damage Hero to supplement his attacks, but the Vanguard is a good way to put together a viable party if the usual melee characters have debilitating Quirks.