Quick Links
Braving the Darkest Dungeon and the surrounding DLC zones is no easy feat. Every encounter could be your last, so there’s always an underlying sense of dread when walking those desolate halls and overgrown courtyards.
Bosses, especially the optional ones, tend to rank as some of the hardest encounters in the game. The Crimson Court brought a bunch of baddies to take down, but once you’ve cleared out the main villains, you unlock the Garden Guardian. The brave can fight the Guardian again, and again, and the reward for doing so is vast riches and powerful trinkets. Beating it might be an issue though.
The Garden Guardian's Statistics and Resistances
The Garden Guardian
|
Health |
Dodge |
Protection |
Speed |
Stun |
Blight |
Bleed |
Debuff |
Move |
|---|---|---|---|---|---|---|---|---|
|
246 |
0 |
35% |
3 |
245% |
245% |
245% |
245% |
245% |
The Blood Fount
|
Health |
Dodge |
Protection |
Speed |
Stun |
Blight |
Bleed |
Debuff |
Move |
|---|---|---|---|---|---|---|---|---|
|
75 |
0 |
25% |
0 |
245% |
245% |
245% |
245% |
245% |
The Stone Shield
|
Health |
Dodge |
Protection |
Speed |
Stun |
Blight |
Bleed |
Debuff |
Move |
|---|---|---|---|---|---|---|---|---|
|
84 |
0 |
40% |
0 |
90% |
245% |
245% |
245% |
245% |
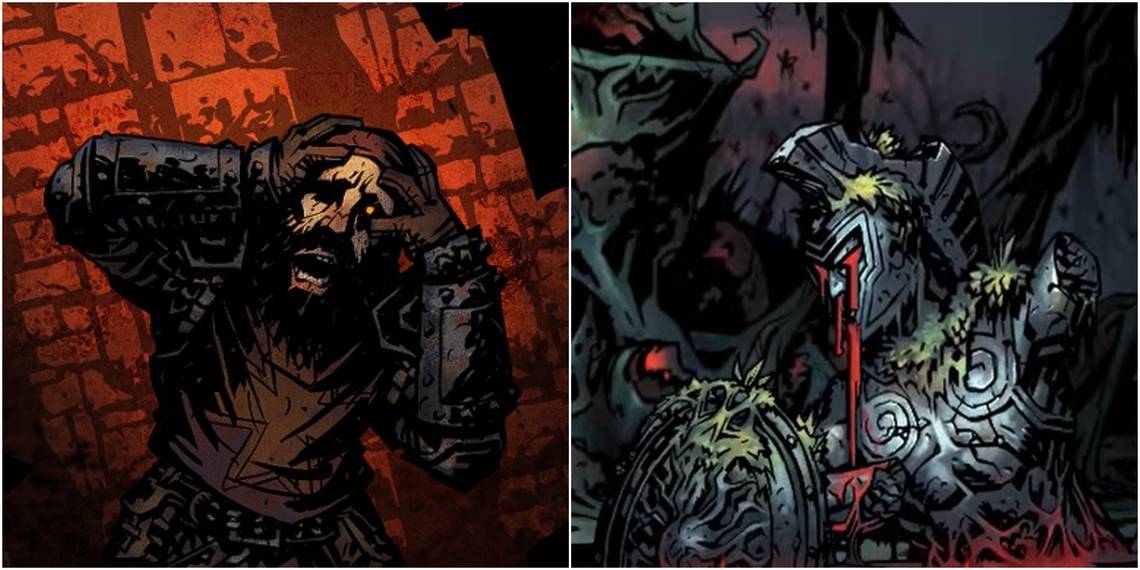
The Garden Guardian isn’t just a guardian of the garden, no, the Garden Guardian has friends, and these friends are the real puzzle. Normally the Garden Guardian will do nothing. It can’t move, it doesn’t attack, and it lets its two lackeys do all the work. It’s an unusual fight that requires planning, thought, and the abuse of the one stat that isn’t hanging out in the mid-200's.
How The Garden Guardian Kills You

The most obvious threat here is the Blood Fount. It can apply a substantial amount of bleed to your party and it deals a fair amount of damage. It is immune to practically everything, so killing it will require a big sword (or something similar).
By the time you encounter it, you can probably tank a lot of the Blood Fount’s damage, but don’t underestimate the power of consecutive Bleeds. That being said, the Blood Fount is the distraction piece.
The Stone Shield is the real bugger. It applies a defensive Mark to the Garden Guardian, making it untargetable. The Stone Shield is immune to all but one ailment, has a ludicrously high Protection stat making it a pain to kill in general, and it's one attack deals high damage to two characters by rising into the air at the end of the turn and crashing down at a later time.
Some things to bear in mind when tackling the Garden Guardian. If you kill the Stone Shield, the Garden Guardian will wake up and become active. In this state, it will buff itself to high heavens and deal disgustingly high damage (that increases every turn) to your entire party. If it wakes up, you have, at most, three turns to kill it. Considering its stats, this is quite the feat.
How To Kill The Garden Guardian

The trick to The Garden Guardian is to ignore everything but the Garden Guardian. The Blood Fount can be killed without any penalty, but depending on your damage output, you may be better off ignoring it. You absolutely do NOT want to attack the Stone Shield. If it dies, you basically lose. The issue is then, how do you get around the protection Mark?
The Mark disappears whenever the Stone Shield leaves the board. This means the Garden Guardian is vulnerable every other turn. This drastically reduces your damage output and considering you are being squished by a stone slab, you don’t want to be dawdling around for too long.
The trick is to Stun the Stone Shield, which removes the Mark, allowing you to attack the Garden Guardian every turn. Packing some Stun trinkets will make this job easier, so come prepared.
You still have to deal with the gigantic Protection stat that the Garden Guardian is packing. Even the strongest of parties will struggle to deal substantial damage to this thing without some serious buffs to offset the damage reduction. Alternatively, you can bring the Sculptor’s Tool Trinket, which increases your damage to Stonework enemies by a whopping 40 percent.
Another method of dealing with this beast is to Mark it yourself. Whilst you won’t land the debuffing portion of any Mark, you will still land the Mark itself. Bringing characters that can interact with Marks can negate the Garden Guardian’s Defences and result in a fairly quick win.
As a side benefit, you only need to Mark once, since the Garden Guardian never moves. Spending one Action to drastically increase your damage for an entire fight is a fine tradeoff.
The final tip would be to stock up on Bandages and Holy Water. Because the Blood Fount is trying to bleed you out, being able to patch yourself up without using an Action is just good value. Holy Water increases your resistances too, so making sure your whole party is buffed before the fight can seriously reduce the Blood Fount’s damage output.
Ideal Party

The big takeaway here is that you absolutely don’t want to take anyone who specialises in Bleed or Blight. This more or less invalidates the Plague Doctor, Antiquarian, and Flagellant. It also makes the Jester, Shieldbreaker, Hellion, Abomination, and Grave Robber noticeably less effective. This cuts down on your party's potential makeup quite a bit.
Man-At-Arms
He is the only Frontline who can deal with every aspect of the Garden Guardian. His mace can reach out and touch the third row, which is something a comparable character like the Crusader can’t do. He can Stun the Stone Shield with Rampart, which will be vital for the party's success. In a pinch, he can even buff your team with bonus Dodge or apply a Guard buff of his own.
Hound Master
Slot two can go to a few characters, although the Hound Master is one of the best choices here. In the second slot, he can use Blackjack to Stun the Stone Shield, giving you multiple ways to get rid of that pesky Guard. He can Mark the Garden Guardian, which as we mentioned, is a once-and-done requirement in this fight.
Alternatively, the Bounty Hunter can do work here too. High damage, a stun, and, again, the ability to Mark, makes him a great stand-in. Finally, the Highwayman can work if you have no other option. His pistol is buffed when attacking Marked targets, which is nice. He lacks a stun and he can’t apply a Mark himself, however.
Hound Master
Who would have thought a man with a dog would be such a good pick when it came to grinding stone. In the third position he loses the ability to Stun the Stone Shield, but practically everything else still works. His damage is great, he synergises with Mark, he can apply Mark, and he can even Guard his fellow party members similar to the Man-At-Arms. A great all-rounder.
If you want some support, then the Occultist can work in the third slot too. He can drop a Mark (which is always handy), he can stun, and he can heal in a pinch.
Arbalest
The Arbalest has one job - kill the Garden Guardian. Out of all the characters in this roster, she will likely deal the most damage with Sniper Shot - especially when equipped with damage trinkets like the Sculptor’s Tools. Naturally she combos well with Mark, and she can even apply it herself if you really need to. If all else fails, make sure your Arbalest stays alive. She is the ideal target for guarding.
Old faithful, the Hound Master, can also slot in here because apparently, the Hound Master can go anywhere and still be amazing.