Table Of Contents
|
PvP |
PvE |
|---|---|
Destiny 2's Lightfall expansion has overhauled the entire buildcrafting scene for PvE and PvP. Armor mods received an overhaul, the Artifact now provides passive benefits, the Light subclasses received some new tools, and we got an entirely new subclass in the form of Strand. Needless to say, the state of Destiny 2 builds has completely changed.

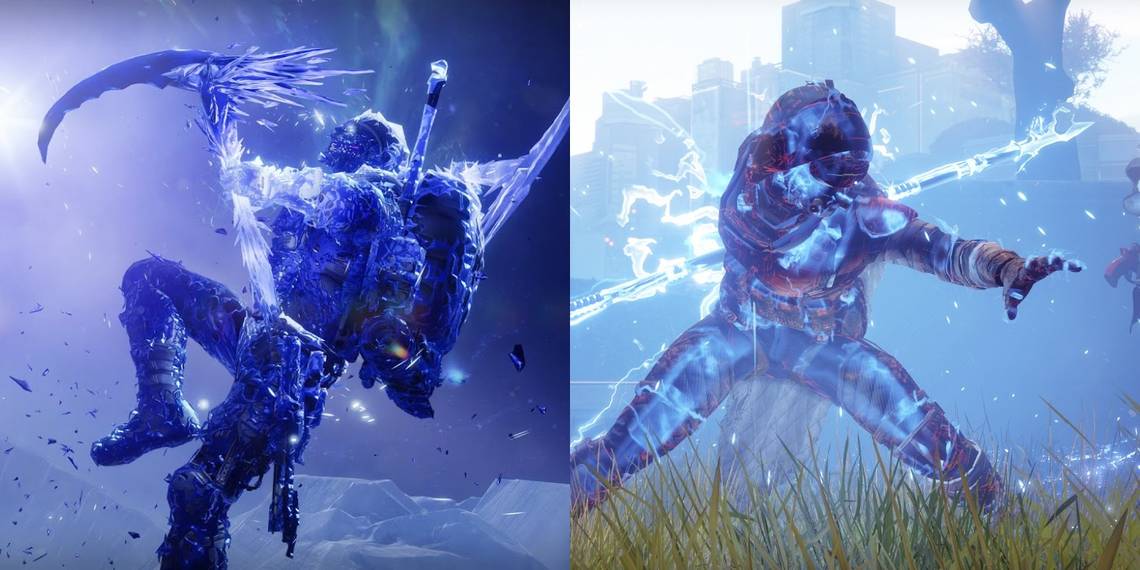
Destiny 2: A Complete Guide To Strand
Learn how to unlock Strand, earn Strand Meditations, and master Destiny 2's newest subclass with this comprehensive guide.Those changes were mostly for the better, as Hunters have never had this many good builds to play with. Today, we'll be looking at ten fantastic builds that will help you dominate the PvE sandbox or Crucible meta. We have builds that range from infinite ability spam to high damage setups for endgame content. These builds are quite large, so feel free to use the table of contents above to navigate to any builds that interest you. DIM links are also provided to let you replicate our builds with the push of a button.
Foreword
Before we begin, we do mention Armor Charge, Fragments, and subclass keywords quite a bit. If you don't know how these effects work, we have guides on armor mods, stats, and subclass keywords. You can find them below:
- A Complete Guide To Armor 2.0
- Armor Mods And Armor Charge Explained
- Arc 3.0 Guide
- Solar 3.0 Guide
- Void 3.0 Guide
- Stasis Guide
- Strand Guide
Updated February 4, 2024, by Charles Burgar: Season of the Wish has made massive changes to Destiny 2's buildcrafting. Ability regeneration mods saw a major overhaul, a new Artifact has made Solar and Stasis much stronger, and general balance changes have nerfed many survivability keywords.
Beyond updating our builds to reflect these changes, we've fundamentally overhauled every build section in this guide. Each build is now showcased in a concise table that displays the exact abilities, Exotics, armor mods, and stat priorities the build uses at a quick glance. Build explanations have been streamlined, Artifact recommendations have been updated, and all Destiny Item Manager (DIM) links have been refreshed.
PvP: Threaded Finality

|
Subclass |
Threadrunner |
|
Exotics |
The Sixth Coyote |
|
Playstyle |
Aggressive |
|
Close Range |
|
|
High Ability Uptime |
|
|
Requires Good High-Stat Armor |
|
Why Play This Build?
Weave an army of Threadlings at a moment's notice with this powerful Strand build. Dodging will create a clone of your character that, when damaged, will detonate into a swarm of Threadlings. The Sixth Coyote Exotic allows you to dodge twice in a row. Throw a few Threadling Grenades for good measure, and you can quickly amass a small army of Threadlings to overwhelm the opposition.
It's arguably the strongest PvP build that Hunters can use currently. Thanks to Strand Fragments and short dodge cooldowns, you'll have access to Threadlings for virtually every gunfight. Use your clone as cover, a distraction, or a remote explosive. The versatility of this build is unmatched, and it's incredibly easy to play.
|
BUILD BREAKDOWN |
|---|

|
|
Subclass Configuration |
Main Stats |
||||
|---|---|---|---|---|---|---|
|
Widow's Silk |
Thread of Generation |
Thread of Ascent |
Mobility |
|||
|
|
|
Threaded Specter |
Thread of Evolution |
Thread of Finality |
Discipline |
|
|
|
|
|||||
|
Gear |
Armor Mods |
|||||
|
|
|
|
|
|
|
|
|
The Sixth Coyote |
Harmonic Targeting |
Fastball |
Unflinching Harmonic Aim |
Absolution |
Reaper |
|
|
|
|
|
|
|
|
|
|
Explosive Personality |
Harmonic Targeting |
Harmonic Loader |
Unflinching Harmonic Aim |
Innervation |
Bomber |
|
|
|
|
|
|
|
||
|
Solar/Strand Dual Siphon |
Harmonic Dexterity |
Unflinching Harmonic Aim |
Recuperation |
Utility Kickstart |
||
The core of this build is Threaded Specter, an Aspect that creates a Strand copy of your Hunter when you dodge. It has a similar silhouette to your character, displays a nameplate, pings enemy radar, draws controller reticle friction, and can be detonated to create two Threadlings. You can quickly blow them up with your Threaded Spike melee and a Wave-Frame Grenade Launcher.
Throw your Threaded Spike at your clones. It will aggressively track nearby targets, Sever them, and restore melee energy. We use Gambler's Dodge so we can perform this combo as frequently as possible.
If you want higher clone uptime, use Marksman's Dodge instead.
But sometimes two Threadlings aren't enough. That's why we use The Sixth Coyote. This lets you dodge twice in a row. We then use Widow's Silk to give our Hunter a second grenade charge. Threadling Grenades are an ideal choice, spawning three Threadlings per grenade. If you use all of your abilities, you can create ten Threadlings in a couple of seconds.
You'll want to use your clones and Threadlings for area control. Dodge backward to use your clones as cover, and throw your Threadling Grenades just shy of a corner to flush targets out of cover. To ensure we can use these abilities frequently, we spec for 100 Mobility, Discipline, and use the Thread of Generation Fragment. We also highly recommend running Thread of Evolution since it buffs your Threadlings.
|
ARTIFACT PERKS |
|---|

While this build doesn't get much stronger through this season's Artifact, there are a few perks you'll want to grab. Flame, Fiber, and Freeze is a perk that grants access to hybrid Siphon mods on your helmet, allowing you to run Strand and Solar Siphon mods in a single mod slot. Flint Striker is also an S-tier pick, allowing you to proc Radiant by landing rapid precision hits with Solar weapons. The Wave-Frame GL isn't a hard requirement, so feel free to swap to a Solar Primary if you want to proc this perk.
Unraveling Rounds is great if you use a Strand Primary, granting Unraveling Rounds for a few seconds after you pick up an Orb of Power. This pairs nicely with Horde Shuttle, allowing you to spawn Threadlings by damaging unraveled targets. This virtually never happens in PvP, but it is a fantastic perk for PvE play.
PvP: Arcing Wind

|
Subclass |
Arcstrider |
|
Exotic |
St0mp-EE5 |
|
Playstyle |
All Purpose |
|
Close/Mid Range |
|
|
Great For All Game Types |
|
|
High Skill Ceiling |
|
Why Play This Build?
This build focuses on improving your neutral game as much as possible, allowing you to use virtually any weapons you enjoy. Benefit from short ability cooldowns, free stats, and a solid ability kit that can shut down groups of enemies with no issue. If you care more about shooting than abilities, this is the build for you.
|
BUILD BREAKDOWN |
|---|

|
|
Subclass Configuration |
Main Stats |
||||
|---|---|---|---|---|---|---|
|
Flow State |
Spark of Recharge |
Spark of Instinct |
Mobility |
|||
|
|
|
Lethal Current |
Spark of Feedback |
Spark of Beacons |
Intellect |
|
|
|
|
|||||
|
Gear |
Armor Mods |
|||||
|
|
|
|
|
|
|
|
|
St0mp-EE5 |
Harmonic Siphon |
Fastball |
Unflinching Kinetic Aim |
Absolution |
Reaper |
|
|
|
|
|
|
|
|
|
|
Matador 64 |
Kinetic Siphon |
Kinetic Loader |
Unflinching Kinetic Aim |
Recuperation |
Distribution |
|
|
|
|
|
|
|
||
|
Kinetic Targeting |
Harmonic Dexterity |
Empty Mod Socket |
Harmonic Holster |
Bomber |
||
Arcstrider's neutral game comes from the Flow State Aspect, greatly buffing your reload speed and dodge cooldown while Amplified. There's no way to become Amplified without killing someone as an Arcstrider, so we'll need to kill a Jolted target. Thankfully, Lethal Current and Spark of Instinct make this quite easy. Lethal Current infuses your melee with Jolt after you dodge, while Instinct inflicts Jolt on nearby foes when your shields break.
Weapon Loadout
This build uses an Arc Special to take advantage of Spark of Beacons, but this can easily be swapped out for another Fragment of your choice. You can use any weapon with this build, so feel free to experiment. The mod configuration assumes you're using a Kinetic Primary and Arc Special.
Once you are Amplified, the build starts to shine. Spark of Beacons will make your Arc Special— preferably Matador 64 or a similar Arc Shotgun—release Blinding explosions with each kill, disorienting nearby targets. Spark of Feedback also pairs nicely with Combination Blow and Lethal Current, ensuring that you'll win most melee fights. Since the build doesn't lean into Ionic Traces, we opt to use Spark of Recharge and class item mods to reduce our ability cooldowns.
|
ARTIFACT PERKS |
|---|
No Artifact perks directly affect this build, so feel free to spec your Artifact towards other builds you use. If you decide to use a Solar Primary weapon, equip the Flint Striker perk to gain Radiant for landing rapid precision hits.
PvP: Vermin's Shroud

|
Subclass |
Revenant |
|
Exotics |
Rat King, Mask of Bakris |
|
Playstyle |
Excellent Crowd Control |
|
Short Range |
|
|
Great In All Modes |
|
|
Heavily Reliant On Dodging |
|
Why Play This Build?
This build merges the strengths of Revenant and Nightstalker together to keep your enemies disoriented. You'll be able to constantly slow your enemies, go invisible after every kill, and periodically teleport. Lure your enemies close to you, slow them, strike them down with Rat King, then teleport into Invisibility while slowing all nearby targets. It's tricky to use in 3v3 modes, but this build causes some serious carnage in 6v6 modes, especially Rift.
|
BUILD BREAKDOWN |
|---|

|
|
Subclass Configuration |
Main Stats |
||||
|---|---|---|---|---|---|---|
|
Touch of Winter |
Whisper of Shards |
Whisper of Rending |
Mobility |
|||
|
|
|
Winter's Shroud |
Whisper of Durance |
Whisper of Chains |
Intellect |
|
|
|
|
|||||
|
Gear |
Armor Mods |
|||||
|
|
|
|
|
|
|
|
|
Mask of Bakris |
Harmonic Siphon |
Fastball |
Unflinching Kinetic Aim |
Absolution |
Reaper |
|
|
|
|
|
|
|
|
|
|
Rat King |
Kinetic Siphon |
Kinetic Loader |
Unflinching Kinetic Aim |
Recuperation |
Bomber |
|
|
|
|
|
|
|
|
|
|
(Alternative) Trespasser |
Powerful Friends |
Kinetic Dexterity |
Empty Mod Socket |
Better Already |
Powerful Attraction |
|
This build uses the Mask of Bakris Exotic to turn your dodge ability into a short-range teleport, granting a 6% damage buff to your Arc and Stasis weapons for a short duration. We mostly care about the teleport itself. Rat King is an amazing weapon to pair with the helmet, as when you dodge with Marksman's Dodge equipped, you will automatically reload your weapon mid-teleport. If you kill an enemy before dodging, you will immediately heal yourself and turn invisible. This is absurdly strong for 6v6 and even 3v3 modes.
Getting into close range with a Sidearm can be tricky, so we use Duskfield Grenades and the Touch of Winter Aspect to slow targets when we need it. Touch of Winter will also inflict slow to nearby targets whenever you dodge, further disorienting your opponents. Throw on some healing mods like Recuperation and Better Already, and you can play quite aggressively.
If you don't like Rat King and want to take advantage of Mask of Bakris' x4 Surge bonus, use Trespasser instead. After using your dodge, Trespasser's can one-burst opponents if its Exotic perk is active. Get a kill, dodge to automatically reload, and enjoy one-bursting enemy Guardians for the next few seconds.
|
ARTIFACT PERKS |
|---|
This season's Artifact has some powerful Stasis perks up for grabs, notably Hail the Storm. Shattering a Stasis crystal or a frozen target will spawn four shard projectiles that behave identically to Withering Blade, dealing 51 damage on hit. This technically means Shatterdive can kill Guardians again, but doing so is quite inconsistent. That's why this build focuses on inflicting slow instead.
Despite that, you'll still want to grab Hail the Storm since Duskfield Grenades do spawn a Stasis crystal that benefits from this perk. You'll also want to grab Pillar of Ice. Freezing an enemy will spawn some Stasis crystals near the target. Whisper of Rending allows you to quickly destroy them, giving you some free AoE damage.

Destiny 2: The Best Warlock Builds For PvP And PvE
Uncover the true potential of each Warlock subclass with these in-depth builds for PvE and PvP.PvP: Mark Of Radiance

|
Subclass |
Gunslinger |
|
Exotics |
Fr0st-EE5 |
|
Playstyle |
Constant Damage Buffs |
|
All Ranges |
|
|
Multiple Synergies |
|
|
Weapon Dependent |
|
Why Play This Build?
Infuse your weapons with the Light by using this powerful Gunslinger build. This build focuses on maintaining high uptime on Radiant, a 10% damage buff that stacks with weapon perks and surges. By using the Fr0st-EE5 Exotic boots, you'll be able to use Acrobat's Dodge and your melee ability to frequently apply Radiant to yourself and nearby allies.
Through the use of certain Fragments and weapon perks, you can recharge all of your abilities in a matter of seconds. It's easy to play, has numerous neutral game buffs, and synergizes incredibly well with certain Solar weapons and perks.
|
BUILD BREAKDOWN |
|---|

|
|
Subclass Configuration |
Main Stats |
||||
|---|---|---|---|---|---|---|
|
On Your Mark |
Ember of Benevolence |
Ember of Solace |
Ember of Searing |
Mobility |
||
|
|
|
Knock 'Em Down |
Ember of Torches |
Ember of Empyrean |
Discipline |
|
|
|
|
|||||
|
Gear |
Armor Mods |
|||||
|
|
|
|
|
|
|
|
|
Fr0st-EE5 |
Harmonic Targeting |
Impact Induction |
Unflinching Harmonic Aim |
Absolution |
Reaper |
|
|
|
|
|
|
|
|
|
|
Conditional Finality |
Harmonic Siphon |
Harmonic Loader |
Unflinching Harmonic Aim |
Harmonic Holster |
Bomber |
|
|
|
|
|
|
|
|
|
|
Weapons with Heal Clip |
Font of Wisdom |
Harmonic Dexterity |
Unflinching Harmonic Aim |
Solar Weapon Surge |
Time Dilation |
|
Acrobat's Dodge is the core ability to this build. Whenever you dodge, you gain Radiant, x3 On Your Mark, and activate Reaper. Getting a kill with your weapon will then spawn an Orb of Power, buffing you with Font of Wisdom and Solar Weapon Surge for 15 seconds on pickup. If you have a damage perk on your weapon, you will pump out some serious damage.
To ensure that you constantly have Radiant, we use Ember of Solace and Ember of Empyrean to greatly extend the duration of Radiant and Restoration—a keyword we get from Healing Grenades. Keep killing enemies with your Solar weapons, and you can maintain Radiant and Restoration for far longer than usual.
But what makes this build truly shine is its short ability cooldowns. Fr0st-EE5 reduce your ability cooldowns while sprinting, something you'll be doing a lot. More importantly, Ember of Benevolence stacks with Fr0st-EE5, giving your abilities cooldowns reminiscent of most PvE builds. You can trigger Benevolence by buffing your team with Radiant through Acrobat's Dodge or a melee attack via Ember of Torches.
Alternatively, Heal Clip can proc Ember of Benevolence. Any weapon that can get Heal Clip—notably Abyss Defiant and Adhortative—can reliably activate Ember of Benevolence to skyrocket your recharge rate. Paired with Empyrean extending your Radiant and Restoration uptime, this build becomes absurdly powerful if you maintain your killing spree.
|
ARTIFACT PERKS |
|---|

Solar is the poster child of this season's Artifact. Flint Striker gives you a third way to activate Radiant by landing rapid headshots. While Radiant, Kindling Trigger will inflict Scorch to targets that aren't already Scorched, preventing their HP from regenerating. You'll also want to grab Rays of Precision for free Ignitions on precision kills.
PvP: Volatile Executioner

|
Subclass |
Nightstalker |
|
Exotic |
Gyrfalcon's Hauberk |
|
Playstyle |
Aggressive |
|
Close/Medium Range |
|
|
Best In 6v6 Modes |
|
|
Requires Good Weapons |
|
Why Play This Build?
This build turns your Hunter into the ultimate Nightstalker, gaining access to constant invisibility, overshields, Devour, and Volatile Rounds. Gyrfalcon's Hauberk is the centerpiece of this build, granting access to Volatile Rounds after breaking invisibility.
Killing a target that's Volatile will make you invisible, grant an overshield if you have a Repulsor Brace weapon, and you'll be able to gain easy stacks of Armor Charge to gain a constant damage buff. Play this build correctly, and you become practically unstoppable.
|
BUILD BREAKDOWN |
|---|

|
|
Subclass Configuration |
Main Stats |
||||
|---|---|---|---|---|---|---|
|
Vanishing Step |
Echo of Starvation |
Echo of Persistence |
Mobility |
|||
|
|
|
Stylish Executioner |
Echo of Vigilance |
Echo of Dilation |
Intellect |
|
|
|
|
|||||
|
Gear |
Armor Mods |
|||||
|
|
|
|
|
|
|
|
|
Gyrfalcon's Hauberk |
Harmonic Targeting |
Fastball |
Unflinching Harmonic Aim |
Recuperation |
Reaper |
|
|
|
|
|
|
|
|
|
|
Weapons with Repulsor Brace |
Harmonic Siphon |
Harmonic Loader |
Unflinching Harmonic Aim |
Void Weapon Surge |
Bomber |
|
|
|
|
|
|
|
||
|
Powerful Friends |
Harmonic Dexterity |
Unflinching Harmonic Aim |
Void Weapon Surge |
Time Dilation |
||
This build uses Gyrfalcon's Hauberk to gain Volatile Rounds upon breaking invisibility. Killing a Volatile target will trigger Stylish Executioner, an Aspect that makes us invisible. This will trigger Gyrfalcon's Hauberk again, although Stylish Executioner will enter a short cooldown period.
To take advantage of Volatile Rounds, use a Void weapon with the Repulsor Brace perk. Killing a Void-debuffed target (including Volatile) will grant a 45-point Void Overshield, the same as the Sentinel Titan's Bastion Aspect. For moments where Stylish Executioner is on cooldown, you can either dodge to trigger Vanishing Step or eliminate a target while at critical health to activate a Void Overshield via Echo of Vigilance.
Grabbing those Orbs will make this build even stronger, granting Devour, x2 Void Surge, and a flat chunk of health. Dodge, kill an enemy, grab the Orb of Power they drop, and repeat. Paired with a Repulsor Brace weapon, you become incredibly hard to kill.
|
ARTIFACT PERKS |
|---|
This season's Artifact has no Void perks, so you can safely ignore most of the perk options for this build. Spec your Artifact for other builds you frequently play.

Destiny 2 Lightfall: All Action Figure Locations
Locate all nine action figures on Neptune with this in-depth guide.
PvE: Ward Of Dusk

|
Subclass |
Revenant |
|
Exotic |
Renewal Grasps |
|
Playstyle |
Crowd Control |
|
Close/Mid-Range |
|
|
Great for endgame content |
|
|
Reliant on spamming abilities |
|
Why Play This Build?
Now that Renewal Grasps no longer reduce your grenade cooldown, they are an excellent option for endgame PvE content. This build turns your Duskfield Grenades into defensive domes that increase your survivability while greatly debuffing your foes.
Through the use of certain armor mods and Aspects, you'll be able to throw a Duskfield Grenade every ten seconds to lockdown spawn points and other critical locations. This build has short ability cooldowns, great group utility, and excellent survivability that truly shines in Master raids and GM Nightfalls.
|
BUILD BREAKDOWN |
|---|

|
|
Subclass Configuration |
Main Stats |
||||
|---|---|---|---|---|---|---|
|
Grim Harvest |
Whisper of Shards |
Whisper of Rending |
Whisper of Conduction |
Resilience |
||
|
|
|
Touch of Winter |
Whisper of Durance |
Whisper of Chains |
Discipline |
|
|
|
|
|||||
|
Gear |
Armor Mods |
|||||
|
|
|
|
|
|
|
|
|
Renewal Grasps |
Harmonic Siphon |
Harmonic Loader |
Concussive Dampener |
Recuperation |
Reaper |
|
|
|
|
|
|
|
|
|
|
Buried Bloodline |
Heavy Ammo Finder |
Impact Induction |
Any Damage Resistance Mod |
Elemental Charge |
Powerful Attraction |
|
|
|
|
|
|
|
|
|
|
Weapons with Headstone |
Heavy Ammo Scout |
Grenade Kickstart |
Any Damage Resistance Mod |
Stacks on Stacks |
Powerful Attraction |
|
The centerpiece of this build is Renewal Grasps. These gloves buff your Duskfield Grenades to act like miniature Ward of Dawn bubbles, providing 25% DR to allies inside. Enemies caught in the Duskfield will deal 50% less damage, making your grenades a powerful survivability tool for Master and GM content. You can gain an additional 40% DR through Whisper of Chains since every Duskfield you create will spawn a Stasis crystal.
While this build has a copious amount of DR, it lacks a source of healing. That's why we suggest you use Buried Bloodline, the Exotic Sidearm from Warlord's Ruin. This gives you access to Devour as a Revenant, restoring roughly 50% of your HP with every kill. It also pairs nicely with Eyasluna with Headstone and Unrelenting. Land a precision kill, detonate the crystal, and every enemy slain by the explosion will proc Unrelenting's HP regeneration.
Whisper of Rending allows your Primary weapons, including Eyasluna, to one-tap Stasis crystals. It also greatly increases your damage against frozen enemies.
To gain Armor Charge, we opt to use Grim Harvest and the Elemental Shards mod. When you kill a slowed target, they will spawn a Stasis Shard for you and nearby allies, restoring 10% melee energy. Picking up multiple shards will grant Armor Charge. Stacks on Stacks will double the Armor Charge received. This makes Grenade Kickstart a reliable source of grenade energy for this build, significantly reducing the cooldown of your Duskfield.
In essence, spawn a Duskfield, break the crystal to activate Whisper of Shards, and kill the slowed targets. Grab the Stasis Shards to gain Armor Charge, then throw another grenade. If played correctly, you should be able to throw a grenade every 6-10 seconds.
|
ARTIFACT PERKS |
|---|

This Artifact has given Stasis some powerful new tools. Pillar of Ice is a major standout here, creating medium-sized Stasis crystals when you freeze an enemy. This works with enemies frozen by your Duskfield Grenades or Headstone crystals, giving this build some amazing AoE damage. It also makes it much easier to proc Whisper of Shards and Chains.
Hail the Storm is an S-tier option for every Stasis build. Destroying a Stasis crystal or frozen target will spawn four ice shards that launch in a cross pattern. These ice shards deal moderate damage and inflict slow. They function identically to your Withering Blade melee attack, minus the chaining capabilities.
Beyond those two perks, Champion counters are always worth grabbing since they give your weapons Overcharge in endgame content, increasing their damage output by 25%. Unstoppable Hand Cannon and Overload Rocket Launchers are great perks for this particular build.
PvE: Gunslinger's Gamble

|
Subclass |
Gunslinger |
|
Exotics |
Lucky Pants |
|
Playstyle |
Focused on DPS |
|
Medium Range |
|
|
Excellent for raids and dungeons |
|
|
Mediocre add-clearing potential |
|
Why Play This Build?
This build focuses on turning your Hunter into the best gunslinger in the cosmos. We'll be taking advantage of Restoration, Gunpowder Gamble, and the power of Lucky Pants to dish out some serious DPS in endgame content with style.
This build has tons of flair, has excellent sustained DPS in raids and dungeons, and breaks from the traditional mold of melee-oriented Gunslinger builds. It also allows you to use a Hand Cannon in endgame content to deal with adds and Champions alike, something that's otherwise quite difficult to pull off.
|
BUILD BREAKDOWN |
|---|

|
|
Subclass Configuration |
Main Stats |
||||
|---|---|---|---|---|---|---|
|
Gunpowder Gamble |
Ember of Singeing |
Ember of Resolve |
Resilience |
|||
|
|
|
Knock 'Em Down |
Ember of Torches |
Ember of Empyrean |
Discipline |
|
|
|
|
|||||
|
Gear |
Armor Mods |
|||||
|
|
|
|
|
|
|
|
|
Lucky Pants |
Harmonic Siphon |
Impact Induction |
Concussive Dampener |
Harmonic Holster |
Time Dilation |
|
|
|
|
|
|
|
|
|
|
Any 180 RPM Hand Cannon |
Harmonic Siphon |
Firepower |
Any Damage Resistance Mod |
Solar Weapon Surge |
Powerful Attraction |
|
|
|
|
|
|
|
|
|
|
(Optional) Conditional Finality |
Heavy Ammo Finder |
Harmonic Loader |
Any Damage Resistance Mod |
Solar Weapon Surge |
Powerful Attraction |
|
Lucky Pants is perfect for giving your Hand Cannons some much-needed damage in endgame content. Equipping a fully loaded Kinetic or Solar Hand Cannon will grant an escalating damage buff with each shot, up to 600% bonus damage. This makes your Hand Cannons have a DPS value that's comparable to most Rocket Launchers for a short time. Once this buff wears off, you must wait ten seconds to trigger it again.
Ideal Hand Cannons

Lucky Pants works best with fast-firing Hand Cannons. Warden's Law is the best weapon for single-target DPS, although you might prefer using a 180 RPM Hand Cannon for general play. Some good options include Malfeasance, Trust, and Survivor's Epitaph.
This timing perfectly matches a Heavy weapon with Bait and Switch. Dump your Hand Cannon ammo into an enemy, quickly fire your Special, then swap to your Heavy to proc Bait and Switch. By the time Bait and Switch ends, Lucky Pants can be used again. Play the build properly, and your sustained DPS will exceed virtually every other build in the game.
As for fodder units, you have access to Gunpowder Gamble. Killing six enemies with Solar weapons will give you a stick of dynamite as your grenade. Shoot the dynamite midair to create a massive explosion, eliminating red bars in an instant. You can throw one every six seconds, provided you can keep killing enemies. Throw a Healing Grenade beforehand to proc Restoration; kills will extend its duration via Ember of Empyrean.
If you aren't using an Exotic, Conditional Finality is a great choice for this build. Both Solar and Stasis shots can build Gunpowder Gamble stacks and proc Ember of Empyrean.
|
ARTIFACT PERKS |
|---|

Solar has some powerful perks in the Artifact this season, most of which greatly benefit this build. Flint Striker allows you to proc Radiant by landing rapid precision hits with Solar weapons, something you'll be doing quite often. Kindling Trigger will then inflict Scorch when your Solar weapons damage an unscorched target while you're Radiant. This procs Ember of Singeing, effectively removing your dodge cooldown.
Heart of the Flame and From Whence You Came help scale your ability damage in difficult endgame content. Since add clear is one of this build's weak points, you can use Rays of Precision to trigger an Ignition on precision kills. Throw on Argent Ordnance for free Rocket Launcher damage, and you will easily top the DPS charts in your fireteam.

Destiny 2: Every Buff And Debuff Explained
Learn how to use buffs and debuffs to drastically increase your damage output.PvE: Disciple Of The Void

|
Subclass |
Nightstalker |
|
Exotics |
Any Void Weapon, Gyrfalcon's Hauberk |
|
Playstyle |
Lots Of Explosions |
|
Weapon-Focused Build |
|
|
Excellent In All Content |
|
|
Optimal Weapons Are Hard To Get |
|
Why Play This Build?
If you enjoy the Nightstalker subclass but hate staying invisible, this build is for you. Season of the Plunder's Gyrfalcon's Hauberk Exotic turns Hunters into the archetypal rogue, allowing you to deal massive damage upon breaking out of invisibility.
We'll be using Stylish Executioner with Echo of Instability (or Collective Obligation) to constantly trigger invisibility, granting you a near-permanent Volatile Rounds buff. You'll destroy red bars in GMs, annihilate majors in casual content, and deal great single-target DPS in raids and dungeons.
|
BUILD BREAKDOWN |
|---|

|
|
Subclass Configuration |
Main Stats |
||||
|---|---|---|---|---|---|---|
|
Vanishing Step |
Echo of Starvation |
Echo of Persistence |
Resilience |
|||
|
|
|
Stylish Executioner |
Echo of Undermining |
Echo of Cessation |
Discipline |
|
|
|
|
|||||
|
Gear |
Armor Mods |
|||||
|
|
|
|
|
|
|
|
|
Gyrfalcon's Hauberk |
Harmonic Siphon |
Harmonic Loader |
Concussive Dampener |
Harmonic Scavenger |
Powerful Attraction |
|
|
|
|
|
|
|
|
|
|
Graviton Lance |
Heavy Ammo Finder |
Firepower |
Any Damage Resistance Mod |
Void Weapon Surge |
Powerful Attraction |
|
|
|
|
|
|
|
|
|
|
(Alternative) Collective Obligation |
Heavy Ammo Scout |
Font of Focus |
Any Damage Resistance Mod |
Void Weapon Surge |
Time Dilation |
|
Gyrfalcon's Hauberk is the core of this build. It grants Volatile Rounds to all Void weapons for 10 seconds upon breaking invisibility. This buffs all Void weapons you own, even Exotics. Volatile Rounds pair exceptionally well with Graviton Lance, as this weapon creates enemy-seeking bomblets with each kill.
If you are going to play this build in a GM Nightfall or Master raid, use Collective Obligation instead. If you replace your grenade with Suppressor Grenades, you can inflict all three Void debuffs with Collective Obligation. This trivializes most GMs.
To constantly activate Gyrfalcon's Hauberk, we use Stylish Executioner and Vanishing Step. Dodging will make you invisible, and firing your weapon will then break invisibility to grant Volatile Rounds. Killing a Void-debuffed target will then proc Stylish Executioner, turning you invisible. This creates a feedback loop where you have constant Volatile Rounds and invisibility.
Since this is a weapon-focused build, our mods focus on restoring ammo and generating Orbs of Power on weapon kills. Void Weapon Surges are used to buff your weapon damage, and Font of Focus will grant +30 Discipline while you have Armor Charge—a buff you gain from collecting Orbs of Power. Dodging will vacuum all nearby Orbs of Power via Powerful Attraction.
|
ARTIFACT PERKS |
|---|
This season's Artifact has no useful perks for this build. Build your Artifact around other builds instead.
PvE: Vanishing Current

|
Subclass |
Arcstrider |
|
Exotics |
Assassin's Cowl, Tractor Cannon |
|
Playstyle |
Aggressive |
|
Good Boss DPS |
|
|
Excellent Add Clear |
|
|
Melee Only |
|
Why Play This Build?
Turn your enemies into space dust with this melee-focused Arc 3.0 build. Assassin's Cowl and Combination Blow is the ultimate pairing, allowing you to one-shot Champions in endgame content with a single punch while giving you full access to invisibility and healing after each melee kill. If you're looking for a build that requires little investment and can handle endgame content, this build is for you.
|
BUILD BREAKDOWN |
|---|

|
|
Subclass Configuration |
Main Stats |
||||
|---|---|---|---|---|---|---|
|
Lethal Current |
Spark of Resistance |
Spark of Ions |
Resilience |
|||
|
|
|
Flow State |
Spark of Shock |
Spark of Feedback |
Discipline |
|
|
|
|
|||||
|
Gear |
Armor Mods |
|||||
|
|
|
|
|
|
|
|
|
Assassin's Cowl |
Hands-On |
Heavy Handed |
Concussive Dampener |
Recuperation |
Proximity Ward |
|
|
|
|
|
|
|
|
|
|
Tractor Cannon |
Dynamo |
Heavy Handed |
Any Damage Resistance Mod |
[Shotgun Element] Scavenger |
Powerful Attraction |
|
|
|
|
|
|
|
|
|
|
Shotguns with One-Two Punch |
Powerful Friends |
Heavy Handed |
Any Damage Resistance Mod |
Void Holster |
Special Finisher |
|
Combination Blow is your main source of damage for this build. Killing an enemy with this melee will grant a stack of Combination Blow for 20 seconds, increasing your melee damage. We can scale this further with Lethal Current, an Aspect that infuses your punches with Jolt lightning after you dodge. Gambler's Dodge will refresh your melee ability whenever you dodge, creating the build's core gameplay loop: punch, dodge, repeat.
Lethal Current does not refresh Combination Blow stacks. If you're about to punch a tanky enemy and aren't sure if Combination Blow is going to land the kill, use your One-Two Punch Shotgun to ensure the melee hit itself lands the kill. It's the only unintuitive part of this build that takes some getting used to.
While this build focuses solely on your melee, you can use your weapons to drastically increase your Combination Blow damage. One-Two Punch Shotguns increase your melee damage. Shoot your Shotgun, then punch the target to deal some jaw-dropping damage. And if you're fighting a Champion or boss, use Tractor Cannon to apply a 30% Weaken to the target. This should be more than enough damage to one-shot Champions in all but GM-level content.
To ensure that you stay alive, this build uses Assassin's Cowl to gain HP and invisibility from melee kills. The invisibility gives you enough time to reposition, dodge, and reload before punching your next target. Recuperation, Spark of Resistance, and 100 Resilience should help keep you alive. With three Heavy Handed mods, every melee kill will spawn an Orb of Power. Add on Hands-On and Dynamo for even more Super energy, and you can charge your Super in as little as 60 seconds.
|
ARTIFACT PERKS |
|---|
This season's Artifact has no useful perks for this build. Build your Artifact around other builds instead.

Destiny 2: The Best Titan Builds For PvP And PvE
Become invincible, throw infinite grenades, and more with these powerful Titan builds.PvE: Threaded Ascension

|
Subclass |
Threadrunner |
|
Exotic |
Cyrtarachne's Facade |
|
Playstyle |
Aggressive |
|
Close Range |
|
|
Absurd Survivability and Burst DPS |
|
|
Input-Intensive Playstyle |
|
Why Play This Build?
Strand turns your Guardian into a mobile powerhouse, granting access to a powerful grappling hook, Tangles, and a solid add-clearing Super. This build focuses on maximizing your grapple uptime to let you swing across the map. Play this build correctly, and you'll benefit from permanent Woven Mail, near-infinite abilities, instant reloads, and some of the best add clear you'll find in a Hunter build.
|
BUILD BREAKDOWN |
|---|

|
|
Subclass Configuration |
Main Stats |
||||
|---|---|---|---|---|---|---|
|
Widow's Silk |
Thread of Generation |
Thread of Ascent |
Resilience |
|||
|
|
|
Whirling Maelstrom |
Thread of Fury |
Thread of Transmutation |
Discipline |
|
|
|
|
|||||
|
Gear |
Armor Mods |
|||||
|
|
|
|
|
|
|
|
|
Cyrtarachne's Facade |
Harmonic Siphon |
Heavy Handed |
Concussive Dampener |
Recuperation |
Powerful Attraction |
|
|
|
|
|
|
|
|
|
|
Any Exotic Primary |
Heavy Ammo Finder |
Heavy Handed |
Any Damage Resistance Mod |
[Heavy Element] Scavenger |
Powerful Attraction |
|
|
|
|
|
|
|
|
|
|
(Alternative) Buried Bloodline |
Heavy Ammo Scout |
[Primary Element] Loader |
Any Damage Resistance Mod |
Any Weapon Surge |
Time Dilation |
|
Cyrtarachne's Facade is an Exotic helmet that grants you Woven Mail whenever you cast the Grapple Grenade. Woven Mail provides a 45% DR buff and activates Thread of Transmutation, allowing any weapon to spawn Tangles. You can then detonate them to activate Whirling Maelstrom, turning the Tangle into a cyclone of Unraveling projectiles. This deals great damage and can clear dozens of enemies by itself.
Grappling onto a Tangle will fully refund your grenade energy. You can also throw your Tangles and grapple onto them mid-flight.
Your Tangles will also be regenerating your abilities as they deal damage. Thread of Generation will restore Grapple energy whenever you deal damage, and Thread of Fury will provide melee energy as your Whirling Maelstroms damage targets. Throw in Widow's Silk and 100 Discipline for good measure, and you effectively remove your Grapple Grenade's cooldown.
If you want to take this build into endgame content, you'll need some form of healing. Recuperation offers solid health sustain in Master Lost Sectors and raids, but you'll need to play cautiously if you take this build into a GM Nightfall. Alternatively, you can use Buried Bloodline to gain access to Devour, restoring your HP and grenade energy with every kill.
|
ARTIFACT PERKS |
|---|

This season has some powerful Artifact perks for Strand Hunters. Flint Striker allows you to gain Radiant by landing precision hits with a Solar weapon. Since this build doesn't need any specific Exotic weapons, you can run Sunshot or Polaris Lance to activate Radiant with ease.
Torch will then increase your weapon damage against Strand-debuffed targets while Radiant. If you don't have an ability charged, you can rely on Unraveling Orbs and a Strand weapon to inflict Unravel. Wished Into Being will give you more Super uptime, and Horde Shuttle will spawn Threadlings while you damage Unraveled targets.
If you play content solo, we highly recommend Solo Operative for all PvE builds. It buffs all damage you deal while playing content solo, including solo dungeons and Lost Sectors. It pairs exceptionally well with this build, scaling the damage of your weapons and Grapple melee attack.