Strikes, Gambit, Crucible — all these game modes can be done solo, but they truly shine with a full fireteam. So where does this leave the solo Destiny 2 player?
Thankfully, Destiny 2 has an activity for all you maverick renegades that can't be tied down by other Guardians. And best of all, they're all over the place! Every destination in Destiny 2 has Lost Sectors, some of which contain Legend or Master variants that you can farm for Exotic armor. Not all Lost Sectors are created equal, however.
We'll tell you which Legendary Lost Sectors you should be farming, and which ones you should be leaving well enough alone.
Updated February 26, 2022 by William Quick: With the release of the Witch Queen campaign, Destiny 2 continues to expand its universe as it becomes richer and more challenging. To have any chance of surviving the more difficult encounters, you'll need to spend time grinding Lost Sectors for quality loot and XP. Here are the best and worst sectors to consider for the task.
Lost Sectors To Farm
As of this writing, there are 13 Lost Sectors that are eligible for Legend of Master difficulty. Two are chosen on a set rotation every day, one Legend and the other Master. Out of the 12 available as of Season 15, there are eight noteworthy Lost Sectors that you'll want to farm whenever they're available.
Cosmodrome: Veles Labyrinth

Veles Labyrinth is the fastest Legendary Lost Sector to farm in Destiny 2. With the right loadout and some practice, you can clear this mission in two minutes or less on Legend—three to four minutes on Master.
Lament is an excellent Exotic for this Lost Sector, allowing you to counter Barrier Knights and the final boss without much trouble. Equip any weapon that can stun Unstoppables, bring something that can spawn Warmind Cells, then have fun speed-clearing this Lost Sector. You don't even need to kill all the enemies; you can ignore everything but the Champions and boss for this mission with ease.
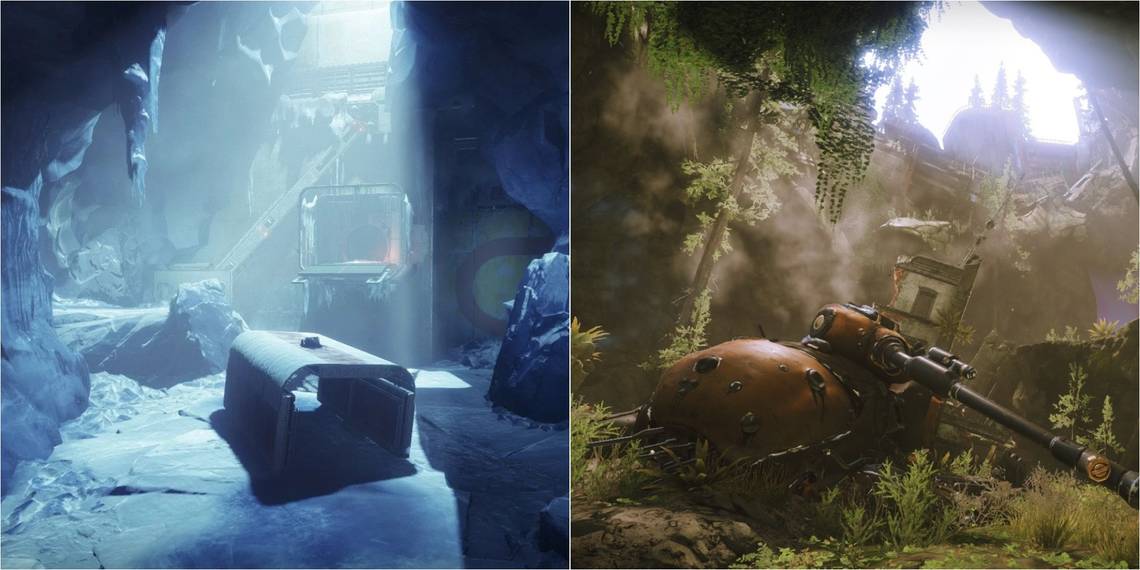
Europa: Bunker E15

If you've never attempted a Legend or Master Lost Sector before, you'll want to give Europa's Bunker E15 Lost Sector a try.
Bunker E15 is great for farming Exotic Armor pieces and enhancement cores for two very important reasons.
- There’s only one shield type to worry about (Void).
- You have allies in this Lost Sector, even if you're playing solo.
There’s an entire army of old Braytech Frames being held captive by the Vex in Bunker E15, and if you free them, they become YOUR army. And best of all, they’re entirely unkillable. They don’t do a lot of damage, but because they can’t die, they can dish out a surprising amount of damage to Bunker E15's final boss. Focus on the Champions, and these small Braytech Frames are more than capable of lowering Hydra's HP by 33% or more on their own.
And for those looking to speedrun this Lost Sector, you can bring Eriana's Vow to bypass the final boss' shields, drastically reducing your time spent in the final encounter. Or you can bring Deathbringer to annihilate the jail cell section. Whichever loadout you decide to rock, this Lost Sector's friendly AI makes it one of the easiest Lost Sectors for newer players.
Tangled Shore: The Empty Tank

There's really nothing particularly noteworthy about this Lost Sector, at least when discussing gameplay. It's not short, it's not long, it doesn't have great rewards, and there's not a particularly great number of enemies to kill here either. I just like the vibe of the place. Who knew the Fallen had such great taste in music?
The Empty Tank is a Fallen nightclub situated just north of Spider's hideout, meaning you could exchange a few materials for Glimmer before dropping in on a Fallen dance party. It's not particularly difficult on Legend or Master, either, although it is far from the most efficient Lost Sector for farming. But if you care more about having fun than raw efficiency, give The Empty Tank a chance. Clearing a Fallen nightclub that houses a presumably illegal fighting ring is nothing short of memorable.
Moon: K1 Revelation

It's the farming spot for repeatable bounties in Destiny 2. Even if you aren't running Legend or Master variants of K1 Revelation, you'll want to stop by this place just because it has so many enemies, making it a perfect place for completing Eris' daily and repeatable bounties.
As for its Legendary variants, K1 Revelation is one of the easier Lost Sectors in Destiny 2. There isn't much cover, but the arenas are so small that Warmind Cells and Grenade Launchers are highly effective. A single Warmind Cell can clear most of the final arena for you. Focus on stunning the Unstoppable Ogres when you can, and be mindful of your positioning when the final boss spawns. If you can manage those two things, you'll have a great time farming K1 Revelation.
Europa: Perdition

Europa's Perdition Lost Sector is one of the most fun to farm. It isn't too long, has quite a few enemies, and the arenas are fairly small. You can speedrun this Lost Sector in two or three minutes on Legend, and it's fairly easy on Master once you learn enemy spawn patterns.
There is a Hydra at the very beginning that'll give you trouble, although a Lament or Anarchy should fix that. Two Wyverns also spawn about halfway through the Lost Sector, so you'll want to bring Heavy weapons that deal good burst DPS like Rocket Launchers. But through crafty use of Stasis, you can easily stunlock the tougher opponents in this mission and carve through the fodder Vex like butter. The final boss is also trivial. Once you have a solution to the Hydra and Wyverns, the Perdition is a breeze to farm.
Rheasilvia: Chamber Of Starlight

The Chamber Of Starlight has one of the most magical-sounding names of all the Lost Sectors. This is complemented by the fact that it's hidden within Rheasilvia in the Dreaming City. Despite this, however, it can be a very straightforward area to farm without a lot of surprises.
Once you arrive in Rheasilvia, you'll need to travel to a cliff-side on the far right and jump over a gap in order to reach the entrance to the Chamber. Though it's dark, you'll be able to easily make your way through and avoid the enemies at the start by following the left wall. When you get to the main area, you'll be attacked by Taken Acolytes who will be serving Inkasi, Disciple Of Quria. Being a Wizard, Inkasi will rely heavily on distance and ranged attacks so be prepared to chase her down.
Divalian Mists: Bay Of Drowned Wishes

Sometimes a name can be both mystical and morbid at the same time as is proven by the Bay Of Drowned Wishes. This Lost Sector is hidden within the Divalian Mists and will take you down into the earth where you'll find a fair amount of nature and luminescence that gives the whole area a strange mystique.
This Sector is quite easy to find as a mark for it will show up as soon as you arrive in the Mists. Once you make it across the chasm, you'll simply need to enter the cave entrance to get into the bay. The enemies will be beastly in nature since they're Scorn-kind so be wary of Abominations, Lurkers, and Screebs that will try to overwhelm you. The final area will pit you against a powerful warrior called Yirksii, Subversive Chieftain so try to defeat him quickly before reinforcements have a chance to arrive.
Asterion Abyss: Concealed Void

There's very little incentive to want to spend time anywhere that has the word "Void" in its name, but Concealed Void can change your mind. If you choose to seek it out, then you'll have to delve into the darkness of the Asterion Abyss.
This Lost Sector will require a fair amount of navigation and endurance since you'll encounter a lot of different enemies. Though they're all members of the Taken, there will be a diverse range of quick soldiers like Vandals and heavy-hitters like Heavy Shanks and Captains to give you trouble. As you jump between platforms and make your way down to the last room, take time to brace yourself for a huge battle with Taken such as Dregs and Servitors while the Teliks, House Salvation leads the charge.
Lost Sectors To Avoid
While every Legend and Master Lost Sector is worth farming for Exotic armor, there are a few that are arguably too difficult or annoying to warrant farming over extended periods of time. If you plan to spend an entire play session farming for Exotic armor, we recommend you avoid these five Lost Sectors if you can help it.
Moon: K1 Crew Quarters

If there's one Lost Sector you should avoid, it's the Moon's K1 Crew Quarters. This Lost Sector is brutal on Master difficulty, pitting you against dozens of Sniper Shanks that can one-shot under-leveled players and overlapping Champions.
You have to take Crew Quarters slow, utilizing more defensive subclasses and weapons to take out targets from a distance. Speedrunning this mission is suicide unless you have a very clear idea of where to go. Even then, the presence of Attrition makes every mistake much harder to recover from — especially with how many long sightlines the enemies have. Only farm this Lost Sector if you have to.
EDZ: Excavation Site XII

Excavation Site XII is a meat grinder of a Lost Sector. One mistake is enough to kill you here. This is mostly due to the second encounter where multiple Barrier Champions and half a dozen Cabal are guarding a bridge. Overextending just a little is certain death.
This Lost Sector demands patience and long-range gunfights. Unless you're a Devour Warlock that's at or over-leveled for this mission, pushing straight ahead with a Sword is suicide. Weapons like Eriana's Vow and Solar Rocket Launchers work best here, although you'll need to bring something that can break Void shields. Avoid this Lost Sector if you can.
Cosmodrome: Exodus Garden 2A

Exodus Garden 2A isn't hard so much as it's annoying. This Lost Sector shows just how not fun Barrier Servitors are to fight. Each encounter—excluding the final boss—is in a claustrophobic space with practically no flanking routes. This wouldn't be an issue if Barrier Servitors didn't make enemies invulnerable through walls.
Once a Servitor deploys its immunity tethers, you're forced to damage the Servitor, break its barrier, then face the now-vulnerable Fallen. If you don't, you'll end up getting two-shot by over a dozen invulnerable Fallen shooting you simultaneously. Beyond the Barrier Servitors, this Lost Sector is actually pretty easy to clear. You can even cheese the last boss somewhat by staying in the storage room and never pushing forward, giving you plenty of time to dodge the boss' attacks. Yet the presence of Barrier Servitors in such a small environment makes this Lost Sector tough to recommend farming.
The Moon: K1 Logistics

We're only mentioning K1 Logistics for its opening encounter. It's downright brutal if you're under-leveled, pitting you against an Overload Captain that's supported by Vandals and a Barrier Servitor near the back of the room. If you fail to kill the Barrier Servitor, it'll retreat to the next room and make the second encounter much harder.
Past the opening, this Lost Sector isn't too hard. Just don't get hit by the boss' attacks, as the Servitor's Void blasts deal 50% more damage due to the singe.
EDZ: Scavenger's Den

This Lost Sector is incredibly difficult if you don't use Warmind Cells. It's somewhat long, Overload Captains deal 50% more damage due to the singe, enemy trip mines have much more range than what you'd expect, and the final boss encounter is complete chaos. Barrier Servitors make most of the boss' minions immune while every enemy focuses you down in an arena that doesn't provide much cover or flanking routes.
You can farm this one with moderate success once you get the hang of it, but there are definitely easier Lost Sectors you could be farming instead.