Beyond Light's Deep Stone Crypt raid is one of the most unique raids the Destiny franchise has seen thus far. Three unique roles or "augments" determine what players are responsible for during certain encounters.
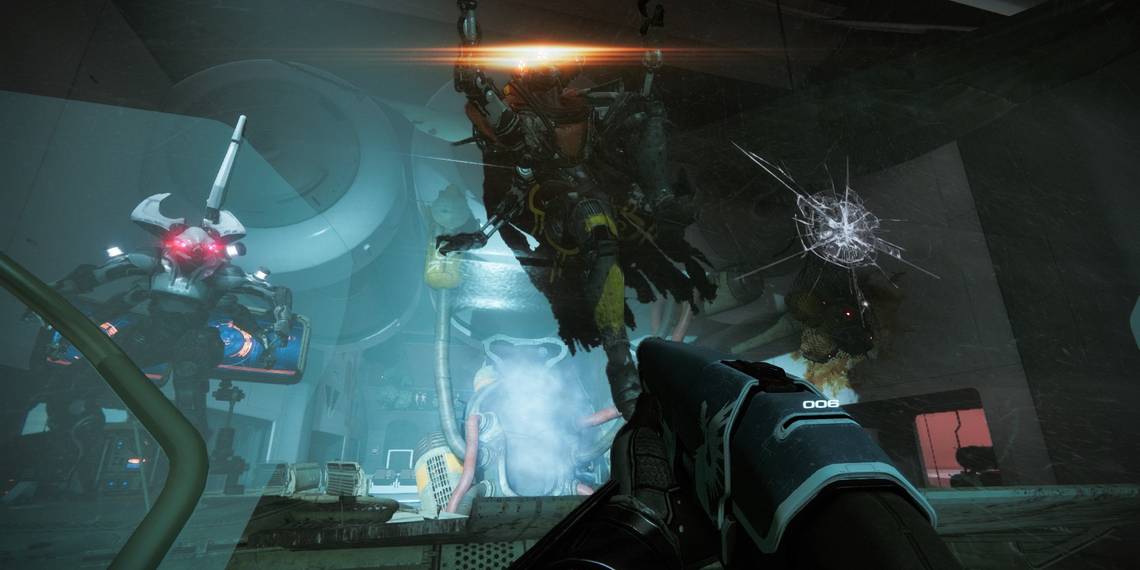
Atraks-1, Fallen Exo is the second encounter in this raid and takes those augments to their limit. Similar to the Gahlran fight in the Crown of Sorrow raid, this encounter is mostly about managing a myriad of mechanics simultaneously while the team is split up. Players will need to deal with the boss's eight clones, figure out which one is real, and prevent its clones from duplicating. It's an absurdly tough fight for LFG teams but not impossible. Here is a complete guide to the Atraks-1 encounter in Destiny 2's Deep Stone Crypt raid.
Updated January 15th, 2021 by Charles Burgar: Atraks-1's weekly challenge is now in rotation for the Deep Stone Crypt raid. Should Copies of Copies be the weekly modifier, Guardians can complete this optional challenge for additional loot and progress towards the Descendant title. We have updated the guide to cover these challenges to make sure you're well-equipped for this encounter.
A Quick Rundown Of The Fight, Mechanics, And Roles

Atraks-1, Fallen Exo has multiple clones that are in space and on Europa. Three Guardians will deal with her in space while the rest of the fireteam stays on Europa. Kill six Servitors to start the DPS phase. Similar to the Crypt Security encounter, Scanners will call out which clone can be damaged. Operators will manage Replication orbs that drop from dead clones. Kill as many clones as necessary to finish the encounter.
Mechanics:
- Servitors: Six spawn every cycle, evenly split between space and Europa. Servitors disable augment terminals while they are alive. Destroying all six starts the DPS phase.
- Replication Orbs: Glowing orbs that drop from defeated clones. Players can walk over them to obtain the "Replication" debuff that lasts 45 seconds. If it reaches zero, the orb holder dies. Operators shoot the orb to drop it, refreshing the debuff's duration. If dropped while in an airlock, they will be purged for good.
- Airlocks: Four rooms in space that can be opened by the Operator via a red terminal. Airlocks are split evenly between the left and right parts of the room. The same airlock cannot be used again until two different airlocks have been opened.
Augment Roles:
- Scanner: Call out which Atraks-1 clone is vulnerable to your team. The correct clone has a bright yellow glow.
- Operator: Manage the Replication debuff Atraks' clones drop. Shooting a Replication orb drops it, refreshing its duration. Damage Replication orbs in airlocks to remove them permanently.
- No Augment: Grab Replication orbs and damage Atraks-1.
How To Defeat Atraks-1, Fallen Exo

Walk towards the purple orb at the end of the room to start the encounter. Three pods near the purple orb will take players to space. After a short period, six Servitors will spawn—three in space and three on Europa. It is recommended to split the team in half and send three Guardians to space. During this time, two Vandals will spawn that carry the Scanner and Operator augments. Space has the Scanner augment while Europa spawns the Operator augment. Make sure the Scanner and Operator players have their respective augments before killing all six Servitors.
If all six Servitors are destroyed or 90 seconds have passed since they've spawned, Atraks-1 will begin a wipe mechanic named Extinction Protocol. The Scanner must call out which clone is glowing yellow for the team to damage (the first clone is always in space). Atraks' clone will vanish shortly after it takes damage, leaving behind a Replication orb. Players without an augment should grab the orb while the Scanner player deposits their augment into an augment terminal. Ground team will take the Scanner augment and damage their clone. Once four clones have been damaged, the DPS phase will end. A fresh set of Servitors will spawn soon after the fourth clone vanishes. Rinse and repeat this process until Atraks reaches the last portion of her health bar.
When the Atraks clone vanishes, it will drop a red orb that grants the Replication debuff. Operators must shoot this orb to refresh its duration to prevent the Replication carrier from dying. To permanently remove the debuff, Operators must shoot the orb off players while standing in an open airlock in the space station. These airlocks can be opened by shooting a glowing red terminal beside the airlock door. The same airlock cannot be used again until two other airlocks have been used. While it might sound counterintuitive, Operators can cleanse themselves of the debuff by shooting a nearby wall at head level. This only works if your gun has ricochet or seraph rounds.
Once Atraks-1 reaches 20% of her health, every clone will teleport to the space station. Every player must make their way to space and damage any clones the Scanner calls out. When a clone vanishes during this phase, another one will immediately become vulnerable. Destroy as many clones as necessary to beat the encounter.
Recommended Loadouts
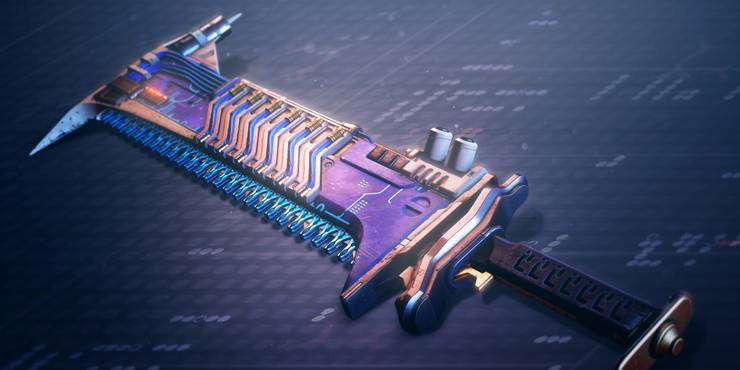
Swords are by far the best weapons for damaging Atraks-1. The Lament is the strongest choice for damaging this boss. Before damaging Atraks, make sure that your team is near her and has their guard up. Use three light attacks than a heavy attack to deal over 250,000 damage in one combo. This is so strong that most teams can easily one-phase Atraks with this weapon—a strategy we discuss in the "Strategy 1: One-Phase Atraks" section of the guide.
Subclasses
- Hunter: Way of the Sharpshooter, although anything works well here.
- Warlock: Attunement of Grace for Well of Radiance.
- Titans: Code of the Defender for Weapons of Light.
Weapons
- The Lament: Best-in-slot for boss DPS. Make sure your guard is up before attacking for optimal damage. Reach Banshee's Wail x9 before using a heavy attack for optimal damage.
- Falling Guillotine: Use this if Lament gets nerfed. A roll with Whirlwind Blade is preferred.
- Xenophage: Best used if Swords get nerfed. A solid choice for dealing with Servitors and Atraks alike.
Mods
- Lucent Blade: Grants a 35% damage boost to your Sword for five seconds after hitting someone. This pairs well with Lament, Falling Guillotine, and Black Talon. Activate its secondary perk to recharge your Sword faster.
- Arc Damage Resistance: Nearly every enemy deals Arc damage in this encounter. Grants 25% Arc damage resistance with one Mod, 40% with two.
Completing The Copies Of Copies Challenge

Copies of Copies: Defeat Atraks-1, Fallen Exo without depositing Replication Orbs into airlocks.
Copies of Copies is a weekly challenge that requires your fireteam to defeat Atraks-1 without using any airlocks. Instead of purging the Replication Orb by shooting it into space, Operators must refresh the buff. Raid teams will need to juggle these debuffs for the whole encounter.
Fortunately, The Lament is such an absurd weapon for this encounter that Copies of Copies is trivial to complete. Most teams can easily one-phase Atraks with this Sword, meaning only four debuffs needs to be managed at most. Follow the "Strategy One" portion of the guide for more information on how to accomplish this. Completing a challenge run grants two chests instead of one, the second chest rewarding a second item and five Spoils of Conquest.
5 Seconds To Paradise Triumph

5 Seconds to Paradise: Defeat Atraks-1 while destroying all Servitors within 5 seconds of each other.
This is a fairly simple Triumph that can be completed at any time; 5 Seconds to Paradise is not a weekly challenge. Similar to Copies of Copies, this Triumph is easiest to achieve by using the one-phase strategy discussed in the next section.
Instead of having the Operator stay on Europa, have them travel to space with their team. When the Operator buff spawns, the ground team will transfer the buff to space via an augment terminal. During this period, every player will be assigned one Servitor to kill. Have everyone weaken but not kill their Servitor. Once the Operator and Scanner have their respective buffs, start a countdown before ordering every fireteam member to kill their Servitor. Execute the one-phase strategy after this to receive the Triumph.
Strategy One: One-Phase Atraks

This strategy revolves around using The Lament Exotic Sword to melt Atraks-1's health bar in a single DPS phase. Since every phase has four clones, your team has four opportunities to deal some serious damage. Note that this strategy puts an immense amount of pressure on your Scanner.
Strategy Synopsis:
- Send three players to space. A fourth player heads to space once they grab the Operator augment.
- The Operator sends two pods to Europa. Ground team kills their Servitors before heading to space.
- Space team kills their Servitors.
- All six players attack the same Atraks clone using Lament.
- The Scanner and three other players head to Europa. The Operator stays in space to purge the Replication orb in an airlock.
- Ground team kills their clone and heads up to space once more. If your team's damage is low, grab the Replication orb and take it to space.
- Repeat steps four through six until Atraks reaches 20% health.
- Every player heads to space. Kill any clones the Scanner calls out until Atraks' health reaches zero.
Start the encounter by sending three players into space. Make sure one of the space team's Servitors is left alive. One player on Europa will kill the Operator Vandal and take the augment. Have that player take the fourth orbital pod to space. Once they are in space, have the Operator send two orbital pods to Europa by shooting the glowing terminals near them. The final two players on Europa will kill their Servitors and take the pods up.
All six players should now be at space at this point. When the Scanner has their augment, kill the Servitors in space to star the DPS phase. Get all six players near Atraks, plant a Ward of Dawn of Well of Radiance if available, and then have all fireteam members attack the clone simultaneously. If done correctly, the boss should have lost around 25% of her health.
Four players will then head down to Europa, one of which needs to be the Scanner. Have the Operator stay in space to take care of the Replication orb. Ground team's Scanner will need to call out the vulnerable clone immediately upon landing. Damage the clone, send the four players back up, then damage the third clone. This should be more than enough damage to start the enraged phase. Run up to whichever clone the Scanner calls out and tear the clone apart. Repeat until Atraks is dead.
That's it! If done fast enough, this fight should be over before the second Replication orb needs to be refreshed. Operators only need to deal with one orb while Scanners never need to rotate their augment, although Operators can easily purge all four orbs with each airlock if need be.
Strategy Two: Two Airlocks

If contest modifier ever returns and the first strategy is no longer viable, this is a solid way to defeat Atraks-1 that focuses more on technique than sheer damage. For this strategy, the Operator uses two airlocks for every DPS cycle and never rotates their augment. If executed properly, the Operator augment never leaves the space station and makes managing Replication purges much easier.
Strategy Synopsis:
- The Operator grabs their augment on Europa and heads to space. Every other role plays out as normal.
- Kill all six Servitors. Operator sends down the rest of the orbital pods to ground team.
- Space team kills a clone and sends Scanner down to ground team. The Operator or non-augmented player grabs the Replication orb. Refresh the orb as needed.
- Ground team grabs Scanner and kills a clone. Scanner passes the augment back up to space team.
- One member of ground team that isn't the Scanner grabs the Replication orb and immediately heads to space.
- Space team grabs Scanner and kills another clone. The Operator refreshes all Replication debuffs and cleanses everyone in an airlock. The member of ground team heads back to Europa.
- Scanner is placed in the augment terminal once again. Ground team grabs it and kills another clone.
- One member of ground team grabs the Replication orb and immediately heads to space.
- The Operator cleanses the ground team member in a separate airlock.
- Pass Scanner back to space team.
- Repeat steps two through ten until Atraks is at 20% HP.
- Send everyone to space and kill any clones the Scanner calls out. If someone's Replication timer is low, have the Operator cleanse them in an airlock.
In essence, use two airlocks for every damage cycle instead of just one, cleansing three players in one and a single player in the second airlock. This will require ground team members to immediately enter an orbital pod once they grab the Replication orb.
If done correctly, the first ground team member should arrive during or after space team has killed their second clone, allowing the Operator to purge three buffs at once. When ground team gets their second Replication orb, they head up to space and are cleansed in a separate airlock. Due to how airlocks work, there are always two airlocks available.
This strategy prevents the Operator augment from having to be passed and makes coordinating airlock purges much simpler. Besides that change, the encounter plays identically to how it normally does. Scanners pass their augment after every clone kill, and everyone heads up to space when Atraks is near death as normal.
Strategy Three: Solo Atraks Cheese

Due to the way Bungie designed this boss fight, there is a rather cheesy exploit that allows Guardians to solo this fight with ease. Similar to the Riven cheese in Last Wish, this strategy bypasses every mechanic tied to the fight and makes it a DPS check. Note that only Titans and Hunters can do this cheese.
Strategy Synopsis:
- Equip Salvation's Grip and a specific Super. Titans need Thundercrash, while Hunters need Silence & Squall. Warlocks can't do this currently. Head to space.
- Walk up to the exit door and face away from it, your back touching the center of the door.
- Make a Stasis wall with Salvation's Grip that is parallel with the door: fire a charged Stasis crystal at your feet, create a second to your left, then create a third one on your right.
- Stand in the center of the crystals and use your Super, moving backward as you do this. The game will push you through the door.
- Equip a better Power weapon and proceed to the orange generator room.
- Defeat the "Atraks-1, Fallen Exo" Captain at the end of the room. He won't retaliate.
That's right, Atraks' health pool is tied to a tough Fallen Captain that resides in the orange generator room after this encounter. Players have found a way to glitch into this area and fight him. Slaying the Captain ends the encounter.
Equip Salvation's Grip and travel up to space. On the closest door to your right is the exit. Stand next to the door, face away from the door, then fire a charged Stasis crystal directly under you. Slightly move to your left and fire a second charged Stasis crystal under you, creating a makeshift wall. Do this once more to your right. Walk to the center of the Stasis wall and use your Super, moving backward while staring straight ahead as you do so. If done correctly, you should slide through the door. Should you slide to the side and not through the door, your Stasis crystals need to be placed closer together.
Follow the linear path until you reach a large, orange generator. At the back of the generator should be a non-aggressive Fallen Captain named "Atraks-1, Fallen Exo." This is where Atraks' health data is being stored. Use everything you have to kill this Fallen Captain to complete the encounter.