Quick Links
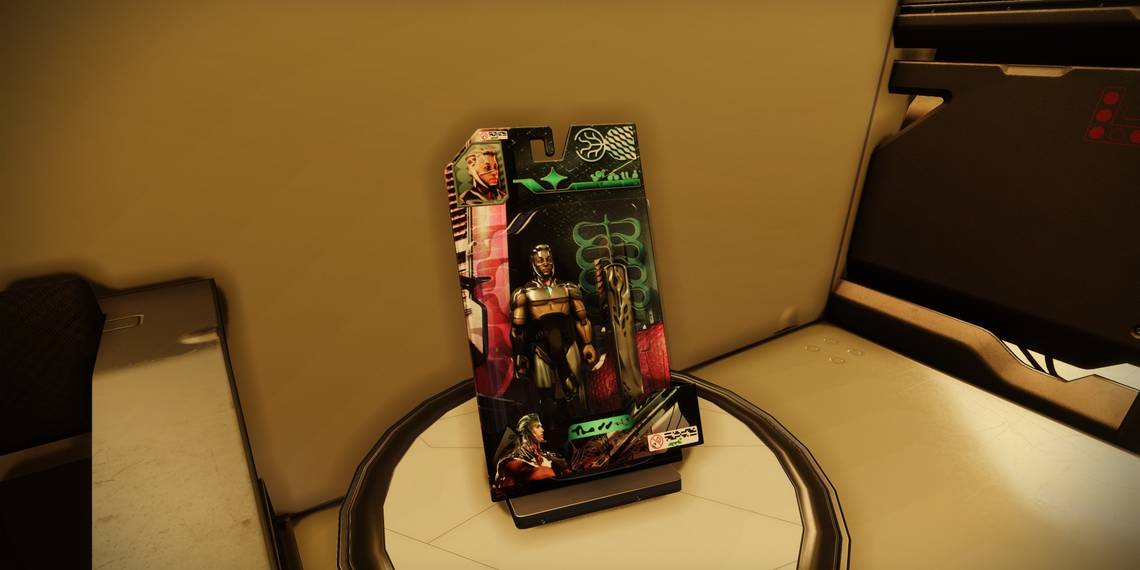
Destiny 2: Lightfall has plenty of collectibles for Guardians to find. Neomuna has a wide range of collectible types, ranging from Darkness shards to Cloud Strider action figures. These action figures are what we'll be focusing on today, as they are tied to Neomuna's Virtual Fighter title and various Triumph rewards.
There are nine action figures in total, one for each section of Neomuna. In this guide, we'll cover how to obtain all nine action figures and where to display them, granting progress toward the 'They're Not Dolls' Triumph. These collectibles require you to complete minigames and short puzzles, so don't expect this to be a scavenger hunt.
Action Figure #1: Zephyr Concourse

- Location: Southeast segment of the map, found next to a bar counter.
Make your way to the southeast quadrant of Zephyr Concourse. You'll find an entertainment area with a small bar area. Look past the bar counter to find an action figure resting near some glasses.
Action Figure #2: Esi Terminal

- Location: Found in a building next to an Apogee Repeater.
This action figure can be found in Esi Terminal, an isolated area located west of Zephyr Concourse. When you reach the zone, turn left at the stairs and kill the Cabal stationed there. At the end of the path, turn right and run down the stairs. Enter the abandoned pub on your left. You'll want to walk into the kitchen. Interact with the sink.
A message stating, "The dishes are pilling up!" will appear on your screen. You must dunk four orbs into a nearby sink to spawn the action figure. The orbs and dunking location are marked on your HUD, so this part shouldn't take you long. Gladiators will also spawn during this minigame. You can either avoid them or kill them between each orb deposit. Depositing all four orbs will spawn the action figure in the sink you were just dunking at.
Action Figure #3: Irkalla Complex

- Location: In the Veil Containment area, spawning after you destroy three floating objects.
For this action figure, you'll need to reach the Irkalla Complex. This zone is found west of Zephyr Concourse and south of Esi Terminal. Once you've entered Esi Terminal, you'll want to turn left at the entry stairs and jump over the small balcony. Follow the path until you reach Irkalla Complex. Once there, jump through the portal and fight past the Cabal to reach the Veil Containment complex.
From here, you'll need to jump on the perimeter wall and jump atop each destroyed artillery cannon. A small Darkness shard will spawn in the distance. You must destroy this shard before standing on another cannon, doing so three times in total. Destroying all three shards will spawn an action figure above one of the artillery cannons.
Action Figure #4: Ahimsa Park

- Location: Center building, found under the stairs that lead to T3 Terminal Overload.
Make your way to the center building in Ahimsa Park. When you walk in, look for the entrance that has a set of stairs. Walk under the stairs to find a hidden action figure.
Action Figure #5: Typhon Imperator

- Location: At the very end of the zone, spawning after you complete a short parkour time trial.
The Typhon Imperator is Calus' personal ship, located on the eastern corner of Ahimsa Park. Head inside the ship and make your way to the very end of the zone. You'll eventually jump through a portal that takes you to an isolated area. Once you're in this circular room, head right and clear out the small group of Cabal. Interact with the bowl on the display shelf nearby when you're ready.
Your goal is to run through multiple Vex cubes as fast as possible. Doing this too slowly will reset the challenge, so we highly recommend you use Strand for this part. The cubes spawn roughly in this order:
- Spawns directly behind you.
- Spawns in the center of the arena.
- Turn slightly left and jump across the gap.
- Climb up the wall in front of you and turn slightly to your right.
- Turn slightly right and climb up the wall.
- Spawns directly in front of you.
- Jump across the gap.
- Face the center of the room and jump as high as you can.
- Drop down to the center of the room.
- Keep running forward.
You have roughly ten seconds between each Vex cube before you need to restart. If that happens, interact with the bowl once again to reset. The action figure will spawn on the last cube when you've completed the time trial successfully.
Action Figure #6: Liming Harbor

- Location: Behind a reception desk in the center building. Fend off the Vex to spawn the action figure.
Spawn at Liming Harbor and enter the structure at the center of the harbor. You'll find a reception area on the northern end of the building. Interact with the terminal on a circular desk to start a wave defense minigame. Your goal is to prevent any Vex from entering the doors behind you without leaving the desk. Use a Machine Gun to easily clear out any Vex that get in your way. Some will try to sneak past you, so keep a close eye on your radar. Killing all the Vex intruders will spawn the action figure on the desk.
Action Figure #7: Radiosonde

- Location: Complete a puzzle in a room bathed in blue light.
Make your way into Radiosonde by heading south in Liming Harbor, entering the massive ship that's docked here. You'll want to make your way past both rooms with destructible doors and the adjacent room with multiple Vex enemies. In the following room will be a small terminal that's surrounded by blue light.
Interacting with this terminal will start a short puzzle. A series of images will flash behind you. You must shoot the plates under the symbols in this order: 6-8-4-5-2-7-1, with the top left plate being one and the bottom right plate being eight. If done correctly, an action figure will spawn on the terminal you used to start the minigame.
Action Figure #8: Maya's Retreat

- Location: Found after interacting with three massive braziers scattered throughout the zone.
Maya's Retreat has three hidden braziers you can interact with, igniting them with a blue flame. Activate all three braziers in the zone to spawn an action figure. The locations are as follows:
- After the first group of Vex, head left instead of right. You'll find a brazier hiding in a corner just before you cross to find the nearby Apogee Repeater.
- After the first brazier, cross the gap and enter the cave directly across from you. The Brazier will be inside the cave.
- Exit the cave and look up. Grapple up and follow the natural ledges until you reach a cavernous area guarded by Vex. The back-left corner of the cavern has a brazier.
When all three braziers are lit, the action figure will spawn under the third brazier. Be sure to grab it before leaving the zone.
Action Figure #9: Strider's Gate

- Location: In the recreational building on the western edge of the area.
Spawn in Strider's Gate and jump down from Nimbus' vantage point. Enter the building on your right to reach a recreational building that's filled with arcade machines. Interact with one of these machines to enter a shooting range. Equip a Scout Rifle before starting this minigame.
You must destroy all explosive barrels without leaving the balcony before the timer expires. You can find the timer floating near the center of the shooting range, denoted with diamond symbols that decay each second. If that hits zero, you'll need to restart. Barrels will initially spawn in a sequence, requiring you to destroy one at a time. Once you've destroyed a few barrels, you'll start seeing octahedrons spawn in the arena. Destroying these floating diamonds will reset the timer. They despawn after a few seconds, so be sure to break them whenever you see one.
Wave One
The first set of barrels will spawn in a sequence, meaning you'll need to destroy one at a time. The first barrel spawns atop a crate that's fairly close to your vantage point. Shoot it and all subsequent barrels that spawn to your right. If you destroy all these barrels and get lost, the next few barrels wrap around the middle of the complex before going up a floor, ending on the left-hand side of the shooting range. The octahedron spawns right next to the timer.
Wave Two
These barrels will spawn in a straight line fairly close to you. Destroy the line of barrels to spawn another wave. The octahedron spawns to your left, floating beside the path that leads out of Strider's Gate.
Wave Three
Barrels will spawn away from each other in this wave:
- A cluster of barrels will spawn atop crates near the center of the shooting range, just under the timer.
- One barrel spawns atop a trio of red rockets.
- One barrel spawns on the far right of the shooting range, resting atop a red platform.
The octahedron spawns at the tip of the rockets strapped together on the right-hand side of the shooting range.
Wave Four
Some barrels might not explode when you set off the chain reaction. If this happens, you'll need to reset the shooting range and try again.
All the barrels will spawn atop circular platforms on the far-right end of the shooting range. One shot should destroy all of them. The octahedron spawns at the very back of the shooting range, hiding under the yellow platform that leads to the recreational building.
Wave Five
This last wave will spawn a series of barrels at five different spots:
- Near the crates from wave three, located under the timer.
- Beside rectangular-shaped walls on the back part of the shooting range.
- Beside the trio of rockets.
- On the wall of the right-most building.
- On the wall of the left-most building.
The octahedron spawns in the same spot as the last wave. Make every shot count, and remember to hit those barrels on the very edges of the shooting range. Doing this successfully will teleport you back into the yellow building, rewarding you with an action figure.
Where To Place Your Action Figures

You can display all collected action figures at Strider's Gate. From spawn, drop down and look for a yellow building on your right. This is a recreational building that can display all nine action figures. Interact with various tables around the room to showcase your action figures, granting progress toward the 'They're Not Dolls' Triumph and Virtual Fighter title.