Quick Links
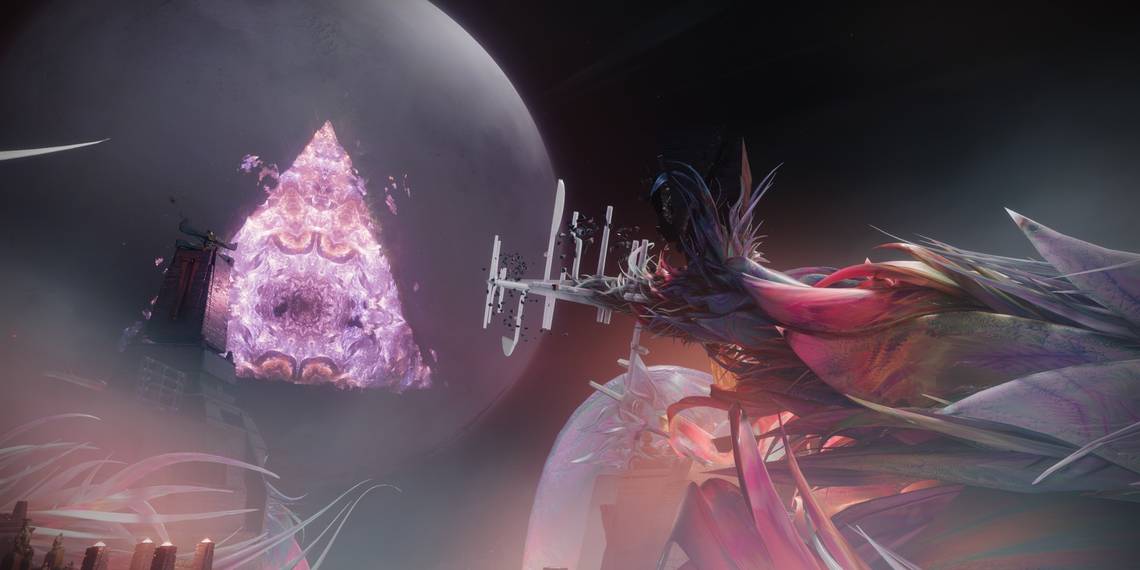
Destiny 2: Lightfall's raid is Root of Nightmares, taking place aboard the Witness' terraformed ship. Delve within the Pyramid ship to uncover new secrets and fight an ancient evil. If you can master the raid's core mechanic, Root of Nightmares is one of Destiny 2's easiest raids and features some exciting weapons, one of which is a double-barreled shotgun.
In terms of mechanics, expect something similar to the Spire of the Watcher dungeon here. Get comfortable connecting nodes, bring a good Rocket Launcher, and prepare to demolish one of Destiny 2's most notorious villains: Nezarec. This guide will cover every mechanic tied to this raid, provide tips on how to complete the raid, showcase all hidden chest locations, and we'll provide loadout recommendations to make your first clear as smooth as possible.
Updated April 18, 2023, by Charles Burgar: Root of Nightmares now has a Master variant for Guardians to tackle, granting Adept loot that's slightly better than Normal clear drops. We've updated this guide to include all differences between Normal and Master, and we've made some slight tweaks to our hidden chest and Cataclysm sections for added clarity. Links to our Root of Nightmares raid challenges guide have also been added for players looking to earn the Dream Warrior title.
This guide does not cover raid challenges. For tips on completing all eight RoN raid challenges, give our Root of Nightmares raid challenges guide a look.
Master Difficulty Differences And Rewards

Root of Nightmares features two difficulty variants to choose from: Normal and Master.
|
Normal |
Master |
|
|---|---|---|
|
Power Level |
1,770 +0 Power Delta |
1,840 -20 Power Delta |
|
Champions |
Barrier |
Barrier, Unstoppable |
|
Modifiers |
None |
Extra Shields & Champions Surges and Overcharge Weapons are enabled. |
Mechanically speaking, both raids are exactly the same. Master difficulty adds additional Champions to each encounter, adds additional shields to enemy types, and restricts your Power Level to always be -20 under the enemies you're facing. In laymen's terms, enemies hit harder, deal more damage, and are more likely to have shields.
Conversely, Master difficulty features Surges and Overcharge, two mechanics that buff certain element and weapon archetypes. Surges cause your subclass abilities and weapons that match the listed Surge elements (including Kinetic) to deal 25% more damage, stacking with damage buffs and armor mods. Weapons that match the Overcharge modifier will deal 25% more damage as well. Surges and Overcharge do not stack.
Weapons which gain Anti-Champion properties from the seasonal Artifact are considered Overcharged in Master raids, receiving a 25% damage buff regardless of modifiers.
Master Difficulty Champions
Master difficulty features Barrier and Unstoppable Champions, present in the following encounters:
|
Cataclysm |
Barrier Colossi |
|
Schism |
Unstoppable Incendiors |
|
Macrocosm |
Barrier Colossi |
|
Nezarec |
Barrier Colossi |
Cataclysm spawns an additional Barrier Champion whenever a Tormentor spawns. Schism now spawns Unstoppable Incendiors on the second and third floors, one on each side. Macrocosm replaces all plate Colossi with Barrier variants. Finally, the Nezarec encounter replaces the Colossi present on each side with Barrier Champions, three in total.
Master Difficulty Rewards
Master raids do not drop Artifice gear.
Completing Root of Nightmares encounters on Master difficulty will award Adept weapons, prestigious variants of each raid weapon that come with an Adept mod socket and additional stat bonuses when Masterworked. Unlike Vault of Glass' Timelost weapons, the Adept weapons from RoN do not come with additional perks in each column. However, Adept weapons can be converted to Deepsight variants through an upgrade option in the inspection screen. Once converted to a Deepsight variant, visiting the Enclave on Mars will allow you to adjust the Adept weapon's barrel, magazine, and enhance the traits present on your roll. You cannot change the traits themselves; they can only be enhanced. Masterwork bonuses are also locked and cannot be changed through Deepsight.
Additionally, completing weekly challenges on Master difficulty will guarantee an Adept weapon drop. Completing these challenges for the first time will also increase the drop chance of Conditional Finality, Root of Nightmare's raid Exotic.
Recommended Loadouts

|
Subclasses |
||
|---|---|---|
|
Hunter |
Warlock |
Titan |
|
Nightstalker |
Dawnblade |
Berserker |
|
Threadrunner |
Shadebinder |
Sunbreaker |
Hunters can't go wrong with Nightstalkers for this raid. Gyrfalcon's Hauberk is a fantastic Exotic that lets you go invisible after every kill thanks to the Stylish Executioner Aspect. Shadowshot is also critical for optimal DPS now that Divinity only provides a 15% debuff. That said, don't sleep on Theadrunner. Its excellent agility can be useful for the first two encounters to quickly link Light and Darkness nodes together. It also lets you bypass the incredibly buggy gravity cannon in the second encounter if you don't/can't limit your FPS (we cover this in the encounter itself).
Warlocks shouldn't be surprised that Dawnblade and Shadebinder are both great in Root of Nightmares. Dawnblade has access to Well of Radiance, arguably the most important Super in any raid. Use this Super to become virtually unkillable for 30 seconds, buffing your team's damage in the process. Pair this subclass with Starfire Protocol for some excellent single-target DPS. Alternatively, use Shadebinder with Osmiomancy Gloves to trivialize adds. A few Coldsnap Grenades and Bleak Watcher turrets can make the combat difficulty of this raid virtually non-existent.
Titans should use either Sunbreaker or Berserker for this raid. Berserkers can suspend targets with their Barricade and Shackle Grenades, giving them some of the strongest crowd control in Destiny 2. If you don't have a Shadebinder Warlock, a Berserker Titan is an excellent alternative. As for Master or contest mode runs, Sunbreaker Titan is virtually unkillable. Use Loreley Splendor to gain Restoration when your shields break, allowing you to heal through an absurd amount of punishment. Sunbreakers make for great runners in the second encounter and taunters for the final boss.
The bosses in Root of Nightmares have small health totals. Optimal DPS isn't needed here, so use what you enjoy. If your team is really struggling, everyone can use Rat King or Outbreak Perfected to kill all bosses, even on Contest/Master difficulty (final encounter spoilers).
|
Weapons |
||
|---|---|---|
|
Kinetic |
Energy |
Heavy |
|
Witherhoard |
Divinity |
Rocket Launchers |
|
Izanagi's Burden |
Trinity Ghoul |
Linear Fusion Rifles |
|
Arbalest |
Wave Frame GLs |
Machine Guns |
Kinetic weapons should mostly consist of Special ammo weapons. Witherhoard is an excellent pick for clearing out adds and dealing passive boss DPS. Starfire Protocol Warlocks should run Witherhoard to easily get their Fusion Grenade energy back. Izanagi's Burden is great for killing tankier enemies in later encounters, and it's the best weapon to pair with an auto-loading Rocket Launcher like Hothead. Finally, if you don't own any of those weapons, you can't go wrong with Arbalest or a hard-hitting Sniper Rifle like Succession.
Energy weapons tend to bias add clear, so that is what we'll be recommending for this slot. Wave Frame Grenade Launchers, notably Forbearance and Harsh Language, instantly kill adds and are quite ammo efficient. If your team is struggling for ammo, consider using Trinity Ghoul with Heavy Ammo Finder and Heavy Ammo Scout. Your Trinity Ghoul will one-shot packs of adds and spawn Heavy ammo quite frequently, ammo your entire team will receive. And if your team is using Linear Fusion Rifles or Machine Guns for DPS, you'll want at least one Divinity user to ensure your team lands critical hits.
Heavy weapons will serve as your main method of damaging raid bosses, so bring something that packs a punch. Rocket Launchers are amazing for this raid. They deal high burst damage, are easy to use, and don't require headshots to achieve optimal DPS. Be sure one member of your fireteam is using Gjallarhorn if you opt for Rocket Launchers, as most of your team's DPS will come from Gjallarhorn's Wolfpack Rounds buff.
If your team doesn't have any good Rocket Launchers, Linear Fusion Rifles are always a good option. Sleeper Simulant is what we recommend if you're new to raiding since its body shot damage is quite forgiving. Finally, if you're feeling adventurous, Machine Guns are surprisingly good for this raid. They chew through adds and Tormentors for the first few encounters, and they can deal solid single-target DPS with the right gun. We recommend Thunderlord if you're new to raiding and Retrofit Escapade if you crafted one last year—preferably with Target Lock and Fourth Time's the Charm.
Root Of Nightmares Hidden Chests

Similar to Vow of the Disciple and King's Fall, Root of Nightmares features a guaranteed red border chest and two secret chests. The red border chest requires you to complete a short puzzle throughout the entire raid, while the two hidden chests are found in platforming sections between encounters. You may only open the red border chest once per week, even on alternate characters. Secrets chests may be looted once per week on each character.
Red border chests will always drop a weapon with a crafting pattern. Secret chests can drop any weapon or armor piece previously acquired in the Root of Nightmares raid. Additionally, secret chests also drop raid-specific mods that can be slotted into Root of Nightmares raid armor. These mods only work inside the raid.
Red Border Chest

The red border chest spawns after completing three puzzles throughout your Root of Nightmares run. Each puzzle requires you to find a hidden plate of Light or Dark energy and link them to nearby nodes, similar to the first and final encounter. The nodes you need to link can be found at the very start of the raid. During the opening section, before jumping down toward the Pyramid entrance, run to the wall of white pedals on your left.
Three orbs will be glowing on this wall, each either light or dark. These are the colored plates you need to activate during each puzzle, showcased in order from left to right. For example, if you got Light, Light, and Dark on the wall, you'll need to link all the Light plates on the first puzzle, Light plates on the second puzzle, and Dark plates on the final puzzle. Doing so successfully will display, "A great harvest awaits..." on your screen and play a unique audio queue. The chest will spawn beside the Spoils of Conquest vendor once you defeat Nezarec.
We'll list each puzzle location below. Credit to YouTuber Skarrow9 for finding all three locations.
- Puzzle #1: Before the first encounter, when you first enter the Pyramid structure, you'll find a room bathed in bright light with a giant mass of Traveler roots lining one of the walls. Find a way past these roots to find a hidden room. Follow the stairs to reach the hidden basement plate puzzle.
- Puzzle #2: During the nuclear jumping puzzle, continue to progress until you use the gravity cannon that launches you to a set of stairs. After climbing the stairs, you'll want to look for an isolated Pyramid structure floating off to your left—this structure is quite a ways away and not connected to anything. Use Strand or an Eager Edge Sword to traverse the gap. The puzzle can be found inside the structure.
- Puzzle #3: This puzzle is found just before the final encounter. Just before you reach Nezarec, you'll be running along Traveler branches connecting to a Pyramid platform. Instead of running straight across, look down for a strange metallic symbol floating on the underside of the structure. Jump onto that symbol and hop to the adjacent debris. You should see a hole in the structure right above you. Jump up to find the plate puzzle.
Hidden Chest #1: After Cataclysm
While on the jumping section to the second encounter, you'll eventually get sniped by multiple Psions on three sniper perches on your right. Kill the Psions and jump to the tallest square hole in the wall. Each one has a doorway that leads inside the pyramid. Head inside and turn right. At the end of the hall will be a Tormentor and some Shadow Legion. Defeat all the enemies to spawn the chest.
Hidden Chest #2: Nuclear Jumping Puzzle

During the second half of the dedicated jumping puzzle—right after your fireteam opens a door to a series of stairs—climb up the stairs to your right. Run slightly to your right and look over the edge of the structure. If you look straight down, you should see a Darkness crux. Shoot it to open a hidden room directly behind you. Head inside to find the chest.
Cataclysm

Encounter Synopsis
-
Activate all plates with the "Field of Light" buff.
- Gain "Field of Light" by damaging plate spheres with an aura.
- Traveler spheres reveal the next plate that needs to be activated.
- Stand atop the inactive plate and damage the black sphere to activate them, consuming your buff.
-
Extend the "Sweeping Terror" timer by killing Tormentors.
- Melee a pair of floating Psions to spawn a Tormentor.
- Barrier Champions are present.
Roles
|
Plate Runners |
Add Clear |
|---|---|
|
|
Encounter Overview
The goal of this encounter is to activate every plate in the arena without letting the "Sweeping Terror" debuff expire. Before your team starts, dedicate at least two people to activating plates. Everyone else will focus on add clear, although you might want to dedicate two players to solely killing Tormentors. No boss fight is present here, so go all-in on add clear. Machine Guns and Supers work wonders here.
A plate beside spawn will have a floating Traveler orb and a faint aura. Stand within this aura and damage the Traveler ball to gain "Field of Light," a 20-second buff that allows you to activate nearby plates. This is also how you start the encounter. Anyone inside the aura when the Traveler ball is shot will gain the buff. Nothing happens when it expires, so it's fine if everyone grabs it to start.

Starting the encounter will grant "Sweeping Terror" to all players, a 35-second timer that wipes your fireteam when it expires. Add clear team must look for two bubble Psions in the arena—they're protected by glowing spheres. Punching both Psions will spawn a Tormentor on either side of the arena. Call out which side the Tormentor is on, then work on breaking its shoulder weak points. Once vulnerable, every member of add clear must focus on killing the Tormentor. Killing a Tormentor will extend the "Sweeping Terror" debuff by 30 seconds, giving your plate runners time to cleanse every plate.
Active plates will emit a faint beam of energy in a certain direction. Plate runners will run in the direction of that beam until they reach a plate with a floating black sphere. This sphere is quite tiny, so you might need to get close. Your team will also need to kill one Tormentor before they can start spawning, so be patient. Once you find the correct plate, run atop the plate and damage the black sphere to activate it, consuming your "Field of Light" buff. This will spawn a Traveler ball on that plate to denote its cleansed status.
Run back to a previous plate and look for an aura. Stand inside the aura and shoot that plate's Traveler ball to regain "Field of Light". The last plate you activated will now emit a directional beam. You'll repeat this process until all plates have been activated. Only one person needs to be a plate runner to beat this encounter, although having two plate runners can speed up buff swaps.
Efficient Plate Runner Strategy

Since you can only cleanse one plate with "Field of Light," you can significantly speed up this encounter by alternating plate activations between two players. Have both runners gain "Field of Light" when the encounter begins. The first runner will find and cleanse the first plate, as per usual. The second runner must wait for that plate to get activated—if not, a lockout timer will commence—then they'll immediately shoot the Traveler aura to refresh "Field of Light." This reveals the next plate location. The second runner will then run toward the next plate while the first runner backtracks to the aura to regain "Field of Light." You're effectively swapping places every plate, like so:
|
Runner #1 |
Runner #2 |
|
|---|---|---|
|
Start |
Gets Buff |
Gets Buff |
|
Plate #1 |
Cleanses Plate |
Gets Buff |
|
Plate #2 |
Gets Buff |
Cleanses Plate |
|
Plate #3 |
Cleanses Plate |
Gets Buff |
|
Plate #4 |
Gets Buff |
Cleanses Plate |
|
Plate #5 |
Cleanses Plate |
Gets Buff |
|
Plate #6 |
Gets Buff |
Cleanses Plate |
Every set of plates your team cleanses will push back the Shadow Legion, resetting the "Sweeping Terror" buff and shifting the starting plate for your plate runners. Continue to kill Tormentors and activate plates until the encounter ends. There are four sets of plates in total.
Encounter Rundown: Plate Runner
Encounter Rundown: Add Clear
Scission

Encounter Synopsis
- Divide your team into two groups. Assign each group a side of the map.
-
Runners alternate between sides, activating plates with "Field of Light" and "Flux of Darkness".
- Gravity cannons line the arena and can be used to quickly traverse the level.
- Add clear must obtain "Field of Light" or "Flux of Darkness" to defeat Centurions, allowing runners to cleanse plates.
-
Activate all plates on your floor to spawn a miniboss on each side. Use Light/Dark buffs to kill them.
- Activate the gravity cannon near you to reach the next floor.
- Cleanse all three floors to beat the encounter.
- Barrier Champions are present.
Roles
|
Plate Runners |
Add Clear |
|---|---|
|
|
Encounter Overview
Gravity Cannon Physics Bug (PC Users)
The gravity cannon in this encounter behaves inconsistently when your frame rate is above 60FPS, launching players into walls or entirely different floors. This will most likely kill you. We highly recommend you limit your frame rate to 60FPS to ensure the gravity cannons work as expected. Console users that experience this bug can use Strand or an Eager Edge Sword to mitigate physics deaths.
This is an expanded version of the last encounter, replacing Tormentors with a second buff called "Flux of Darkness." Beating this encounter will require your fireteam to activate all Light and Darkness plates across three different floors. Tormentors aren't present here, replaced with Redolence enemies that are vulnerable to damage when you're affected by the correct buff (Light or Dark). Machine Guns and crowd control are recommended here. Plate runners might also want to use Strand or an Eager Edge Sword to speed up the encounter.
Before you start, split your team into two groups. Each group will cover one side of the arena (left or right). They're symmetrical copies of one another, the only difference being their buffs. The left side gets "Flux of Darkness" and the right side gets "Field of Light." Both buffs are functionally the same. The only difference is their color. Have each side huddle around their plate's aura, then shoot the floating object to start the encounter.
Each side has five plates that need to be cleansed before the "Imminent Expulsion" debuff reaches zero. But unlike the last encounter, some of the plates require the opposite side's buff. For example, the Darkness side's first plate requires Field of Light to cleanse and vice versa. This means your buff carriers will need to immediately swap sides. You can do this by using the gravity cannons that line the edge of the chasm. Align your back to the cannon and shoot the floating crux to activate it, launching you to the other side.

While your runners are out cleansing plates, add clear will need to keep the Shadow Legion at bay. Most of the adds in this encounter are quite easy to kill, the toughest being the Barrier Champions that spawn toward the end of each floor. A single Super or Strand's suspend effect can trivialize them. More importantly, each wave will also spawn a Redolence enemy, a glowing Cabal that can only be damaged while you have either the "Field of Light" or "Flux of Darkness" buff. The color of the enemy determines the buff you need. Left-side Redolence mobs glow orange and require "Flux of Darkness" to kill. Right-side Redolence mobs glow white, requiring the "Field of Light" buff to kill. Be sure to coordinate your buff pickups so your add clear team can take care of these enemies without disrupting your runners.
Orb Lockout Timer
Whenever you activate "Field of Light" or "Flux of Darkness" orbs, a plate must be cleansed before anyone can grab another buff. Failing to do so will lock all plates for the next 15-20 seconds, soft-locking the encounter. Coordinate your buff pickups with other players to ensure this doesn't happen.
Once all plates have been activated, a small group of Cabal will spawn on each side. Gain "Field of Light" or "Flux of Darkness"—whichever is on your side—to kill the Cabal. If the aura doesn't show up, it means you grabbed the buff too early and are soft-locked; you'll need to wipe if this happens. When the enemies are dealt with, use the nearby gravity cannon to launch yourself up a floor. Repeat this process until you're cleansed the plates on all three floors.

Now, there are two strategies you can use to beat this encounter:
-
Two Runner Strategy: Assign one runner to each side. They will grab a buff, immediately swap, cleanse two plates (the second plate requiring the opposite buff), and repeat.
- Each Runner cleanses two plates per side, grabbing buff before switching sides.
-
Four Runner Strategy: Assign two runners to each side. One pair will immediately swap and cleanse a plate. The second group then grabs the buff when the first pair is done to cleanse the next plate. Repeat.
- Rotating pair grabs buff, switches sides, then cleanses a plate.
- Stationary pair never rotates, grabs the buff after rotating pair is done, then cleanses a plate.
If you're still confused by the rotation, we cover each strategy in the expandable subsections below. But for now, decide if you'd rather have two or four runners. The two runner strategy can get a lot more stressful for the runners, although this greatly reduces communication clutter and minimizes failure points between players. Having four runners is less stressful for plate runners but adds more failure points—notably pairs grabbing their buffs too soon. Having two runners is easier for inexperienced teams, but using four runners makes this encounter much faster.

Encounter Rundown: Add Clear (All Strategies)
Encounter Rundown: Plate Runner (Two Runner Strategy)
Encounter Rundown: Plate Runner (Four Runner Strategy)
Survive The Jumping Puzzle

Encounter Synopsis
- Navigate the jumping puzzle while avoiding a nuclear explosion.
- Grab "Field of Light" to power "Refuge of Darkness" plates.
- With "Refuge of Darkness" active, the explosion can't kill you.
Before you reach the jumping puzzle proper, you'll find yourself in a room with a floating disc at the room's epicenter. You must link Light and Darkness plates scattered across the room to the disc. Once both are linked, the path to the true jumping puzzle will open.
Root of Nightmares' jumping puzzle is quite lengthy but straightforward. You'll notice various Light and Darkness plates on your path. Your goal is to gain the "Field of Light" buff to empower the "Refuge of Darkness" plates, allowing you to survive the periodic nuclear blast from Nezarec. That's right, you'll need to survive nuclear explosions while navigating this jumping puzzle.
A floating pyramid in the distance will emit a bright orange glow that progressively gets brighter. Once that glow gets bright enough (roughly every 15 seconds), it will release a massive explosion that will kill everyone. You'll need to be buffed with "Refuge of Darkness" to survive the blast. Make sure one member of your fireteam is activating the Darkness plates to ensure your team has a clear path forward. Fight your way to each plate, use any gravity cannons you stumble across, and you should find your way to the next encounter. This jumping puzzle is quite lengthy, so take your time.
Macrocosm

Encounter Synopsis
- Assign a player to each corner of the arena.
- Each player defeats their Lieutenant. Look at the planets.
- Find the planet that doesn't match the others. Interact with that planet and call it out to your team.
- Swap sides. Interact with the planet your teammate used.
- Kill the Lieutenant one more time. Check the planets at the center of the arena.
- Light planets are cleansed by left-side players. Dark planets are cleansed by right-side players.
- DPS Phase: damage the boss while standing on the correct plate.
Roles
|
Planet Shifters |
Add Clear |
|---|---|
|
|
Encounter Overview
Your fireteam finds themselves in the Witness' planning room, complete with a showcase of Sol's various planets and moons. At the center of the arena is Zo'aurc, Explicator of Planets, a Cabal Incendior that has the power to move planets. Your goal is to shift the correct planets to each side to start the DPS phase.
Moving entire planets is much easier than one might expect. Before you start the encounter, assign one person to each corner of the arena. Each corner has a triangular platform with a planet on each vertex. The side you're on determines the color of planets you'll see shortly after the encounter starts. Left side has Light planets. Right side has Dark planets. Remember this, as it'll be critical to finding the correct planet later. The other two players not on plates will kill adds and damage the boss, nothing more. Get near the middle of the arena to start the encounter.

Shortly after the encounter starts, a Lieutenant Colossus will spawn on each plate. The planet shifters will need to kill their Lieutenant. Add clear users should avoid killing them, as whoever kills the Lieutenant must pick up their buff. When you kill the Lieutenant, you will find the planets above you shrouded in Light and Darkness. Interact with the planet that does not match your side, then call out which planet it was. Left side is looking for a Darkness orb, and right side is looking for a Light orb. This will align the planet to your character, allowing you to move it to the correct plate.
Now the planet shifters must swap sides, interacting with the planet called out by that side. For example, if the top-left corner called out "L1" or "Light 1," you would dunk at the "L1" planet on left side. We recommend you run directly across the arena and focus solely on their planets. For example, the top left and top right corners would swap after they discover which planets need to be shifted.
The map below showcases the callouts for each planet.

Once you've interacted with the opposite side, return to your original corner. After defeating another round of Lieutenants, the three planets floating on the central DPS plates will begin to glow. Three players must interact with the planet that corresponds with their side. Left side players interact with the Light planets, and right side players will interact with the Dark planets. For example, if you see two Darkness planets and one Light planet above the central plates, both players on right side would interact with the Darkness planets (one each). Only one player from left side would interact with the Light planet. Once finished, shoot the crux at the epicenter of the arena to start the DPS phase.
During DPS, the boss will glow a certain color. You must stand on the plate that matches the boss' shield color. If the boss starts glowing white, you must stand on a white plate. Conversely, an orange shield requires you to stand on an orange plate. Zo'aurc will become immune to damage shortly after you remove roughly 10% of its HP, so be prepared to quickly swap plates. Rocket Launchers do wonders here. Once you've used all three plates, the encounter will reset and the planets will shift back to their original locations. Repeat the process once again to get another DPS window. You have three attempts before the boss enrages.
Dealing 90% of the boss' HP will start a final stand. After a short delay, you will have roughly 20 seconds to kill the boss before a wipe mechanic is triggered. Once again, burn the boss down with your Heavy weapon and abilities. Slaying Zo'aurc will end the encounter and reveal the path to Nezarec, the final boss.
Defeat Nezarec

Encounter Synopsis
-
Complete the Light and Darkness nodes on each side simultaneously to start the DPS phase.
- There are six nodes per side. Assign at least one person for each side.
-
Taunt Nezarec to draw their aggro, preventing the "Nezarec's Hatred" debuff from killing your runners.
- This should be done by two players.
- Gain the "Field of Light" and "Flux of Darkness" buffs to avoid Nezarec's wipe mechanic.
Roles
|
Plate Runners |
Taunters |
Add Clear |
|---|---|---|
|
|
|
Encounter Overview
You can forget everything you learned during the last encounter, as none of it is used here. This final boss plays like the second encounter without any side swapping. Your team's goal is to charge all six nodes on each side of the arena to stun Nezarec, starting the DPS phase. There are no new mechanics when it comes to charging the plates, so your previous plate runners should continue fulfilling this role. You'll want at least two runners, preferably four if you want to bypass a certain wipe mechanic.

Start the encounter by having your runners damage the Light and Darkness orbs at each end of the arena. The runners will need to charge all six nodes in roughly one minute before Nezarec wipes your fireteam. No side swapping is required to activate the nodes this time, so runners will stay on their side. Both sides will need to time their final node activations to occur simultaneously. If the delay between the final dunk on both sides is more than a couple of seconds, you will wipe.
While all of this is going on, Nezarec is going to rain purple hell on your team. One fireteam member will randomly get afflicted with "Nezarec's Hatred," causing that player to take constant damage and randomly get flung into the air. To prevent this from killing your runners, two players will be assigned to taunt Nezarec. A taunter will damage both Nezarec's shoulders and chest. This will force the buff to apply to the taunter, giving your team ten seconds of reprieve. The taunter will spend this time staying alive, kiting Nezarec around the map once the boss drops into the arena. Have a second taunter on standby to steal Nezarec's aggro, alternating taunts every ten seconds.
Surviving Nezarec's Wipe Mechanic

When a taunter breaks Nezarec's shoulders, the boss will release a colored explosion. This will either be blue or orange. Note this color and call it out to your team. One of your runners will need to create a "Refuge of Light" (blue explosion) or "Refuge of Darkness" (orange explosion) buff. This is done by grabbing the opposite side's buff and depositing it on a plate. For example, to create "Refuge of Darkness," you'd take "Field of Light" from left side and deposit it at a Darkness plate on right side. Anyone with the correct Refuge buff will become immune to Nezarec's wipe mechanic.
Once all plates are active, Nezarec will be temporarily stunned. Find a plate near the middle of the arena and plant a Well of Radiance, preparing for the DPS phase. Shortly after the stun, Nezarec will become vulnerable to damage for the next 30 seconds. Use your Heavy weapons and Supers to burn Nezarec's health bar. So long as you're atop a plate and inside Well of Radiance, Nezarec can't kill you. Beware of Nezarec's slam attack, as it can suppress you on hit. Nezarec will become immune once the DPS phase ends, resetting the encounter. You have three tries before Nezarec enrages.
It's important to note that Nezarec's wipe mechanic seems much faster after the first damage phase. Once you finish the DPS phase, we highly recommend you speedrun node completions or create a Refuge node (explained in the tip above) to avoid the wipe mechanic. As for Nezarec's final stand, it's the same as last encounter. Once Nezarec reaches critical health, melt their health bar with everything you've got. Killing Nezarec completes your Root of Nightmares run.

Encounter Rundown: Plate Runners
Encounter Rundown: Taunters
Encounter Rundown: Add Clear