Table Of Contents
- What Are Trivial, Enigmatic, And Ascendant Mysteries?
- All Ascendant Mysteries
- All Enigmatic Mysteries
- All Trivial Mysteries
- All Data Caches
- What Are Ascendant Anchors?
- All Ascendant Anchor Locations
Destiny 2's Season of the Lost has introduced a new weekly mission type for players to explore. Named the Shattered Realm, these missions involve exploring the Ascendant Realm to rescue Mara Sov's corrupted Techeuns. As with most content surrounding the Ascendant Realm, there are quite a few secrets to uncover.
Shattered Realm missions contain two types of secrets: Mysteries and Ascendant Anchors. Both types of secrets are closely tied with some of Season 15's Triumphs and Seasonal Challenges, so it's in your best interest to find these collectibles. We'll go over each type of secret and explain how you can find every Mystery and Ascendant Anchor in the Shattered Realm's Forest of Echoes.
Updated October 5th, 2021, by Charles Burgar: The final set of mysteries has been released for the Forest of Echoes. Data Caches can now be obtained in this mission, allowing players to obtain the Shattered Scholar Triumph. We've not only added the Data Cache locations to this guide, but we've also made some organization tweaks. Each secret is now listed to match the in-game Triumphs page for the Forest of Echoes.
What Are Trivial, Enigmatic, And Ascendant Mysteries?

Trivial Mysteries are hidden chests found by using certain Awoken markers. These markers grant you one of three buffs. Trival Mysteries are typically locked behind Awoken barriers, requiring the Barrier Breach marker to reach.
Enigmatic Mysteries are hidden chests that require two or more markers to reach. The loot inside these chests is gold instead of blue.
Ascendant Mysteries are unique challenges tied to each level. Queen Mara Sov will make an audio quip whenever you approach a zone tied to an Ascendant Mystery. These are level-specific.
How To Breach Barriers

Complete the Forest of Echoes mission once to unlock the Barrier Breach ability. Future runs of the mission will allow you to interact with purple markers around the level. They'll spawn transparent, preventing use. You'll need to charge the closest beacon to the marker to turn it opaque, allowing you to activate the marker.
Some markers have the "Barrier Breach" interaction, allowing you to run through Awoken barriers for 15 seconds. Most hidden zones have a barrier marker in them, so don't worry about getting stuck. Activate a marker, run through a nearby Awoken barrier, then open the hidden chest inside. This is also how you find some of this level's Ascendant Anchors (explained later in the guide).
Shattered Realm's Markers Explained


There's a good chance there are more mysteries to the Forest of Echoes than we have access to currently. This mission contains three types of markers, each granting a unique ability. As of writing, players only have access to the Barrier Breach marker—which is unlocked by clearing the Forest of Echoes mission at least once. The next two markers are likely unlocked by clearing the other two Shattered Realm missions that'll release in the coming weeks.
You can tell what the marker does off of the symbol on the marker. If you've played the Last Wish raid, these symbols should be familiar:
-
Barrier Breach
- Effect: For 15 seconds, you can walk through Awoken barriers.
- Symbol: Bird diving
-
True Sight
- Effect: For 30 seconds, you can see floating structures appear from thin air.
- Symbol: Bird flying
-
Safe Passage
- Effect: For 10 seconds, slow fields no longer hinder your movement. Three Taken Majors spawn the first time you use this per marker.
- Symbol: Bird standing
Once you've activated the closest beacon to that marker, it'll go from translucent to opaque. So long as you have the marker's respective ability unlocked, you can invoke your ability at the marker. In this case, you'll be able to breach barriers for 15 seconds after activating one of the markers with a bird diving symbol.
All Ascendant Mysteries

Two Ascendant Mysteries can be found in this mission. You'll need to have access to True Sight and Barrier Breach to complete both of them.
Ascendant Mystery #1: The Dark Ritual

- Location: The Abbey of Whispers
For this chest, you'll want to make your way to the church that houses beacon #1. Head to the northern outskirts of the church (facing the abyss). Invoke the True Sight marker beside the church, then follow the platforms to the isolated Awoken statue out in the distance.
This statue will have a Relic that must be escorted into the depths of the church. Follow the Toland orbs to reach your intended destination. The orbs will take you to The Dark Forest, then the Crypt, then a True Sight path that leads into the bowels of the church. Dunk the orb into the Awoken statue when you're ready.
An Ascendant Knight, Apocalyptic Blade, will spawn right as you dunk the orb. This enemy is fairly tanky and deals immense damage with its melee swings, so keep your distance. Any Fusion Rifle with Particle Deconstruction should make short work of the boss. When slain, a chest will spawn in front of the statue you dunked the relic at.
Ascendant Mystery #2: Born In Darkness
- Location: Beacon #2
After you activate the second beacon, climb up the nearby rocks to find a Taken Blight. You'll want to enter the Blight and destroy it. Additional Blights and Taken enemies will spawn near the beacon shortly thereafter. Clear out all of the Taken enemies and Blights.
Even more Blights will spawn near the portal to the Techeun boss. After you deal with that Blight, the final few Blights can be found in The Ruins. Take out the remaining Blights.
You should now see a Toland orb floating above a well. Descend into the well. You'll end up in a small cave that's guarded by a Devourered Ogre. This Ogre is much more durable than the rest of the enemies in this level, so consider using your Super and Heavy to take it out. Once the Ogre is slain, an Ascendant Chest will spawn beside a rock pillar in the center of the cave.
All Enigmatic Mysteries

Three Enigmatic Mysteries can be found in the Forest of Echoes, one of which is exceptionally hard to reach. We recommend you only grab the first two if you're just looking to finish a Seasonal Challenge.
Enigmatic Mystery #1: The Bells

- Location: The Abbey of Whispers
Make your way to the church rooftop's Ascendant Anchor. A True Sight passage can be activated here that'll lead you to the floating debris of a bell tower. Reach the top to find a chest.
Enigmatic Mystery #2: As Above, So Unseen
- Location: The Abbey of Whispers
Just outside the southern end of the church is a Safe Passage marker. Before you interact with it, you'll want to activate a True Sight marker nearby. Obtain True Sight, then invoke Safe Passage. Follow the ascending platforms to reach the chest. Safe Passage doesn't last very long, so you'll need to be quick.
Enigmatic Mystery #3: Vantage

- Location: The Sunken Cave
Make your way to the top of The Sunken Cave. You should be in a slow field that's protected by a few Taken mobs. You'll need to activate True Sight and Safe Passage to beat this one.
This chest is tough to reach. You don't have enough time to climb the entire path without upgrading your Wayfinder's Compass. If you're missing a few upgrades, jump towards the Taken Blight orb halfway up the path (shown in the image gallery above). Make a right U-turn and close the gap. You should be able to reach the second to last platform that has the chest. Hop onto the final platform to grab it.
All Trivial Mysteries

The Forest of Echoes has ten Trivial Mysteries—otherwise known as hidden chests—for you to find. One Seasonal Challenge requires three, and another requires 20. Each chest claimed will complete a Triumph. Let's go over where you can find all of them.
Trivial Mystery #1: Entombed

- Location: The Crypt
When you start the mission, you'll be led to a withering forest guarded by a group of Taken forces. Right next to the Taken slow field surrounding a church is a small building that leads to a crypt. Activate the Barrier Breach marker outside the crypt entrance, then head inside. The chest will be guarded by three Taken Thrall in a short corridor.
Trivial Mystery #2: Left Behind

- Location: The Outskirts
Travel to the east side of the church. A short rock path should be visible, leading you up a cliffside. Climb up the path to reach the ruins of a building. You'll want to jump on top of a pointy boulder, then climb up a floor. Cross a gap to find the Breach Barrier marker. Activate it, then descend to the bottom floor. The chest will be tucked in a corner.
Trivial Mystery #3: Twofold Ward

- Location: The Outer Ruins
Make your way to the ruins east of the crypt entrance. This rather spacious building has an Awoken barrier at the back of the second floor. Hop up the ruins of a pillar to reach the second floor. Loop around the pillar to your left to find a Barrier Breach marker. Activate it, then run through the barrier. You'll find the chest on a floating platform.
Trivial Mystery #4: Taken Root
- Location: The Dark Forest
From the crypt entrance in Trivial Mystery #2, head west towards the base of a withered tree. A nearby tree to your right will have a Breach Barrier marker. Invoke your Breach Barrier ability, then run through the barrier at the base of the tree. Turn left to find the chest.
Trivial Mystery #5: In Shadow

- Location: The Harrowed Cliffs
Right as you activate the second beacon, climb up the cliffs to the east. When you reach the top, you should see a group of Taken Acolytes guarding a circle of markers right under you. Drop down, take out the Taken, then look for a Breach Barrier marker. Invoke the marker, then jump through the hole in the cliffside in front of you.
Trivial Mystery #6: Abandoned

|
Note: You'll need to invoke a marker from Trivial Mystery #5 to reach this chest. |
- Location: The Harrowed Cliffs
Invoke the Breach Barrier marker from the Harrowed Cliffs chest (described in the above entry). Run directly across the beacon to the Taken slow field. Enter the mill to your left to find a chest.
Trivial Mystery #7: Deep Defenses
- Location: The Ruins
Make your way to The Ruins—a destroyed building located south of the church. Instead of swinging left towards the second beacon, head right. Look straight down the cliffside for a narrow platform. Jump down. You should see a marker to your left. Reach that marker, then enter the cave to see the chest protected by a barrier. Invoke the Breach Barrier marker floating atop a rock to reach the chest.
Trivial Mystery #8: Laid To Rest

- Location: The Crypt
From Trivial Mystery #2, head to the other end of the corridor. Activate both markers, then follow the path to the underside of the church. You'll find the chest in the back-right corner of the room.
Trivial Mystery #9: Airwalk

- Location: The Outskirts
Make your way back to the destroyed building in Trivial Mystery #4. Instead of climbing up a floor, look for a True Sight marker near the end of the building. Activate it, then follow the path. You'll find the chest after you wrap around a floating boulder.
Trivial Mystery #10: Enshrined

- Location: The Abbey of Whispers
Head to the northern part of the church. Activate the True Sight marker, then follow the path until you reach the Awoken statue. There should be a chest resting near the statue. If you don't see it, make sure True Sight is active.
Illusory Barrier Chest: The Harrowed Cliffs

- Location: The Harrowed Cliffs
- Requires Ager's Scepter
This technically isn't a Trivial Mystery. In fact, it doesn't have any Triumphs tied to it at all. But since it's a secret you can find in this mission, we feel it warrants a mention.
Head to the isolated island on the end of the zone—the island with multiple markers you head to in Trivial Mystery #8. Activate the True Sight marker, then descend the island. Break the glowing rock on the cliffside to find a chest.
All Data Caches

Forest of Echoes contains three Data Caches for you to find. These floating orbs can only be seen while True Sight is active. You'll need the "Frequency Echoes" upgrade from the Wayfinder's Compass for them to spawn.
Data Cache #1: The Intruder

- Location: The Ruins
Make your way to The Ruins—the set of destroyed buildings dead-center of the map. Use the True Sight marker in the area, then immediately turn to your right to find the Data Cache floating in one of the buildings.
Data Cache #2: Bearings

- Location: The Outer Ruins
While the Data Cache is in The Outer Ruins, you'll want to head to The Outskirts instead—a destroyed building right of the church. Activate the True Sight marker and follow the path. When you reach the Airwalk Trivial Mystery chest, keep following the path to reach a watchtower above The Outer Ruins. This watchtower is where you'll find the Data Cache.
Data Cache #3: In Memory
- Location: The Shrine
|
Note: This Triumph's in-game description is incorrect. The Data Cache is located at The Shrine. |
The Shrine is a floating shrine located just outside The Dark Forest and The Abbey of Whispers (church). Use a True Sight marker to bridge the gap. You'll find the Data Cache behind the statue.
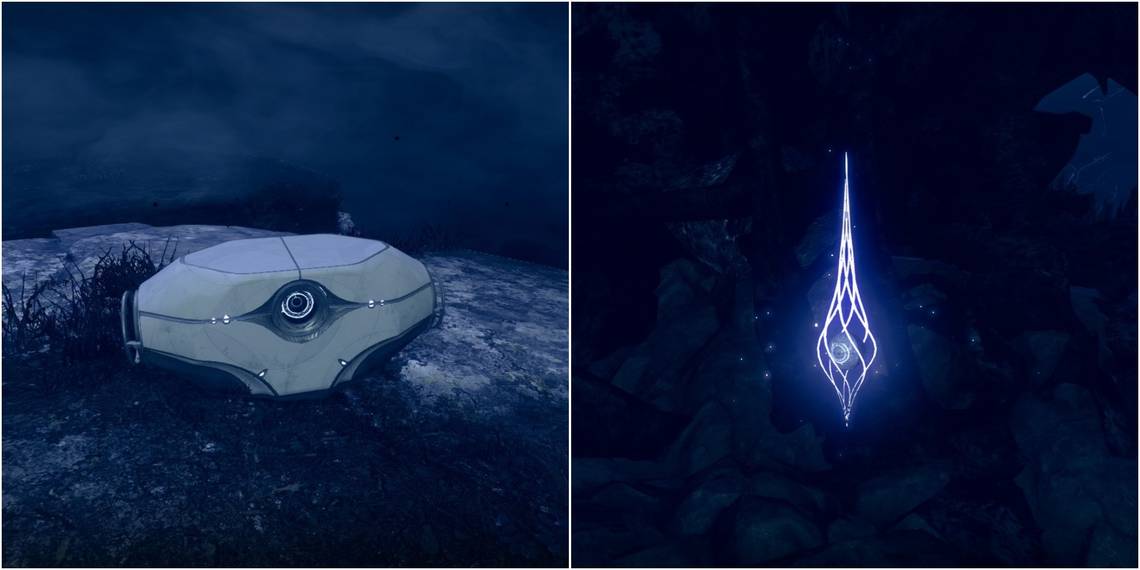
What Are Ascendant Anchors?

Ascendant Anchors are floating orbs scattered throughout the Ascendant Plane. These orbs emit a purple pillar of light to help denote their location. Unfortunately, most of these Anchors are hidden in caves and other interiors across the Shattered Realm. You'll need to go on a scavenger hunt to find all of them.
There are 18 Anchors in the Forest of Echoes, which is more than enough to complete the "Ley Line Rumors" Seasonal Challenge.
All Ascendant Anchor Locations

Below is a list of every Ascendant Anchor you'll find in the Forest Echoes. For images that don't have a proper Anchor present, Stasis crystals have been placed in their stead.
|
IMPORTANT: The Mill Ascendant Anchor resets progress towards "Ley Line Rumors." Grab this Anchor first to avoid this bug. |
Ascendant Anchor #1: The Dark Forest

- Location: The Dark Forest
You'll find this Anchor resting beside a tree on your way to the first beacon, right next to the crypt entrance. This one is incredibly hard to miss.
Ascendant Anchor #2: The Abbey Of Whispers

- Location: Beacon #1
After you finish charging the first beacon, run to the other side of the church's interior to find a Breach Barrier marker. Activate it, then climb up the pillars beside the beacon. You should see a wooden platform near the roof. Hop onto the wooden platform to find the Ascendant Anchor.
Ascendant Anchor #3: The Shrine

- Location: The Abbey of Whispers
Use the True Sight marker on the northern end of The Abbey of Whispers. This will take you right to an Ascendant Anchor.
Ascendant Anchor #4: The Outskirts

- Location: East of the Abbey of Whispers
Run outside of the church that the first beacon is in. You should see a path up a cliffside just outside of the Taken slow field. Climb up the path to find an Ascendant Anchor overlooking the area.
Ascendant Anchor #5: The Dark Forest
- Location: Behind the Crypt entrance
This Anchor is hiding behind the building that leads to the crypt.
Ascendant Anchor #6: The Crypt

- Location: The Crypt
Invoke the Barrier Breach marker beside the crypt entrance. Descend into the crypt, then hang left to find the Anchor in a corner.
Ascendant Anchor #7: The Crypt (Illusory Barrier)

- Location: The Crypt
- Requires Ager's Scepter
You'll find a destructible rock right beside Trivial Mystery #2. Head to the rocks just left of the chest, then look straight up. Break the rock to find the Anchor. Alternatively, you can break the rock on the surface level of the church. Look for a rock to the left of a leaning statue.
Ascendant Anchor #8: The Crypt (Illusory Barrier)

- Location: The Crypt
- Requires Ager's Scepter
From Ascendant Anchor #7, head to the other end of the corridor with two markers. Activate both, then follow the path. You should now be right under the church. Run through the hole in the wall. When you reach a dead-end, look up to find a rock you can break with Ager's Scepter. Inside will be an Anchor.
Ascendant Anchor #9: The Dark Forest

- Location: The Dark Forest (next to Anchor #1)
The Dark Forest is the first area you reach after you start the mission. The base of a massive withering tree contains an Awoken barrier. Use the nearby Barrier Breaching marker to enter the tree. You'll find the Anchor on the lower floor of the cave, floating above a rock.
Ascendant Anchor #10: The Ruins

- Location: The Ruins (building south of the crypt)
You'll reach this location on your way to the second beacon. When you reach the destroyed building, climb up to the remains of the top floor on your right. They'll be an Anchor hiding in the corner.
Ascendant Anchor #11: The Ruins
- Location: The Ruins (building south of the crypt)
Make your way to the western end of The Ruins (facing left of the church). You'll find a True Sight marker. Activate it, then follow the path that goes west. This will take you straight to an Anchor.
Ascendant Anchor #12: The Sunken Cave

- Location: The Ruins
From the same ruins as Anchor #11, head to the cliffside opposite of the path you take to reach beacon #2. Look down the cliffside to see a narrow ledge. Follow the series of ledges to find a hidden cave. Inside the cave is an Ascendant Anchor floating above a rock.
Ascendant Anchor #13: The Sunken Cave

- Location: The Sunken Cave
After you grab Ascendant Anchor #12, look for a True Sight marker at the other exit of the cave. Activate a Barrier Breach marker before you activate the True Sight marker. Climb up the floating platforms outside to find an Anchor.
Ascendant Anchor #14: The Mill

|
IMPORTANT: This Anchor will reset progress on the "Ley Line Anchors" challenge. Grab this one first to prevent any loss of progress. |
- Location: Beacon #2
From the second beacon, look for a mill. The large, spinning wheel tied to the mill is close to the Taken slow field. You'll find the Anchor floating in the middle of the wheel.
Ascendant Anchor #15: The Harrowed Cliffs (Illusory Barrier)

- Location: Slow field that leads to Beacon #2
- Requires Ager's Scepter
In the slow field that leads to beacon #2, keep your eyes to the left of the rock wall. One of the rocks can be destroyed with Ager's Scepter, revealing an Anchor in its place.
Ascendant Anchor #16: The Harrowed Cliffs

- Location: Beacon #2
Climb up the cliffs next to the second beacon. At the edge of the cliff, you should see a floating platform surrounded by markers. Drop down to the floating island to find an Anchor beside a tree.
Ascendant Anchor #17: The Courtyard

- Location: The Courtyard
Interact with the True Sight marker on the southern end of The Courtyard, just beside the entrance to The Crypt. Follow the path to find an Anchor.
Ascendant Anchor #18: The Harrowed Cliffs

- Location: The Harrowed Cliffs
From Ascendant Anchor #17, keep following the path until you reach the Taken portal that leads to the Techeun boss. Interact with the True Sight marker right next to the portal to find the next Anchor.