The third and final Shattered Realm mission is here. Destiny 2's Ruins of Wrath is arguably the most linear mission out of the Shattered Realm trilogy, consisting mostly of combat sequences separated by rather short jumping sections.You'll need to deal with Unstoppable and Barrier Champions in this mission. There's also a jumping section that takes place in a slow field, so be sure you bring some high Mobility gear before you hop into this mission. Let's go over where you can find all three beacons and how to defeat the final boss. If you aren't above 1,300 Power, you'll want a defensive loadout for this mission.
|
Note: This guide only covers mission mechanics. For a collectibles guide, consult our Mysteries and Anchors guide for this mission. |
Updated October 19th, 2021, by Charles Burgar: Ruins of Wrath had its Legend variant release during the ninth week of Season of the Lost, allowing players to obtain seasonal gear and progress their Realmwalker title. We've updated this guide with information on the Legend difficulty variant, including modifiers, enemy shields present, and some loadout recommendations to make your time in this mission as painless as possible.
Legend Difficulty Differences
Ruins of Wrath has a Legend difficulty variant you can attempt, granting seasonal weapons or armor when completed. This variant has the following modifiers:
|
Modifier |
Description |
|---|---|
|
Recommended Power Level |
|
|
Champions: Unstoppable |
|
|
Champions: Barrier |
|
|
Equipment Locked |
|
|
Match Game |
|
|
Empath |
|
|
Chaff |
|
|
Shields |
|
Since Empath and Chaff are present in this level, try to keep your distance. Enemies that melee you can deal some absurd damage, one-shotting you if they're a Champion or a boss. You'll also encounter Arc and Solar shields in this mission, so bring weapons that can counter those shield types.
Recommend Loadout
This variant of Ruins of Wrath is somewhat tough if you lack good anti-Champion weapons. Fusion Rifles work great here, allowing you to stun Unstoppables and break a shield type. Some good options include Plug One.1 (Arc), Vex Mythoclast (Solar), and Cartesian Coordinate (Solar). You can also use One Thousand Voices if you own it to brute force your way through both shield types.
Cover the other shield type with your Heavy weapon of choice. If you plan to run Eriana's for your Energy, consider using a Linear Fusion Rifle. Tarantula can break Arc shields, although its perk pool is far from stellar. If you can get away with using an Arc subclass, use Reed's Regret or Threaded Needle.
For your Kinetic, unless you're using Eriana's Vow, an Auto Rifle is recommended since they can break Barriers this season. Some good options include Monte Carlo, Chroma Rush, Scathelocke, and The Last Breath.
If you don't own any of these weapons, here are a few more alternatives:
- Merciless: Breaks Solar shields, deals great damage with Particle Deconstruction, and it can stun Unstoppables.
- Eriana's Vow: If you can run a Linear Fusion Rifle as your Heavy, Eriana's can counter most of this mission's enemy types.
- Traveler's Chosen: It can stun Unstoppables, switch to your subclass element when Masterworked, and it grants a copious amount of ability energy.
Finally, bring a defensive subclass for this mission. The final boss is rather hard to solo due to the lack of cover and dozens of enemies. Hunters might want to run Nightstalker, Warlocks should use either middle tree Dawnblade or Shadebinder, and Titans should run top tree Sentinel or bottom tree Sunbreaker.
Align The Beacons

Once again, you'll need to align three different beacons and defeat a boss to finish this Shattered Realm mission. Unlike the last two missions, the beacons are extremely easy to find this time around, connected through a rather linear path.
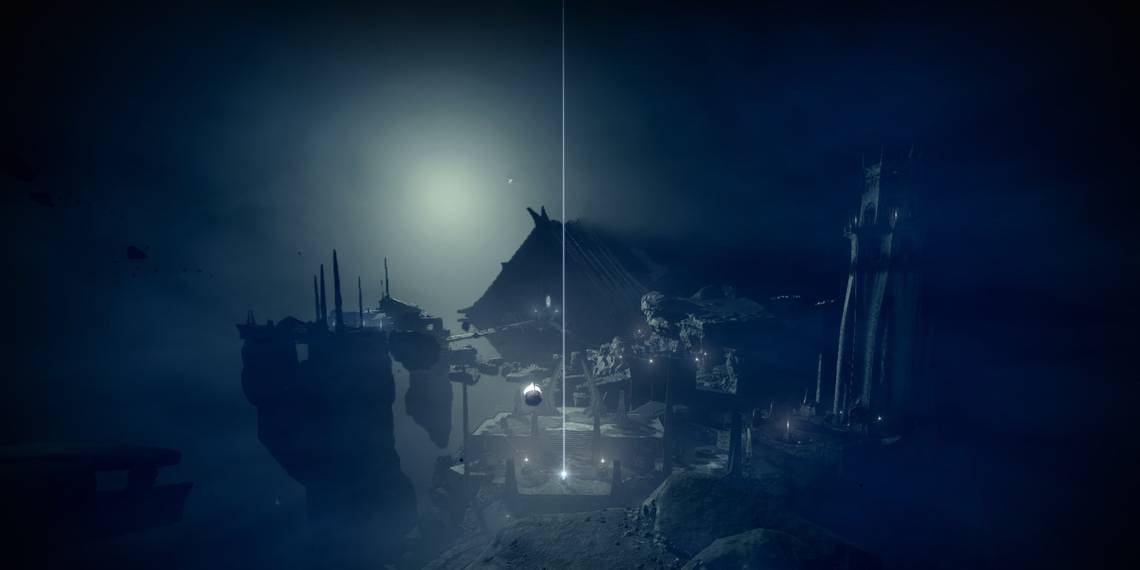
Beacon #1 – The Staging Ground
You'll find the first beacon directly after you exit spawn. Follow the floating platforms and drop down towards the Hive architecture below to find the first beacon. Activate it to start a defense section.
Hive ships will spawn waves of enemies throughout this section, most of which are Acolytes and Knights. Partway through the defense section, a Hive portal will open that will spawn two Wizard majors. They're fairly easy to kill, but these Wizards will give way to two Orgres and, eventually, an Unstoppable Ogre. Particle Deconstruction and an Exotic Fusion/LFR can easily eliminate the Ogre. Clear out the enemies to collapse the Hive portal. Run through the portal frame to find the path forward.
Beacon #2 – The Field Of Promised Ruin
Right after the Hive portal from the first beacon, you should see a series of floating objects surrounded by a slow field. While in the slow field, you want to go left whenever possible. Your goal is to reach the purple pillar of light slightly to your left. You might need 80-100 Mobility to make some of the jumps. A Hive ship will bombard your location with Void artillery occasionally, so be swift.
Once out of the slow field, climb up the nearby rocks to reach the second beacon platform. Activate it to start the defense section. Once again, you'll be facing mostly Acolytes, Knights, and Wizards during this part—nothing a good Primary can't handle. The final wave will spawn a Barrier Knight, so you'll either want an Anti-Barrier weapon or a high damage gun. Null Composure with Particle Deconstructor can kill the Knight before it deploys its shield, allowing you to forgo Anti-Barrier mods.
Beacon #3 – The Warship
From the second beacon, you'll want to make your way towards the mini-dreadnaught on the northern end of the map. A series of platforms on the northern end of beacon #2 will lead straight into the ship.
The first room in the ship is guarded by an Ogre major and fodder Hive units. If you're at or under 1,290 Power, you might want to take this part somewhat slow. Kill all of the enemies as you see fit. You'll find the third beacon in the next room. Activate it to start the boss fight.
Defeat An Xohol, Jaws Of Xivu Arath

Interacting with the third beacon will spawn An Xohol, Jaws of Xivu Arath. In essence, this is a giant Hive Knight that becomes invincible while a Wizard major is alive. It'll be vulnerable when it first spawns. Damage it until Xohol reaches 80% HP.

A Ritualist of Xivu Arath Wizard will spawn when Xohol reaches that health threshold. Defeat the Wizard, then stand in the aura its corpse creates. You'll gain the Wrathful buff for five seconds after you leave the aura, allowing you to break Xohol's invulnerable shield. Beyond the shield, Xohol is fairly weak for a final boss. A few bursts from a Fusion Rifle with Particle Deconstructor will melt its health bar. If you can't one-phase the boss, try to take care of the adds before removing Xohol's shield again.
Once the boss is slain, interact with the crystal at the end of the arena to rescue the third Techeun. This Techeun will allow you to purchase the Safe Passage ability from the Wayfinder's Compass, allowing you to resist the effects of slow fields for ten seconds. Unlocking this ability will also unlock the third and final row of the Compass' upgrade grid.