The enemies of the Traveler in Destiny are equally unique and dangerous. Factions like the Hive focus on swarming the player with melee enemies and suppressive fire, while another faction like the Vex uses time itself to manipulate the flow of battle.
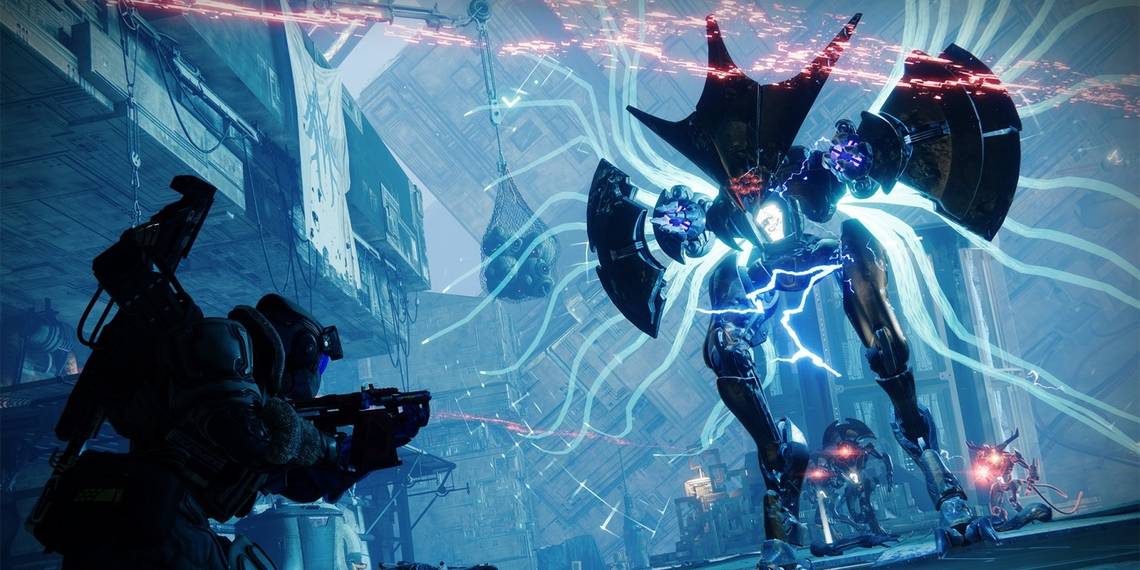
Whether they are machines from the future or giant space turtles, the enemies in Destiny can prove quite dangerous to New Lights and veterans alike. Each enemy presents a unique challenge for players to overcome, which can be from pure, uncompromising damage or unique mechanics. From casting spells to rapid teleports, here are ten of the most powerful enemies you can fight in Destiny 2. This list will not cover unique bosses from strikes, raids, or Gambit. Champions are fair game since they're rather common in endgame content.
Updated October 28th, 2021, by Charles Burgar: As Destiny 2 evolves with each season, so too does our relative power level. The enemies of Destiny 2 become stronger with each yearly expansion, although Bungie sometimes adds new foes partway through a season as they did with the Scorn Champions in Season of the Lost. We've updated this tier list to go more in-depth on why some of these enemies are so powerful, and we've replaced a few entries with more deadly combatants. Once again, we are not considering unique enemies from strikes or raids (sorry, mini Screebs).
10 Cabal & Taken Phalanxes

Why they're hard: Shield physics
We decided to include the Cabal and Taken variants of the Phalanx enemy for one reason: they both use shields. These shields will bend the laws of physics to fling you towards a wall at the speed of sound if you get too close.
Phalanxes have found a way to weaponize the physics engine of Destiny 2. If you get close to a Phalanx, they will usually fling you with their shield. There's a good chance it'll fling you back a few meters and deal moderate damage, but they will sometimes launch you with such force that you'll instantly die. The same thing happens if they turn around while you're beside them.
As an actual enemy type, Cabal Phalanxes are pushovers and serve as typical cannon fodder. Taken Phalanxes are much deadlier, pushing players with a ranged shield attack. This can easily throw Guardians off of their mid-air trajectory, leading to easy environmental deaths. These enemies won't kill you through devastating firepower. Rather, they turn Destiny's wonky physics engine against you.
9 Vex Cyclops

Why they're hard: One-shot potential
It might be strange seeing an immobile enemy on this list, but anyone who attempted Garden of Salvation on Contest Mode or any Vex GM Nightfall can attest to how terrifying a Cyclops can be. On lower levels, these enemies serve as annoying turrets that deal heavy AoE damage. When you're underleveled, these enemies can easily one-shot you. Since Cyclopses are fairly infrequent in most Destiny content, we can't place them higher on the list. But be careful; one blast is all it takes to kill you.
8 Taken Knight

Why they're hard: Forces Guardians to move
Taken Knights serve the role of aggressors for the Taken faction, utilizing their melee and ranged weapons to apply pressure to Guardians. Unlike the Hive variant, Taken Knights can spout flaming projectiles from their head, dealing substantial damage to anyone caught in the area.
Standing in the same location is heavily punished when these enemies are on the battlefield. Their flame attacks last for an eternity, and their ranged projectiles have enough AoE to bypass light cover and corners. Even worse, Taken Knights usually come in pairs, as seen in the Prophecy dungeon. Anyone who's tried to solo Master-tier content can attest to how brutal these enemies can be.
7 Overload Taken Hobgoblin

Why they're hard: Non-stop barrage of projectiles
Taken Hobgoblins are already tough opponents. They deal serious damage from afar and launch a swarm of projectiles towards you when they take damage. Overload Taken Hobgoblins are their final form, launching these projectiles much more frequently while dealing an immense amount of damage with their sniper rifle.
Like most Overload Champions in Destiny 2, they're fairly easy to counter once you get into a rhythm. But landing that first stun can be an issue since any damage they take will spawn projectiles, and their sniper can one-shot you in GM content if you lack damage resistance mods. Bring an Overload weapon with some explosive perk to make these enemies far easier to counter.
6 Vex Wyvern

Why they're hard: One-shot potential and aggression
One of Destiny 2's newest enemy types, Vex Wyverns are effectively Vex Cyclopses with legs. Wyverns fire devastating Void cannons that can one-shot players in Master-tier content. If you play too passively, Wyverns will jump into the air before making a rapid descent towards your location.
Vex Wyverns don't play around. To kill Wyverns efficiently, you need to use weapons that can stagger enemies. An Unstoppable round or any high-damage round will stagger Wyverns, revealing their weak point for a short duration. This is the only reliable means of facing a Wyvern head-on in high-level content. If you lack the right tools, prepare to get annihilated.
5 Hive Wizard

Why they're hard: One-shot potential and mobility
Hive Wizards are ranged casters that deal incredible amounts of damage from a safe distance.
Besides their flurry of projectiles, Hive Wizards have the ability to deploy smoke clouds that suppress movement, blur your vision, and deal small amounts of damage over time. Fortunately, these enemies float in the air, making them easy prey for the likes of Snipers or Scout Rifles. Majors and boss variants of Wizards fire faster and deal more damage, resulting in an enemy that can kill players instantly. If you can't break their shield, prepare for an onslaught of projectiles.
4 Taken Captain

Why they're hard: Darkness bolts and teleport spam
If you have ever played Gambit, you know how frustrating Taken Captains are. These modified Fallen Captains have new powers that make them deadly in PvE and Gambit.
Like most Taken enemies, Taken Captains can teleport around the battlefield to avoid damage. They can also use a Shotgun or dual-wield Swords to make combat against them extra tricky. Even worse, Taken Captains tend to throw darkness bolts that slow you down and deal a solid chunk of damage. They don't just cast this once a minute; Captains can repeatedly teleport as much as they want. They are easily one of the most frustrating enemy types to fight in all of Destiny.
3 Hive & Taken Ogres

Why they're hard: One-shot potential and projectile knockback
Both the Hive and Taken variants of the Ogre deserve mention for how oppressive they can be in a firefight. Hive Ogres will melt your health bar from a distance with their devastating Void eye beam. Taken Ogres fire projectiles instead of a solid beam, although this variant applies a massive degree of knockback when it makes contact with something. And if you end up fighting an Unstoppable variant, you better have an Unstoppable Shot ready before it sees you.
Hive Ogres are difficult to counter without relying on staggers. If they begin to stare at you, there's very little time to react. Standing in the beam for just a second can get you killed in most content. If it's a Master Nightfall or similar activity, a quarter of a second is all it takes for a Hive Ogre to kill you. Closing the gap isn't an option, as their stomp has a strong knockback effect. Similar to Vex Wyverns, staggers are the only safe means of defeating one.
Taken Ogres focus more on applying pressure to you than outright killing you. Their beam has a ludicrous amount of knockback, launching players hundreds of meters in the air after a second of continuous fire. When multiple Taken Ogres enter the fray, sticking to cover is the only option. Otherwise, expect to be flung into the sky at absurd speeds.
2 Fallen Overload Captain

Why they're hard: One-shot potential and non-stop teleporting
Bungie took the frustrating aspects of the Fallen Captain and cranked them up to 11 with the Overload Captain. These Fallen Captains are augmented to have no abilities cooldowns, rapid health regeneration, and weapons that can easily two-shot players.
The most noteworthy aspect of Overload Captains is their affinity for teleporting. Not a second goes by without them teleporting to a distant location, sometimes teleporting directly behind you with no telegraph. Rapid-fire weapons will send any unprepared Guardian into the grave.
Fortunately, they're also the easiest Overload Champion to counter. So long as your Overload weapon has Explosive Payload or some sort of explosive perk, the Captain will immediately get stunned. You have to keep landing Overload shots right after it recuperates or you'll be back to square one, but proper use of Destiny's anti-Champion mods can trivialize these enemies. The same can't be said for our final entry.
1 Fallen Barrier Servitor

Why they're hard: Makes enemies immune through walls; deceptive crit spot
If the community's complaints with Champions could be distilled into one thing, it would be the Fallen's Barrier Servitor. This single enemy can:
- Fire ranged projectiles that deal massive damage.
- Make an unlimited amount of enemies invulnerable without needing line of sight.
- Project a barrier that reflects all projectiles, regenerating its health near-immediately in the process.
None of those mechanics are hyperbole. A single Barrier Servitor can swing an otherwise good Master Lost Sector run into a complete nightmare. Any enemy within around 20 meters of the Servitor will become immune, persisting even through walls. This becomes troublesome in pinnacle PvE content when snipers and even Overload Captains can be made invulnerable. Your only means of removing the immunity tethers is to break the Barrier Servitor's shield when it loses around 25% of its health. Even then, this only gives you a short window to clear out every previously immune enemy.
If you focus your attention on the Barrier Servitor, you'll also notice that its crit spot isn't where it should be. When stunned, its critical spot is slightly under its center "eye." It's easy to compensate for once you know about it, but many players will unload entire magazines into the Servitor's eye and realize it isn't taking critical damage. That issue is small in the grand scheme of things, yet it hammers home the idea that Barrier Servitors feel cheap to fight against. Good luck fighting one of these enemies indoors.