Quick Links
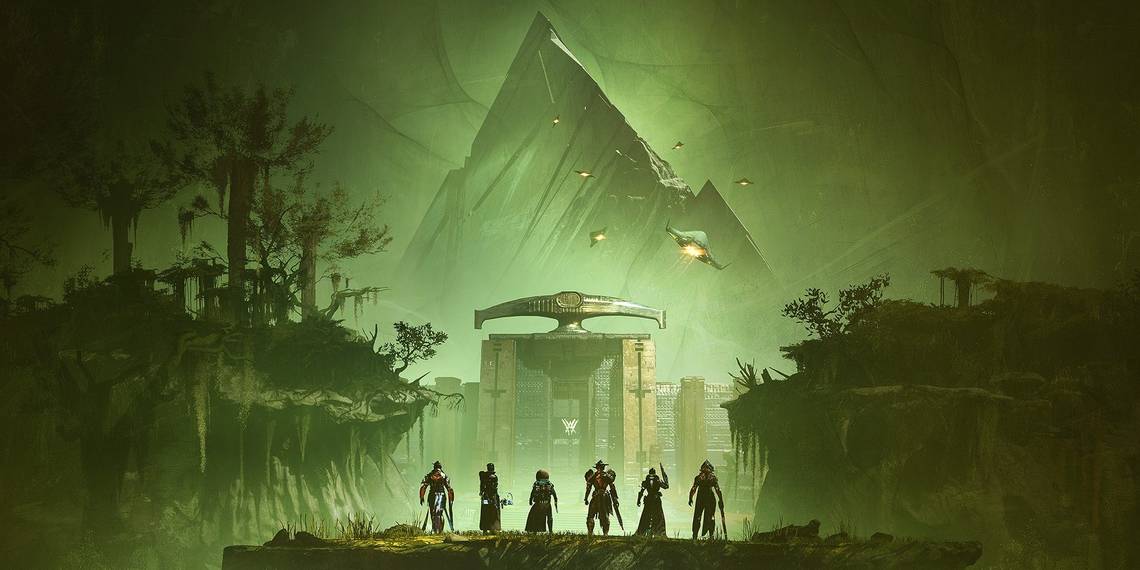
Vow of the Disciple is Destiny 2's latest raid. Released with the Witch Queen expansion, this raid takes players deep inside a Pyramid ship in Savathun's Throne World to defeat humanity's greatest threat yet. For those who can clear this raid, you'll be rewarded with some of the strongest weapons ever released in Destiny 2.
In this guide, we'll be giving a thorough walkthrough of every encounter. We'll break down each encounter into roles, showcase the best strategies and tips for newcomers, and give some loadout recommendations to make these encounters as easy as possible. Consult the table of contents above to jump to the section that interests you, or continue reading to learn this raid's various callouts and which loadouts you should bring.
Updated April 21st, 2022, by Charles Burgar: Vow of the Disciple's Master variant was recently released, giving players a means of earning Adept weapons from this raid. We've updated this guide to include information on how the Master variant works, the rewards you can expect, and we've linked our complete VotD challenges guide to this raid walkthrough.
Symbol Callouts And Raid Prep

If you want to jump straight into encounter guides, click here.
Symbol Callouts
Similar to the Last Wish raid, Vow of the Disciple has a large emphasis on calling out images you see. To have a smooth experience with this raid, you'll want to establish symbol callouts with your team. Bungie actually created some callouts for this raid that you can use, showcased by inspecting the symbols in this raid's "wishing room" just before the Acquisition encounter. The image below showcases each official callout as shown in-game. Credit to users u/itsnon and u/nerdorado for the image.

Bear in mind that some teams might use slightly different callouts than what's listed here, so be sure that you and your fireteam are on the same page about each symbol. There are 27 symbols in total.
Recommended Loadouts

|
Subclasses |
||
|---|---|---|
|
Hunter |
Warlock |
Titan |
|
Nightstalker |
Voidwalker / Shadebinder |
Sentinel |
|
Revenant |
Middle Tree Dawnblade |
Middle Tree Striker |
Hunters will want to use either Nightstalker or Revenant for this raid. Nightstalkers are fantastic runners for the Caretaker and Rhulk encounters, and Mobius Quiver with Orpheus Rig/Star-Eater Scales and Devouring Depths is one of the highest DPS Supers in the game. Underleveled teams or those attempting Master should consider playing a Revenant, as Duskfield Grenade with Renewal Grasps double as excellent crowd control and damage mitigation for your team.
Warlocks can run either Voidwalker or Shadebinder if add-clear or crowd control is required; use whichever one you like more. For boss encounters, Middle Tree Dawnblade is fantastic for healing your team and providing a damage buff through Well of Radiance—although the Rhulk boss fight makes using Well somewhat difficult.
Titans should run Sentinel if they're conflicted on what to play. Volatile serves as a fantastic add-clear tool that can heal your team with the Controlled Destruction Aspect. You can also use Ward of Dawn to buff your team's damage or Banner Shield to keep them alive during Caretaker's DPS phase. For Rhulk, you might want to run Middle Tree Striker instead to nuke his health bar with Thundercrash.
|
Weapons |
||
|---|---|---|
|
Kinetic |
Energy |
Heavy |
|
Izanagi's Burden |
Divinity |
Rocket Launchers |
|
Add-Clear Weapons |
Add-Clear Weapons |
Linear Fusion Rifles |
For weapons, we only have a few recommendations for this raid:
-
Izanagi's Burden: When paired with a Legendary Rocket Launcher, this has the highest DPS potential in the game currently. It's also great for killing majors during non-boss encounters.
- If you don't own Iznagi's Burden, bring your best Kinetic Sniper Rifle instead. Thoughtless from the PsiOps activity is a great substitute.
- Divinity: You'll need this when facing Rhulk, as he moves around the arena a ton during the DPS phase.
- Rocket Launchers: Gjallarhorn is needed if your team wishes to use rockets for DPS. Everyone else should bring a Legendary Rocket Launcher that matches their subclass element. If you don't have a good RL, craft a Red Herring or Palmybra-B at The Enclave.
- Linear Fusion Rifles: If your team is struggling to land rockets, run Linear Fusion Rifles instead. Sleeper Simulant, Reed's Regret, and Threaded Needle are fantastic here.
- Outbreak Perfected: If you don't own anything we listed above and still want to contribute, have everyone in your fireteam run Outbreak. This weapon is fantastic for the Caretaker encounter.
Beyond that, bring your favorite add-clearing weapon to deal with fodder enemies. Salvager's Salvo, Trinity Ghoul, Fusion Rifles with Reservoir Burst, and Void weapons when paired with Volatile Rounds work extremely well here.
Master Difficulty Differences And Rewards

Like the Vault of Glass, Vow of the Disciple features two difficulty variants with different modifiers and rewards. No mechanical changes are present between the Legend and Master variants; only combat has seen a difficulty spike. Completing challenges in Master Vow will grant Adept weapons, with a chance of earning Masterwork materials and Adept mods.
Master Vow Of The Disciple Modifiers
|
Power Level |
1,580 |
|
Match Game |
Enemy shields are highly resistant to all unmatched elemental damage. |
|
Champion Foes |
Overload and Unstoppable Champions are present. |
|
Champions: Mob |
This mode contains additional Champions. |
|
Chaff |
Radar is disabled. |
|
Weekly Challenge |
One encounter will have an optional challenge that rotates weekly. |
You do not have to be at 1,580 Power to run Vow of the Disciple; that is simply the level of each enemy you'll face in this variant. Additional Champions spawn in each encounter, shielded foes take significantly less damage from non-matching elemental damage, and your radar is disabled for the entire raid. The weekly challenge for both the Legend and Master variants is the same and rotates weekly. There are no new mechanics in Master Vow of the Disciple.
Master Vow Of The Disciple Rewards
There are two notable rewards in Master Vow of the Disciple:
- Stat-focused armor.
- Adept weapons.
Each week, one of six stat types is chosen as Master Vow's stat bias. All armor that drops from the Master raid will come with a high bias towards the chosen stat (shown when selecting Vow's difficulty). You can pair this with an Armorer Ghost mod to force the game to drop armor with the stats you need.
Additionally, completing challenges in Master Vow of the Disciple will grant an Adept variant of the raid's six Legendary weapons. Adept weapons come with additional stats when Masterworked, two selectable perks in each column, and the ability to use Adept mods. Check out our Adept weapons guide for more information on how Adept weapons and mods work.
Vow Of The Disciple Challenges

Vow of the Disciple features four weekly challenges and four challenge Triumphs, all eight of which are required to earn the Disciple-Slayer title. The weekly challenges rotate each week, while the Triumph challenges can be completed at any time. Weekly challenge completions also grant an additional raid weapon or armor piece. For an in-depth breakdown of each challenge and how to complete them, give our Vow of the Disciple raid challenges guide a look.
Hidden Chest Locations

Hidden Chest #1: Barge

If this is your first run of Vow of the Disciple, this chest will not give any raid loot. Consider opening this chest after completing at least one encounter.
You'll need to destroy three Darkness fragments to spawn this chest. They're found in the following locations:
- Right after you locate the barge, head straight across the bog. When you reach a slanted tree branch, turn left to find the fragment nestled in a corner.
- Head down the narrow path paved with Pyramid architecture. At the very end of the path, turn left to find a fragment hiding in a corner.
- Near the end of this encounter, the barge will ascend over a narrow bridge. You'll want to drop down to the other side of the bridge. Walk inside to find the third and final fragment.
Once the fragments are destroyed, a door to the hidden chest will open. From the third fragment, turn around and book it to the other side of the area. Jump up the elevated terrain and walk into the structure on your right. The chest is inside.
Hidden Chest #2: Jumping Puzzle

During the second platforming section—right after you clear a second room filled with enemies—follow the platforms to your right. You'll eventually climb up to a series of horizontal pillars. Hop across the pillars until it seems like a dead end. Look to the wall on your left to find a small gap you can jump through. The chest will be in the following room.
Hidden Chest #3: Rhulk

For this chest, you'll need to activate three symbols throughout the Vow of the Disciple raid, starting right after the Barge encounter and ending just before you face Rhulk.
Once you've entered the Pyramid ship, you'll come across a totem with three symbols on it. Take a picture of these symbols or write them down somewhere. You'll need to find hidden rooms throughout Vow of the Disciple and shoot wall plates to activate these symbols. Upon activating all three symbols, a message stating, "Rhulk accepts your offering..." will appear. This means you've entered the code correctly. Defeat Rhulk to spawn an additional chest. This chest will always drop a resonance weapon. You can only open this chest once per week on your account.
The location for each symbol room is as follows:
- Pyramid: Once you enter the Pyramid, drop down into the depths as if you were starting the Acquisition encounter. Instead of going forward, turn around and walk backward. Enter the hidden room and shoot the wall panel to activate the Pyramid symbol.
- Give: From the wishing room—a room filled with tons of interactable symbols—run from the exit straight across to the next room. This wall panel activates the Give symbol.
- Darkness: In the Acquisition encounter, climb up to the golden statue left of spawn. A floating Darkness switch can be found near the statue. Shoot it to reveal a hidden room on your left.
- Traveler: In the room preceding the Caretaker encounter (named "Collection" in-game), climb up to the second floor to find a hidden Darkness switch. Shoot it to reveal a room below.
- Worship: Right after you defeat the Caretaker, look to your right to find a Darkness switch. Damaging it reveals a hidden room behind you.
- Light: After the Caretaker encounter, progress through the jumping puzzle until you reach the first group of enemies. Look at the ceiling to the left of the entrance to find a Darkness switch, opening a room to the right of the switch.
- Stop: At the third platforming section during the jumping puzzle (the part with moving platforms), look at the back of the room to find a Darkness switch. Shoot it to open the room.
- Guardian: After clearing the Upended encounter, run up the left-most stairs and continue heading left. You'll find a Darkness switch floating behind a wall. Backtrack to the previous room and run behind a white statue to find the room.
- Kill: This symbol can be found during the platforming section preceding the Rhulk encounter. When you enter the section with Taken Vandals, look for a dark wall at the opposite end of where you're supposed to go. A dim orange glow will give away a Darkness switch you can shoot. A room will open at the top-most level on your right, protected by a sizable group of enemies. If you reached the Shadow Thrall hallway, you've gone too far.
For a video breakdown of where these symbol rooms are, give Aztecross hidden chest video a look.
So long as the wall panel is displaying the symbol, it's active. You can shoot the panel a second time to deactivate a symbol.
Escort The Barge

This encounter is just like the Preservation weekly mission.
Your fireteam will start the raid at the northwest corner of Miasma. A remnant of Savathun and a few Hive will be guarding the entrance to the Disciple's Bog. Clear them out, then push into the swamp on your Sparrow. Your team will eventually come across a Darkness barge surrounded by an orange glow.
When you arrive, waves of Scorn will begin to spawn around you. Some of these enemies will be Abominations. Defeating them will spawn nine Darkness fragments around the arena. Your job is to grab three of them and return to the barge. Each fragment you collect will grant a Knowledge buff. The amount of stacks determines the name:
- One Stack: Heightened Knowledge
- Two Stacks: Brimming Knowledge
- Three Stacks: Overflowing Knowledge
While outside of the barge, you'll slowly increment stacks of a debuff called Pervading Darkness. Should this reach ten stacks, you'll die. Stand near the barge or collect Darkness Fragments to lower your debuff stacks.
Deposit all nine Fragments and hop onto the barge. It will begin moving momentarily, taking you to another part of the bog. Repeat this cycle three more times to enter the Pyramid on the other side of the bog. Descend into the depths of the ship to start the first proper encounter: Acquisition.
Acquisition

Encounter Synopsis
- Split your team into pairs. Have them cover one of the three obelisks in the arena.
- Designate each pair to have a runner and reader.
- Readers will disclose symbols that appear on their side's totem. The first symbol tells which side of the arena a Taken Knight will spawn at. Runners will defeat them to uncover more symbols.
- Runners will enter rooms that match the symbols presented on the totem. Defeat a Glyphkeeper based on the third image disclosed by a reader (Light or Dark).
- Runners will record the image the Glyphkeeper reveals. Repeat two more times.
- One obelisk will have all three symbols the Glyphkeepers revealed. Shoot all three symbols on the obelisk in short succession.
- Repeat two more times to clear all obelisks of symbols, completing the encounter.
Roles
|
Readers |
Runners |
|---|---|
|
|
Encounter Overview

This encounter features Unstoppable Champions.
This encounter is all about symbols. Before you start, walk around the arena. Get a good feel for the layout and the symbols adorned above the various rooms around the perimeter. You'll notice three obelisks in the arena—one top-left, one top-right, and the last near the entrance. Split your team into pairs and have them defend one of the three obelisks. Near each obelisk will be a totem that has three blank symbols. Assign one person from each pair as a reader and runner. Your role will determine what you do for this encounter. Both roles should also take note of the floating Darkness switch near the center of the arena. Shooting this switch starts the encounter and swaps which perimeter doors are open and closed.
Everyone's goal is to purge each obelisk of three symbols that spawn off slain Glyphkeepers. Locating a Glyphkeeper requires the use of your totem, a narrow structure that can display three images. Readers will need to call out which symbols they see to guide runners on where they need to go. Runners will use this information to eventually find a Glyphkeeper, kill them, then record the symbol that Glyphkeeper drops. This is repeated three times before your team must present an offering to an obelisk. We'll explain how offerings work in a moment.
Start the encounter by shooting the floating darkness switch near the center of the arena. A wave of Scorn will spawn on each side. Eliminate the Scorn to spawn a symbol on one team's totem. That side's reader will state which symbol they see (it can only be "Traveler" or "Pyramid"). Runners will then roam that section of the arena—left side for Pyramid, and right side for Traveler—to look for a Taken Knight. Slaying the Taken Knight will display a second symbol on the reader's obelisk. This symbol states which room a runner must enter to find a Glyphkeeper. Should the runner reach their room and find the door closed, shoot the floating Darkness switch near the center of the arena. This will open all closed doors and vice versa.
The second symbol presented on a totem won't always be on that obelisk's area. For example, the bottom totem could call out a symbol closest to the top-right, meaning the top-right runner needs to enter that room.
Once the runner is inside the room, the reader will unveil a third symbol that's either "Light" or "Dark." This determines which Glyphkeeper the runner must kill. Runners will look for a "Light" or "Dark" symbol on the wall to find the correct Glyphkeeper. Kill that Glyphkeer to uncover a symbol near their corpse. Record this symbol in text chat, on paper, or wherever is most convenient. The runner will then leave the room, help with finding the next Taken Knight that a new side will disclose, and repeat the process two more times. Once your team has uncovered three Glyphkeeper symbols, it's time to cleanse an obelisk.

To cleanse an obelisk, you must find the three symbols recorded by your runners and shoot them in short succession. Only one obelisk will have all three symbols, so work with your partner to check if your obelisk is the correct one. Once discovered, work with your partner to shoot all three symbols in a short time window. Should you take too long or shoot the wrong symbols, the message "Your offering was rejected" will appear on-screen. Try again until you get the timing down. When done successfully, the obelisk will accept your offering and reset the encounter. You must now repeat this encounter two more times to cleanse the other two obelisks. Cleansing all obelisks of symbols will end the encounter.
Encounter Rundown: Readers
Encounter Rundown: Runners
The Caretaker
Encounter Synopsis
- Divide your team into runners, stunners, and add clear.
- Runners will enter certain rooms to recover Darkness fragments, using those fragments to cleanse symbols on an obelisk.
- Stunners will shoot the Caretaker's face and back to stun the boss, buying the runners more time.
- Add clear will kill Taken and Scorn that spawn throughout the encounter.
- When the obelisk is purged, everyone will converge to DPS the boss, moving between glowing platforms to damage the Caretaker.
- Ascend a floor. Repeat two more times to start the final stand fight.
- Enter the fourth and final floor to kill the Caretaker.
Roles
|
Runners |
Stunners |
Add Clear |
|---|---|---|
|
|
|
Encounter Overview
The Caretaker is a Scorn Abomination that will attempt to harvest the essence of a nearby obelisk. Should it reach the obelisk, your team will wipe. Your goal is to prevent the Caretaker from extracting the essence of your obelisk by cleansing it first, charging nearby plates that allow your fireteam to damage the boss. Before you start the encounter, take note of the arena you're in. The center will contain the obelisk you need to defend. Right behind it is a door locked by two floating Darkness switches. Shoot either switch to open the door, starting the encounter. The Caretaker will spawn in the center of the room, directly across from the obelisk.
Split your team into three roles, preferably two of each: runners, stunners, and add clear. Experienced teams can later shift add clear into runners to speed up this encounter, but this isn't necessary.
Runners will start the encounter by opening the door. Inside will be nine fragments with symbols above them. They will need to grab at least one fragment, remembering the symbol that appeared above. Exit the room, wait for the bottom-left of your screen to state "The obelisk awaits [player name's] offering..." before shooting your symbol. Continue to grab fragments until all nine symbols have been purged. This starts the DPS phase.
Stunners need to buy the runners enough time to cleanse the obelisk, so they'll be standing next to the Caretaker for most of the fight. Stand right under the Abomination to force a slam attack, drawing their gaze. Its face will glow yellow, allowing you to damage it. Breaking this glow will expose the Caretaker's back. Should that break, the boss will be stunned momentarily, Both stunners will work together to keep the Caretaker occupied while the runners do their job. While the Caretaker is stunned, this group should also destroy any Darkness orbs that shoot out of the boss' back.
Add Clear is just what it sounds like. Two players, one on each side, will defend the room from a constant swarm of Taken and Scorn enemies. Be sure to eliminate the Taken Vandals that spawn on the edges of the arena, as these enemies can easily kill your stun team if you aren't careful. Keep clearing out the fodder enemies until runners cleanse the obelisk and start the DPS phase.
With the obelisk cleansed, everyone will head to one of three plates. Similar to the Calus encounter aboard the Leviathan, your team will have short windows to DPS the boss before needing to move. The plate that activates first will depend on where the Caretaker was going. If it was going right, the first plate will be right and vice versa. Once the Caretaker's HP bar begins to glow, you can damage them. Keep an eye on the chat messages on the bottom-left of your screen to see when a plate is about to fade and shift elsewhere.
After you've removed 30% of the Caretaker's HP or all three plates have been used, the boss will teleport to a floor above you. Stairs will form near you to let you ascend the arena. Reach the next floor and repeat the encounter as before. Runners will have more dangerous rooms to traverse each time, so be careful. Once your team has cleared three floors, a final phase will begin. In this final phase, you must climb up to a fourth floor and burst down the Caretaker's remaining HP. You have three plates to finish this fight, so give it everything you've got. The encounter ends once the Caretaker is slain.
The Best Weapons For Caretaker DPS

Caretaker is all about ammo management and making smart use of your abilities. This fight is a serious endurance test, so we highly recommend you use ammo finder and scavenger mods. Some good weapons include:
- Rocket Launchers: They deal immense damage and make great use of ammo scavenger bricks. Be sure one player is running Gjallarhorn to maximize your team's damage.
- Linear Fusion Rifles: If your fireteam has an LFR with Triple Tap or Field Prep, that might serve better for ammo conservation.
- Divinity: One member of your fireteam should use Divinity to inflict a 30% debuff for the entire fight. It also makes landing headshots much easier.
- Izanagi's Burden: When paired with Legendary Rocket Launchers, you'll deal the highest DPS out of any loadout in Destiny currently.
- Outbreak Perfected: Underleveled fireteams can make great use of Outbreak Perfected to deal consistent damage to this boss. Be sure to use your Supers on each floor to maximize your damage.
- Malfeasance + Witherhoard: Enemies struck by Witherhoard count as Taken for the purposes of Malfeasance's Taken Predator perk, causing it to deal 20% more damage. Five Hunters with Lucky Pants and Malfeasance alongside a Witherhoard can deal very respectable, consistent damage to the Caretaker.
Encounter Rundown: Runners
Encounter Rundown: Stunners
Encounter Rundown: Add Clear
Jumping Section

This raid's jumping puzzle is quite lengthy compared to previous raids, although it is fairly easy once you know how Darkness switches work. From the Caretaker encounter, follow the path until you enter a room filled with enemies. Take note of a rectangular structure on the right-hand side of the room. Above it is a floating Darkness switch you can shoot. This is how you'll alternate platforms in the jumping section ahead.
Further along the path, you'll see a few platforms alongside the walls of this rather massive structure. Jump atop the platforms until it appears to hit a dead end. One player will need to use a long-range weapon or backtrack to shoot the crystal, extending a few platforms. The platforms that move during this all have an orange glow; any non-glowing platforms are static. Repeat this process until your group can get a sightline on the switch once again. Escort the remaining players back to the group.

Your team will eventually enter a second room with tons of enemies, a floating Darkness switch appearing at the very end of the room. Turn right upon entering the room to find the next set of platforms to jump on. You can go either left or right here:
- Left: The path to the next platforming section.
- Right: The path to a hidden chest.
Should you grab the hidden chest, a hole in the floor will take you to the next platforming section.
This platforming section requires you to jump across moving platforms that are controlled from a Darkness switch. Leave at least one player behind to shoot the switch while everyone else jumps across the platforms. Making it across will cause the platforms to extend out from their pathways, giving your switch team a safe way to traverse. You'll find the next encounter shortly thereafter.
The Upended

Encounter Synopsis
- Your team must rush against the clock to uncover Glyphkeeper symbols and unlock new rooms.
-
Defeating slain Glyphkeeper displays three symbols. A pair of Glyphkeepers will have a matching symbol.
- Only certain players can read these symbols.
- Record matching symbols. Shoot these symbols at a doorframe to unlock the next room.
-
Each room contains various relics that must be used:
- VoG's Aegis shield
- Leviathan's Crystal
- Last Wish's Taken Essence
- Aegis wielders must cleanse the Pervading Darkness debuff from allies.
- Crystal wielders must defeat Taken Knights to extend the timer in this encounter.
- Taken Essence wielders must destroy blights to make enemies vulnerable to damage.
Roles
|
Everyone |
||
|---|---|---|
|
||
|
Aegis |
Crystal |
Taken |
|
|
|
Encounter Overview

Overload Champions are present in this encounter.
This encounter is a race against the clock to push through three rooms, each containing multiple Glyphkeepers, Taken Hobgoblins, and Scorn. Unlike previous encounters, you'll be using three relics seen in previous Destiny raids to interact with mechanics. There are three relics that are present in this encounter:
- Crystal (Leviathan): Shoots a beam of energy, piercing through Taken Knight shields. Slaying Taken Knights gives your team more team to clear each room.
-
Aegis (Vault of Glass): You can melee targets with it, shoot a projectile with your Super, or block to create a dome around yourself. Blocking cleanses yourself and nearby allies of the Pervading Darkness debuff.
- Should that debuff reach x10, you die.
-
Taken Essence (Last Wish): You can shoot at enemies or cleanse nearby blighted orbs with your grenade key.
- This relic appears during the second and third rooms.
Start the encounter by grabbing the Crystal relic at the center of the room. A timer called Terminal Resonance will appear on your screen. If this reaches zero, you wipe. Resetting this timer requires you to either kill Taken Knights or unlock a new room. Unlocking a room requires you to locate symbols from Glyphkeepers.

Two Glyphkeepers will spawn, one on each side of the room. Slaying the Glyphkeepers will display three symbols that only half of your fireteam can see. If you can't see one group of symbols, you can see the other group. Your team will need to read both sets of symbols and determine which symbol is matching. This determines which symbol you shoot at the nearby doorframe to proceed.
Let's give an example:
-
Left Glyphkeeper:
- Hive
- Worm
- Savathun
-
Right Glyphkeeper:
- Tower
- Savathun
- Witness
Savathun is the common symbol between both, so you'd shoot the Savathun symbol on the doorframe to open it. You'll need two matching symbols to open subsequent rooms, requiring you to kill two pairs of Glyphkeepers instead of one.
The next room will introduce the Aegis relic, allowing you to cleanse allies of the Pervading Darkness debuff using your block button. Deposit the Crystal relic into a nearby pedestal to spawn the shield relic. Whoever carried a relic cannot do so for the next room, as they'll have a 30-second debuff preventing them from doing so. Have two players grab each relic to open the next room. Clear out all of the Taken Hobgoblins to spawn the Glyphkeepers. Defeat the Glyphkeepers to spawn a Taken Knight, allowing you to extend your timer. The Aegis carrier should stick near the team, and the Crystal user should stick near the exit door to defeat any Taken Knights that spawn.
Reaching the second room will introduce a Taken relic that someone will need to grab. This relic is used to destroy blights that spawn throughout the arena. Walk near one, then press the grenade key to break it. You'll want to do this for every blight in the arena to make the enemies vulnerable to damage, allowing your team to kill them and spawn a Taken Knight. Once again, spawn two pairs of Glyphkeepers and compare their symbols to find out how to reach the next room. Repeat this one more time in the next room to beat the encounter. Everyone will need to use a relic at some point, so get comfortable with at least one of them (explained below).
Upended Map And Tips

Recreation by @Chargerhawk
To make this encounter a little bit easier, you can follow the diagram created by @hughmlong (image recreated by @Chargerhawk) shown above to figure out each Glyphkeeper and Taken Knight spawn point. Beyond that, we highly recommend that you create an order for which person will grab relics in each room. Remember, you can't grab a relic if you used one in the previous room, so plan carefully. Here's an example of what you can do:
-
Starter Room
- Crystal: Player #1
-
Room #1
- Crystal: Player #2
- Shield: Player #3
-
Room #2
- Crystal: Player #1
- Shield: Player #4
- Taken: Player #5
-
Room #3
- Crystal: Player #2
- Shield: Player #3
- Taken: Player #6
This order ensures that someone can grab the relics in each room, saving your team precious seconds to find and kill those Glyphkeepers.
Beyond that, here are a few tips:
- Bring add-clearing weapons to ensure you don't miss any enemies. Trinity Ghoul, Riskrunner, Witherhoard, and Gjallarhorn are great picks.
- You can bypass the 30-second lockout timer by dying. Deposit a relic, blow yourself up, then have someone revive you to take the relic into the next room.
- The side you can read symbols from seems consistent for subsequent runs, so long as you don't relaunch the activity. For example, those who can read the symbols from the left Glyphkeeper should kill left Glyphkeeper for all runs.
- Two Knights spawn per room (excluding the starter room). Defeat a pair of Glyphkeepers to spawn a Knight. Glyphkeepers spawn once most Taken Hobgoblins in the area have been killed.
- There are no bosses in this encounter, so make liberal use of your abilities and Super.
Encounter Rundown: Crystal Artifact
Encounter Rundown: Aegis Artifact
Encounter Rundown: Taken Artifact
Rhulk, Disciple Of The Witness

Encounter Synopsis
- Cleanse certain totems to remove Rhulk's projection field, allowing you to reach him.
- Assign roles to each fireteam member: runner, buff retainers, reader, and add clear.
- Buff retainers and runners will shoot the Darkness fragments spawned by Rhulk to receive the Leeching Force buff.
- Runners will receive the Leeching Force buff and stand into a laser attack, allowing them to run inside the projection field and cleanse a totem.
- Buff retainers can read the left-hand side symbols. Everyone else reads right-hand side.
- Find the matching symbol and look for totems with that symbol.
- Repeat this process until the projection field drops.
- Destroy glaives spawned by Rhulk to obtain the Leeching Force buff. Convert Leeching into Empowering Force.
- Dunk at certain totems to open precision weakpoints. Destroy them to start the DPS phase.
Roles
|
Buff Retainers |
Runners |
|---|---|
|
|
|
Readers |
Add Clear |
|
|
Encounter Overview

If the synopsis wasn't a hint, there's a lot going on in this encounter. In essence, you'll be using the skills learned in the third encounter to cleanse totems inside Rhulk's forcefield. There are no relics in this encounter, but there are two new buffs: Leeching Force and Emanating Force. You'll receive the first buff upon breaking Darkness fragments that the boss spawns throughout the encounter.
Before you start the encounter, assign two dedicated buff retainers, at least one runner, a dedicated reader, and have everyone else focus on killing adds. It's possible to have readers on add-killing duty or to have multiple runners, but this is a solid squad composition to start. Also, take note of the forcefield the boss spawns. You cannot bypass this field unless you have the Emanating buff, something only runners should have. Don't get too close to the forcefield or you'll risk getting flung off the map or into a wall.
Start the encounter by walking up to Rhulk. He'll push everyone back before projecting a Darkness fragment above his head. Whoever destroys the fragment will gain the Leeching Force buff. Have the buff retainers destroy the fragment. A plate right next to spawn will activate whenever a Leeching Force retainer stands atop it. Have whoever just broke the fragment stand on the plate to spawn two more fragments. Have your second buff retainer and dedicated runner break each fragment.
Only the player with Leeching Force needs to stand on the plate. Those shooting the fragments can damage them from anywhere in the arena.
Your runner will need to get hit by Rhalk's laser attack to charge their buff. Everyone else, including your other buff retainer, must avoid the beam attack. If successful, the runner's buff will turn into Emanating Force. This means you can now enter the forcefield without getting thrown out of the arena.
During this part, those on add clear duty will have to kill two Glyphkeepers, one on each side. This will spawn three symbols on each side of the arena, projecting right above a nearby pillar. Leeching Force retainers can read the left-hand symbols, while everyone else can only read the right-hand symbols. Your reader and runner will need to deduce which symbol matches between the two sets, just like the last encounter. Find the matching symbol, then look for which totems contain that symbol. The runner cannot see any totem symbols, so be sure that it's the correct totem. Should the runner dunk at the wrong totem, they will die.
Totem symbols change with each cleanse. Readers will need to check totems after each cleanse to see where runners need to dunk next.
Totems are typically labeled as, L1, R1, L2, and so on—the number representing how close the totem is to spawn. A rough map of totem positions can be found below:

Have the runner dunk at either totem called out by the runner. The current buff retainer should be standing on a plate at this point to spawn two Darkness fragments. Have the runner and second buff retainer shoot each fragment to split the Leeching Force buff. The second retainer will stand on the plate, while the runner will attempt to get hit by Rhulk's beam attack. Kill the Glyphkeepers, figure out which symbol matches, then have the runner dunk at the totem. The forcefield will shrink every time you do this correctly. Split the Leeching Force buff again, then repeat what you've been doing until the forcefield has dissipated completely. Removing the forcefield starts the second phase of this encounter.
Should your fireteam lose the Leeching Force buff, Rhulk will spawn a large Darkness fragment so you can receive it again. You only get this opportunity once per encounter. Losing the buff again will cause your fireteam to wipe.
Rhulk DPS Phase

Don't let off your rockets and Supers just yet. Before you can damage Rhulk, you'll need to destroy four weakpoints on his body that open up when you deposit the Emanating buff. Before we continue, Rhulk is not a prop in this encounter. He will charge at you and dropkick you. Keep as much distance between you and Rhulk as possible to prevent dying. One death in this phase can quickly spiral into a wipe.
There are three attacks worth mentioning during this phase:
- Drop Kick: Rhulk will kick anyone beside him. This deals immense damage, capable of one-shotting underleveled Guardians or those playing on Master difficulty.
- Charge: Rhuik will create a glaive in his right hand, stand up straight, then charge forward. A wave of yellow energy will project in front of him during the telegraph, giving you a chance to dodge. Slide perpendicular to the charge's direction to avoid
- Laser AoE: Rhulk will charge multiple beams around himself and release them all at once. Find a gap between the beams to survive. Those with the Leeching Force buff want to get hit by this attack (explained below).
Rhulk will spawn glaives behind him throughout this phase. Have your runner destroy the glaive to receive the Leeching Force buff. As before, the runner must get hit by Rhulk's lasers to empower the buff. Non-runners will be able to see a symbol when Rhulk's glaive breaks. This signifies which totem your runner must deposit the buff at. Credit to u/Athena_Rip for the image below:

- Top Right: Darkness
- Bottom Right: Light
- Top Left: Pyramid
- Bottom Left: Traveler
Dunking a buff will stun Rhulk and expose one of his weakpoints. You'll expose his shoulders first, then his left leg (right from your perspective), then the other leg. Destroying Rhulk's fourth critical spot will start the DPS phase once he's finished with his current attack. Should you take too long, Rhulk will become immune and wipe your fireteam.
Six Shadow Thrall spawn a few seconds after Rhulk attacks. You can use them to spawn Orbs of Power or Elemental Wells to proc High-Energy Fire and Font of Might, respectively.
DPS phase begins when Rhulk transforms, the arena turning a dark red color. This is your window to strike, but beware of Rhulk's attacks. Like before, he's capable of charging at you and using his glaive to kill any unsuspecting Guardians. Keep your distance from the boss; never stop moving. Once Rhulk becomes immune to all damage, retreat to the start of the encounter. Repeat what you did before to reach Rhulk again. You have three DPS phases before Rhulk enrages and wipes your fireteam.
When Rhulk reaches the last portion of his HP, he'll enrage and enter a final stand mode. The Pervading Darkness debuff will begin to stack during this part. Your job is simple, kill Rhulk before Pervading Darkness reaches x10. Should it reach x10, you wipe. Spam your Heavy weapons, use your Supers, and remember to avoid his attacks. Defeating Rhulk ends the Vow of the Disciple raid.
The Best Weapons For Rhulk DPS

-
Izanagi's Burden + Rocket Launchers: This is currently the highest DPS combo in Destiny 2. Be sure that your RL has Auto-Loading Holster and some sort of damage perk.
- Tip: You'll want to fire a rocket, swap to Izanagi's, fire a Honed Edge shot, reload a Honed Edge shot, then swap to your Rocket Launcher. If you have very high handling, you can even weave a grenade launcher shot into this combo.
- Be sure one member of your fireteam is using Gjallarhorn to maximize your damage.
- Divinity: Hitting Rhulk's crit points is a pain in this encounter. Use Divinity to debuff the boss while making critical hits much easier to land.
- Linear Fusion Rifles: Reed's Regret, Threaded Needle, and Sleeper Simulant are fantastic for this encounter.
- Witherhoard: Have one player run Witherhoard. It's great for killing adds during the first part and deals solid damage to Rhulk. It can even kill him if he's on the verge of death when your fireteam wipes.
Alongside these recommendations, we highly recommend that you use High-Energy Fire for this encounter. Due to how dangerous and mobile Rhulk is, Well of Radiance is difficult to use effectively during this encounter. Ward of Dawn can also block shots if placed in a bad spot, and Banner Shield doesn't seem to protect from Rhulk's melee attacks. This makes High-Energy Fire your best bet for buffing your damage. Rock this mod with Taking Charge and/or Radiant Light to always have High-Energy Fire active during the DPS phase.
Additionally, you can also use Font of Might to gain an additional 25% damage buff that stacks with High-Energy Fire. Stasis users can easily proc this mod by having at least one member of your fireteam run Supreme Wellmaker. Pop your Super, spawn three Stasis Wells, then have your Stasis players grab the Wells to buff their damage. Void users can spawn Wells by using Reaping Wellmaker. Use your class ability, kill a Shadow Thrall, then grab the Well once the DPS phase begins.
Encounter Rundown: Buff Retainers
Encounter Rundown: Runners
Encounter Rundown: Readers
Encounter Rundown: Add Clear