Quick Links
Dragon Quest Treasures' world is strung together by a series of floating railroad line. Unfortunately, none of the stations connected to it are in working order. Thankfully, we know just the person to fix them. It's you. Obviously.
Restoring all the railway stations to their former glory makes exploring the world of Dragon Quest Treasures considerably more efficient. From what resources are needed, to where you can find them; we'll detail everything you need to do in order to get all these stations up and running again.
Updated December 22, 2022: We've updated this guide so that it includes the final Railway Station. We also cleaned up a few things in the other entries that we felt could be explained a little better. Hopefully, at this point this guide should answer every question you may have about unlocking the railways.
Railway Quest Housekeeping

Before we get started with the quests proper, we figured we would answer a few questions preemptively...
Where Do I Get Sanguinite?

One piece of Sanguinite will be given to you by the named St4tion-M4ster who mans the first station of every island. However, the majority of your sanguinite will be earned by delving deeper into The Snarl.
When Should I Start Unlocking Railways?

Each island (with the notable exception of the Paternoggin) has one station that is extremely easy to open. So, even if you are at the beginning of the game, you should be looking to get these stations up and running as soon as possible. Since they only require one piece of Sanguinite, the piece you are given by the first St4tion-M4ster will be enough to get it up and running.
Not only does unlocking stations make traveling around the world easier, but it also gives your more areas to send your monsters on expeditions to.
Finding Food For New Recruits

One of the biggest hurdles you will encounter when trying to recruit different monsters is their food requirements. The materials are not generally that difficult to find, but the foods can be a real pain in the butt. So, here is some general advice. Firstly, make sure to go to the first station of every island and buy all the recipes from the nearby shops. Next, if you just walk around with tons of loot, you will be attacked by other gangs, and they will often leave food behind. Finally, the requirements for hiring monsters are not uniform, so pick up a few monsters of the same type, and you may just get one that is easier to hire. Beyond that, open every chest you encounter, as some of them have recipes inside.
The Cinderback Ridge

You are going to start at the Cold Shoulder Central Station. Here, talk to Mr. Banks and receive one Sanguinite. You will now travel along the path that is heading north. Eventually, this winding path will take you to Bloodleaf Boulevard Station.
Bloodleaf Boulevard Station


|
Requirements |
|---|
|
4 Detonuts |
|
1 Piece Of Sanguinite |
All you need to get Bloodleaf Boulevard Station up and running again is 4 detonuts and 1 piece of Sanguinite. So, give the St4tion-M4ster the Sanguinite Mr. Banks just gave you. You probably collected plenty of detonuts on your way to this station, as they are all over this place. However, if you didn't, you can find some detonuts to the north of the station.
Redscale Rise station


|
Requirements |
|---|
|
6 Lava Lumps |
|
4 Pieces Of Sanguinite |
Now, back on the path again. The trail will take you west before hooking around and leading you south. As You will end up at the Redscale Rise station. In order to get this station up and running, you are going to need to collect some lava lumps. They will be found near lava, and look like red ore deposits. Unlike the detonuts, you won't encounter many of these on the path leading here. North of the station you will find a number of lava lumps lining the banks of the river of lava here. Give them to the St4tion-M4ster
Once you have reopened the station, head back to Cold Shoulder Central Station and speak to Mr. Banks. This will conclude your quest, and you will be rewarded.
The Hinterquarters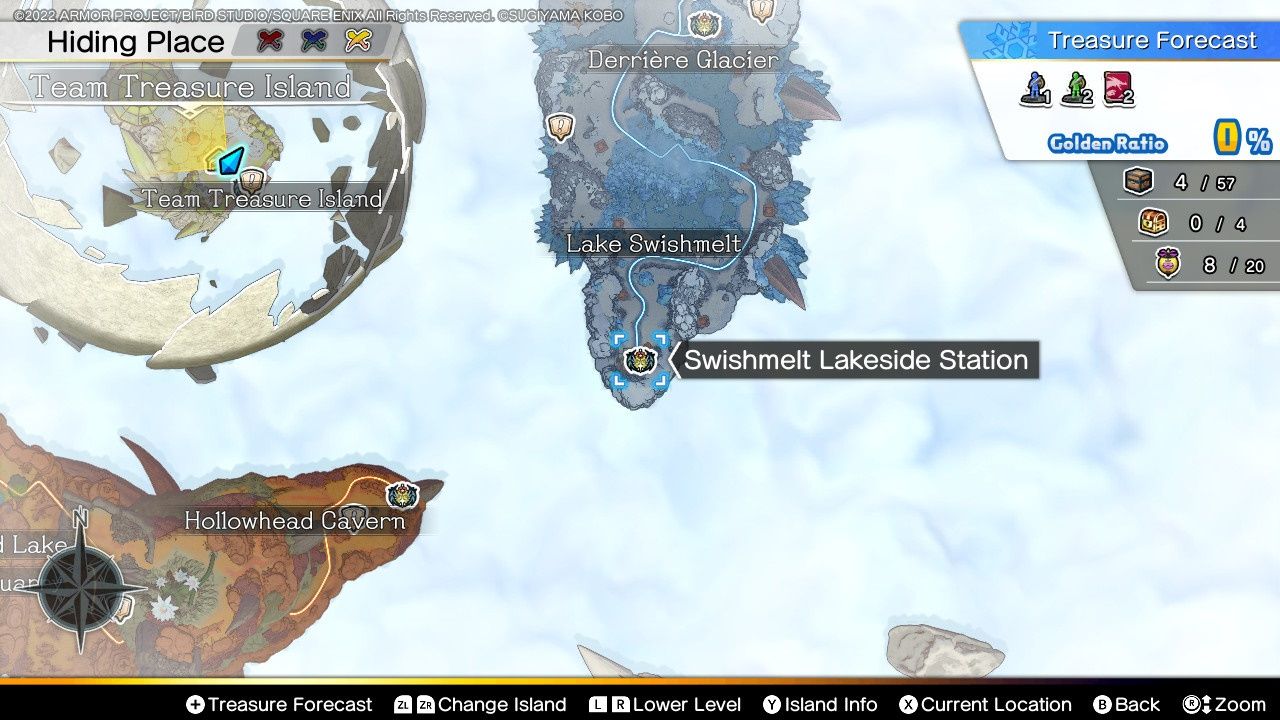
You will start at Swishmelt Lakeside Station. Talk to Mr. Victor and receive your Sanguinite. You will now travel along the path that is heading north to Glacier Junction.
Glacier Junction Station


|
Requirements |
|---|
|
4 Cool Heads |
|
1 Piece Of Sanguinite |
When you get here you will be instructed that you need to fetch four Cool Heads. You can find a bunch of them clustered around a large rock to the west. They look like ribcages. Bring them back to the St4tion-M4ster and give them to him alongside the Sanguinite you received from Mr. Victor. Now, once this is up and running, if you got the Sanguinite on hand, head north on that path once more.
Bitterbutte Bottom


|
Requirements |
|---|
|
Queen Slime |
|
4 Lotus Nectars |
|
4 Pieces Of Sanguinite |
Once you get to the northmost station—Bitterbutte Bottom Station—you will need to acquire four Lotus Nectars. You can find under these plants under trees south of the station. You will also need to recruit a Queen Slime. You can find one nearby to the north.
You will need to now head back to the base in order to hire the Queen Slime. Once you do, head back again, and you will open up the final Hinterquarters railway station. After you do, head back to Swishmelt Lakeside Station, and you will complete the quest.
The Wingswept Moors


You will start at the Swoopswamp station. Talk to Miss Kensington and you will be given your typical piece of Sanguinite. Now, if you intend to unlock every railway station, we recommend heading west. You will find a group of Giganteses lounging on a hill in this area. Try to recruit one! You will need one in order to reopen Grey Wing Bridge Station. Once you successfully scout a Gigantes, head back to your headquarters and officially hire them. Now, head back to the Swoop Swamp Station, and follow the path to the southwest. Eventually, you will arrive at the Soaring Steps Station.
There are also a bunch of Great Sabrecubs here. You will need one of those for a later station, so you may want to pick one of those up while you are here.
Soaring Steps Station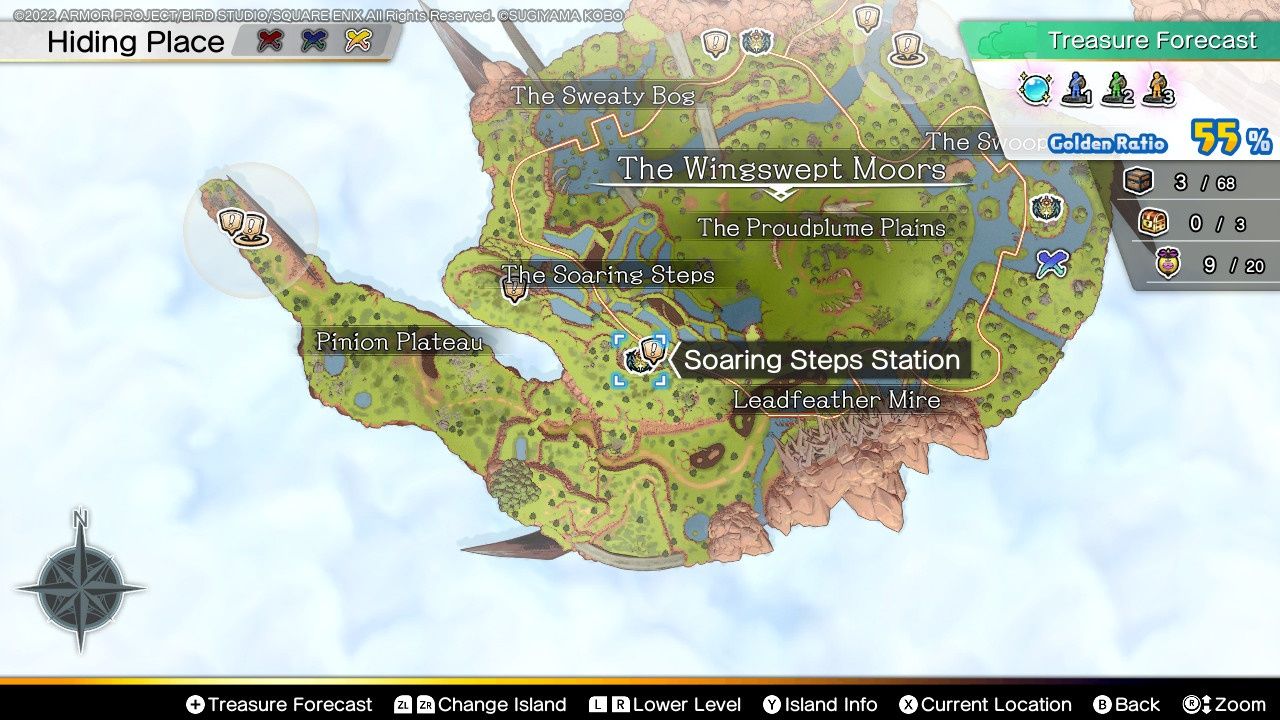

|
Requirements |
|---|
|
6 Black Glumpets |
|
1 Piece Of Sanguinite |
Once you arrive at this station, just circle the railway, and pick the mushrooms sitting under trees. You will very quickly get your six black glumpet mushrooms in a heartbeat. Now, hand over those mushrooms to the St4tion-M4ster, give him that Sanguinite you got from Miss Kensington. With that station up and running, follow the path to the north. You will hook around the west side of the map and end up at the Greywing Gateway Station.
Greywing Gateway Station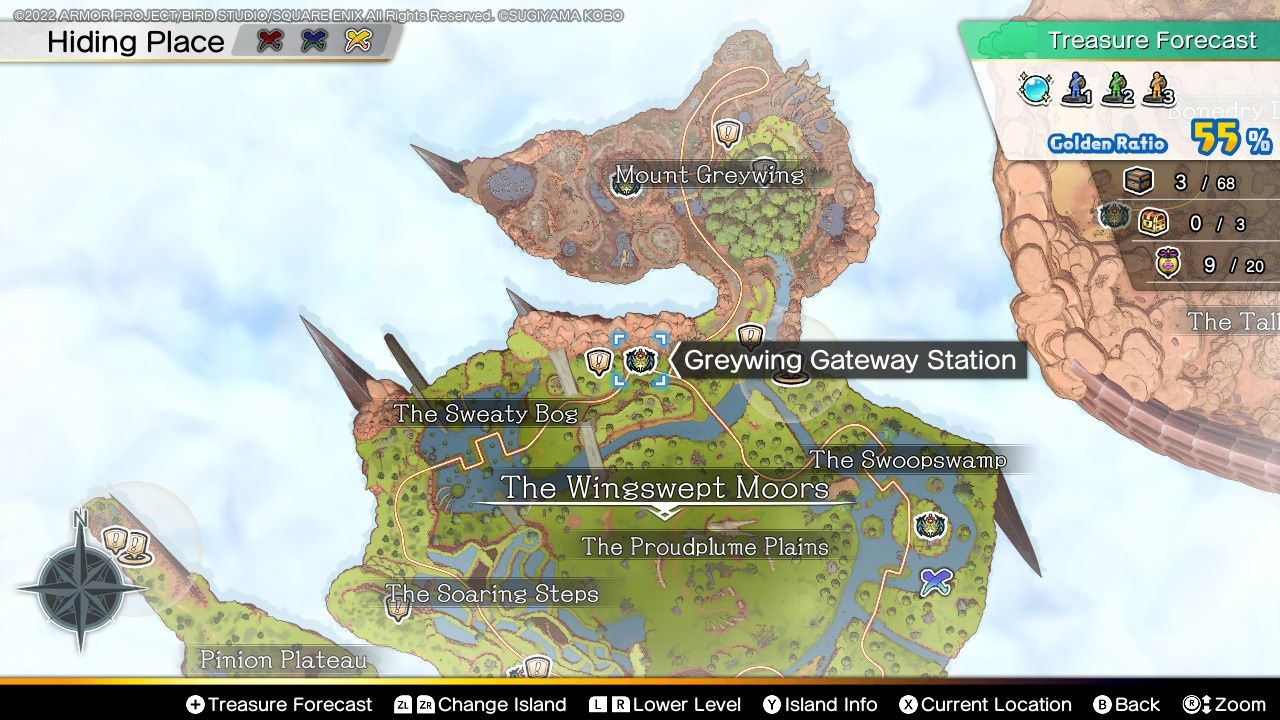

|
Requirements |
|---|
|
4 Load Stones |
|
1 Piece Of Sanguinite |
Once you arrive at the station, keep on the path and look for some nearby mineral deposits. There are Load Stones just a little to the east of the Greywing Gateway Station. Once you get four of 'em, head straight to the St4tion-M4ster and hand them over. You will have already used your Sanguinite, so you are going to need to have at least completed The first level of The Snarl. After getting this railway back online, follow the path to the east and then north. Make sure to maintain the high road (literally, not figuratively). This will take you right to Greywing Bridge Station
Greywing Bridge Station

|
Requirements |
|---|
|
Gigantis |
|
10 Tingle Tops |
|
5 Pieces Of Sanguinite |
So, as we said in the beginning of this section, right when you exit the Swoopswamp Station, head to the west, and you will run directly into a whole group of Gigantises. Hopefully, you grabbed one already—and hired them back at your base—and can hand them over to the St4tion-M4ster; if not go recruit one now. The Tingle Tops are a common mushroom found in the area. If you just circle the station you will most certainly find all you need. Lastly, that is a hefty amount of Sanguinite, which means you are going to need to be a floor or two down in The Spire. Once you have collected everything, hand it over to the St4tion-M4ster and you will unlock the final station in The Wingswept Moors.
The Maneland

There are a number of airstreams you can ride using the Glide Forte in The Maneland. We strongly recommend coming with a monster who had this ability.
You will start off at the Bonedry Heights station. Talk to Mr. Baker and get your Sanguinite. From the station, head to the east. Just follow the path, but make sure to forage as you go. If you see flowers, pluck 'em. Eventually, you will arrive at the Sweetshade Glade Station.
Sweetshade Glade Station

|
Requirements |
|---|
|
4 Sandelions |
|
1 Piece Of Sanguinite |
Talk to the St4tion-M4ster and give them the Sanguinite you received from Mr. Baker. If you didn't pick up Sandelions on your way here, there are some south of the Station. Once you have reopened the station, keep heading east. Follow the path through the desert area. However, if you don't already have a Golem back at your base you are willing to give up, instead of continuing on to the Hotbreath Halt Station, you should look to recruit a Golem here. There are plenty wandering around.
Once you have a Golem, head back to your base and hire them. Now, travel back to Sweetshade Glade and follow the path until you arrive at Hotbreath Halt Station.
Hotbreath Halt Station


|
Requirements |
|---|
|
Golem |
|
10 Scorched Earths |
|
5 Pieces Of Sanguinite |
Hand over the Sanguinite to the St4tion-M4ster and the Golem (which you hopefully already recruited before you made your way out here). Now the only thing left to do is to locate the 10 Scorched Earths. Thankfully, you can find them in and around this area. Just a little west of the station. Give the Scorched Earths to the St4tion-M4ster, and then head back and talk to Mr. Baker. You will now have officially unlocked all the railways in the Maneland!
The Forsaken Station


|
Requirements |
|---|
|
Great Sabrecat |
|
5 Pieces Of Sanguinite |
Once you are finished with all the stations, you will have the option to finally unlock the Paternoggin's Forsaken Station. The Great Sabrecat is located nearby. Just follow the path that leads directly to The Forsaken Station. You will inevitably run directly into a Great Sabrecat. As for the Sanguinite, you will need to have completed The Snarl, as it will clear you out.