The Lakeside Crystal Cave is one of the earlier dungeons in Elden Ring’s Liurnia of the Lakes region. It is very dark, with demi-humans waiting to ambush you at every turn. The short upper cavern also houses a demi-human chief, who guards a chest with the Spear Talisman, which increases the damage of spear counterattacks.
However, this is not the final boss of the dungeon. There is more to explore which lies hidden at the bottom of a chasm. This dungeon will require you to use stealth, drop between platforms, and crush snails. The rewards are worth it in the form of two talismans and many runes.
Lakeside Crystal Cave Overview

|
Lakeside Crystal Cave Overview |
|
|---|---|
|
Bosses |
Bloodhound Knight |
|
Enemies |
Demi-Humans, Demi-Human Chief, Crystal Snails |
|
Notable Loot |
Spear Talisman, Cerulean Amber Medallion |
Dungeon Guide

Immediately upon entering the cave there is a chest. Open it up and grab the Arteria Leaf within. Follow the path west, next to the large open hole. Be wary of the bushes immediately ahead as a demi-human will jump out from them to attack you. Another demi-human with a shield also patrols this area and will call out for help if given the chance.

Follow the path to the left up towards the fire. Three more demi-humans are hiding up here around a corpse. Finish them off and collect the three hefty beast bones from the body.
The cavern is extremely dark and difficult to fight in without a torch. Purchase a lantern from the Nomadic Merchant by the Liurnia Lake Shore Grace to light your way and keep your hands free.
Head back down the path, then continue westwards towards the fires ahead. There are two more demi-humans here, one of whom is large and carries a spiked club.

After killing these two, continue through the tunnel ahead to a cavern containing bushes, a waterfall, and a small camp. A threatening demi-human chief patrols this room. He is tough but particularly vulnerable to slashing damage and status effects. Two more demi-humans will attempt to ambush you as you enter, one from the bushes and another from the boxes opposite the waterfall.
Use target lock whenever you suspect an ambush is coming to reveal hidden attackers.
After defeating the chief, head to the campsite area and open the chest there. Grab the Spear Talisman, then head back out through the tunnel.

The chief can be a difficult fight, but he is not the boss of the dungeon. To get to the boss, you have to descend into the large hole in the main cavern. Carefully drop between the platforms jutting out from the wall, first to the west, then east towards the fire.
Enter the room ahead, which contains three crystal snails. These enemies have irritating area-of-effect attacks, so do not allow them to surround you. A corpse on the floor contains five throwing daggers.

Go into the passage on the north wall of this room. Immediately to your left is a large group of sleeping snails surrounding a corpse. Use area-of-effect attacks to finish them quickly or lure them back through the chamber one by one to avoid being overwhelmed. The corpse underneath them carries a golden rune [5]. Continue down the passage.

You will emerge at a ledge near the bottom of the cavern, surrounded by large crystals. Go to the left side of the ledge and drop down to the platform with a body on it. Pick up the two soft cottons on the body, then drop down again to the cavern floor.
Search the bodies on the floor to receive a smithing stone [4], a smithing stone [2], and a lump of flesh. Travel westwards through the cave, past three more snails. The entrance ahead will lead directly to the boss, without having to traverse any mist. Be prepared to fight before you enter.
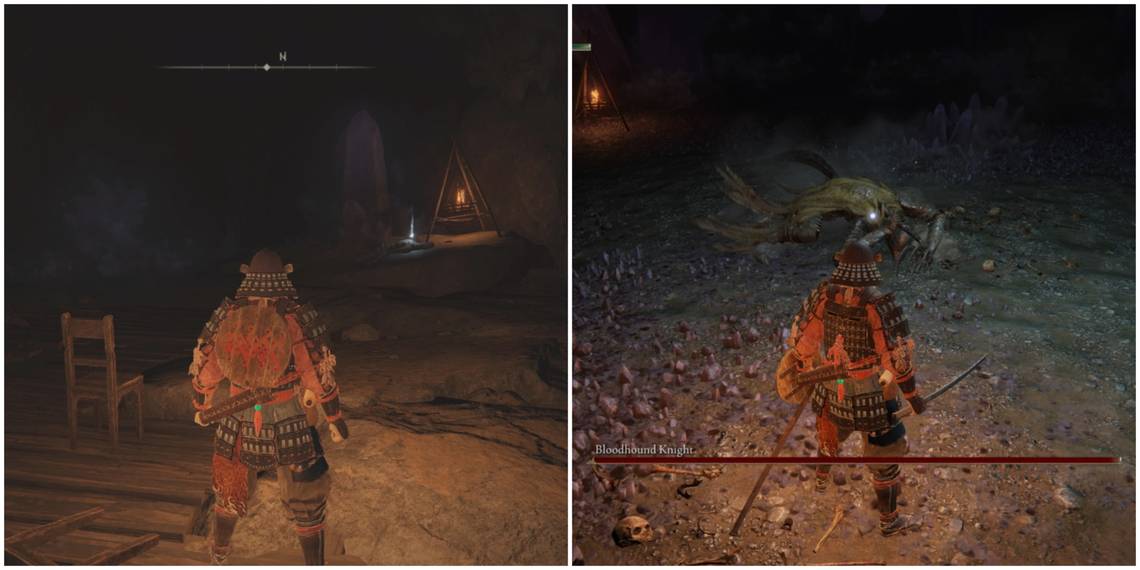
Bloodhound Knight Boss Fight

The Bloodhound Knight can be a tricky boss to fight, especially in such a confined area. He can close distances quickly, teleporting forward to avoid damage. His slashes have a wide, sweeping arc, and he will stack blood loss on you with every attack.
However, his attacks are clearly telegraphed and can be easily dodged with good enough timing. Summons are active for this fight, so make use of them. Remain close to the boss, attack at the end of his combos, and roll into his attacks to avoid them best. A shield can be useful but will not protect you from blood loss build-up. Ranged fighters may struggle with this boss’s ability to close distance rapidly, so distract the boss with summons and avoid attacks with long animations.
Defeating this boss provides you with the Cerulean Amber Medallion and 3,600 runes. It also gives you access to the Lone Wolf Shack, where you can speak to Latenna.
|
Bloodhound Knight Attacks |
|
|---|---|
|
Slashes |
The Bloodhound Knight slashes his sword in two wide arcs, then follows up with an overhead strike. Counter: Roll into each of the slashes, then forward through the overhead strike, placing you in a good position to attack. |
|
Teleport slash |
The Knight disappears, then reappears closer to you and immediately attacks. This can sometimes be chained into a three-slash combo. Counter: The knight signals this move by sliding in the dust. Dodge immediately towards his sword when he reappears. |
|
Upward slash |
The knight drags his claw weapon along the ground, creating sparks, before slicing up into the air. Counter: roll forward and through the slash, positioning you behind him for a hit. |