Seethewater Cave is the first dungeon you'll stumble upon once you enter Mt. Gelmir. There's plenty of cool armor in Elden Ring, but the only way to get the Mushroom armor set is by completing this here cave.
The cave is initially locked by an imp statue fog wall, requiring two Stonesword Keys to unlock. It is also guarded by an enemy. Seethewater Cave harbors many enemies of poison, as well as poisonous rivers, so prepare yourself accordingly.
Seethewater Cave Overview

|
Seethewater Cave Overview |
|
|---|---|
|
Bosses |
Kindred of Rot Duo |
|
Enemies |
Giant Miranda, Rat, Noble, Servant of Rot |
|
Notable Loot |
Golden Runes, Mushroom armor set |
Dungeon Guide

The first thing you want to do is jump down a small ledge, in front of a summoning pool statue. There's only one way forward here.

You'll bump into a Leyndell noble with a torch. To your right is a cave-in with a campfire and another noble.

Past these guards, you'll have to jump down from ledge to ledge and inevitably fall into a swamp of poison. Make a break for it so that you don't get too much poison build-up. There will be a small island in front of you, out of the claustrophobic cave.

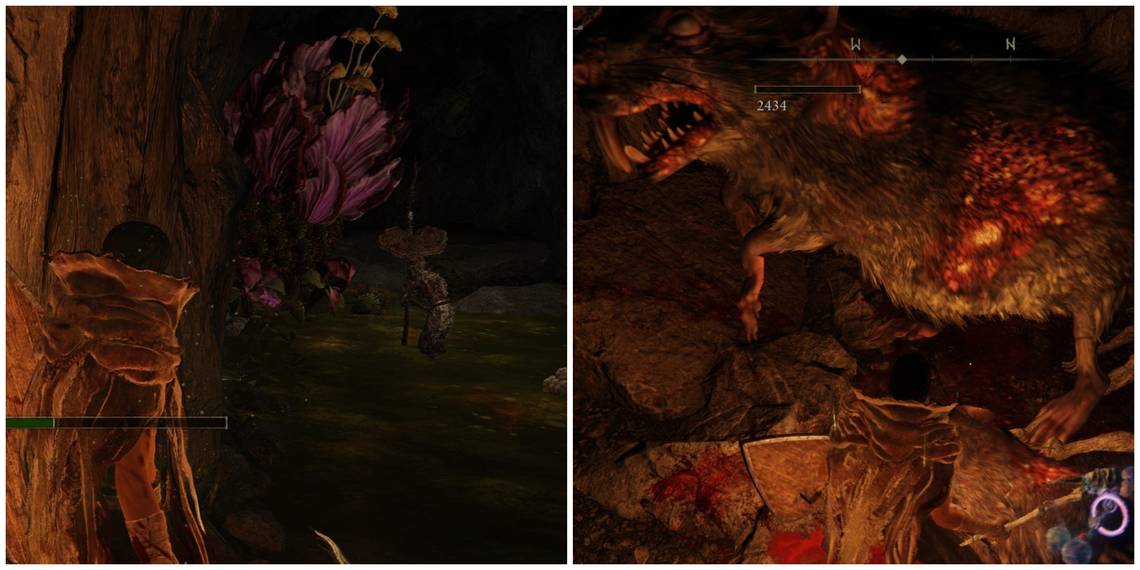
From this island, there are seemingly two ways to go. To the left, you will find a giant rat guarding some Lump of Flesh and a dead end. The right pathway continues the cave. Behind you should be some Poison Grease on a corpse.

Be wary of poisonous globs that will fall from the ceiling. If you're not careful, they may drop on you, trapping you and eating away at your health before releasing. If not trapped by one, they are slow and harmless.

Continuing through the cave by heading down the right path, turn to your immediate left to seek rest from the poison build-up. Across from you, you'll notice various mushroom-rot enemies circling a pillar. If you have ranged damage, you can take them out one by one from this spot without them becoming aggro onto you. Otherwise, you'll have to run toward them and brute force the many enemies by yourself. Where they stand is another safe island from the poison.

From this next location, try target-locking South-East. There is an enemy on top of a ledge. With a ranged attack, you can kill them here or get them later in the cave. If you follow the arrow in the photo above, you'll find a dead-end to the left with a Preserving Boluses on a corpse. This item helps alleviate scarlet rot build-up.

Turn around and head West, where you'll find a poisonous waterfall. There will be a little island to your right to seek a break from the poison. When you're ready, you must jump down.

To the left will be extra exploration. You'll find some rats and Golden Runes. This leads back to the ledge where you saw the enemy above the Preserving Boluses.

If you continue right, there will be another opening with a large poisonous flower and more servants of rot. They will be too busy worshiping the flower to notice you, so you range attack from the opening if you wish. You will find the Mushroom armor set here, where the flower lay.

Backtrack back to the poisonous waterfall. This time head right. There will be a huge hole in the floor. Carefully jump down each ledge. At the very bottom will be the boss fog wall.
Kindred of Rot Boss Fight Guide
-1.jpg?q=50&fit=crop&w=740&dpr=1.5)
If you've been to Lake of Rot already during Ranni's questline, you'll have bumped into Kindred of Rot before. They are horrendous enemies because of their Pest Threads attack, which you can find as an incantation for yourself. This attack instantly KO's players in Lake of Rot. Imagine going against two of these enemies as bosses.
There's no doubt that you will need to summon a Spirit Ash for a distraction or extra damage if you're not a melee tank yourself. The Kindred of Rot is relatively weak, your issue will be their Pest Threads attack and managing two of said attacks at once.
When dodging the Pest Threads attack, it's important to remember not to dodge when they release the threads, but to dodge a bit after. Dodging too early will result in death.
Sometimes you can get lucky enough that the second Kindred of Rot is further away and barely attacking, while you deal with the first one. If this happens, make sure to continuously lure the angry one away from the second so that the second stays passive until you've finished the job.
If not, summoning is your best bet for the sake of only dealing with one Pest Threads attack instead of two, as this instantly kills you. Summon an upgraded Spirit Ash with heavier HP, otherwise, this special attack will instantly kill your summon as well. You may want to either use one tanky summon to kill the second Kindred of Rot or use ashes that summon multiple allies for the sake of distraction or stagger.
Upon defeat, Kindred of Rot duo drops the Kindred of Rot's Exaultation Talisman.