Quick Links
It's another Jeb level in Escape Academy, so you know what that means: disaster. His first level brought us the threat of drowning, the second poisoned us, and now we're faced with something else entirely - a blazing library that we have to escape. It almost seems like someone is trying to get rid of us.
Of course, nothing is as easy as it should be on this convoluted campus, and we're going to have to solve some puzzles if we want to escape the blazing inferno. This will involve some of the trickiest puzzles that you'll have encountered yet.
Updated August 29, 2022: We've updated this guide to include a video walkthrough of how to escape the fire in Escape Academy.
How To Reveal The Secret Exit
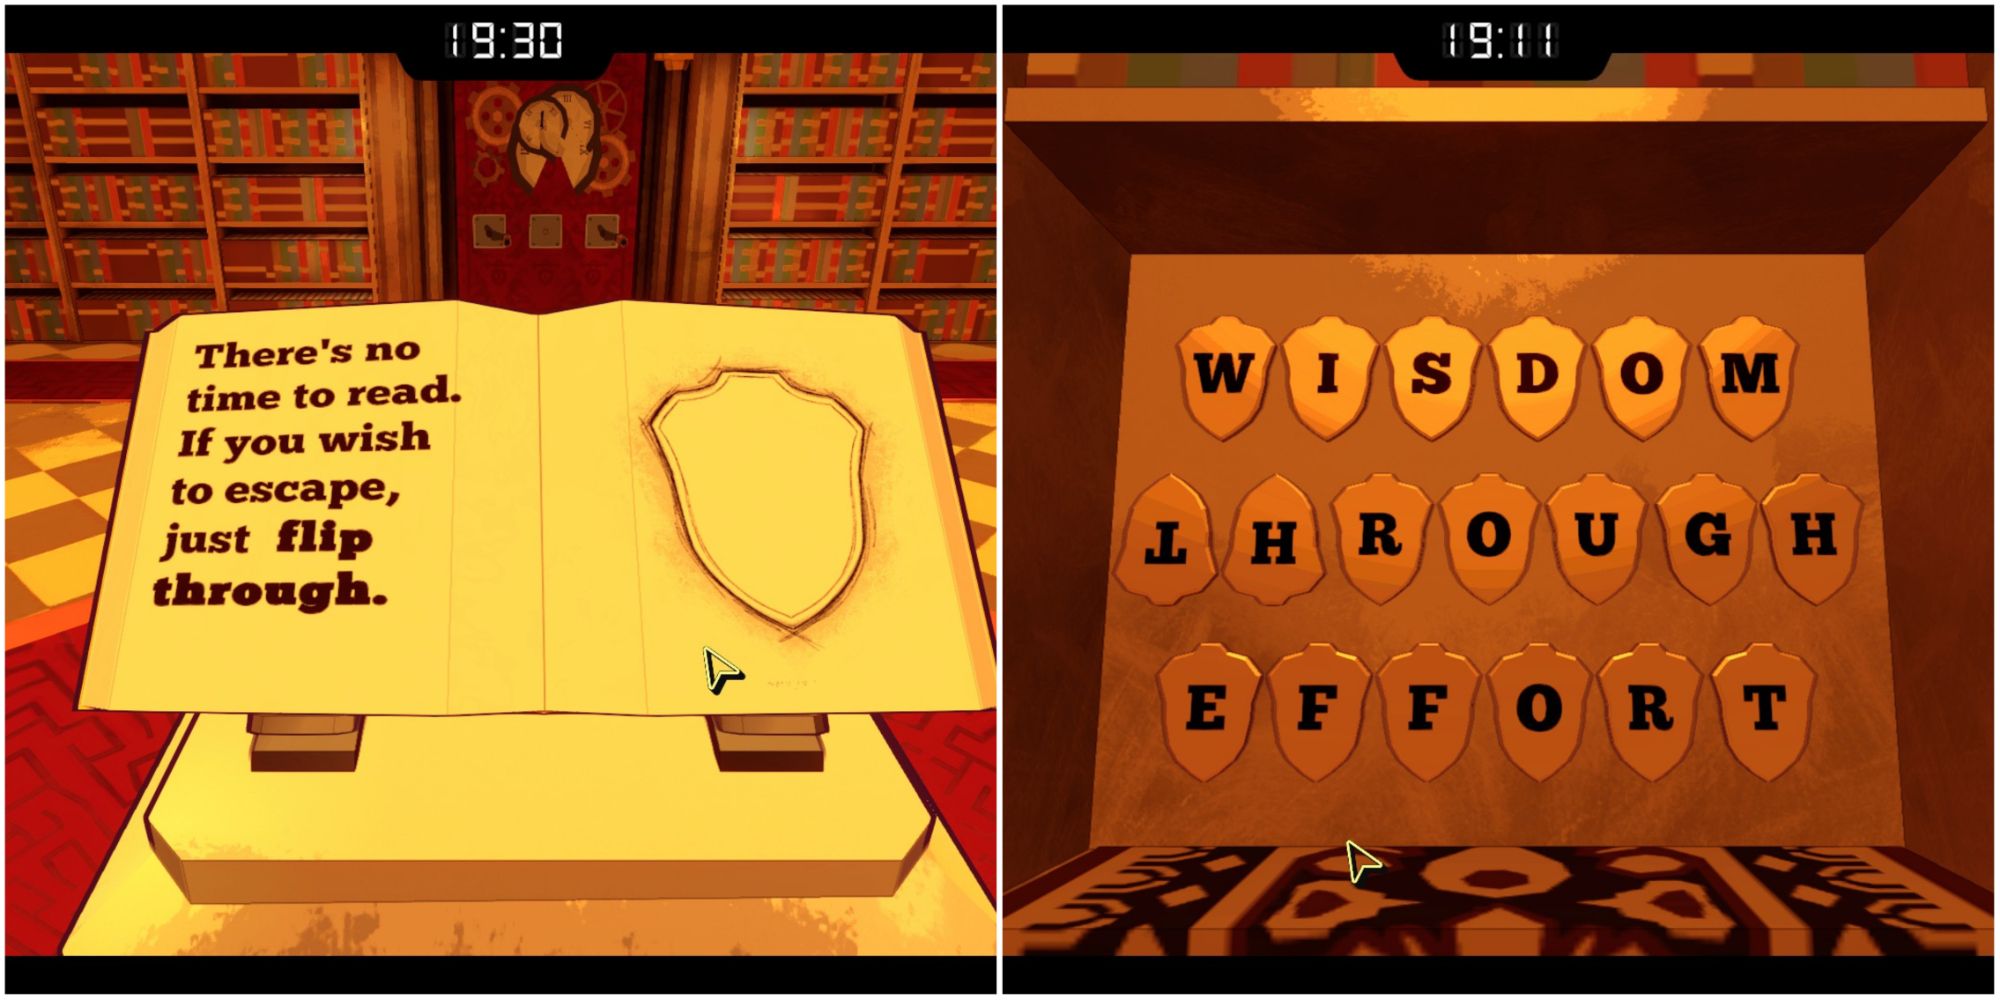
As you start the level, there is a very obvious book on a podium in front of you that you're supposed to read. Examine it, and you'll find a passage with the following phrase highlighted: flip through. On the back wall, just to the right, you'll find a small display of plaques that reads: Wisdom Through Effort.
Interact with the display and click on the plaques to flip them. As you'd expect, flipping only the middle word, 'through,' is the key to this puzzle.
The bookcase will fall into the ground, revealing the secret exit. You'll need four Strange Tiles to unlock this route to safety, so let's get hunting.
How To Get The First Strange Tile
Go back to the spot you started the level and turn to your left; there's a door in the corner. Push it open and head down the stairs to find two lock puzzles. There's a locked box next to a plaque and some shattered glass right at the bottom of the stairs, and a locked chest in the room just to the right.
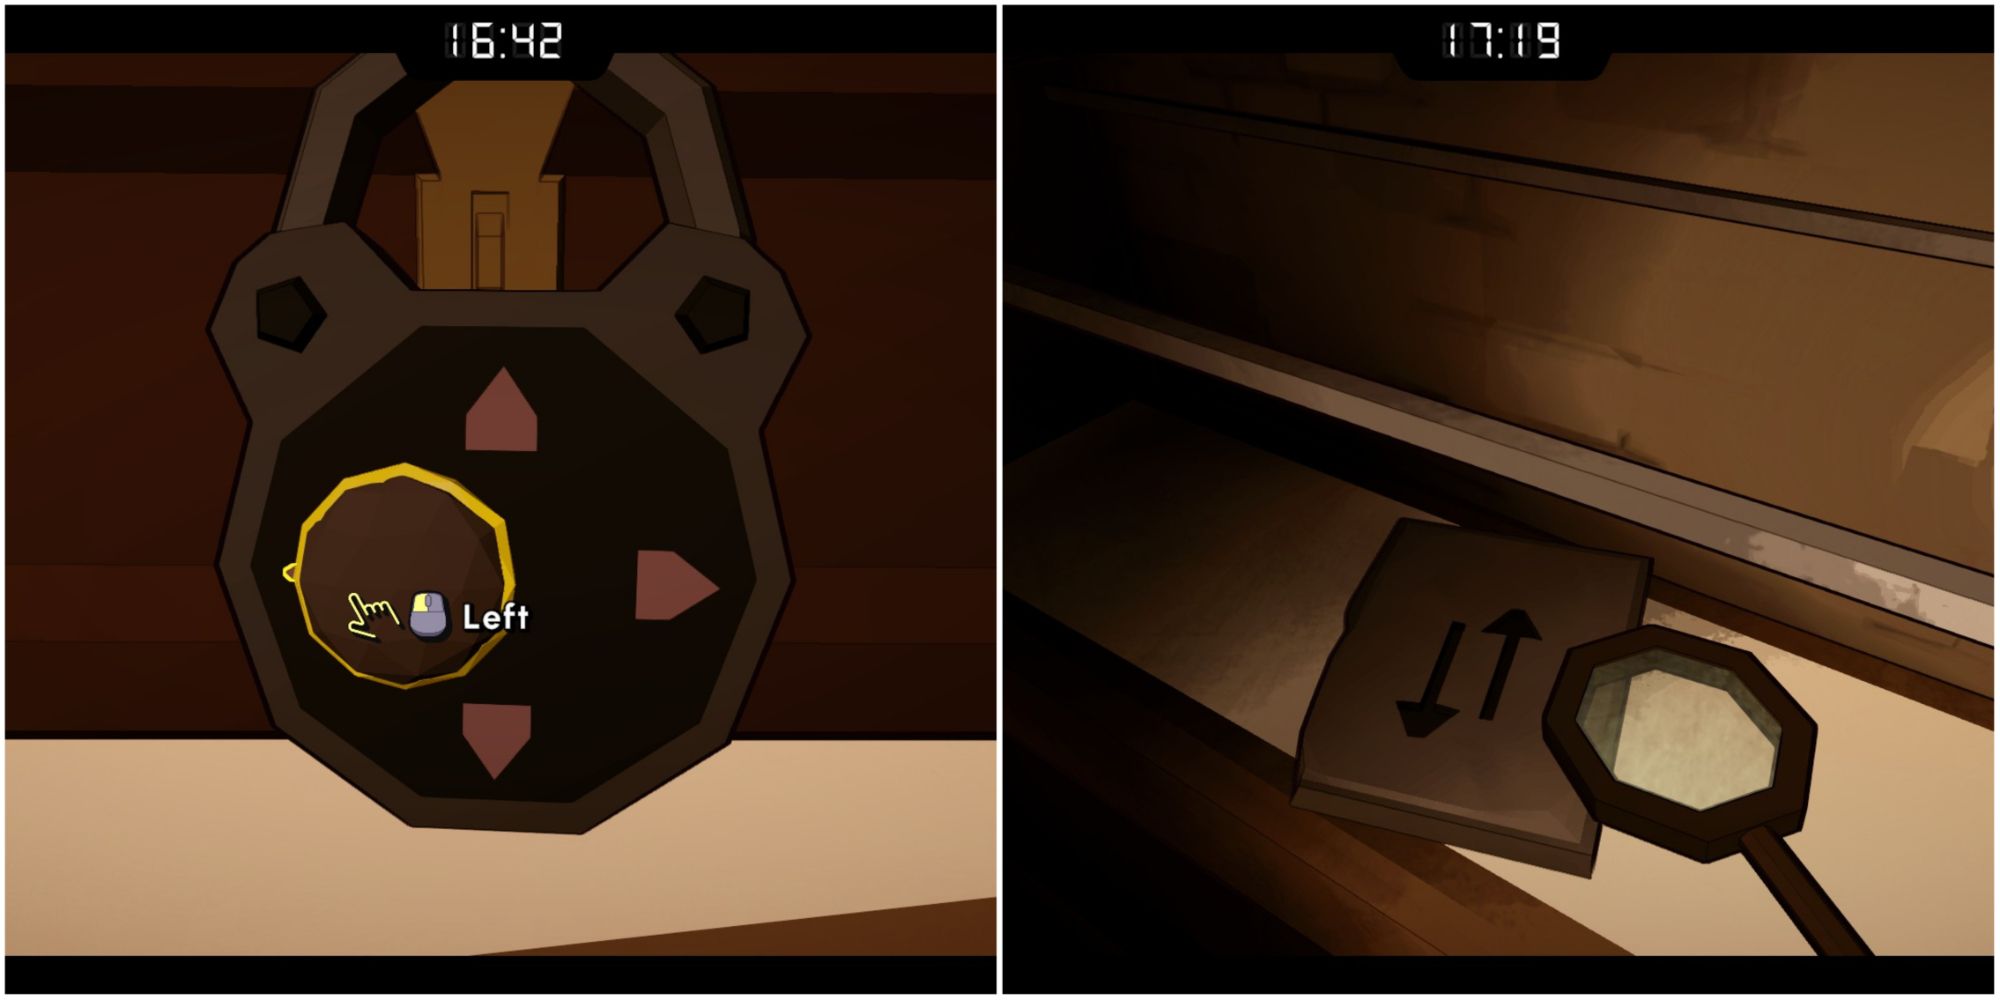
Examine the plaque that has two arrows on it - you may have noticed very similar plaques in the main room of the library in a smashed display case. In any case, head back to that display case and make a note of the arrows on the plaques, as well as the missing space. Mentally place the spare plaque into that space, and you get the following code: Right, Right, Up, Left, Down, Up, Left, Left.
Use this code on the arrow lock downstairs, and the case will open, letting you pick up a Crank Handle and an Hourglass. You'll use these to open up new puzzles.
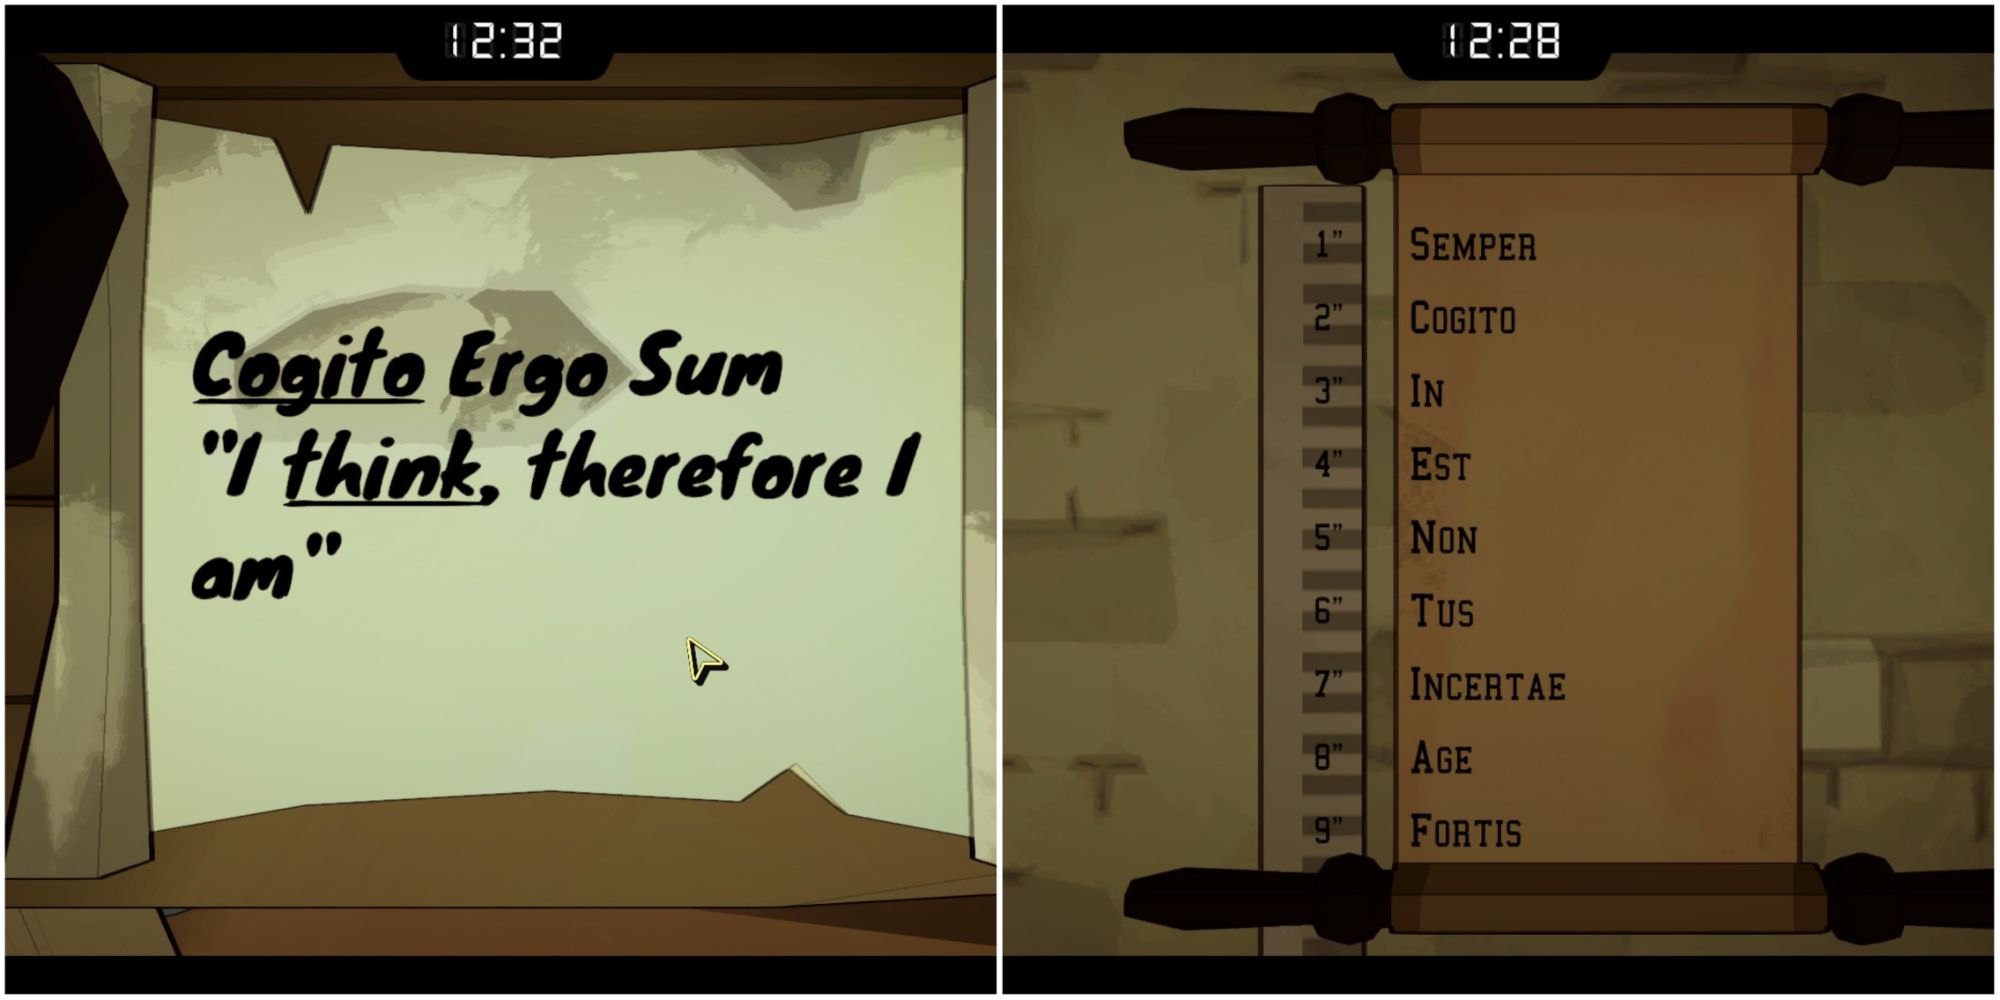
Now go into the room to the right of that puzzle. There's a painting with the words 'The Golden Rule: THINK Twice' on it, a scroll that reads 'Cogito Ergo Sum "I think, therefore I am"' with Cogito and Think underlined, and three wall scrolls next to rulers with Latin words on them. There's also a combination locked chest.
The solution to this puzzle is in a combination of these three hints. You need to find the numbers that correspond to the words in the phrase 'Cogito Ergo Sum' on the wall scrolls, counting the number that means 'think' (Cogito) twice.
With these clues all worked out, enter the code 2257 into the chest's lock. Inside, you'll find the first Strange Tile. Head back to the main hall, and the doorway will collapse behind you, signifying that you've finished everything you need to do there.
How To Get The Second Strange Tile
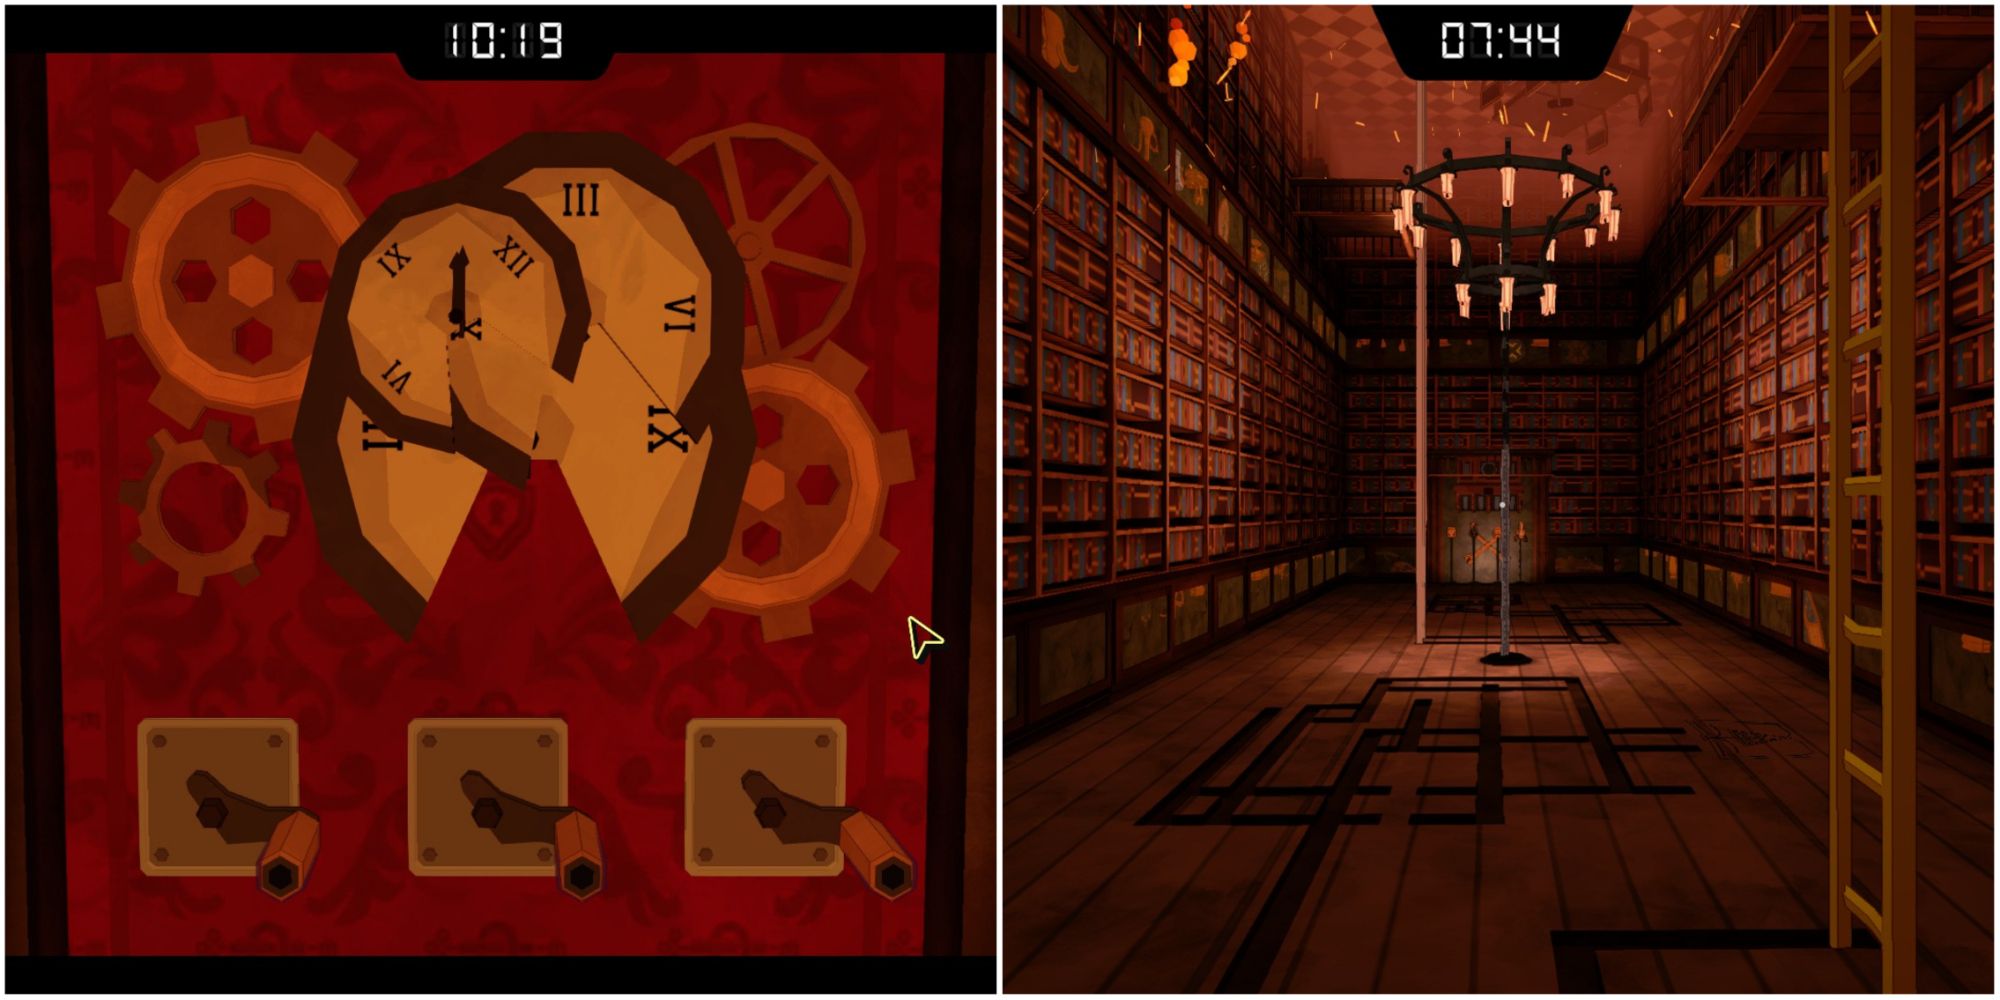
We'll head to the room that's currently blocked by a door full of broken clocks next. Interact with the door and place the Crank Handle into the center tile. Now perform the following actions:
- Click the middle crank until the largest clock has the six (VI) at the bottom.
- Click the right crank until the middle clock has the six at the bottom.
- Click the left crank until the smallest clock also has the six at the bottom.
With all three clocks in the correct orientation, a hole is revealed, and you can click the button behind it to reveal the next area. This room is oriented upside down and has two ladders inside it. Move the ladders by interacting with them, following the grooves in the ground in a way that leads them to their destinations. Check out the images below to see the correct route you'll need to take.
Climb up the ladder furthest from the door first and flip the lever. Climb back down and then head up the other ladder - you'll find your second Strange Tile at the top.
How To Get The Third Strange Tile
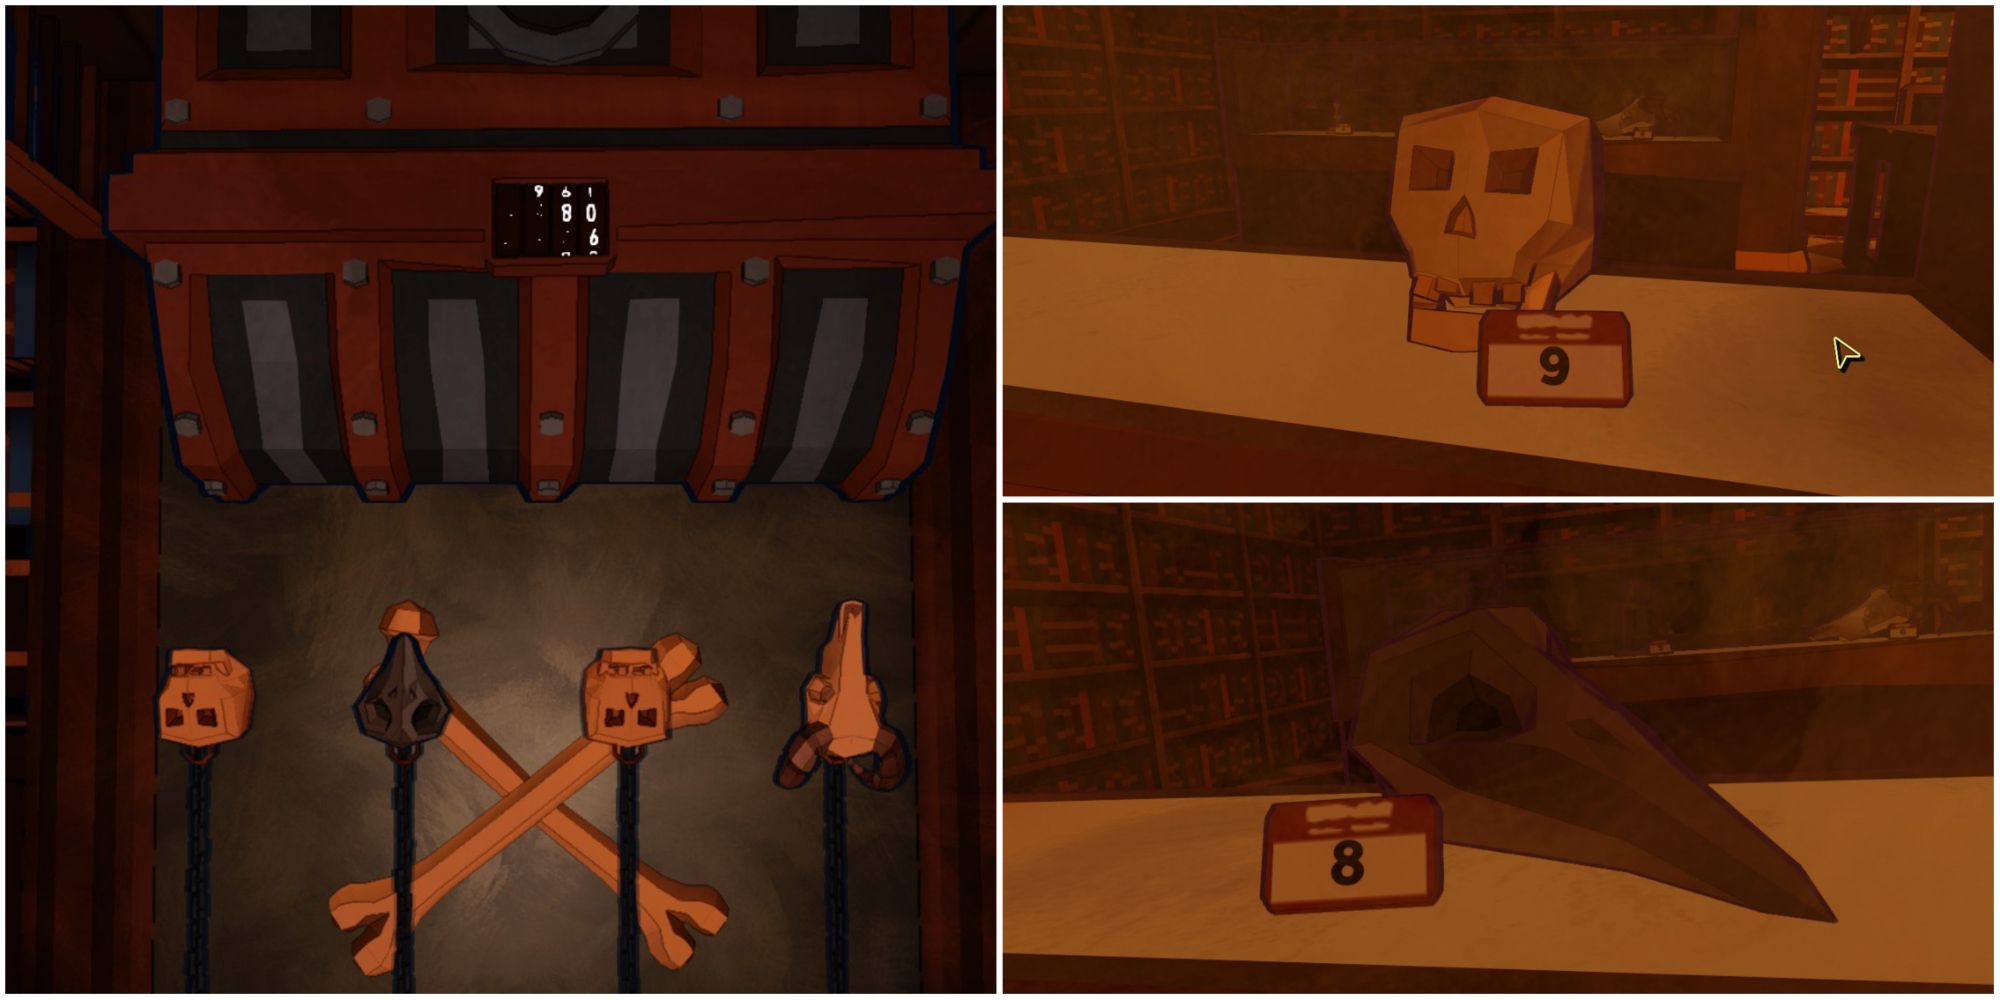
In the same room, take a look at the display at the back wall. There are four objects 'hanging' on wires and a chest locked with a combination lock. Make a note of the four objects: a human skull, a bird skill, another human skull, and a ram skull.
Head back to the hall and you'll be able to find those same objects in the display cases on the right-hand side of the room. The human skull is exhibit nine, the bird skull is exhibit eight, and the ram skull is exhibit six. Unfortunately, thanks to the chest and its lock being upside down, you're going to have to do some perspective flipping to work out the code - especially since all the helpful numbers have been rubbed off.
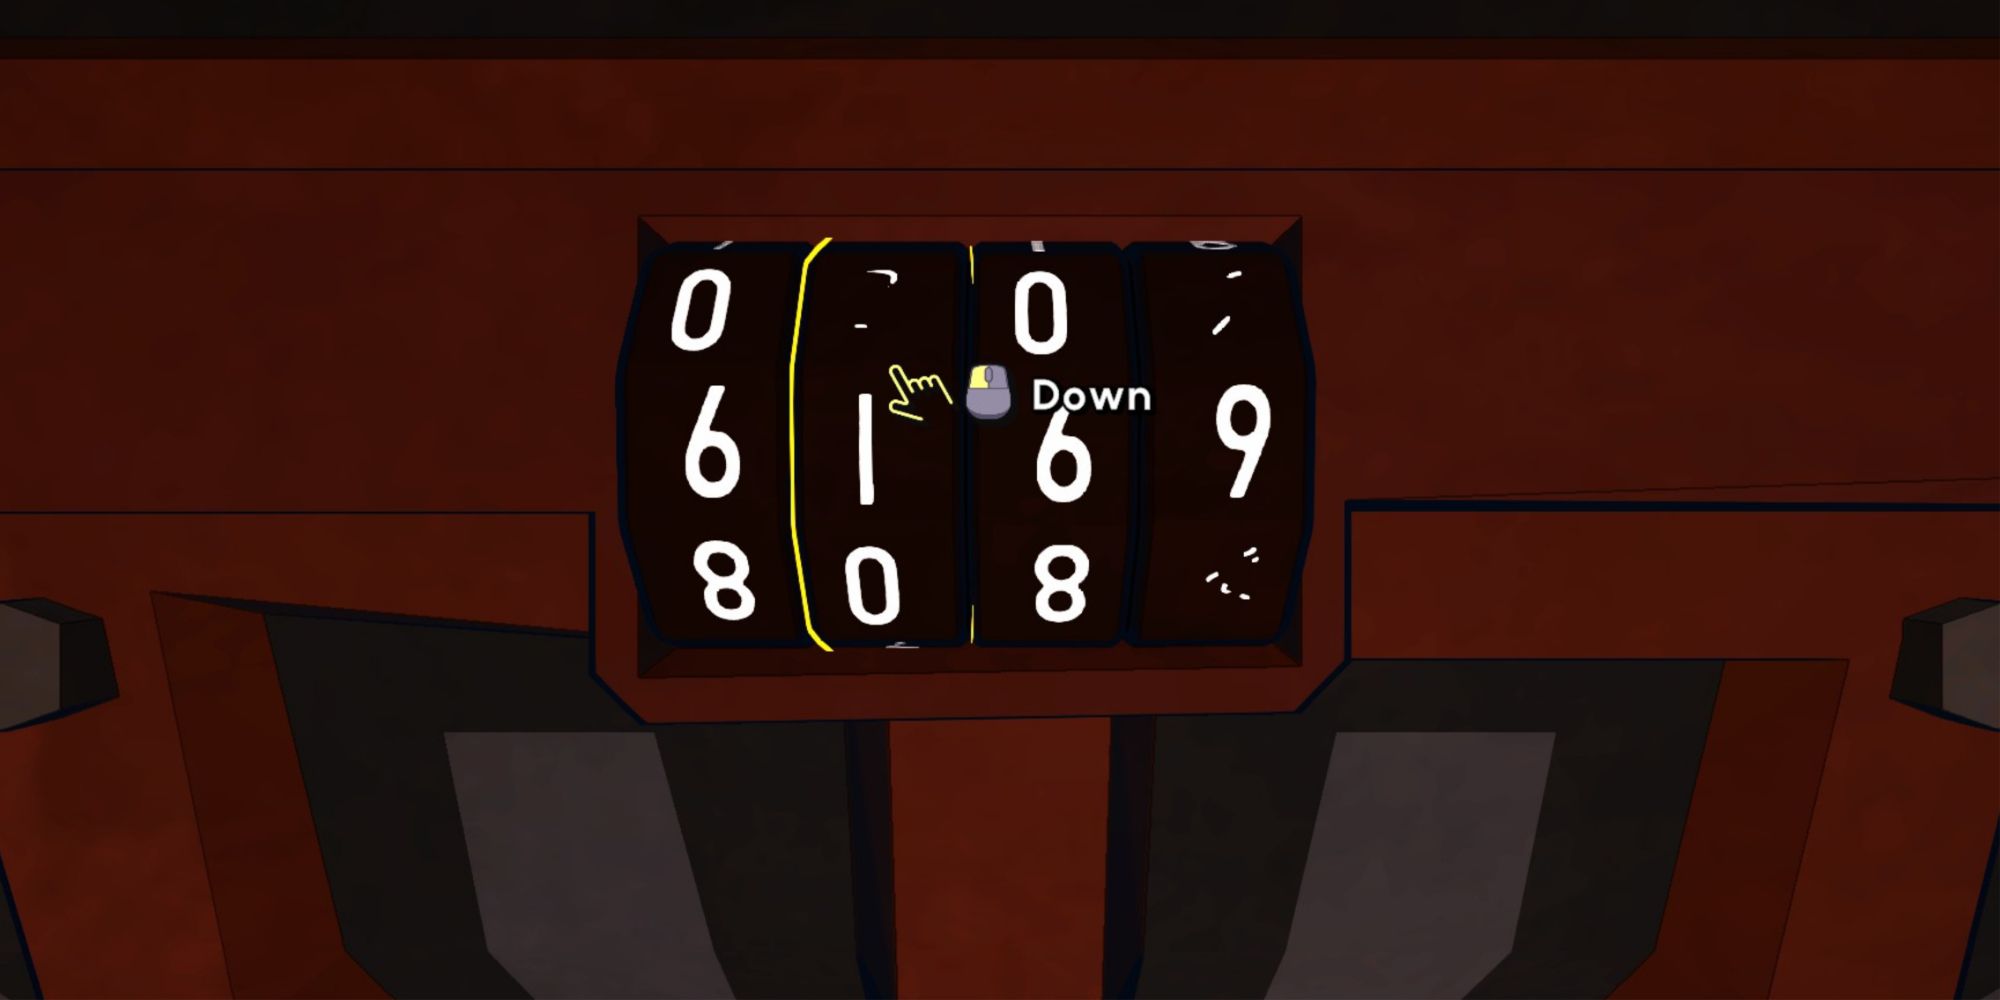
If we flip the display at the end of the room right-side up, it begins with a ram skull. This means the first digit of the code is a six. This means that from your perspective, it'll look like a nine and be on the right-hand side of the code.
From left to right, the code looks like the following number: 6869. When entered, the chest will open and you'll get your third tile. Only one left!
How To Get The Fourth Strange Tile
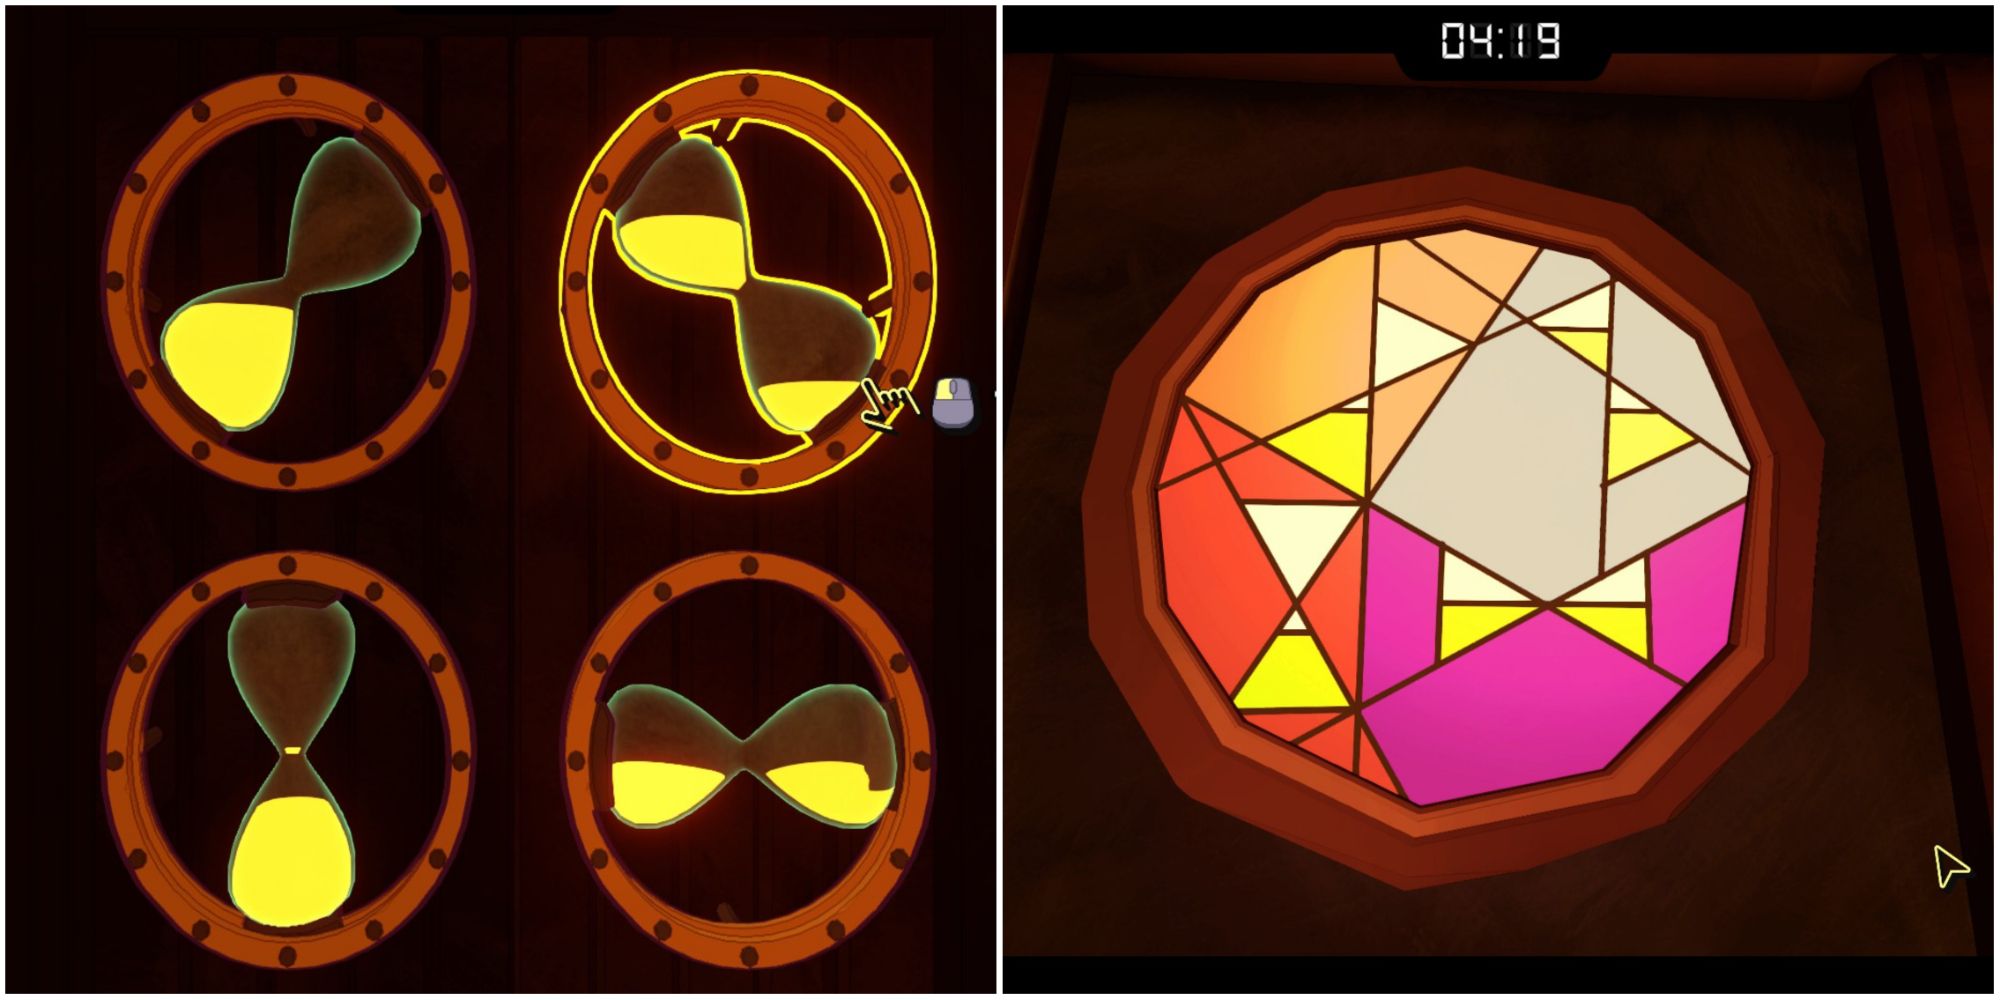
There's only one door to unlock now, the one with the hourglasses. Interact with it and insert the missing hourglass that you picked up earlier. To open this door, you'll have to make the four hourglasses match up with the stained glass window above the door.
- Turn the top-left hourglass until it is on a diagonal with neither bulb facing the center of the door.
- Turn the top-right hourglass until it is on a diagonal with neither bulb facing the center of the door.
- Turn the bottom-left hourglass until it is vertical.
- Turn the bottom-right hourglass until it is horizontal.
Of the four hourglasses displayed above the door, one of them is depicted while sand is still flowing. Leave this one, the one on the top-right, for last.
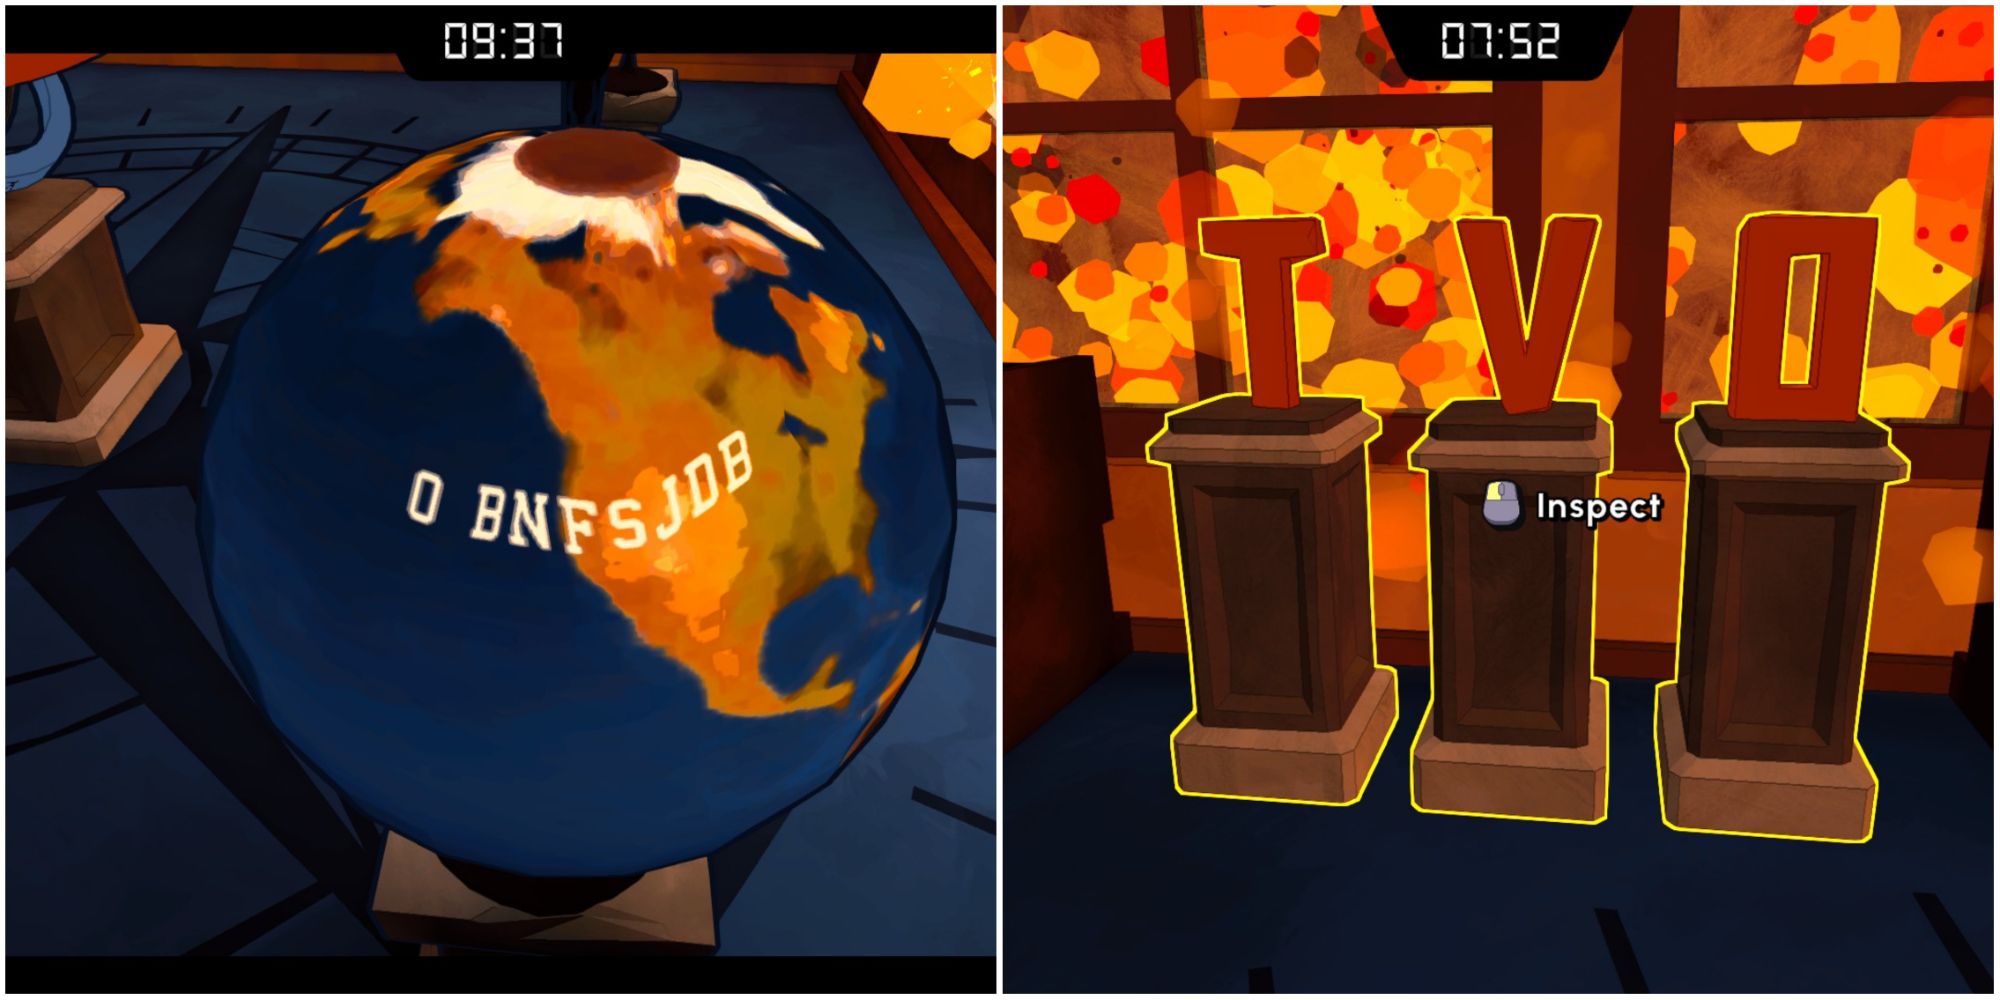
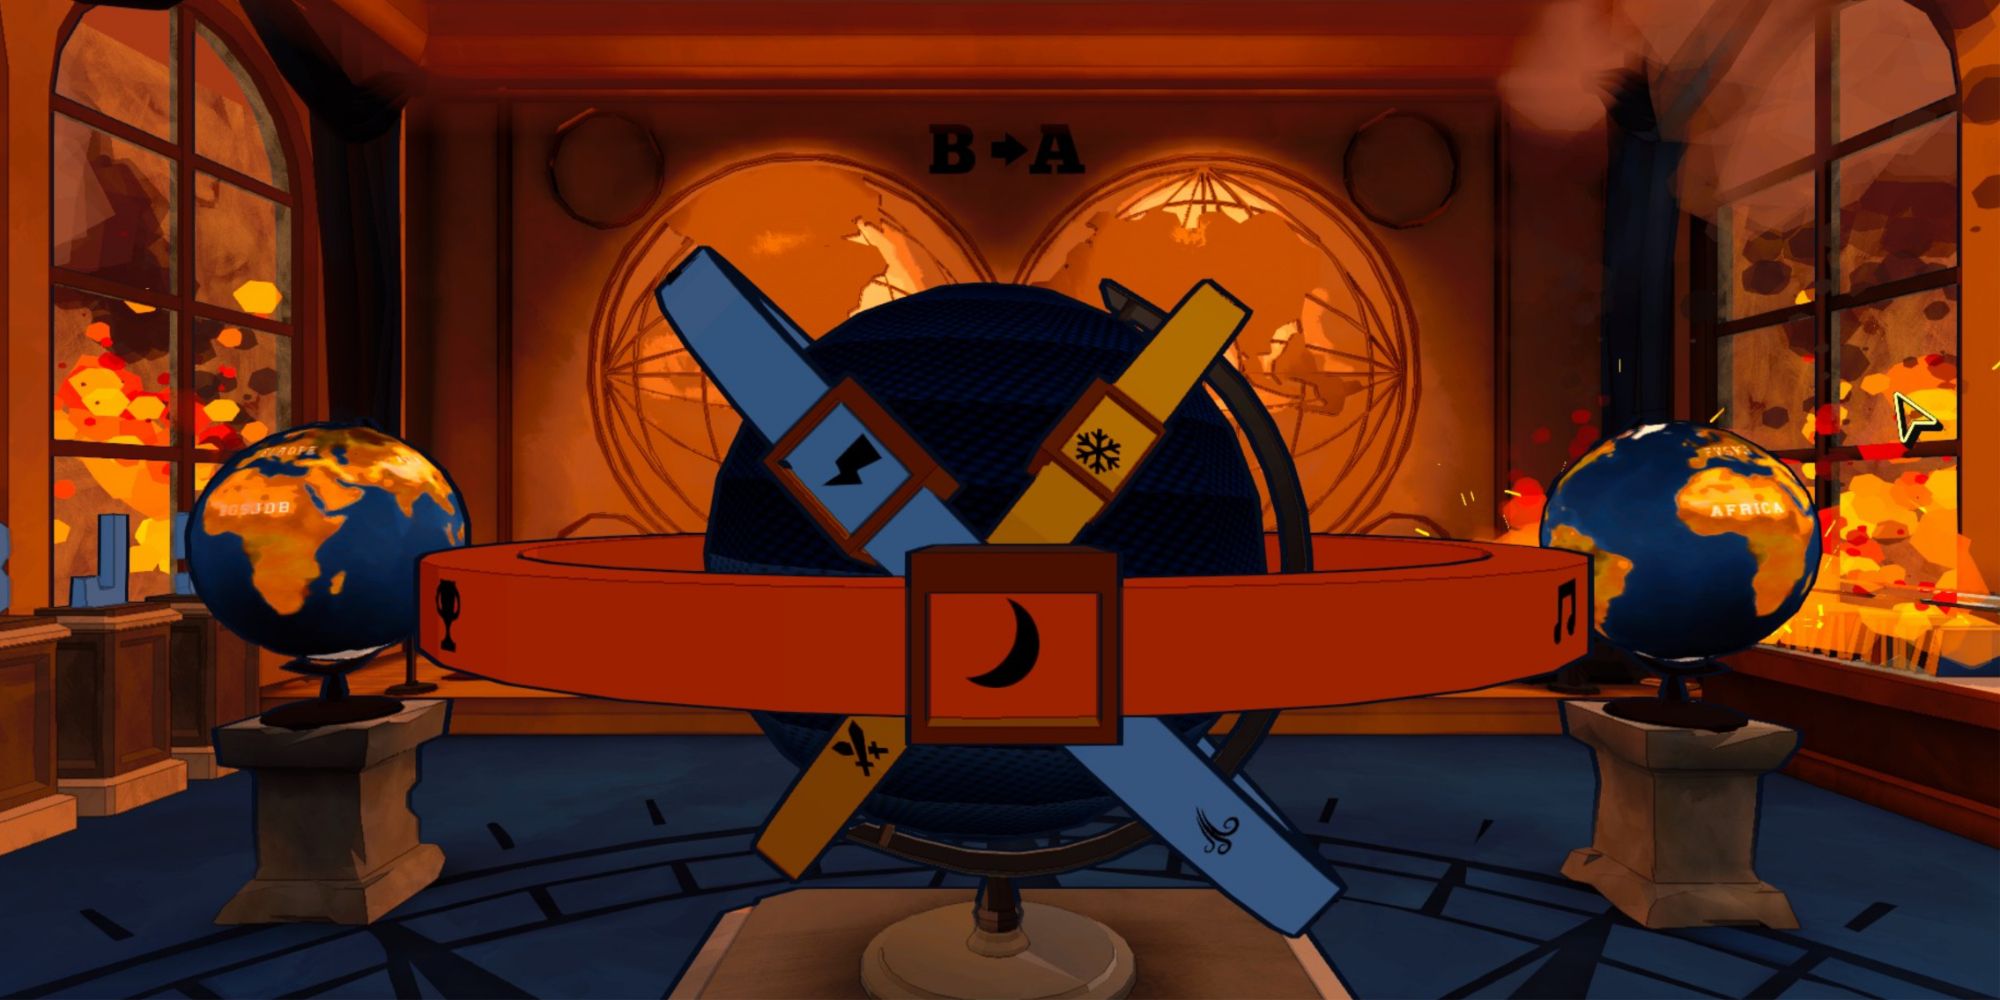
With that done, the door will open and you'll be able to enter a room with multiple globes in it. This room has a wordy, language puzzle in it that you can figure out by examining each of the globes and taking a look at the hint atop the mural on the back wall.
Basically, letters in this room are altered so that they are one letter after in the alphabet. To illustrate this, one of the globes has N AMERICA over North America. Another globe, however, has O BNFSJDB - every letter has been pushed forwards one place in the alphabet.
With that rule established, check out the three lettered displays in the room. There's an orange display that reads 'TVO,' a blue display that reads 'BJS,' and a yellow display that reads 'GJSF.' Using the rule, we know that these equate to 'SUN,' 'AIR,' and 'FIRE,' respectively.
Interact with the globe in the center of the room. Clicking on the rings will change the icon displayed on them. You need the colored ring icons to match the colored letter displays:
- The orange ring should display a sun.
- The blue ring should display wind.
- The yellow ring should display fire.
The globe opens up and reveals the final Strange Tile.
How To Escape The Burning Library
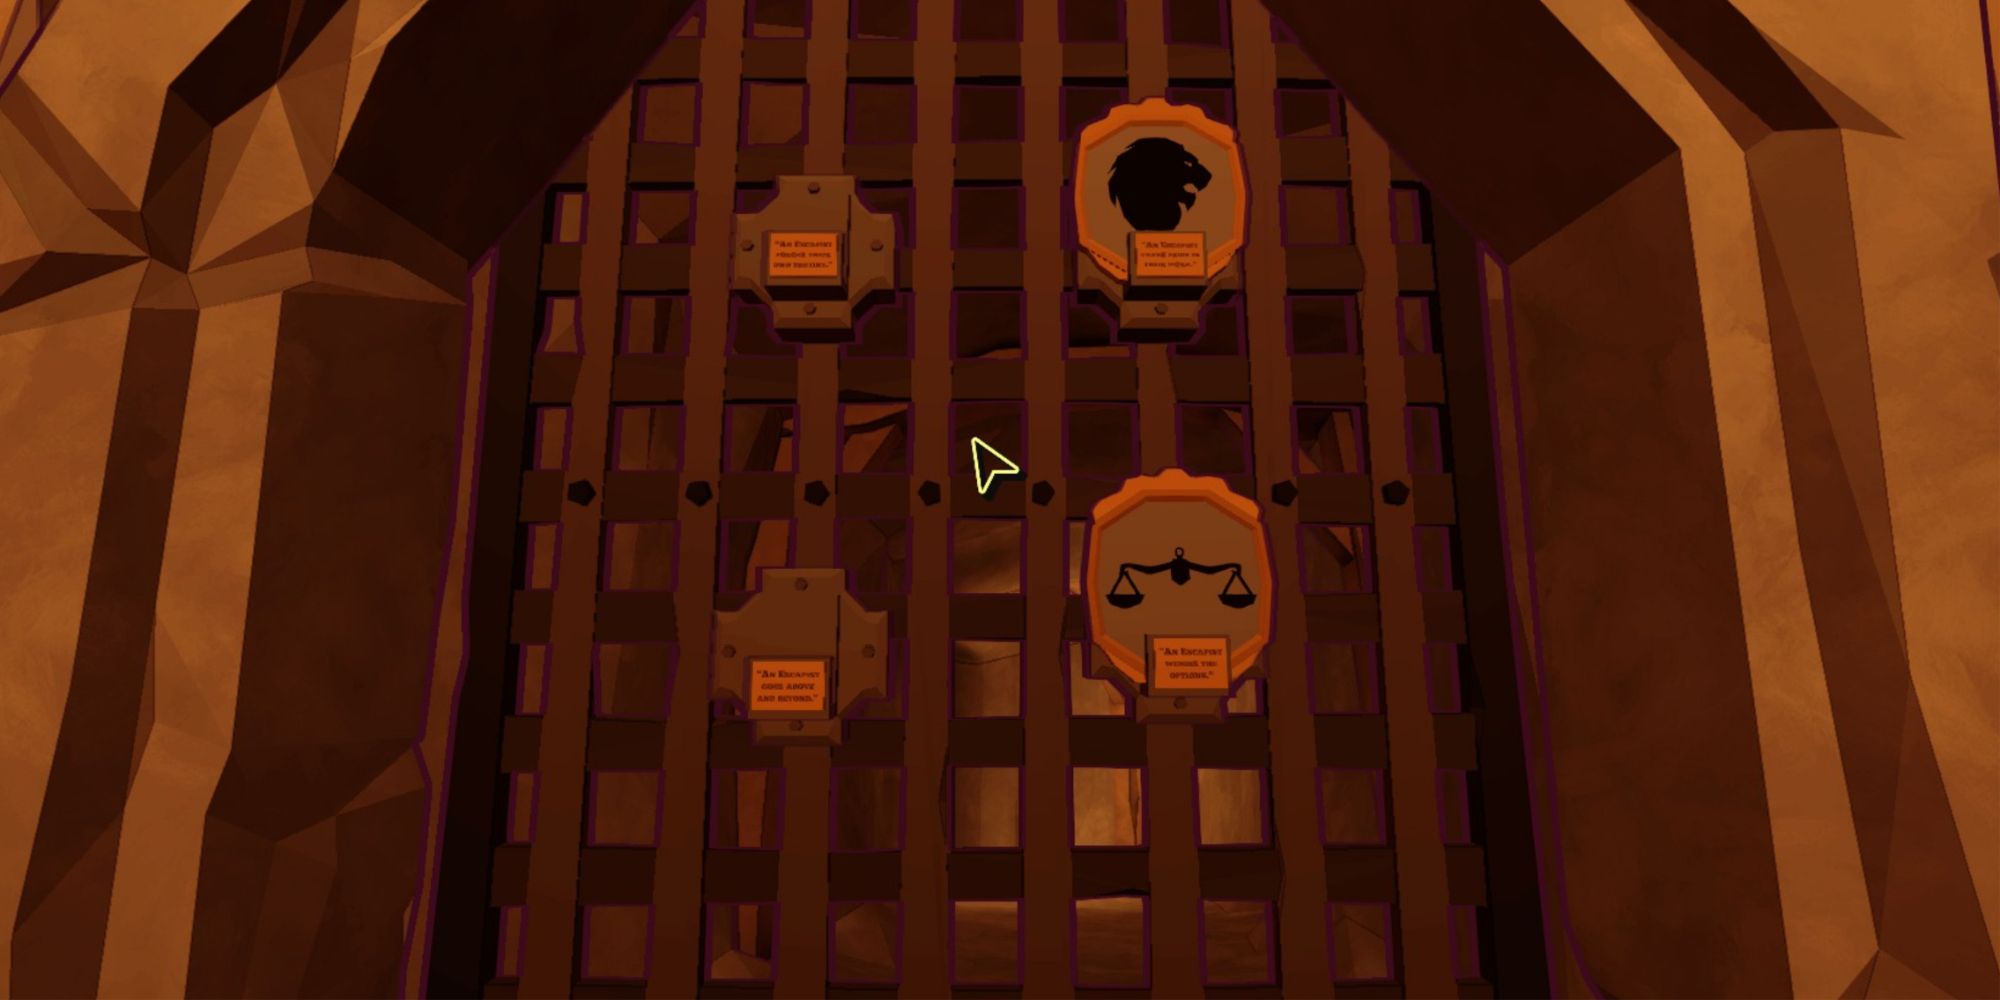
Head back to the secret exit. It's now your task to place the four Strange Tiles in the correct spots. Each slot has a plaque underneath with a short phrase - use these as hints for the tiles, which all have icons on them.
|
Phrase |
Tile |
|---|---|
|
An escapist forges their own destiny. |
Anvil Tile |
|
An escapist takes pride in their work. |
Lion Tile |
|
An escapist goes above and beyond. |
Bird Tile |
|
An escapist weighs the options. |
Scales Tile |
With all four tiles placed, you're free to live another day.


