Throughout your pilgrimage journey with Yuna and the rest of her companions in Final Fantasy 10, you will visit many temples all over Spira in order for Yuna to earn new aeons. As part of this, you'll find yourself having to solve puzzles in the Cloister of Trials in each one and some of these can get rather tricky.
Solving the puzzles is one thing, but there are also additional steps you can take to secure extra items in each trial — items relating to obtaining the aeon Anima later in the game. We have the solution of each temple's Cloister of Trials just below, including instructions on how to get the Destruction Sphere and hidden treasure in each one too so you don't miss out on Anima.
Note: If you have already done some of the temples and missed the Destruction Sphere items, you can simply return to that temple and do the trial again. Be warned though, revisiting these areas later in the game means facing some Dark Aeon bosses in some temples.
Besaid Temple Cloister of Trials
- Examine the glyph at the rear of the first room. This will cause the glyph on the wall to your right to react.
- Examine this second glyph to open a new passageway.
- Go down the stairs and examine the Glyph Sphere on the wall. (You'll get a brief intro about spheres here.)
- Put the Glyph Sphere into the door at the bottom of the stairs to open the door.
- Take the Glyph Sphere from the now open door.
- Carry it down the passageway and insert the Glyph Sphere into the next recess you come across. This will open a room with a Destruction Sphere, but leave it for now.
- Continue down the passageway and examine the writing on the wall opposite the pedestal to open a new room.
- Go inside and pick up the Besaid Sphere.
- Take the Besaid Sphere and put it in the pedestal to open another room.
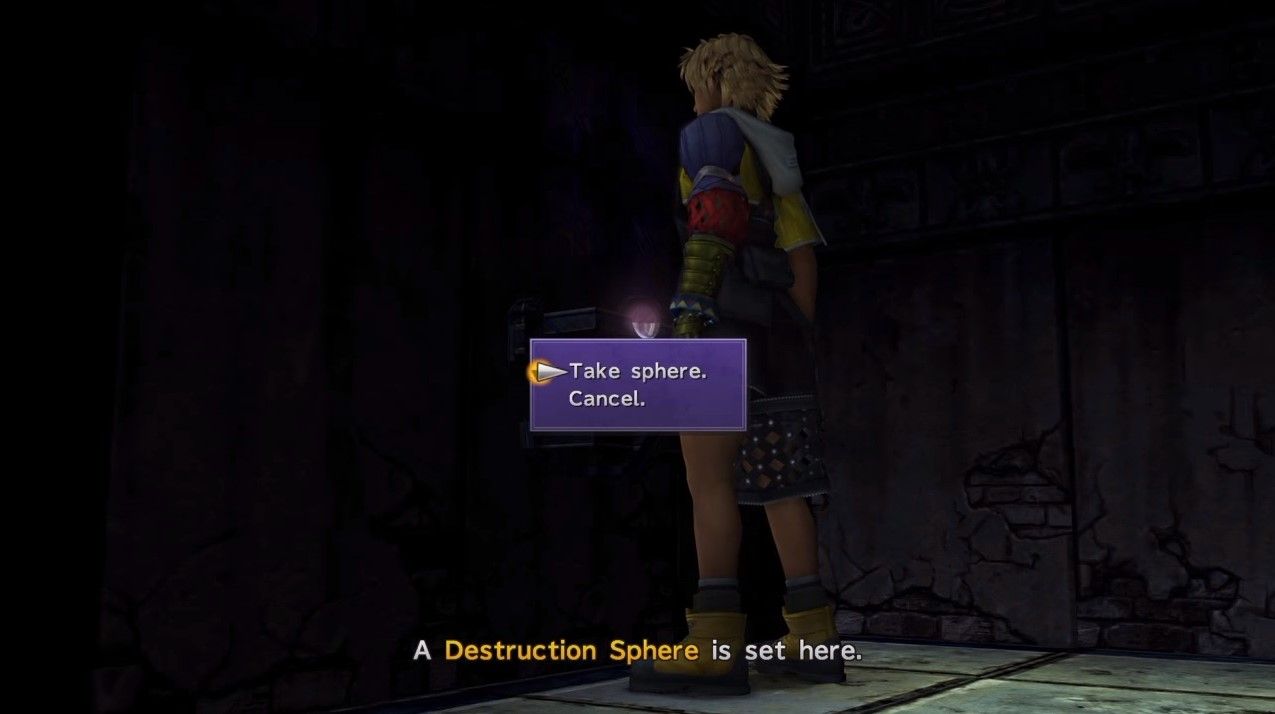
- Head back to the Destruction Sphere and pick it up.
- Put the Destruction Sphere into the place where you found the Besaid Sphere. This opens up a new room at the end of the passageway.
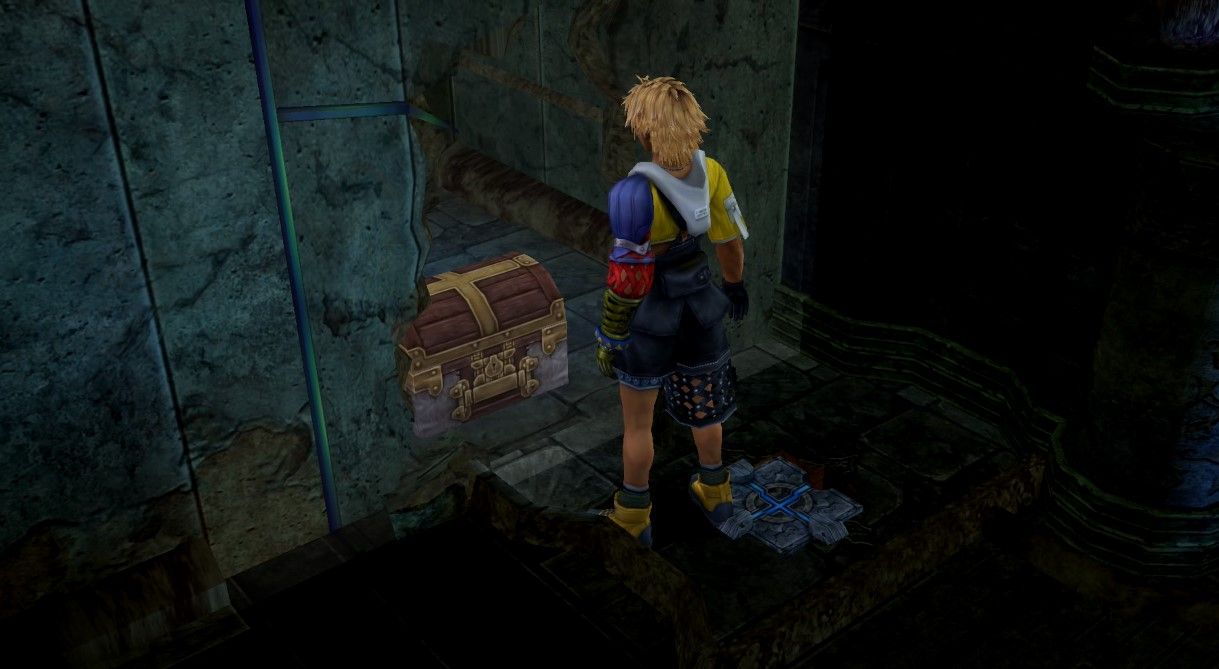
- Go into this new room and claim the Rod of Wisdom from the treasure chest.
- Head back to the pedestal and then push it into place (until it sinks into the floor). You're done!
Kilika Temple Cloister of Trials
- Take the Kilika Sphere from the pedestal on your left.
- Place the Kilika Sphere in the recess next to the door to make it catch fire.
- Remove the Kilika Sphere from the recess and head into the next area.
- Put the Kilika Sphere in the recess on the northern wall.
- After the glyph appears above the recess, remove the Kilika Sphere.
- Put the Kilika Sphere into one of the recesses on either the eastern or western wall.
- Take the Glyph Sphere from the pedestal in this room and insert it into the other wall.
- Touch the glyph on the northern door to open a new room.
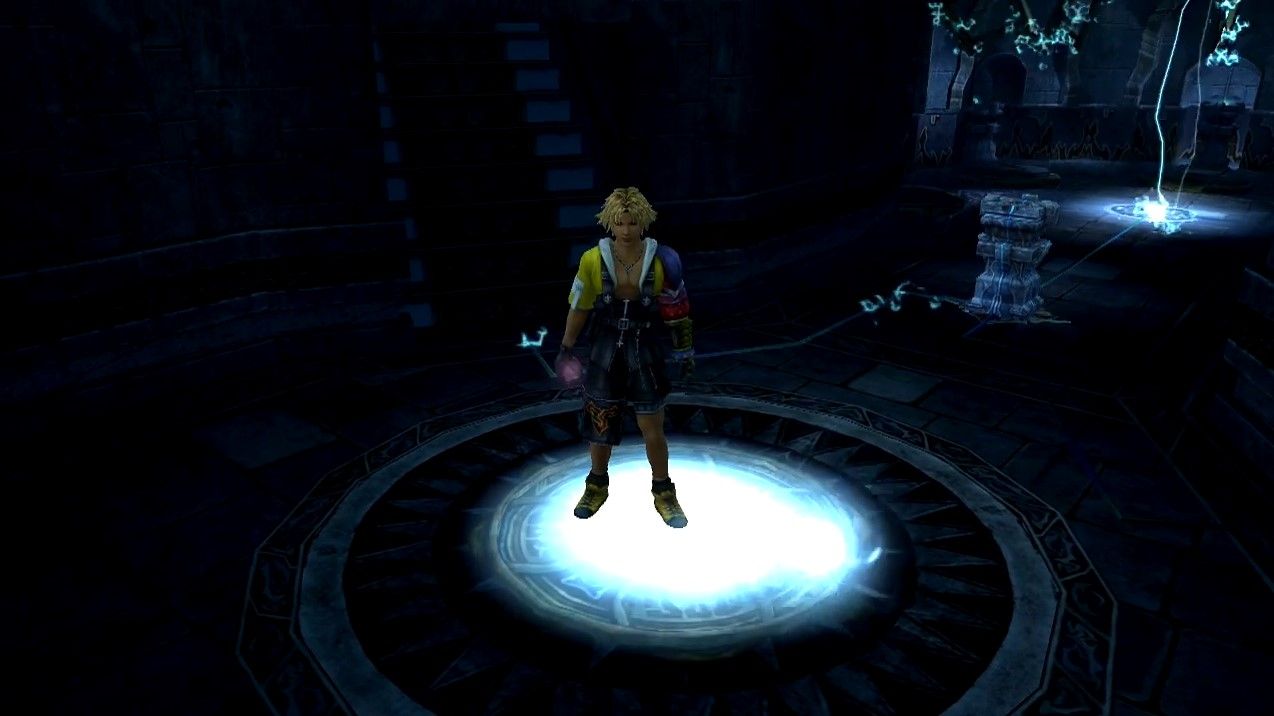
- In this room, stand on the glowing spot on your right to teleport the pedestal into this room.
- Take the Kilika Sphere from the wall on your right and put it into the pedestal.
- Go back to the last room and grab the Glyph Sphere.
- Return to the fiery room and put the Glyph Sphere into the wall on the right (where you just took the Kilika Sphere from). This opens up a new room.
- Push the pedestal with the Kilika Sphere onto the glowing spot and this will make this section of the floor disappear.
- Run down the stairs and grab this newly discovered Kilika Sphere.
- Put this Kilika Sphere in the recess in the northern wall in this room to open the door, but don't go inside.
- Head back to the previous door you opened on the other platform, run into the room and grab the Destruction Sphere.
- Go down the stairs and put the Destruction Sphere into the recess on the right wall here (where you took the Kilika Sphere from).
- This reveals a treasure chest, so grab the Red Armlet.
- Head back up to the northern wall and take the Kilika Sphere out of its recess to stop the fire, then head inside.
Djose Temple Cloister of Trials
- Take out the Djose Spheres from each side wall and place them into the recesses beside the double doors to open it up.
- Take both Djose Spheres out of the northern wall in this new room, and place them into the two recesses on the eastern path.
- Push the pedestal from the center of the room to the east, placing it beside the charged pedestal on the ceiling to super-charge the Djose Sphere on the pedestal.
- Grab the super-charged Djose Sphere and put it into the recess to the right of the door at the north of this chamber to open up a new passageway, but don't go in yet.
- Take both Djose Spheres out of the wall from the eastern passageway and put them into each side of the pedestal.
- Go to the western side of the room and step on the glowing spot to teleport the pedestal to the center once more.
- Push the pedestal through the north passageway and into the lightning. The pedestal will become suspended in the air.
- Jump onto the suspended pedestal and then jump again to get to the pedestal to the north.
- Push this pedestal into the wall.
- Jump back across the pedestal and return to the previous room where you need to step on the glowing spot once more to retrieve the pedestal.
- Take both of the Djose Spheres out of the pedestal and return them to the sidewalls from the very first room.
- Take the super-charged Djose Sphere from the right of the door before the lightning room and put it in the recess to the left of the door.
- The area where the pedestal was will now carry you up to the next floor when you step onto it.
- There are five pedestals here, so push each one into the wall to open up a stairway to the left of the screen. However, don't go there yet.
- Step on the glyph to travel back down to the previous level.
- On the western side of this room, examine the middle section of the wall that is glowing to reveal a glyph.
- Touch the glyph to open up the wall where a Destruction Sphere can be found.
- Grab the Destruction Sphere and travel back up to the next level.
- Put the Destruction Sphere into the pedestal in the center of the room to unveil a treasure chest to the right of the screen.
- Grab the Magic Sphere from the treasure chest, then head to the left and go up the stairs.
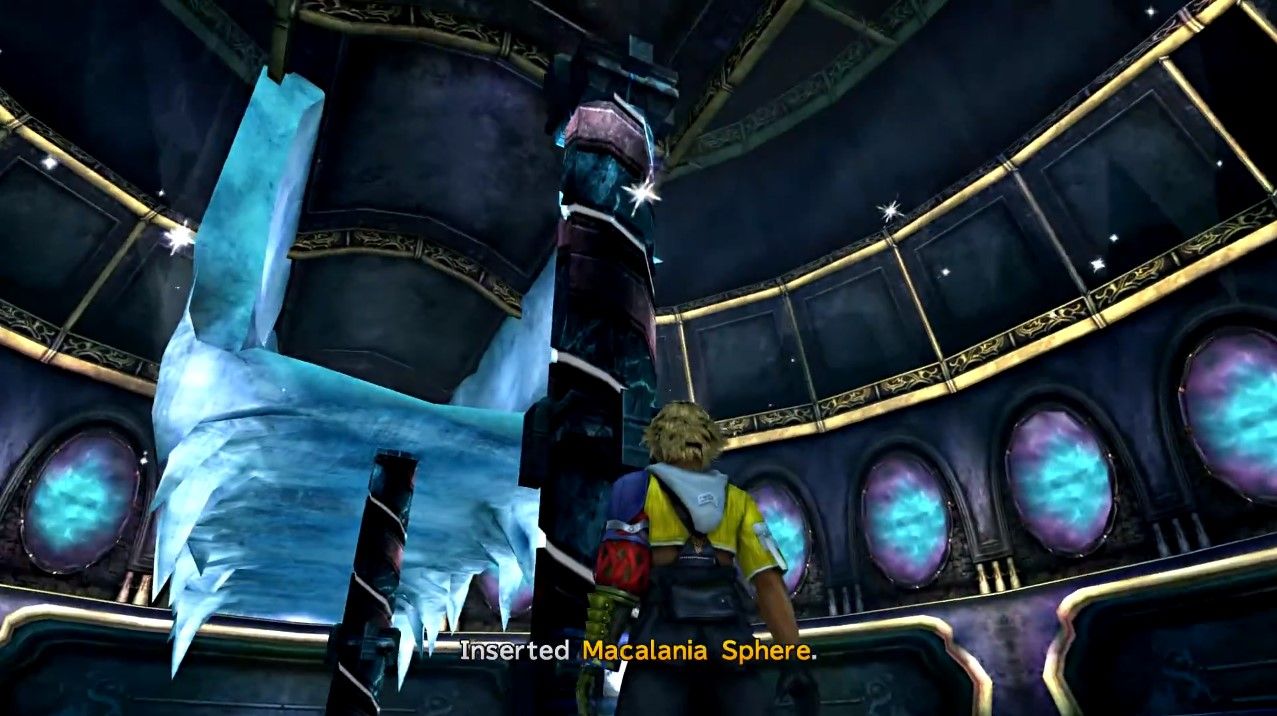
Macalania Temple Cloister of Trials
- Attempting to go through the ice tunnel will make the floor disappear and a slope will appear on your left.
- Go down the slope and grab the Glyph Sphere from the column in the middle of the room.
- Put the Glyph Sphere into the pedestal and then push the pedestal into the ice stalagmite on the right to make it disappear.
- Push the pedestal north, across the room, where it will make another ice stalagmite disappear and reveal a slope down to another level.
- Go down the ramp and take the Glyph Sphere from the pedestal and place it into the last recess on the left side of this passageway.
- This makes a section of the wall rise into the area above, so go upstairs and grab the Macalania Sphere that appears with this.
- Go back downstairs and place the Macalania Sphere into the pedestal.
- Push the pedestal towards the right of the screen to make part of the ice tunnel reappear.
- Go back upstairs and grab the Macalania Sphere from the right side of the screen.
- Go downstairs again and place the Macalania Sphere in the column on your left to make another part of the ice passage reappear.
- Head back upstairs and grab the Macalania Sphere from the top of the ramp and place it into the central column (where you originally took the Glyph Sphere from). This makes the final part of the ice passage reappear.
- Go up the ramp to the ice passage and step on the glowing spot to make the pedestal appear on your left.
- Take the Macalania Sphere out from the pedestal and then push the pedestal down the slope where it will go on to destroy another ice stalagmite.
- Go down the ramp and step on the glowing spot in the foreground of the screen to retrieve the pedestal.
- Put the Macalania Sphere into the recess on the right of the screen to make the first ice stalagmites reappear.
- Remove the Macalania Sphere from the center column and place it into the recess next to the ramp at the north of the screen to make the ramp re-appear.
- Grab the Destruction Sphere from the pedestal and take it down the ramp.
- Put the Destruction Sphere in the first recess to the left on this lower level.
- Part of the floor will disappear revealing a treasure chest with a Luck Sphere inside, so grab this.
- Go back upstairs and push the pedestal to the right to destroy the ice stalagmites again.
- Grab the Macalania Sphere from the recess on the right of the room and put it into the pedestal.
- Push the pedestal north towards the ramp so that it returns to the lowest level once more.
- Go downstairs and push the pedestal to the right of the screen again to make part of the ice tunnel reappear.
- Head back upstairs and grab the Macalania Sphere from the top of the ramp and place it into the central column to make the final section of the ice tunnel reappear.
- Head back up the slope to the highest level to continue.
Bevelle Temple Cloister of Trials
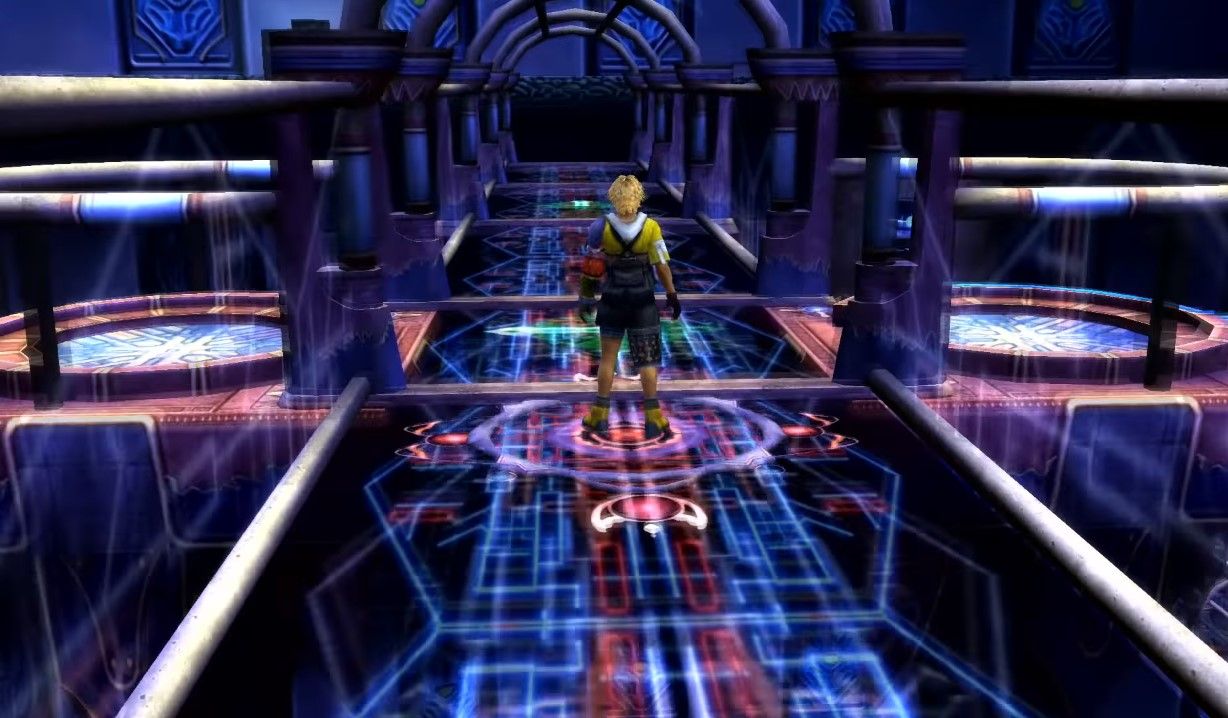
After pushing the pedestal onto the path you'll find yourself on a moving platform and the idea is to hit X/A while passing over glyphs, taking into account the direction in which the arrow is facing on each glyph as it changes.
Essentially, you need to time it right to hit the button when the arrow is facing the way you want. If you fail and continue off the edge, you simply restart, so don't worry.
- You want to aim to hit the button on the first glyph on this path when the arrow is facing to the right.
- At the very bottom of this path (you'll need to continue forward at one point) is a Bevelle Sphere, grab it and put it into the pedestal.
- Push the pedestal onto the path and ride back to the start. Once again, you'll need to confirm your path forward at one point.
- On the top path, once you are facing down the path again, you want to reach the second glyph when the arrow is facing to the right and press your button.
- Take a Bevelle Sphere from the pedestal and insert it into the recess here, which activates another part of the maze.
- Push the pedestal back onto the path and either go off the edge so you restart, or hit the arrow point backward on the last glyph to go back the way you came. You want to aim to get to the area opposite the last recess. So either turn left at the second glyph if you started over or turn right on the first glyph if you turned around.
- Take the Bevelle Sphere from the recess and put it into the pedestal.
- Push the pedestal back onto the path and go off the end so you restart.
- Take the right path at the first glyph again so you head back down a level.
- When you stop at the first glyph, choose to go left.
- Pass the first two glyphs and aim to turn right at the final glyph before the end.
- Take a Bevelle Sphere from the pedestal and insert it into the recess here, which opens up a new area (though it's currently blocked).
- Push the pedestal back onto the path and ride off the edge to restart at the beginning of this level where you will automatically stop at the first glyph and need to proceed forward.
- Aim for the second-to-last glyph and turn right.
- Grab the Glyph Sphere and then put it on the pedestal.
- Push the pedestal back onto the path, take the first right to get to the last glyph on the path, and take a right.
- Walk to the wall and insert the Glyph Sphere to open up the way to the Destruction Sphere.
- Grab the Destruction Sphere and put it on the pedestal, then push the pedestal back onto the path. Ride off the end to restart on this level.
- Aim for the second-to-last glyph and turn right to head towards where you found the Glyph Sphere. Insert the Destruction Sphere into this recess, which opens up a new pathway.
- Push the pedestal back onto the path and head towards the final glyph on this level and take a right.
- Grab the Bevelle Sphere and put it on your pedestal (you should now have two Bevelle Spheres).
- Push the pedestal back onto the path and ride off the end so you restart on this level.
- On the second glyph you come to (the first after the one that prompts you for a direction), take a right.
- Push the pedestal across this platform and onto the new path on the other side.
- Run up the stairs and grab the HP Sphere from the treasure chest on your right.
- Afterward, a glowing spot will appear, step on it to teleport the pedestal up.
- Grab a Bevelle Sphere and put it in the recess behind the pedestal.
- Push the pedestal onto the path to your left to ride to the remaining treasure chest and grab the Knight Lance.
- Ride back to the right, then continue running right to exit the trial.
Zanarkand Temple Cloister of Trials
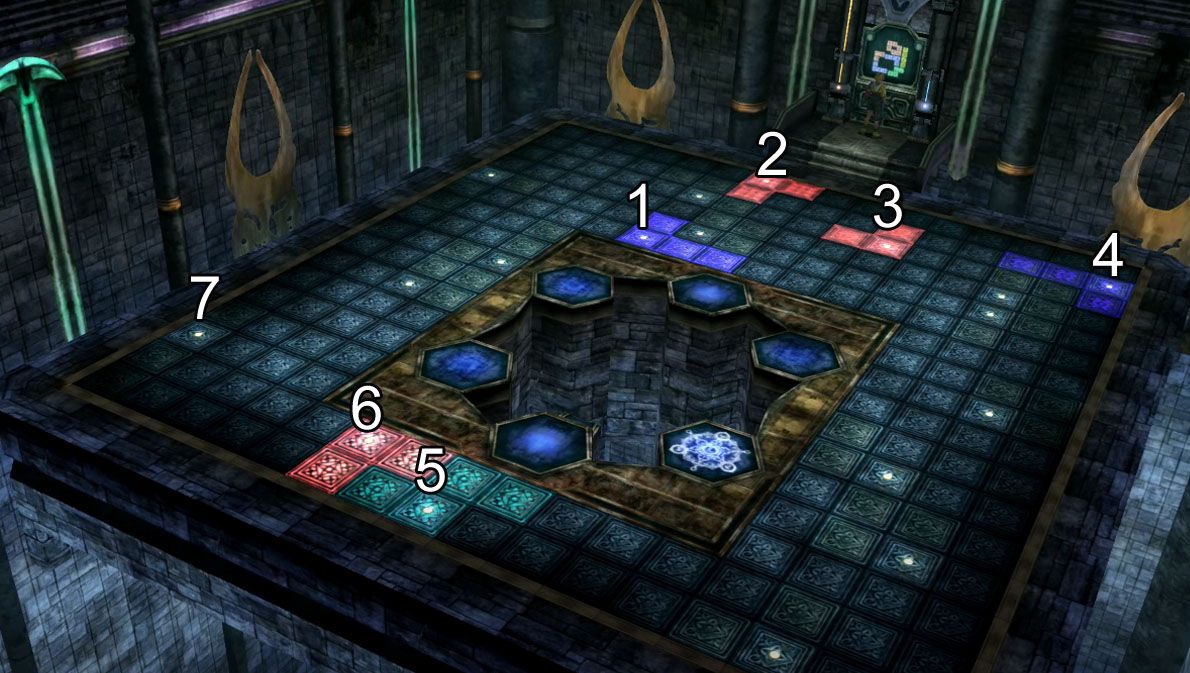
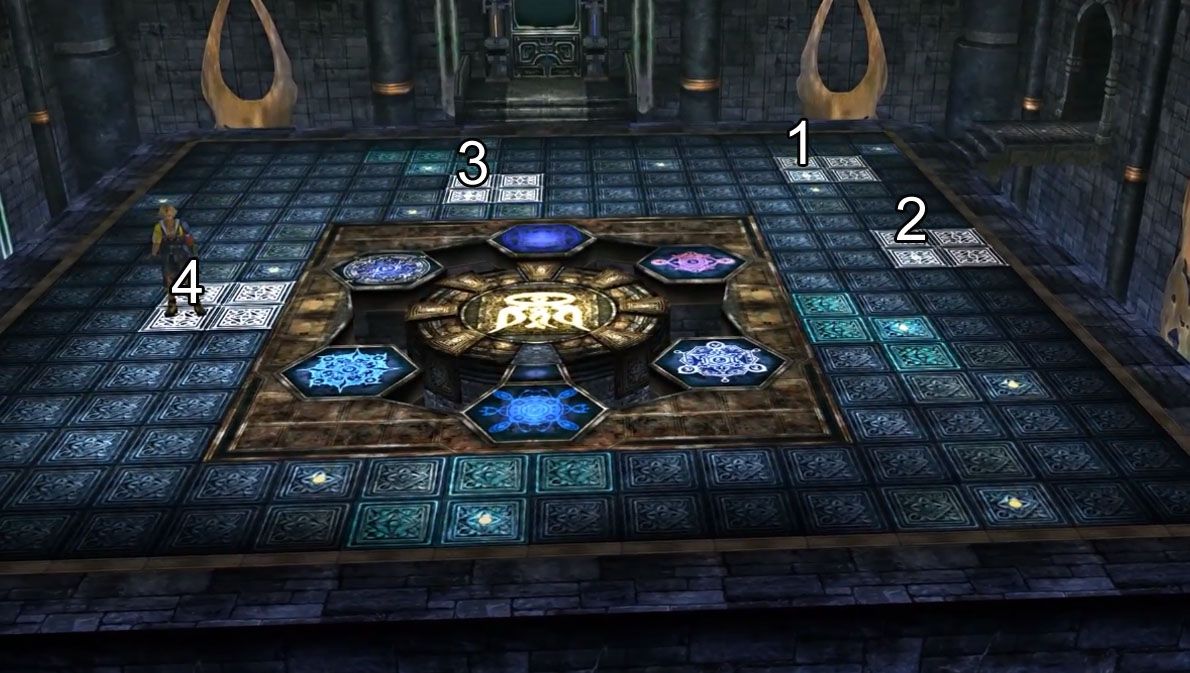
You will find yourself in a room with a Tetris-like solution displayed on the wall. Interacting with the solution wall will briefly show you the location of the shapes on the floor.
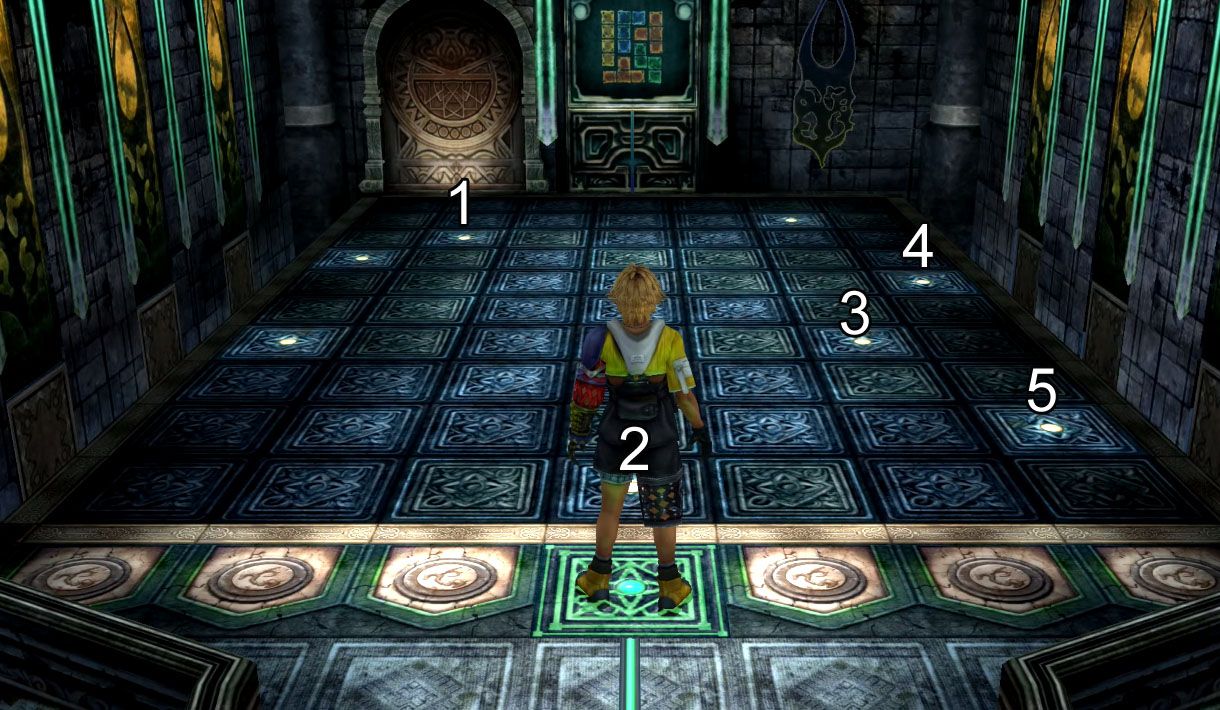
You need to step on the white dots on the floor to make the correct shapes appear — the shapes that are present on the wall. Stepping on the wrong spot will make you have to restart.
All of the spots you have to step on for the first puzzle are shown below:
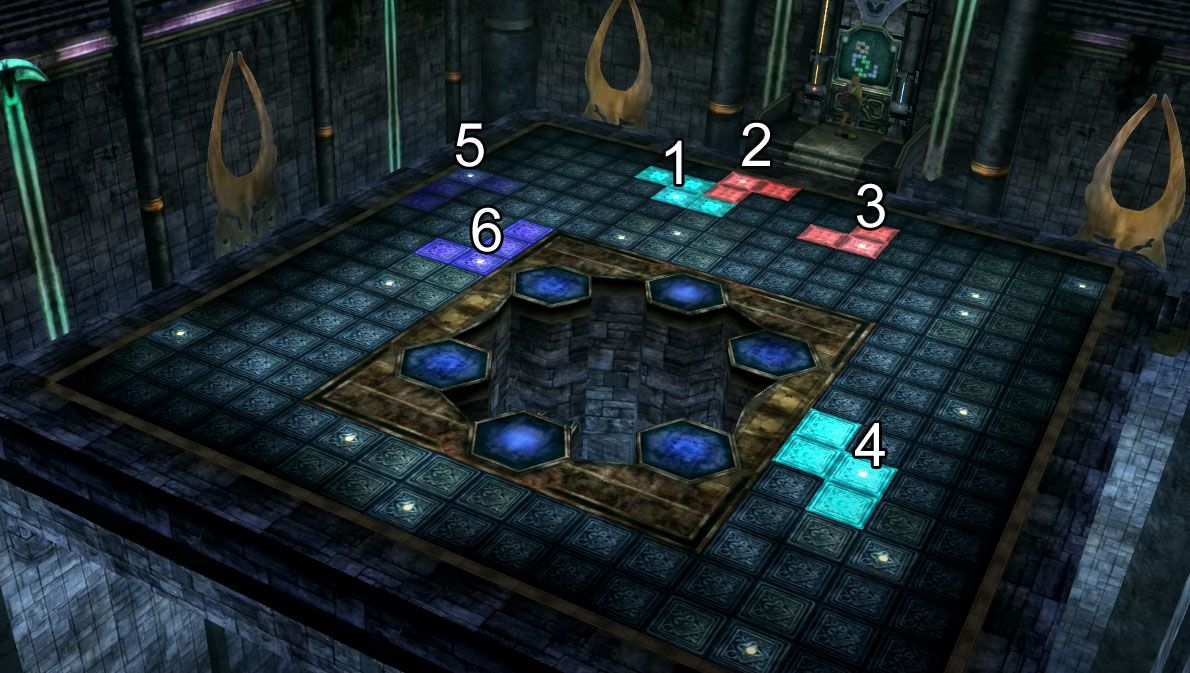
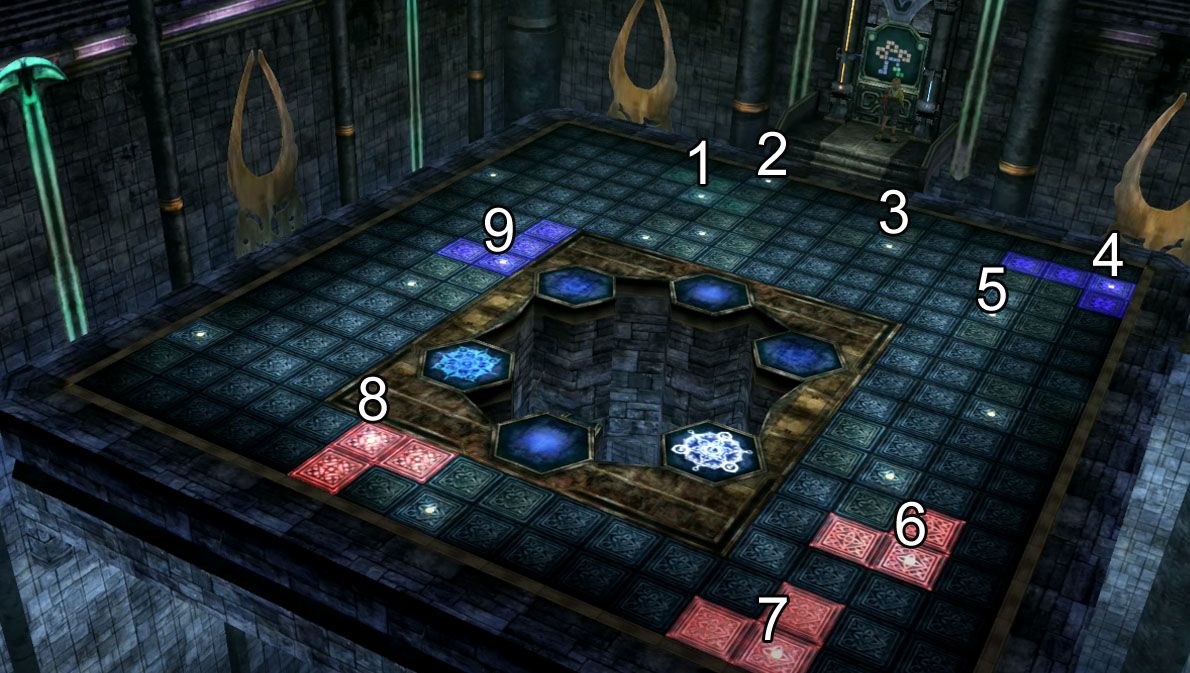
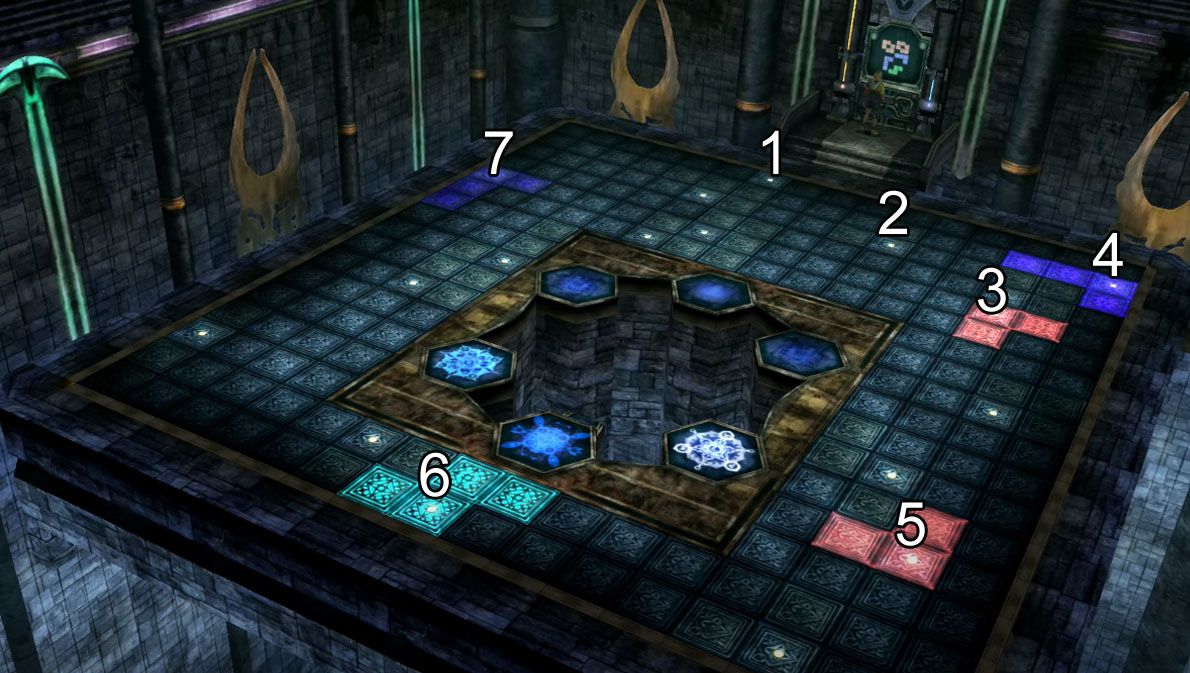
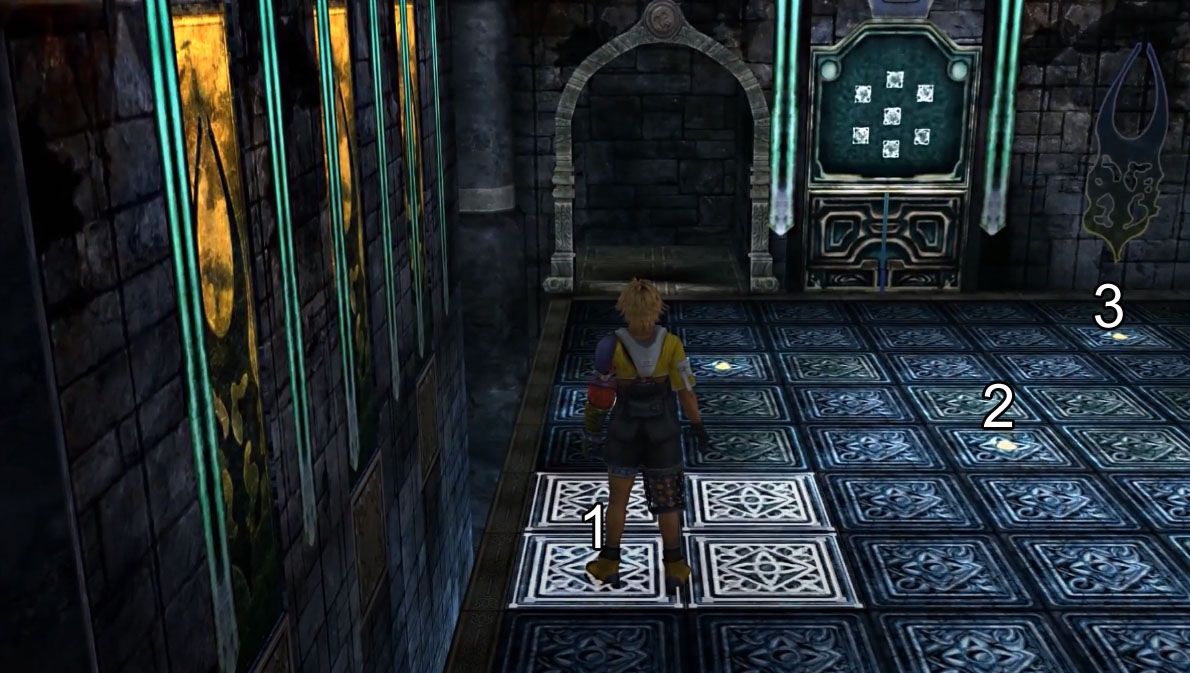
Afterward, six pedestals will appear and the door to the north will open. Four of the pedestals can be pushed into the wall and will display a new puzzle solution, after which you must head through the door and recreate the new shapes, just as you did before. After each puzzle is solved, a glyph will light up in the center of this room.
Here are all of the four pedestal puzzle solutions:
Top Left Pedestal Puzzle
Bottom Left Pedestal Puzzle
Top Right Pedestal Puzzle
Bottom Right Pedestal Puzzle
Once you have solved all four pedestal puzzles, you can grab the Kilika Sphere and Besaid Sphere from the top of the second puzzle room and put them into the two center pedestals in the first room (the ones you didn't push in). This will make a save sphere appear, so save up and prepare yourself for a boss fight.
Zanarkand Temple Cloister of Trials Destruction Sphere and Treasure
If you were wondering where the Destruction Sphere and treasure were on your first visit to the Zanarkand Cloister of Trials, worry not. You can't get this until you have airship access, at which point you need to return to Zanarkand.
On your return, the puzzle solution screen is now displaying white squares, so you need to find all the white square shapes in both puzzle rooms.
White Squares in First Puzzle Room
White Squares in Second Puzzle Room
After doing this, the solution screen in the first room will open to reveal the Destruction Sphere. Grab it and then return to the second puzzle room and insert the Destruction Sphere to the right of the second puzzle room's solution screen. This will make the second screen reveal a treasure chest with the Magistral Rod.

