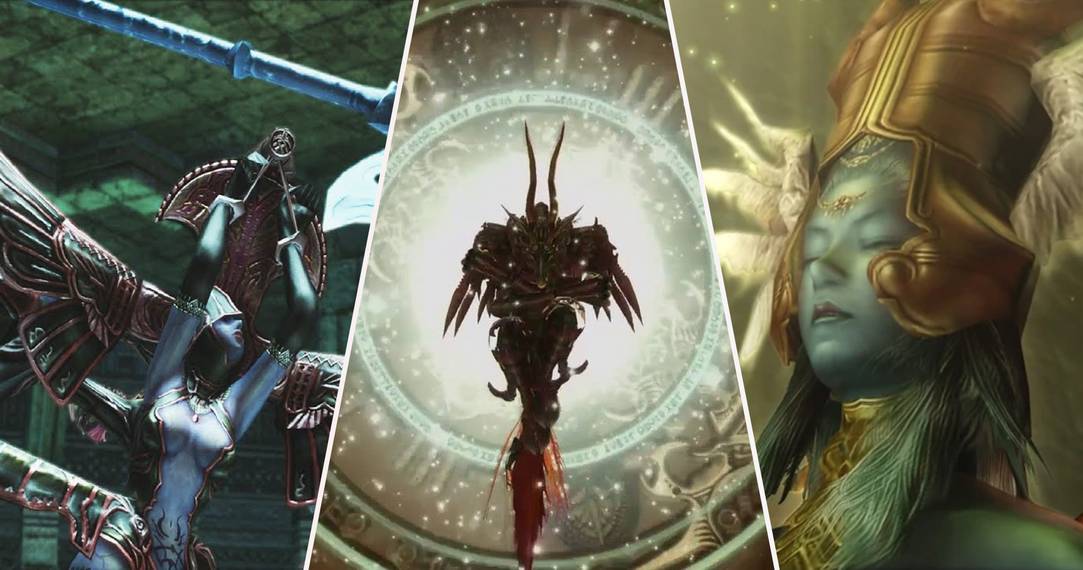
Final Fantasy 12 offers many longstanding Final Final traditions and features, one of which is of course the ability to summon creatures into battle to aid you in your fight. These creatures go by different names depending on the game, but in Final Fantasy 12 they are referred to as Espers.
There are 13 Espers in total, 12 of which are based on the zodiac signs. Five of these are obtained during the main storyline, but the other eight are entirely optional. Collecting all of the Espers will earn you the "High Summoner" achievement/trophy. Espers are encountered as bosses, and once defeated, their licenses can be purchased and attributed to a single character.
Belias, the Gigas

Belias is the first esper that players will obtain as part of the storyline. He is a level one Esper that can be found guarding the Dawn Shard at the very bottom of the Tomb of Raithwall.
Belias unlocks the following license boards:
- Foebreaker: Horology Technick
- Knight: Potion Lore 1
- Bushi: Libra Technick
Mateus, the Corrupt

Mateus is another level one Esper and is the second one that you will obtain by progressing the main storyline. Mateus is found guarding the Sword of Kings in the Stilshrine of Miriam.
Mateus unlocks the following license boards:
- Black Mage: Can equip Caldera and Volcano hand-bombs
- Shikari: Gil Toss Technick
- Knight: Can use the White Magicks Esuna, Cleanse, Curaga, and Regen
- Time Battlemage: +230 HP
- Uhlan: Magick Lore x2
Adrammelech, the Wroth

Adrammelech is an optional level one Esper that can be found in the middle of the Zertinan Caverns, in the Athroza Quicksands area. He only becomes available after completing the Tomb of Raithwall.
Adrammelech unlocks the following license boards:
- Black Mage: Can equip Fumarole and Tumulus hand-bombs
- Foebreaker: Battle Lore
- Shikari: Shades of Black Technick
- Bushi: Souleater Technick
- Time Battlemage: Can use the White Magicks Cura and Raise
- Uhlan: Battle Lore
- White Mage: Battle Lore and Souleater Technicks
Zalera, the Death Seraph

Zalera is an optional level one Esper that can be found in Terminus No. 7, in the Barheim Passage. Zalera is available after you have completed the Tomb of Raithwall but in order to reach the area of Barheim Passage where Zalera is, you will need the Barheim Key.
Additionally, you will only have five minutes to defeat Zalera, after this time, the battle will be a failure and your party will be returned to the Terminus 7 adjunct and you will need to try again.
Zalera unlocks the following license boards:
- Black Mage: Steal and Poach Technicks
- Foebreaker: Traveler Technick
- Shikari: +435 HP
- Monk: Traveler Technick
- Bushi: Can equip the Blood Sword and Karkata swords
- Time Battlemage: Ether Lore 3
Shemhazai, the Whisperer

Shemhazai is a level two Esper and the third Esper that players will obtain as part of the main storyline, at the very end of Giruvegan.
Shemhazai unlocks the following license boards:
- Archer: Can use the Dragon Helm, Dragon Mail, Magepower Shishak, Maximillian, Grand Helm, and Grand Armor heavy armors
- Black Mage: Mirror Mail Technick
- Shikari: Can equip the Spica, Antares, Arcturus, and Fomalhaut guns
- Knight: Potion Lore 2
- Machinist: Can equip Caldera and Volcano hand-bombs
- Monk: Potion Lore 3
- Red Battlemage: Can use the White Magicks Esuna and Cleanse
- Bushi: Shield Block Technick
- White Mage: +230 HP
Hashmal, Bringer of Order

Hashmal is a level two Esper and is the fourth to be unlocked as part of the main storyline. He is found at the end of the Pharos of Ridorana.
Hashmal unlocks the following license boards:
- Black Mage: Can equip Makara hand-bombs
- Foebreaker: Swiftness Technick
- Shikari: Bonecrusher Technick
- Knight: Can use the White Magicks Confuse, Faith, Bravery, and Curaja
- Monk: Can use the White Magicks Cura and Raise
- Red Battlemage: Steal Technick
- Time Battlemage: Channeling Technick
- Uhlan: Bonecrusher Technick
Cuchulainn, the Impure

Cuchulainn is an optional level two Esper that can be found in the Garamsythe Waterway underneath Rabanastre. This Esper is only available once you have completed the Tomb of Raithwall. Additionally, you must have completed the "Waterway Haunting" and "Lost in the Pudding" Hunts, which will reward you with the Sluice Gate Key required to access the area.
- In order to reach the area with Cuchulainn you must head to the Central Waterway Control and activate sluice gates No. 3 and No. 10.
- Then head to the No. 10 Channel in the No. 3 Cloaca Spur and activate the No. 1 South Waterway switch at the southern end.
- Return to the Central Waterway and deactivate the No.3 and No.10 sluice gates, and instead activate No. 4 and No. 11.
- Head into the No. 11 Channel and into the No.4 Cloaca Spur. At the southern end, flip the switch to activate the No. 1 North Waterway Control.
- Return to the Central Waterway control and deactivate the No. 11 sluice gate, but activate the No. 3 switch instead. So at this point, only No.3 and No.4 should be active.
- This allows you to enter the middle of the No. 1 Cloaca area where Cuchulainn is found.
Cuchulainn unlocks the following license boards:
- Foebreaker: Shades of Black Technick
- Shikari: Can use the White Magicks Protectga and Shellga
- Knight: Battle Lore
- Machinist: Magick Lore
- Red Battlemage: Can use the Black Magicks Firaga, Thundaga, Blizzaga, and Sleepga
- Bushi: Stamp Technick
- Uhlan: Wither Technick
- White Mage: Libra Technick
Zeromus, the Condemner

Zeromus is an optional level two Esper that can be found in the Stilshrine of Miriam. He is located in a hidden chamber that can only be accessed by using the Stone of the Condemner at a way stone.
In order to access Zeromus, you must have progressed past the events at Stillshrine of Miriam and Mt. Bur-Omisace. Then you need to speak to the Nu Mou Acolyte at the Temple Grounds in Mt. Bur-Omisace in order to receive the Stone of the Condemner. This can then be used on the first way stone in the Stillshrine on Miriam to enter the hidden chamber.
Zeromus unlocks the following license boards:
- Black Mage: Can equip the Giant's Helmet and Carabineer Mail heavy armors
- Foebreaker: Magick Lore x4
- Machinist: Can Equip Makara Hand-bombs
- Monk: Sight Unseeing Technick
- Red Battlemage: Channeling Technick
- Bushi: Magick Lore x2
- Time Battlemage: Addle and Shear Technicks
- White Mage: +270 HP
Exodus, the Judge-Sal

Exodus is an optional level two Esper that can be found in the highest area of the Mosphoran Highwaste in the Empyrean Seat once all shrines have been activated.
You must have progressed past the events at Stillshrine of Miriam and Mt. Bur-Omisace for this Esper to become available and have some Gysahl Greens in order to mount Chocobos. In order to reach Exodus, you must first speak with the Moogle Boss and his workers in the Salikawood and get them to fix the gate leading to the Phon Coast. Afterward, return to the Mosphoran Highwaste, speak to the Learned Man, and activate the Shrine of the South Wind.
Next, take the northeast exit from the Babbling Vale and use some Gysahl Greens on the Chocobo to be able to ride it across the hidden path, (shown on your map with an exclamation mark). Continue west through the high grass and then navigate around the lower area of Skyreach Ridge to head back into the Babbling Vale. Activate the West Wind Shrine and then push the nearby weathered rock to create a new path.
Head back towards the shop where you can find and activate the Northwest Wind Shrine. This will prompt two new pathways with exclamation marks to show on your map, which leads the way to Exodus.
Exodus unlocks the following license boards:
- Black Mage: Can equip the Platinum Helm and Platinum Armor heavy armors
- Foebreaker: Magick Lore x4
- Shikari: Stamp Technick
- Knight: +350 HP
- Machinist: Can use the Green Magicks Decoy and Oil
- Monk: Souleater Technick
- Red Battlemage: Can equip the Platinum Helm, Platinum Armor, Giant's Helmet, Carabineer Mail, Dragon Helm, and Dragon Mail heavy armors
- Bushi: +500 HP
- Time Battlemage: Battle Lore
- White Mage: Battle Lore
Famfrit, the Darkening Cloud

Famfrit is a level three Esper and is the last one to be obtained as part of the main storyline. He is encountered at the end of the Pharos of Ridorana when Dr. Cid summons him.
Famfrit unlocks the following license boards:
- Archer: +390 HP and +435 HP
- Black Mage: +190 HP, +230 HP, and +310 HP
- Foebreaker: Magick Lore
- Machinist: Can use the Time Magicks Vanishga, Balance, Reflectga, Slowga, Graviga, and Hastega
- Monk: Can use the White Magicks Arise and Dispelga
- Red Battlemage: Battle Lore x2
- Time Battlemage: Battle Lore
- Uhlan: Potion Lore 3
- White Mage: Can equip the Orichalcum Dirk and Platinum Dagger, and gains the Numerology Technick
Chaos, Walker of the Wheel

Chaos is a level three optional Esper found in the Necrohol of Nabudis, in the Cloister of the Highborn. In order to reach Chaos, players must have progressed past visiting Archades, collect three medallions, and defeat the optional bosses Fury and Humbaba Mistant first.
In the Necrohol of Nabudis, head to the Cloister of Distant Song and use the Medallion of Bravery to open the Door of Horrors, where Humbaba Mistant awaits. After defeating this boss, head to the Hall of the Ivory Covenant and open the Door of Loathing by using the Medallion of Love. The Fury boss is waiting on the other side for you. After both are defeated, the Lusterless Medallion changes into the Medallion of Might. This can then be used to open the Door of Despair in the central section, where you will find Chaos.
Chaos unlocks the following license boards:
Archer: Magic Lore x5
Machinist: +350 HP
Monk: Can use the White Magicks Holy, Esunaga, Protectga, and Shellga
Red Battlemage: Can equip the Ultima Blade greatsword
Bushi: Brawler Technick
Time Battlemage: +270 HP
Uhlan: Can use the Black Magicks Bio, Blindga, Aeroga, and Silencega
White Mage: +310 HP, and can equip the Defender and Save the Queen greatswords
Ultima, the High Seraph

Ultima is an optional level three Esper that can be found at the very top of the Great Crystal in Giruvegan. She can only be obtained after the events at Giruvegan once the Treaty Blade has been collected.
Ultima unlocks the following license boards:
- Archer: Infuse and 1000 Needles Technicks
- Black Mage: Telekinesis Technick
- Foebreaker: Swiftness Technick
- Shikari: Phoenix Lore x2
- Knight: Telekinesis Technick and Battle Lore
- Monk: Swiftness x2
- Red Battlemage: Can equip the Claymore, Defender, and Save the Queen greatswords
- Bushi: Stamp Technick
- Time Battlemage: Can equip the Diamond Sword, Runeblade, Deathbringer, and Stoneblade swords
- Uhlan: Expose Technick
- Machinist: Magick Lore x3
Zodiark, Keeper of Precepts

Zodiark is a level three optional Esper and can only be obtained after the events in Giruvegan with the Great Crystal. Additionally, players must have collected at least ten other Espers and have completed the Hunt "The Mine Flayer".
Once all of these conditions are met, speak with Geomancer Yugelu in Jahara, before traveling to Henne Mines where you can now access a new area — the Special Charter Dig area, which can be entered just east of Ore Separation. This is a very high-level area with lots of difficult monsters, and at the end of this area, you will find Zodiark, the final and most challenging Esper.
Zodiark unlocks the following license boards:
- Archer: Infuse and 1000 Needles Technicks
- Machinist: +390 HP
- Monk: Can use the White Magick Renew
- Red Battlemage: Can equip the Ragnarok greatsword
- Bushi: Can equip the Giant's Helmet, Carabineer Mail, Dragon Helm, Dragon Mail, Magepower Shishak, and Maximillian heavy armors
- Time Battlemage: Can equip the Durandal and Simha swords
- White Mage: Can equip the Claymore greatsword