Quick Links
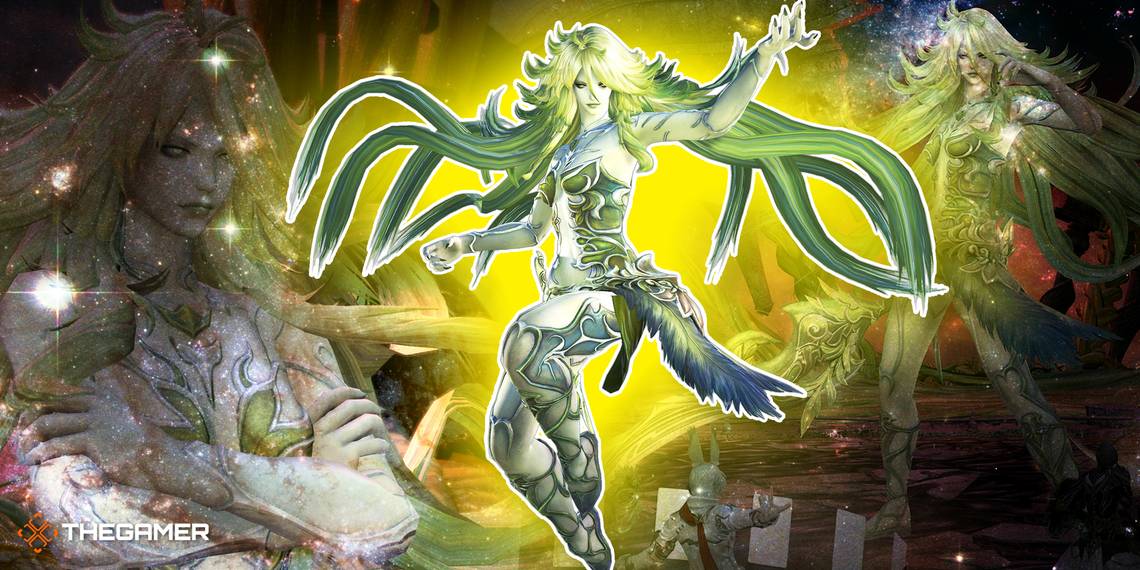
Final Fantasy 14's massive Patch 6.2 brought in several news activities for players to take a crack at, including the all-new Extreme Trial that features the formidable Barbariccia. The Storm's Crown Extreme Trial is what we're referring to: a chaotic blend of precise movements and a somewhat demanding DPS check, meaning you will have to be on point to clear it.
However, once you get the mechanics of the encounter down, it's not terrible by any stretch and turns out to be far more chaotic than it is challenging, which can still push newcomers to their limits early on. If you're still trying to gear up for the new Savage Raid and need a better weapon, look no further than this guide to help you obtain it.
Storm's Crown Extreme Overview

Before you can partake in the Storm's Crown Extreme Trial, you will first have to meet a few requirements beforehand, having you progress beyond the base story of Endwalker and complete the standard Storm's Crown Trial. You can find the complete list of prerequisites below!
Requirements
- Complete 6.2 MSQ "The Wind Rises"
- Have an iLevel of at least 600
When caught up with everything above, head to Old Sharlayan and speak to the Wandering Minstrel (X:12.7, Y:14.3). After this, you will have the Storm's Crown Extreme Trial unlocked, allowing you to queue for it via Party Finder or with a static group.
Storm's Crown Extreme Waymarks

One of the most crucial aspects of any endgame activity in Final Fantasy 14 is understanding your role, its placement, and how to work as a team to achieve victory in these challenging trials. To do this, you will often split into Light Parties and then locate your Clock Position, giving you two waypoints to retreat to during critical moments of the battle. You can learn more about these in the sections below!
Light Parties/Waymarks

Light Parties in Final Fantasy 14 happen whenever you split a Full Party in half, making two separate parties comprising one Tank, Healer, Ranged DPS, and Melee DPS. This method will allow you to avoid confusing situations when things get hectic or chaotic and you need to stack on your Healer or Tank to mitigate damage.
Additionally, Waymarks are easily as important to understand, and you can see their placement in the image above. Typically, most Waymarks will be laid out this way, but you may run into various iterations of it in Party Finder, so be aware of those situations. But, for the most part, A, B, C, and D will be the markers used for the cardinal directions, and 1, 2, 3, and 4 will mark your intercardinal directions. "A" is almost always used to denote the north-most position, with "C" marking the south-most. While understanding where everything is will benefit you, you should always know where north is, as it will help you realign yourself with your Clock Position during chaotic situations.
Clock Positions

Another crucial aspect of endgame content in Final Fantasy 14 is understanding Clock Positions. As shown in the image above, your Melee DPS should always be placed in the south-most intercardinal directions, with the Ranged DPS being positioned in the north-most intercardinal directions. The Healers will then be placed on either side of the target, on the east and west-most markers. Ending with the Tanks, who take the north and south points, allowing them to easily swap and keep the enemy's back towards the Melee DPS Jobs, allowing them to land their positionals.
Storm's Crown Extreme: Phase 1

With the pre-amble out of the way, it's time to dive into the first phase of the Storm's Crown Extreme Trial. Here, Barbariccia wastes no time delivering a decently strong raid-wide AoE with her Void Aero IV attack that can swiftly be countered with a well-placed shield via your trusty Healer. From this point onward, she will use the fundamental attacks you will see throughout the encounter, which we will cover in the sections below.
Savage Barbery
After performing Void Aero IV, Barbariccia will always launch into Savage Barbery, which has a few mechanics of its own to keep you on your toes. During this attack, she will either hold her sword down or point it upward, which dictates where you need to position yourself to avoid taking severe damage. After positioning her sword, Barbariccia will hurl it in the direction she's facing after delivering a devastating strike with it, so it's essential to get your placement right, which we will cover below.
- Sword Down: If Barbariccia holds her sword down, you want to position everyone inside of her hitbox, as she will perform a circular slash, creating a Donut AoE, capping it off by throwing her sword in the direction she's facing. Resolving this is simple, stay inside her hitbox and move opposite where she's throwing her sword.
- Sword Up: When you see Barbariccia point her sword upward, you will have to move to either side of her, opposite where she's going to throw her sword. She will unleash a devastating slash that travels down the middle of the arena before turning to throw her sword, making one-half of the arena safe. Have your party go there to avoid damage and get some free hits in.
Standing Hair Raid + Hair Spray (AoE)
Barbariccia will follow her Savage Barbery attack up with either a Standing or Kneeling Hair Raid having you react quickly almost immediately, both having a Hair Spray (Raid-wide AoE Markers) and a Deadly Twist (Stack Markers on Healers) variant, which are resolved in entirely different ways.
Everyone will receive an AoE Marker above their head if it's her Standing Hair Raid + Hair Spray attack, signaling you need to move to your Clock Positions. However, before doing so, you must wait until she performs a wide slash that creates a Donut AoE, then will have to swiftly move to your respective Clock Position to resolve the mechanic.
Standing Hair Raid + Deadly Twist (Stack)

If it's Standing Hair Raid + Deadly Twist, however, Barbariccia will place a Stack Marker on each of your Healers, having you split into your preassigned Light Parties, standing on either side of her according to your respective squad. Group 1 will typically take the west-most side, with Group 2 taking the east-most one to avoid confusion. After you absorb the Stack, the mechanic will be cleared, and she will move on to the next attack.
Standing Hair Raid + Hair Spray and Deadly Twist are both telegraphed by Barbariccia standing after she throws her sword, which she will then follow up with a Donut AoE, having the Stack or AoE Markers appear immediately after.
Kneeling Hair Raid + Hair Spray (AoE)
Kneeling Hair Raid is similar to the Standing one, as it has two possible outcomes, having you stay on high alert if you get this action. This version is telegraphed by Barbariccia kneeling after throwing her sword, letting you know she is about to pounce on her sword and deliver a far-reaching cone-shaped attack in front of her. This will force you to split into your Light Parties and position yourselves to the left and right of her sword.
If you get Kneeling Hair Raid + Hair Spray, everyone will have to lineup in their respective group to the left and right of her, hugging the wall. After she performs her slash, you must swiftly reposition yourselves to avoid overlapping AoE Markers. We suggest having Melee DPS move to the front of the boss, as the Tanks will pull aggro, and everyone else will spread out alongside the wall to resolve this mechanic.
Kneeling Hair Raid + Deadly Twist (Stack)

Kneeling Hair Raid + Deadly Twist is the easier of the two mechanics, having you pair up into your Light Parties, hug the wall to the left and right of the sword, and absorb the damage as a group. Not having to reposition yourself immediately after Barbariccia delivers her cleave is relieving and far safer.
After Barbariccia performs her first Hair Raid, she will immediately launch into another Savage Barbery, which chains into yet another Hair Raid. She will always do the opposite of what she did previously, meaning if her sword was down last time, it will now be up, and if she performed a Kneeling Hair Raid + Deadly Twist, it would now be a Standing Hair Raid + Hair Spray.
Teasing Tangles

After the second round of Savage Barbery and Hair Raid, Barbariccia will perform a raid-wide Void Aero IV, followed shortly by her Tank Buster attack, Void Aero III, which plagues whoever it hits with a devastating Damage Over Time debuff. Deal with Void Aero IV just as you did the first time, and use Invuln and a Tank Swap regarding Void Aero III. From here, she will launch into Teasing Tangles.
When Barbariccia casts Teasing Tangles, she will generate four cone-shaped pillars with her hair, pulling two players into a wide AoE surrounding the cones, creating four groups of two. During this section, you will move much slower than usual and have to pay attention to several things to get out alive. First, touching the sides of the barrier will snap you back to the cone of hair in the center of the circle, so avoid touching the sides at all costs.
Next, some players will receive a Blue Enumeration AoE Marker above their heads, some will receive a large Red AoE Marker, and others won't have anything above their heads. The goal here is to pair the Blue Enumeration Markers and Markerless players from another circle together and have the Red AoE Marked players isolate themselves to avoid spreading their damage to other players.
To easily accomplish this, players with the Blue Enumeration Markers and no Markers should always move toward the 1 and 3 Waymarks. Move as close to the barrier as possible without touching it to have the circumference of the Enumeration AoE eclipse the Markerless player, allowing you to resolve the mechanic. Additionally, if you have a Red AoE Marker, your goal is to move to the 2 and 4 Waymarks and position yourself in a way that doesn't clip the other Red AoE Marked player in the circle beside you.
Immediately after this mechanic is resolved, Barbariccia will perform Secret Breeze, a conal AoE that covers all cardinal directions. Players that had a Blue Enumeration Mark and no Mark should move slightly towards their respective cone to avoid clipping. Those with the Red AoE Marker should be fine to stay put unless they were out of position or might be overlapping. After this attack concludes, she will unleash another Void Aero IV, which will lead into Phase 2.
Storm's Crown Extreme: Phase 2

Time for Phase 2, which is easily more hectic than what we just went through, kicking things off with her Curling Iron action that shows her transition into her second phase, knocking everyone backward from the center of the arena with Voidstorm. While this phase is more chaotic and fast-paced, it's also where one player's mistake can cost someone else their life in the blink of an eye, so you must be on point with rotating to your Clock Position and evading incoming AoEs.
Brutal Rush

Barbariccia's first attack to open her second phase is Brutal Rush, which has her tether to all Tanks and Healers before delivering a swift kick to them in random order. To get past this mechanic, simply stand in your assigned Clock Positions and let her do her thing. If you are out of place here or stacked on one another, you will die and bring whoever's near you down with you. Just stand at your assigned Clock Position, and everything will be fine.
Boulder Break/Brittle Boulder
Following Brutal Rush, Barbariccia will immediately cast Boulder Break, which randomly targets a Tank. Simply pop Invuln here to negate the damage and resolve the mechanic. However, the mechanic after this is a little more involved than that and is her Brittle Boulder attack.
Brittle Boulder will place Red Crystal-like AoE Markers above all player's heads, which can be daunting to see at first. To deal with these, immediately gather in the center of the arena after Brutal Rush concludes. Then, while still in the middle, position yourself nearby your Clock Position. Now wait for the Red Crystal AoE to drop in the middle of the arena, then quickly move to your Clock Position while avoiding the swirly AoEs created by Barbariccia.
After you drop the Red Crystal AoE, you will receive a smaller, purple-ish one. As you stand in a safe spot in your Clock Position, avoid overlapping this AoE with another player's circle. Following this is Barbariccia's Tornado Chain attack, which you can find below.
Tornado Chain
Instantly after Brittle Boulder ends, Barbariccia will cast Tornado Chain, covering the entire arena orange. There will be an outer ring and an inner circle. Barbariccia will attack the inner circle first, meaning you will have to stand on the edge of the arena, wait for her to attack, then swiftly move forward to evade her outer attacks. After this, she will place Blue Enumeration Markers above all Tanks and Healers. Ranged and Melee DPS players will need to rotate clockwise and link up with one of them to resolve this mechanic.
Brutal Rush

Quickly move to your Clock Positions when you resolve the Enumeration Mechanic for Tornado Chain, as Barbariccia will perform Brutal Rush again, this time targetting all Melee and Ranged DPS players. Like before, this should be easy to resolve if everyone is in their correct positions.
Knuckle Drum

Following Brutal Rush, everyone should relocate to the 1 Waymark, which will make this easier to deal with and set you up excellently for the next mechanic. After scrunching together, Barbariccia will punch the ground 12 times, dealing massive raid-wide damage with Knuckle Drum. While tempting, don't blow all of your mitigations here. Use them with discipline and control, as using them too early will get everyone killed.
Blow Away
Instantly after Knuckle Drum, Barbariccia will unleash Blow Away, which is widely known as "Mario Kart" in the game's Party Finder. This mechanic places AoE Markers above everyone's head that will drop where they stand, having the potential to turn the situation into a mess real quick. Thankfully, we have a plan for that.
To resolve this mechanic, you want to move as a synchronized group, clockwise, around the arena, baiting the AoEs into controlled areas. If you followed the previous step, your first AoE drop should be on the 1 Waymark, the second near the A Waymark, the third on 2, and the final landing on B. Move together, briefly stop together, and then immediately begin moving as soon as your Markers drop, and the new one appears.
Impact/Bold Boulder
After resolving that part of the mechanic, both Tanks will receive a Flare Marker, and one Healer will receive a Stack Marker, signifying the beginning of her Impact/Bold Boulder attacks. Have the Tanks position themselves on the Ranged DPS Waymarks (1 and 2), and have everyone else Stack on the Healer towards the south end of the arena (C). You will see a blue AoE surrounding Barbariccia. This AoE will push you back, no matter where you are on the map, so position as close as you can to her without touching the AoE to avoid getting pushed into the out-of-bounds area on the outskirts of the arena.
Trample
Following Impact/Bold Boulder, Barbariccia will lunge at the previously marked Healer with her Trample attack. Mitigate through this until the Tanks can make their way down to her and regain aggro. This mechanic isn't overly hard to deal with. It can just catch many off guard who aren't expecting her to dive at the Healer suddenly. Immediately after this, she will perform another Brutal Rush that targets Melee and Ranged DPS players, deal with it the exact same way as before.
Teasing Tangles: Part 2
The final leg of Phase 2 is another Teasing Tangles, except this time, the mechanics are much different and more hectic. Barbariccia's second iteration of this action can be resolved easily by sending all DPS players to the right of their respective circles after they get pulled into their hair cones and making all Tanks and Healers go to the left. This will allow everyone to have an Enumeration Pair to take care of the mechanic.
However, there is one catch, in addition to pairing up with an Enumeration AoE, you will have to evade incoming mini-twisters and swirly AoEs created by Barbariccia while simultaneously trying to stay linked with your pairing partner in the other circle. This part is quite hectic and can be tricky to get down. The best piece of advice we can give here is that you have much more time to reposition yourself than you might think, so take your time to dodge the chaos in front of you, then get in the Enumeration AoE the moment you see a clear path.
Once this mechanic is resolved, Barbariccia will carry out another Knuckle Drum before transitioning into her third phase. Deal with this the same way you did the other one, gather at the 1 Waymark, and smartly mitigate your way through the onslaught.
Storm's Crown Extreme: Phase 3

Phase 2 is easily the hardest to get through during this encounter, but that doesn't make Phase 3 a cakewalk by any stretch. However, it does help that only one new mechanic gets introduced here, making everything else something you have seen before and already cleared. With that being said, let's get into it!
Entanglement
Barbariccia wastes no time introducing her new mechanic, Entanglement, something you probably have seen being referred to as "PlayStation" in Party Finder, thanks to the symbols being reminiscent of what you'd find on a PlayStation controller. This mechanic will place color-coded shapes above all player's heads, with the goal being for you to match them up. Here's a simple way to go about doing that:
- Circle = 1 Waymark (Red)
- Triangle = 2 Waymark (Green)
- X = 3 Waymark (Blue)
- Square = 4 Waymark (Pink)
Essentially, match whichever shape you have over your head with its corresponding intercardinal direction color. The moment you see your shape and color, move to its matching color, and you should be golden if your teammate does the same. Additionally, you can send all DPS players to their intercardinal direction and have the Tanks and Healers match up with them, but this can cause a bit of added chaos with everyone scrambling around, especially if two DPSs have the same shape.
After matching the shapes, you will be tethered to your pairing partner with hair, slowing your movement and making it difficult to move away from one another. During this section, you will have to evade two incoming attacks. One is a cone attack that has you and your partner position yourselves barely into the safe spaces to resolve, with the other being a line attack that hits all players that follows immediately after. As soon as you're free from the cone attack, adjust your position, so her follow-up attack doesn't overlap with another player's to resolve this mechanic.
Following this, Barbariccia will fall back into her old habits, performing Savage Barbery, Hair Raid, Void Aero IV, and Void Aero III yet again. You resolve these mechanics the exact same as you did earlier. Then, once that's over, it's time for another wave of Entanglement, except with a twist. Joy!
Entanglement: Part 2
The second iteration of Entanglement is a bit frightening to deal with at first, but once you get its general concept down, it's not all that bad. It just requires lots of patience and organization on the fly. It's much worse on paper than in practice, trust us. The first leg of this section is the same as before, match the symbols together and become bound to your partner with a thick band of hair. After that, however, things start to change.
Once tethered with your shape-buddy, Barbariccia will randomly place Enumeration Markers above four players' heads, having you try and position yourselves in such a manner that the Unmarked players are inside of someone's Enumeration Circle. This is tricky because everyone is tethered to someone else who may or may not have an Enumeration Marker.
A popular strategy to resolve this quickly is to congregate in the center of the arena and sort everything by adjusting your positioning on the fly. This may seem daunting and messy, and that's because it is. But you have plenty of time to get everyone situated and organized, and once everyone is in the middle and can see who has what and who needs help, everything will naturally align since everyone is on the same page. Just avoid moving too far away from your partner, as you will be snapped back into them, which can mess up many things for various reasons.
With this step completed, Barbariccia will cast another Savage Barbery and Hair Raid and enter Phase 4 with her trusty Curling Iron ability.
Storm's Crown Extreme: Phase 4

Phase 4 only has one new, albeit nasty, trick up its sleeve, with everything else being something you already know how to resolve. We'll list everything she repeats below to make this a bit easier to comprehend!
- Brutal Rush: Tethers to all Tanks and Healers, resolved the same as before.
- Knuckle Drum: Punches the ground 12 times. Deal with it the same as in previous times.
- Blow Away: Place circles in a clockwise motion like last time.
- Boulder Break/Brittle Boulder: Bait the Rock AoE, then fan out to your Clock Positions. Same as last time.
- Brutal Rush: Tethers to all Melee and Ranged DPS, resolved the same as before.
- Impact/Bold Boulder: Knocks everyone back, targetting the Tanks and a random Healer with an AoE. Deal with this the same as last time.
- Brutal Rush: Tethers to all Tanks and Healers, resolved the same as before.
Begin Dodging
After the onslaught of old tricks, Barbariccia reaches into her bag of tricks once more and turns the arena into utter chaos. Here, you will have to dodge everything coming your way, from small twisters to ever-changing swirly AoEs placed on the ground, essentially tossing every AoE you ever encountered during this battle at you simultaneously. We wish we could provide an image for you to make it easier to comprehend, but there's too much happening at once to make it eligible in a single image. Just seek out the safe spaces, stand in them, and move to the next one that opens up.
Following the dodging spectacle will be another Impact/Bold Boulder, marking all Tanks with a Flare and a random Healer with a Stack Marker. Resolve this the same way you've been, and it's on to the final phase!
Storm's Crown Extreme: Phase 5

The final phase is upon us, which, fortunately, is comprised of old tricks you have conquered many times to make it here. Like before, we will list them in order to make this section easier to glance at and take in what's expected of you.
- Entanglement: This is the first iteration of the action, and it's resolved the same way.
- Savage Barbery: The first attack in her arsenal, handled the same way.
- Hair Raid: You know what follows Savage Barbery by now. You also know how to resolve it.
- Void Aero IV: Raid-wide AoE, deal with it as you've been.
Maelstrom
Lastly, once you whittle her HP down enough, Barbariccia will cast Maelstrom, her Enrage. Her DPS Check isn't terrible, but it can be challenging if your squad is messy in some areas. She won't attack during this phase, but if she successfully casts Maelstrom, it's game over, and your party is wiped. Overall, if you made it this far, you should be able to end it here, and if that's the case, good job! Time to check out the rewards you can obtain below!
Storm's Crown Extreme Rewards

Assuming you're looking at this section because you successfully took Barbariccia down, congratulations! For your efforts, you can receive the following items via rolls, leaving it all up to chance:
- Random Windswept Weapon (iLevel 615)
- Windswept Weapon Coffer (iLevel 615)
- Pearl of Winds (Crafting Material)
- Faded Copy of Battle with the Four Fiends (Buried Memory Orchestrion Roll)
- Lynx of Imperious Wind Flute (Mount)
- Barbariccia Card (Automatically Added To Inventory)
The Random Windswept Weapon is a guaranteed drop, with everything else having a chance at dropping alongside it. Additionally, if you are not fortunate enough to receive a drop, you will always get x2 Windswept Archfiend Totem, which you can exchange ten of for a Windswept Weapon of your choosing. To do this, visit Nesvaas in Radz-at-Han (X:10.6, Y:10.0) and speak with them to make the trade. Here's everything you can receive:
Windswept Weapons
|
Windswept Weapon |
Job |
Item Level |
Cost |
|---|---|---|---|
|
Windswept Shield |
Paladin |
iLevel 615 |
x3 Windswept Archfiend Totem |
|
Windswept Shamshir |
Paladin |
iLevel 615 |
x7 Windswept Archfiend Totem |
|
Windswept Battleaxe |
Warrior |
iLevel 615 |
x10 Windswept Archfiend Totem |
|
Windswept Faussar |
Dark Knight |
iLevel 615 |
x10 Windswept Archfiend Totem |
|
Windswept Gunblade |
Gunbreaker |
iLevel 615 |
x10 Windswept Archfiend Totem |
|
Windswept Cane |
White Mage |
iLevel 615 |
x10 Windswept Archfiend Totem |
|
Windswept Codex |
Scholar |
iLevel 615 |
x10 Windswept Archfiend Totem |
|
Windswept Torquetum |
Astrologian |
iLevel 615 |
x10 Windswept Archfiend Totem |
|
Windswept Milpreves |
Sage |
iLevel 615 |
x10 Windswept Archfiend Totem |
|
Windswept Rod |
Black Mage |
iLevel 615 |
x10 Windswept Archfiend Totem |
|
Windswept Grimoire |
Summoner |
iLevel 615 |
x10 Windswept Archfiend Totem |
|
Windswept Rapier |
Red Mage |
iLevel 615 |
x10 Windswept Archfiend Totem |
|
Windswept Bow |
Bard |
iLevel 615 |
x10 Windswept Archfiend Totem |
|
Windswept Musketoon |
Machinist |
iLevel 615 |
x10 Windswept Archfiend Totem |
|
Windswept Heirsbanes |
Dancer |
iLevel 615 |
x10 Windswept Archfiend Totem |
|
Windswept Fists |
Monk |
iLevel 615 |
x10 Windswept Archfiend Totem |
|
Windswept Spear |
Dragoon |
iLevel 615 |
x10 Windswept Archfiend Totem |
|
Windswept Daggers |
Ninja |
iLevel 615 |
x10 Windswept Archfiend Totem |
|
Windswept Blade |
Samurai |
iLevel 615 |
x10 Windswept Archfiend Totem |
|
Windswept Zaghnal |
Reaper |
iLevel 615 |
x10 Windswept Archfiend Totem |