Quick Links
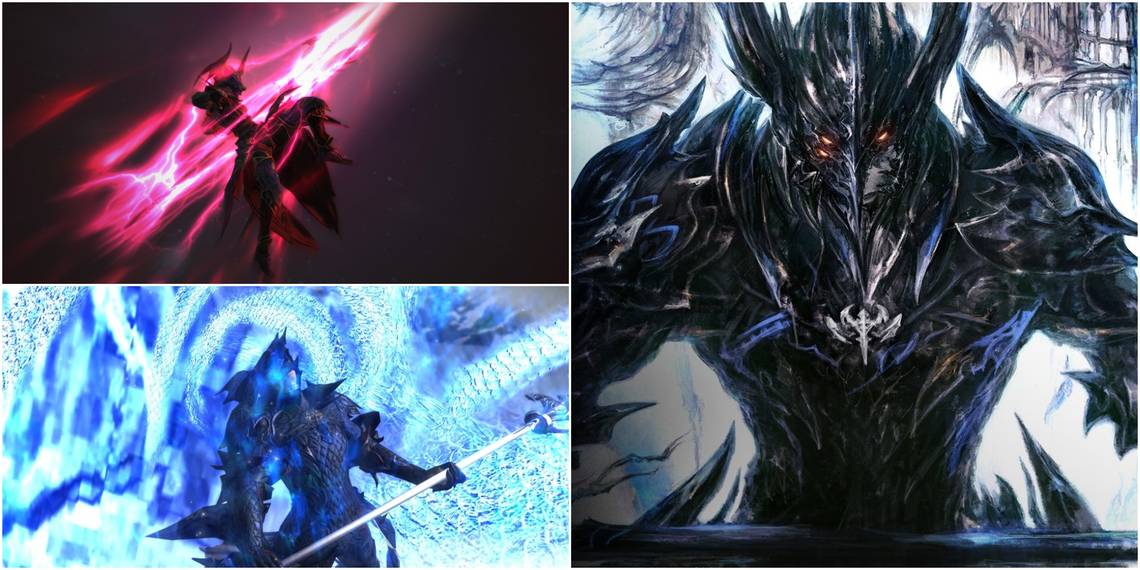
One of Final Fantasy 14's most exhilarating jobs in its PvE is the Dragoon, which carries over flawlessly to the game's PvP mode, especially after Patch 6.1 significantly overhauled the entire PvP system and mechanics. While dabbling into the game's PvP may seem daunting at first, it can be gratifying and fun if you choose to stick with it.
Furthermore, the PvP mode offers several unique rewards, such as the GARO event items or the insanely rare The Feast equipment that will turn the heads of everyone who crosses your path. With PvP finally being one of the game's high points, you can't go wrong with giving it and the Dragoon a try.
Updated June 27, 2023, by Seth Parmer: Patch 6.4 brought in a bit more changes to the Dragoon's PvP kit, tweaking its damage values amongst other things. Thanks to that, we've decided to update this guide to include these changes and to update the formatting to bring it more in line with the others!
Overview

Due to being a Melee DPS job, the Dragoon's overall goal is to deal as much damage as possible while not becoming overly aggressive to the point where you're zoning-in on one enemy and ignoring everything else around you.
You also need to know when to bail out of certain situations and regroup with your team, which can be rather difficult to judge when you're in the heat of combat.
Fortunately for you, the Dragoon's new PvP kit has everything you need to deal absurd amounts of damage, rack up kills, and evade danger, making the job one of PvP's most formidable and annoying to deal with.
Being that pesky thorn in the enemy's side that has the potential to wipe everyone out in an instant is quite powerful, and that's exactly why we love everything about the Dragoon.
In the following sections, we will go over what makes the Dragoon job in PvP shine by going over its abilities and overall strategy. We will also cover what the Dragoon is capable of in the new Crystalline Conflict mode and how to get the most out of the job to help your teammates achieve victory.
Job Action Breakdown

With the new PvP overhaul introduced in Patch 6.1, the Dragoon has access to several devastating abilities that allows them to unleash an exuberant amount of damage in a short amount of time. Some abilities will unlock more routes, while others will allow you to absorb a bit more damage than usual to react accordingly to your current situation.
|
Action |
Recast Time |
Information |
|---|---|---|
|
Raiden Thrust |
2.4s |
Attack with a potency of 3,000. |
|
Fang And Claw |
2.4s |
Attack with a potency of 4,000.
|
|
Wheeling Thrust |
2.4s |
Attacks with a potency of 5,000.
|
|
Chaotic Spring |
15s |
Attack with a potency of 8,000. Absorbs 150% of your damage dealt as HP. |
|
Geriskogul |
20s |
Attack with a potency of 8,000. Grants the effect of Life of the Dragon for 10s, which increase damage dealt and suffered by 25%. |
|
High Jump |
10s |
Attack with a potency of 4,000. Grants the effect of Heavensent for 10s and changes Wheeling Thrust Combo to Heavens' Thrust. |
|
Elusive Jump |
20s |
Performs a jump that places you 15 yalms backward. Grants the effect of Firstminds' Focus for 10s and changes Elusive Jump to Wyrmwind Thrust. |
|
Horrid Roar |
25s |
An AoE attack with a potency of 4,000. Inflicts the Horrid Roar status effect on all enemies hit, reducing their damage dealt to you by 50 percent. |
|
Heaven's Thrust Only while under the effect of Heavensent |
2.4s |
Attack with a potency of 12,000. |
|
Nastrond Only while under the effect of Life of a Dragon |
1s |
Attack with a potency of 4,000 to enemies in a straight line. If the opponent has 50 percent health or less, Nastrond's potency doubles (8,000). |
|
Wyrmwind Thrust Only when under the effect of Firstminds' Focus |
2.4s |
Attack with a potency of 8,000 to enemies in a straight line. The attack's potency scales up the further you are from the opponent, with 15 yalms being the max distance offering 16,000 damage. |
Default Rotation
Your default rotation is a quick and easy way to deal damage and allows you to weave in other actions that will enable you to capitalize on the Dragoon's offensive prowess.
Below is the basic rotation without any fancy stuff thrown into the mix, which we will cover later in this section. The idea of the Wheeling Thrust rotation is it's a great way to buy time when waiting for your more potent actions to come back online.
- Raiden Thrust > Fang and Claw > Wheeling Thrust
Full Combo
Below is an example of a full PvP combo for the Dragoon that incorporates every ability's strong points together in an attempt to milk the most damage out of the job in short manageable bursts. Further below, you can see where some actions lead to devastating attack strings that will put away most opponents before they even know what hit them.
- Elusive Jump > Geirskogul (Wyrmwind Thrust) > High Jump (Heavens' Thrust) > Horrid Roar (Chaotic Spring) > Fang and Claw (Nastrond)
Full Combo Step-By-Step Breakdown
While the Dragoon's Elusive Jump action is your get-out-of-jail-free card, it's also an excellent ability to use when setting up combos that obliterate your opponent. When performing Elusive Jump, you will somersault 15 yalms backward, gain movement speed for five seconds, and obtain the Firstminds' Focus buff for ten seconds.
When under the effects of Firstminds' Focus, you will be able to perform the action Wyrmwind Thrust, which is your most potent attack outside your Limit Break.
However, just before unleashing the Wyrmwind Thrust, you can fill the empty space with your Geirskogul to deal 4,000 damage, remain 15 yalms away, and obtain the Life of a Dragon buff to use a little bit later on.
On its own, if you use Wyrmwind Thrust when close to your opponent, you will only deal 4,000 damage to enemies in a straight line, which isn't too impressive compared to its true potential. However, if you remain 15 yalms away from your target, the Wyrmwind Thrust will do a staggering 16,000 damage to every enemy in a straight line, making it one of the most devastating attacks in PvP.
The Life of the Dragon buff is a double-edged sword that grants you 25 percent attack damage while also making you take 25 percent more damage for ten seconds. This buff is provided to you when using the action Geirskogul, which has an attack potency of 4,000 and can hit multiple enemies in a straight line. Despite it also affecting you, we feel confident putting Geirskogul at the beginning of the combo due to the Dragoon's Horrid Roar and Chaotic Spring abilities. Having a 25 percent potency buff to all attacks through almost the entire sequence is phenomenal and worth the risk.
With both Firstminds' Focus and Life of the Dragon active, you will have to move through several abilities with haste to finish the combo off with Nastrond.
To do this, after casting Wyrmwind Thrust from 15 yalms away, you should immediately follow it up with your High Jump to close the gap on your opponent and gain the Heavensent buff. With Heavensent active, you should directly launch into Heavens' Thrust for a guaranteed 10,000 damage.
While you can theoretically weave something between High Jump and Heavens' Thrust, we recommend immediately following the High Jump up with Heavens' Thrust as the damage dealt is way too high to risk dropping.
At this stage of the combo, you can really benefit from applying debuffs to enemies and also deal a decent chunk of additional damage in the process.
Once you cast Heavens' Thrust, immediately use Horrid Roar to deal 2,000 damage to all enemies in the area and inflict them with the Horrid Roar debuff. This action makes it so anyone inflicted with Horrid Roar will deal 50 percent less damage to you for ten seconds, allowing you to stay in the fight longer.
Following Horrid Roar's lead in terms of performing actions that will keep you in the battle longer, you should go directly into Chaotic Spring after using Horrid Roar. Chaotic Spring is one of the more unique and beneficial actions in the Dragoon's kit as it makes for an excellent offensive and self-support tool.
This action not only deals 8,000 damage to your target but also restores 8,000 HP to yourself. We recommend using Chaotic Spring when you have lost at least 8,000 HP, as you will gain it back. This attack will typically be performed toward the end of your combo.
As mentioned at the top of this section, your goal is to finish strong with Nastrond, which will come immediately after using the Fang and Claw action, filling the downtime with one extra attack that deals 4,000 damage. We save Nastrond until the end because of the insane buff it receives whenever the target is at 50 percent health or below.
Nastrond, on its own, deals 4,000 damage to enemies in a straight line, but that value doubles whenever your opponents have 50 percent or less health, making its potency shoot up to 8,000.
Using Nastrond to close out your combo isn't only beneficial, but it seems to make the most sense, especially since you can squeeze in so many attacks while the Life of the Dragon buff is active, which gives you 25 percent more attack potency.
Patch 6.2 Changes
During Patch 6.2, the Dragoon Job receives two adjustments in PvP that seem minor on paper but actually allow them to play slightly more aggressively than before, which seems unreasonable as they were already one of the strongest DPS Jobs for PvP before this update.
We updated the numbers in all relevant sections above, but in case you missed it, here's what got changed:
- Chaotic Spring now converts 150 percent of your damage into HP instead of 100 percent.
- Horrid Roar now has a 25-second cooldown timer instead of 30.
Both of these changes allow you to stay in encounters much longer as you will not only get more health back when nearing the end of your rotation, but you will now have a more even cooldown reset across all your Actions.
This makes it so you have a bit more flexibility on the timing of your Actions, so you don't have to be near-perfect on your execution to get the most out of it. The window is still tight but not too demanding.
As mentioned before, the Dragoon was already one of the most dominant Jobs in PvP, and this update solidifies that fact, making them even more of a nightmare to deal with if they can get their Actions off and reap the benefits of their buffs.
The changes this Job received in Patches 6.3 and 6.4 were purely Potency tweaks, which are represented in the Job Action Breakdown and Limit Break Breakdown sections!
Limit Break Breakdown

The Limit Break is the most powerful action at your disposal in PvP, with the Dragoons being amongst the strongest in the game.
Not only do you launch yourself into the air and come hurtling down into the earth with tremendous force, but you also deal unmatchable damage and even gain a pretty sizable shield that allows you to heal or distance yourself from the chaos.
Sky High
Sky High is merely the calm before the storm but offers some crucial things you must know that can be the difference between life and death. You will leap high into the air when performing Sky High, preventing the opponent from targetting you.
You can freely move around for five seconds to position yourself in a strategic position where you will hit multiple targets and have several ailments removed from yourself if you were inflicted with them (Bind, Half-Sleep, and Heavy).
Sky Shatter
Sky Shatter is the second part of the Dragoon's Limit Break and is the hardest-hitting action at your disposal. Sky Shatter is an AoE that deals 16,000 damage, with the potency increasing by 50 percent if enemies are within five yalms from your drop zone.
Furthermore, after you crashland into the ground, you will gain a protective barrier that absorbs incoming damage equal to 25 percent of your total HP and lasts for ten seconds.
Dealing that much damage and gaining a shield immediately after makes the Dragoon's Limit Break one of the toughest to deal with, especially in Crystalline Conflict, where everyone is expected to gather near one point on the map. Sky Shatter is easily one of the best Limit Breaks in the game and can rack up multi-kills with little to no effort.
Common Actions Breakdown

Your Common Actions in PvP range from healing potions to sprinting to having the ability to absorb 90 percent of all incoming damage for a short time. These actions allow you to keep afloat and patch yourself up after a hectic scuffle.
|
Action |
Information |
|---|---|
|
Standard-issue Elixir |
The Standard-issue Elixir restores your HP and MP to their maximum values. However, unlike Recuperate, it takes 4.5 seconds to use the Elixir, making it a risky option if there are enemies nearby. We recommend using this only when you know you're safe and behind cover. |
|
Recuperate |
Recuperate is the only action that consumes MP in PvP but is one of the most valuable and essential abilities as a result. Using Recuperate costs 2,500 MP and restores 15,000 HP, and has a one-second cooldown timer, allowing you to spam it to gain back tons of health. So long as you have the MP. |
|
Purify |
In most cases, Purify will be the action you use to escape a fatal situation. Purify allows you to escape the effects of Bind, Deep Freeze, Half-asleep, Heavy, Sleep, and Stun. Furthermore, when using Purify to remove one of the aforementioned ailments, you will gain the buff Resilience for five seconds. Resilience will nullify the effects of every ailment Purify cleanses. |
|
Guard |
Guard will reduce all incoming damage by 90 percent and remove the effects of Bind, Deep Freeze, Half-asleep, Heavy, Sleep, and Stun and prevent knockback and draw-in actions. Guard lasts for five seconds and reduces your movement speed by 50 percent. |
|
Sprint |
Your movement speed increases for a limited time. |
General Strategy

The Dragoon's goal, first and foremost, is to deal damage and lots of it. You will achieve this goal by using everything at your disposal to its full potential, which largely centers around using Wyrmwind Thrust at its max range and following it with High Jump, then continuing with the rest of your combo.
Always plan ahead before diving into an encounter, and make sure you have an exit plan just in case things go south. Whether that means having an Elusive Jump at the ready, Purify, or Guard, you need to make sure you can safely retreat to regroup and come back swinging.
You should always build up to your Limit Break and implement it strategically. This can be used in tandem with your teammates or using it to clear a highly contested area, but it should always be called upon when you know you will get something beneficial out of it and never to evade damage or death.
Sky Shatter is an excellent Limit Break that will not only help you earn kills but can help turn the tides of battle if used properly. A waisted Sky Shatter helps no one, puts you in danger, and can be the cause of defeat. Especially in Crystalline Conflict.
You should always be dealing damage and lean into being the thorn in your opponent's side. Dragoons are incredibly tough to combat in PvP and are honestly quite annoying to deal with, especially if they are coming at you with a strategy.
If you can weave your Off-GCDs in with your primary attacks, you will undoubtedly unleash chaos onto the enemy team without breaking a sweat.
Crystalline Conflict Strategy

When playing Crystalline Conflict, it's essential to know your role and expectations as a Dragoon before heading into the competitive 5v5 mode. In simple terms, you need to apply heavy pressure, deal tons of damage, and help consistently move the Crystal with your team.
As outlined above, dealing damage should come naturally with the job, but strategically positioning yourself during battle to play the objective and use your abilities to their full potential could prove difficult for most players.
One of the most essential aspects to keep in mind is that the Crystal is unmovable during the first 30 seconds of the match, meaning you should use this time to observe your opponents and teammates. This is crucial because getting a KO in this phase is rather useless, as the enemy will likely be back before the Crystal unlocks.
Charging in not only forces your team to do the same but could seriously put the enemy at a slight advantage if they win the engagement (because of the Limit Gauge). Unless your team charges in, you should remain put and need to use this time to study their team composition and pick out potential threats.
At this point in time, the Dragoon is one of the strongest PvP jobs for Crystalline Conflict, meaning you will likely be the enemy's top priority to target and get out of the picture. Use this to your advantage, and never ever go anywhere off the beaten path.
Stick with your teammates, apply your pressure, and bounce when they do or if they fall in battle. It's okay to retreat and wait for your team to regroup. If the enemy succeeds in taking the Dragoon down, they can -and will- move the Crystal with great haste and cover lots of ground.
When attacking the opponent on the Crystal with your team, the Full Combo provided above is an excellent way to approach that scenario. It checks every box needed for the Dragoon to emerge on top. The combo deals excessive damage, keeps you in the fight, and applies excessive pressure on the enemy while quickly filling your Limit Break Gauge.
Furthermore, once your Limit Break is readied, you can quickly assess the enemy's health situation and potentially pick up several kills in the blink of an eye, allowing you and your team to push the Crystal forward significantly before they get to regroup.
The last piece of advice we have for Dragoons in Crystalline Conflict is that chasing after retreating enemies is rarely worth the risk or effort.
You will either get led straight into a group of enemies who spawned back in and regrouped or get dragged so far away from the objective that you essentially abandon your team and leave them empty-handed in terms of a raw DPS player. Stay with your team, attack whoever they're focusing on, and provide the inhuman amounts of damage and pressure the Dragoon is capable of.
Frontline Strategy

Aside from Crystalline Conflict, Frontline is where many of you will spend your time in PvP, thanks to the Daily Duty Roulettes. Fortunately, Frontline is a much slower, calmer, and less serious PvP activity that allows you to play the Dragoon class a bit haphazardly, as dying or chasing after a kill won't necessarily lead to the downfall of your team.
Across the four Frontline maps (Secure, Seize, Shatter, and Danshig Naadam), your goal and strategy as a Dragoon will essentially be the same, aside from the objective being a tad different on each map.
Still, as a Dragoon, you are expected to apply pressure, help secure zones, and deal tons of damage throughout the course of the match. The best path to success in Frontlines as a DPS, especially the Dragoon, is to simply stay behind a Tank at all times and dive into battle with your devastating combos (provided above).
The general rotation of objectives in Frontlines typically goes as follows: Attack > Retreat > Regroup > Capture Objectives > Defend > Repeat
However, the one thing Frontlines encourages that Crystalline Conflict doesn't is to single out opponents who are aimlessly wandering from their team and swiftly take them down. Frontlines is about capturing zones and defending points but kills also contribute to your overall score.
Picking off stragglers or chasing after a retreating enemy with hardly anyone around them can be worth it. Just make sure it's a thoughtful and strategic read, don't carelessly run past an entire squad of enemies for one kill or anything.