With Fire Emblem Engage's thirteenth chapter, we find ourselves once again battling the darkness; and we aren't speaking metaphorically here. This map conceals a dozen troops in the shadows. As you work your way through the darkness, you will also be contending with giant piles of debris that will frequently impede your traversal. And did we mention that there is a whole army of flying units hovering above the open water, just waiting to swoop in and attack?
Needless to say, this battle can be an absolute nightmare if you don't come prepared. Thankfully, we've done all your homework for you. We'll tell you where all the ambushes are, what goodies are up for grabs, and the best route to take. With our help, you will be able to beat back the shadows and stomp out the wretched Totchi and Tetchi before they have a chance to do any severe damage to this tranquil village.
Setup Phase

As you will quickly see, this battle is primarily host to two types of enemy units: backup fighters and flying units. On top of that, there are a ton of axe-wielding enemies. This means that you want to have as many troops who have bows and swords as possible. However, be warned, while at a glance there do not appear to be any enemy archers, there are, in fact, multiple; they are just hiding in the shadows. So, while you may be tempted to bring your flying units, you need to be extremely cautious if you do. Especially when traveling along the left side of the stage, as that is where they have hidden all their snipers.

Make your life easy and make sure Fogado is one of the Archers you bring. He will almost certainly be the best archer in your army at this point in the game. One thing to note is that one of the three new units you will get in this battle (Merrin), is a Wolf Knight; her throwing daggers are excellent at taking out flying units as well.
Moreover, the many barricades make it pretty hard to take full advantage of the extra mobility flying units anyway. You are probably better off just leaving them at the base.

We personally think that the better choice is to bring a bunch of heavily armored units. There are two Mages present in this stage, so you will have to be mindful of them, but they are great at dealing with the rest of the units on the map. And, since the debris will stop your movement short anyway, their more limited range won't be much of a burden. Naturally, you will also need a healer. Make sure they have the Physic staff and Restore Staff. These will be massively helpful in this stage. Illume is also something worth considering.
Naturally, putting Lyn on one of your Armored units will give you the best of both worlds, as they will be able to snipe as well as tank.
Since you are going to be contending with the darkness, torches wouldn't be a terrible item to bring. However, this guide will be telling you where the hidden units are, so if you would rather have your inventories full of other items, then those torches aren't absolutely necessary.
Debris And Barricades

A big part of this battle is dealing with the Barricades. They will stop you in your tracks, and force you to give up turns in order to clear them. Something you should note is that not all debris is created equally. Some piles of debris will take more hits to clear than other piles of debris. The larger it is, the more HP it will have. That being said, Timerra is extremely efficient at clearing Debris. Make use of her ability to do so.
Another element that is vitally important is understanding that the debris isn't just an obstacle for you. You can strategically choose to keep certain pieces of debris on the battlefield in order to impede your opponents. Never end your turn destroying a piece of debris. That just opens the door for the enemy and allows them to advance on you and deal damage. Instead, deal enough damage to the big pieces to make it so they are one hit away from being cleared, and end your turn by getting everyone in position for when the debris is destroyed.
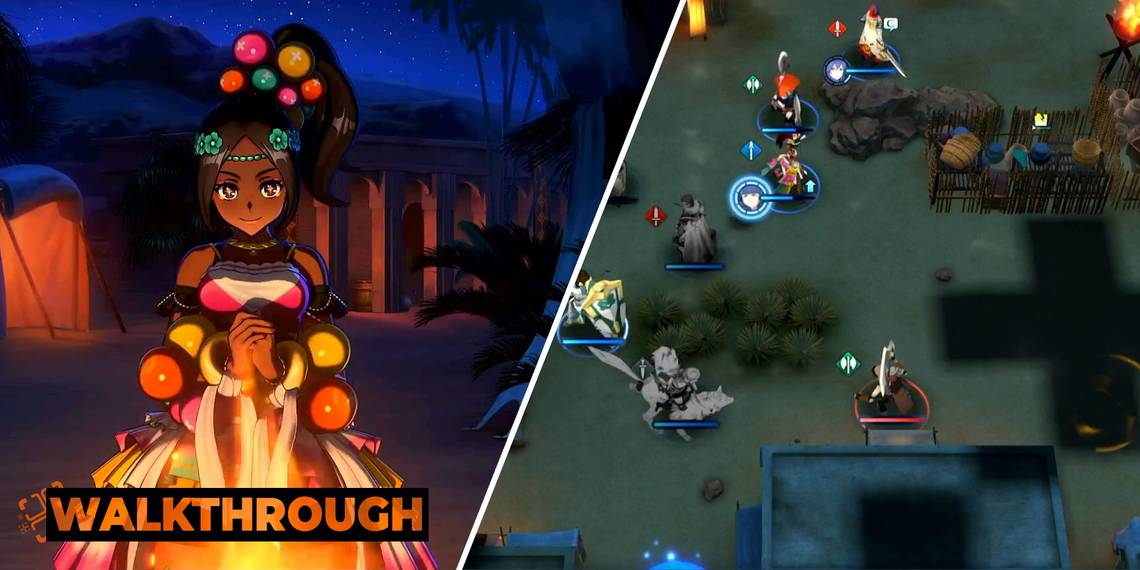
Oasis Village Battle

|
Enemies |
Visible Enemy Units: 2x Barbarians, 2x Axe Fighter, 2x Sword Fighters, 2x Sword Fliers, 4x Axe Fliers, 2x Wyvern Knights, 1x Wolf Knight, 1x Sword Master, 1x Mage, Totchi, Tetchi |
|---|---|
|
Hidden Enemy Units: 1x Sword Master, 1x Sword Fighter, 1x, Axe Fighter, 2x Archer, 1x Mage, 1x Wolf Knight, x2 Sword Flier, x2 Axe Flier |
|
|
8 Units |
|
|
Deployment |
|
|
Victory Conditions |
Eliminate Tetchi And Totchio |
|
Treasures |
Seraph Robe (received from the villager in the tower), Rescue Staff (received from the villager in the house), Enwind (taken from the Mage who accompanies Totchi and Tetchi) |
|
Difficulty |
★★★★★★★☆☆☆ (7/10) |
This is a map with multiple pathways. At the beginning of the stage, you can take a path down and to the left, this path is totally consumed in darkness and has multiple barricades impeding progress. You can also travel down and to the right. This is where your three new units will begin. The plan is to send half of your army down the left path, and the other half down the right. We put one of our Archers on the left, but most of your Archers should be on the right, as they are the ones who are going to have to contend with the waves of flying units.
The Path On The Left

On the left side, you will be able to see a Barbarian. However, there is another Barbarian and an Archer hiding in the shadows a little bit below him. After you take care of them, destroy the next set of debris on the left side. There is an Axe Fighter concealed by the darkness here. However, the bigger threat is the Mage hidden below the Sword Fighter, and the Archer a little to the right of that same Sword Fighter. So, if you took our advice, and loaded your army with heavily armored troops, make sure to be mindful of that Mage. They are bad news for Armored units.
The Archers on this map are not pushovers. They have reasonably high defense and will take a shot well.
The Path On The Right

The other half of your army's main job is to take out the rapidly approaching flying units, but first, they will need to take out the three grounded troops waiting for you. At first, you will only see the Barbarian, but there is a Sword Fighter and a Sword Master hiding in the darkness that separates your chosen units from your three new recruits. The Sword Master is right on the beach and will be able to reach most of your units, so be proactive and take care of them quickly.
There is a tower up along the edge of the water. Send a troop there and warn the residents of the attack. You will be rewarded with a Seraph Robe.
After you have cleared the ground troops out, you will start to be attacked by flying units. You should have at least three units to deal with them (two archers and Merrin). After you have dealt with the first wave, have your troops start heading down, but keep a few of your archers trailing the main party a little. This way, as the flying troops are funneled toward them, the archers can just pluck them out of the sky. Your units will reach an impasse where there will be debris below you and to your right. You don't want to destroy the debris on your right! Those barricades will help keep the flying units at bay.

Now, head to the left, destroy the debris, and join the rest of your party in the bottom-left corner of the map. Both parties will probably be arriving here at the same time. You will help clear out the Mage, Archer, and Barbarian. Once you finish them off, send someone down to the bottom left corner to warn the villagers about the attack. You will be rewarded with a Rescue staff.
The Rescue Staff is a pretty powerful tool for rescuing injured units. It can warp a unit far away from danger.
Pushing Along The Bottom

Once your party has reformed, in the bottom-left corner of the map, you are going to push to the right. There is a Wolf Knight hidden in the shadows near the visible Wolf Knight (makes sense that they would travel in packs, we suppose). If you aren't careful, they will poison your units. So, your best bet is to send in your tankiest tank. They were completely incapable of hurting Louis, which means that they weren't even able to poison him. Just run a unit like that in, and make sure they have a weapon that will hit from a distance so that they can land counterattacks when the Wolf Knights get their (completely ineffectual) shots in.
Once you have cleared them out, just arrange a line of your most resilient soldiers, with the ranged unit supporting them from the back row. There will still be flying units coming for you, so keep that group of Archers trailing the main group by a few squares. They will keep plucking those flying units out of the sky. Watch out once you get close to the clearing. If you advance past the houses, you will be attacked by Totchi and Tetchi.

Once you are ready, advance into the clearing, and prepare to fight Totchi and Tetchi, you will have to deal with a Barbarian and a Mage alongside them. The Barbarian will reach you before the twins can. So, you should be able to take him out before they arrive. Once the twins do get close enough, though, you are going to want to be very deliberate in how you approach them. Totchi and Tetchi both hit extremely hard. They will get to attack you four times each. Start by taking out the Mage (a single Javelin throw will do it). Preferably, you will do this with a tanky unit, as they are going to be left out in the open.
Whoever has Lyn equipped can shoot the Mage from a distance with Astra Storm if they haven't already used all their Emblem Energy.

Now turn your attention to Totchi and Tetchi. You should be able to kill one of the two before they ever have a chance to attack. Start by breaking them with a sword user, then hit them with your heaviest-hitting unit. Remember, Merrin will both do substantial damage, and poison, which means that other follow-up attacks will be more damaging. Once they regenerate their health, break 'em with another sword user, and then finish them off. Make sure that the other brother is blocked off by your tougher troops, as someone is going to be getting hit for a lot of damage.
After you survive the remaining brother's barrage, just pile on him, and you will have completed this chapter.
The Exploration Phase

In the top-left corner of the map (close to where Framme is), you will find some Steel Ingots and Spices. Beside Timerra, there are Bond Fragments lying on the ground. Next to Lapis are some Iron Ingots, and behind Fogado are a few berries. There is a potato beside Jean (who is sitting on the well). Finally, near Diamant is a Tomato.
As for animals, there is a White Elyosian Dog near Timerra, A Panna Camel in the northern section of the clearing. And, finally, on the east side of the clearing, there is an Elyosian Pigeon. Now that you have gotten all those resources, and adopted all your animals, all that is left is to talk to your troops and then head back to The Somniel. You will now have a Flea Market at your base! This will allow you to buy gifts for all your party members.