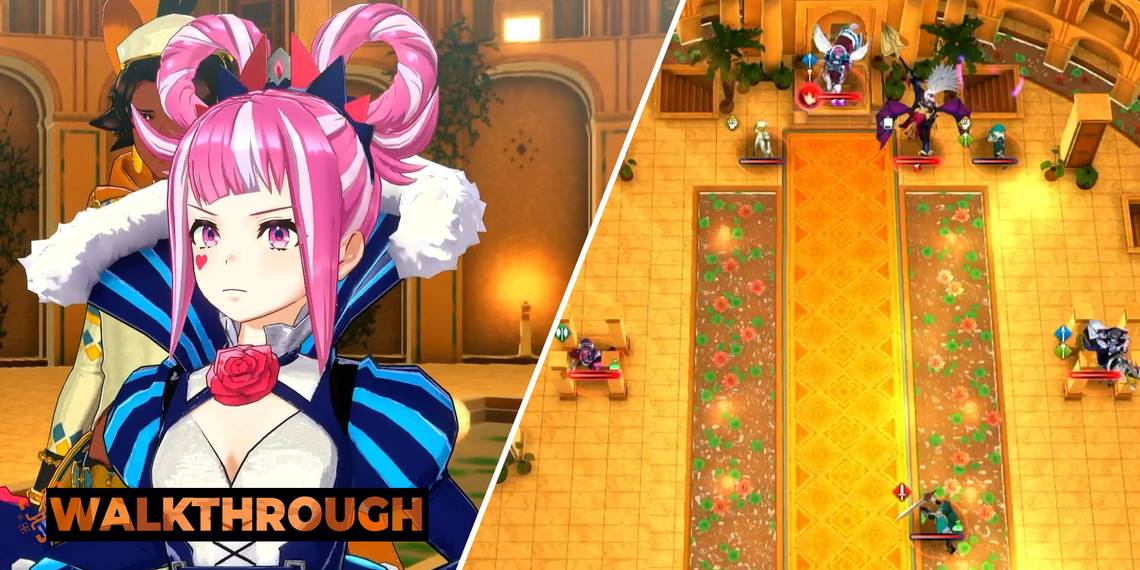
Chapter 14 of Fire Emblem Engage is undeniably pretty familiar. It features a large room with a giant gap in the middle, that has enemies on either side of it, and it hides all of its bosses in a separate room in the back. It even has a familiar setup where you need to race thieves to the treasury. It is Chapter 10 all over again!
However, while there are a lot of similarities, this is most certainly the tougher of the two stages. There are substantially more troops to contend with, and many of them are hard-hitting and heavily armored. The treasures are also substantially more difficult to get to. But where there is a will, there is a way. This guide will lead you to victory against these fearsome foes.
Setup Phase

As we already stated, it really does feel as though chapter 14 is a remix of chapter 10's battle. The general thrust is very similar. You are going to want to have sword-wielding troops to fight the large section of Barbarians, and you are going to want Axe-Wielding troops to fight all the Lance Fighters and Lance Armors.
The same style of gap exists on this stage as well, so you will want to have some flying units to take advantage of it. So, have at least two of them accompany you in this battle. This will also help you protect your softer units from being flanked by the enemy's Wyvern Knights.

Moreover, since the enemy does have some powerful flying units, you are going to want to have archers. At least two of them (one for each squad). Preferably both Archers will have a longbow on them, but make sure the Archer traveling along the right does. Otherwise, the archer they will be fighting against will have a longer range than them. Never good.

Oh, and one last thing, there aren't many enemy Mages on this stage. So, having a few tanky, armored units will not be a bad idea. They aren't great for chasing down the mage at the beginning of the stage, but they are damn good at controlling space. That being said, while armored units make the first section much more manageable, the boss room in the back will be a touch treacherous for them, so don't load your team too heavily with them.

So, just to reiterate, you are going to want to have a decent amount of sword and axe units (at least three of each, we would say), at least one archer per team, a couple of flying units, and then you are going to want to have your typical magical units as well (at the bare minimum you need at least one healer and one mage). When you are fighting Hortensia and Zephia, it is extremely useful to have someone who can use martial skills. So, if you have a Martial Master, we recommend bringing one. Thankfully, you are given a massive 12 units for this battle, so you have a lot of room to play with.
Moreover, at this point in the game, you will have a multitude of troops that fill multiple roles. As an example, Ivy is a powerful mage, who can heal, and who is also a flying unit. Other gaps can be filled by intelligently equipping emblems to certain units in order to cover multiple needs (Lyn can go on a Berserker, as an example, giving you a great melee fighter who can then switch to archery by activating their emblem).

Chapter 14 also has a similar approach to Chapter 10 when it comes to the treasures, though it is a little trickier here (which is sorta the theme of this stage). While a thief would appear at the end of the first round and start pursuing the two treasure chests in chapter 10, here there will be two thieves. And the treasures aren't located in the center of the screen. Instead, there are two treasure rooms: one in the northeast corner and one in the northwest corner.
One last thing, you will notice that there are a bunch of Emblem Energy pools sitting outside the boss room in the back. So, don't be afraid to bust out your Emblems early. You will be able to replenish them before you fight the bosses.
Taking Back Solm Castle

|
Enemies |
4x Lance Fighters, 5x Axe Fighters, 1x, Sword Fighter, 2x Lance Armors, 1x Axe Armor, 2x Halberdiers, 1x Wolf Knight, 1x Berserker, 2x Mages, 1x Sword Flier, 1x Axe Flier, 2x Wyvern Knights, 2x Lance Cavaliers, 2x Paladins, 1x Archer, 1x Martial Monk, 1x High Priest, 1x Swordmaster, 1x Hero, Mauvier, Marni, Zephia, Hortensia |
|---|---|
|
Additional Troops: 2x Thieves, 2x Lance Cavaliers, 2x Sword Fighters, 1x Sword Flier, 1x Axe Flier, 1x Wyvern Knight |
|
|
Hortensia's Backup: 1x Sword Fighter, 1x Lance Fighter, 1x Axe Fighter, 1x Archer |
|
|
12 Units |
|
|
Deployment |
|
|
Victory Conditions |
Defeat Hortensia, Zephia, Marni, Mauvier |
|
Treasures |
Silver-Spirit Art (treasure chest left side), Wyrmslayer (treasure chest left side), Boots (treasure chest right side), Radiant Bow treasure chest right side), Silver Sword (taken from hero), Hurricane Axe (taken from Marni), Steel Sword (taken from Swordmaster), |
|
Difficulty |
★★★★★★★★☆☆ (8/10) |
As we already stated in the setup phase section, you are going to send your axe-wielding units to the left, and your sword-wielding units to the right. You will want to have an archer with each party, as the enemy has their own flying units this time around.

You can use flying units to harass the troops across the gap on the left, as they are lacking any ranged attacks. However, be careful about doing the same on the right side, as there is an archer positioned here. Naturally, you are going to want to use the columns to get an advantage when clashing with enemy units.
Be particularly careful to not overextend on the left side. There are troops with excellent mobility here, and you don't want to expose your archers, as they probably won't be able to survive more than a single attack from these enemy troops.

After the first round, the two thieves will appear in the bottom corners of the stage. The goal is to make a strong enough push to meet them in the corner and take them out early. However, the enemies aren't pushovers on this stage, so you may find that you aren't able to make it to the corners in time (without taking an inordinate amount of risks), which will mean that you will have to chase them. You will have six turns before they have left the treasure room (on the seventh they will escape the map), so all is not lost if you don't intercept them initially.

With all the heavily armored units lining it, the left side of the stage definitely feels extra precarious, so you really don't want to push too hard and get blown up. Even having Mages down there won't necessarily grant you victory, as they can quickly become a target for the Wyvern Knight. You need to build a defensive wall, and protect your vulnerable troops. Let them come after you, then pick them apart once it is your turn. Have your own heavily armored unit take the lead and draw the enemy troops in will be a huge help.
You may want to use Lyn's Emblem attack to take the thief on the left side out from a distance. That way you will have plenty of time to approach the troops on this side cautiously, and not have to worry about getting to the treasury in time.
The right side, on the other hand, feels more by the numbers. Once you have removed the Wyvern Knight and Archer, there isn't much on this side to really give you major problems. No heavily armored troops or anything. Melee fighters in front, ranged fighters in back, push forward and mulch your enemies. It is pretty much that simple. In the fourth round, two Lance Cavalry units will appear in the top left corner of the map, and two Sword Fighters will appear in the top right. As long as you are prepared for them, we doubt they will give you too many problems. You should have plenty of units that can take advantage of their weaknesses, and they don't get to act on their first turn.

Just around the time you have cleared out the bottom room, and you are ready to advance on the bosses, a Wyvern Unit and two Sword Fliers will appear at the bottom of the screen. Just arrange your troops in a line, and let them come to you. You don't want to advance until you have cleared them out, as the bosses are enough of a handful without having these jerks stabbing you in the back.

Just be aware, the Axe Flier has a hammer, so they will deal damage to armored units. The Wyvern Knight, on the other hand, is quite capable of taking nearly any troop down that isn't a resilient frontline fighter. However, there are only three of them. We used a combination of a fully healed Louis (yes, he took some damage from the hammer, but only about a quarter of his health bar, though depending on which tank you are using, and how leveled up they are, your mileage may vary) and Framme using her Chain Guard to help protect the other frontline units. Everyone else was back far enough that they couldn't be reached. Just let them come and get their swings in, then, once it is your turn, shoot them out of the air with your archers.
Hortensia And The Hounds

Once you have dealt with that group of flying units, send some strong fighters up to the top of the stairs and bait out the Hero and the Sword Fighter. The Hero is a fairly strong fighter, but you should have your entire army bunched together, so they won't last particularly long once you hit them with a lance attack or two. Now, be very careful, and get as close as you possibly can while simultaneously making sure you are not within range of Mauvier, Marni, or Zephia. You will want a unit that can use martial attacks up close if possible.

You will see that Hortensia can reach all the way to the bottom of the stairs. However, this is only with her Break staff, which doesn't actually do damage, it just breaks a unit so that they can't counterattack. If the hounds can't reach you, then that is pretty meaningless.

While The Hounds were all absolutely a nightmare a few missions ago, these three aren't actually that tough. Only Zephia has a revival crystal. Marnie dies very, very quickly to magic (she has no answer for it), Zephia is, naturally, extremely weak to arrows. However, she will have just enough life to survive a single attack by one, and then she will get a counterattack (and she hits extremely hard). Ideally, you will have a Martial Monk to break her, or at least a unit of some sort that can equip martial scrolls. If not, soften her up with Emblem attacks before you shoot her with one of your archers. Finally, Mauvier is a strong all-around unit. However, all you need to do is hit him with a single axe attack to break him, then you can lay into him with your big attacks.

Marni can be easily taken out by two characters, the same for Mauvier, and Zephia should be killable in about four actions. You have more than enough characters to kill all three before they ever get a chance to act. Once you are finished with them, advance on Hortensia. Neither her Martial Monk nor her High Priest will be much of an issue. At first, Hortensia mainly just breaks you using her staff (which does no damage). Once you take her first health bar she will start fighting for real. She does have two revives though, and after you kill her the first time, she will summon a Sword Fighter, Lance Fighter, Axe Fighter, and an Archer.

Hortensia's backups will come from the four staircases that surround her. If you have units positioned on these tiles when she loses her first healthbar then no troops will spawn.

Hortensia herself is extremely vulnerable, but just as equally dangerous. She can be broken with any regular axe attack, and her being a flying unit means that arrows do a lot of damage. In general, she doesn't take hits well. After you take her first health bar, her next turn will be spent doing the "Diabolical Dance". This means that you get one turn to finish her. If you can't do it in that amount of time, her next attack will kill someone. However, as long as you keep on her, and keep breaking her with axe attacks. you should be able to quickly overwhelm her. Once she falls, you will be victorious and the battle will be over.
Post-Battle Exploration

To the right of Hortensia you can find Bond Fragments, then head to the left side of the room and grab the Steel Ingots near Diamant. Up on the second floor, there are some spices in the plant behind Louis. Head further down the right side of the map, to where Fogado is. There are eggs hidden in the plant behind Fogado. Why are there eggs in a plant? Shut up. Don't think about it. There just are. Finally, head to the top of the stairs. There are Iron Ingots here.
You will now cash in and get 40,000 gold. There isn't anything new to do back in The Somniel, but you can, at the very least, buy more Seals, as they will be restocked at the item shop. There will also be a TON of new weapons to buy in the weapon shop, as well. There's a good chance you won't have a penny left after you go on your shopping spree.