
Quick Links
Fire Emblem Engage provides you with a truly engaging series of systems that stack in beautifully elegant ways. However, if mishandled, you can very quickly find yourself on the losing end of an absurdly one-sided battle. Troops can be felled by a single attack, battles can be won in a turn. In a game where one of the primary game modes includes permadeath, you are going to want to get a handle on everything at play!
But while the many systems at play may seem overwhelming at first, they all have clear, pre-defined rules. Once you get a handle on how these systems complement each other, we promise that you will feel like the Divine Dragon of legend, as you will dominate your foes on the battlefield!
Updated February 11th, 2023 by James Kennedy: While we thought this guide did a pretty solid job of covering the basics, we couldn't help but feel like there were a few omissions which needed to be addressed. So, we added a section to help you with class types. We also added a much-needed section on Emblems.
Weapon Dynamics - Rock, Paper, Sword

If you have played past Fire Emblem games, you are probably pretty familiar with the rock, paper, scissors mechanics. The foundation of this system is that sword beats axe, axe beats spear, and spear beats sword. When fighting an enemy troop wielding the opposite weapon type you will deal additional damage as well as "break" their stance (for further information on breaking, read the "break system" section down below).
However, even here, there is a level of nuance. For instance, Chain Attacks will not break, even if the unit performing the Chain Attack is using a weapon from an opposing weapon type. Similarly, while weapon type will still play a role in these encounters, the dynamic shifts dramatically when "armored" units are involved. An axe may have a huge advantage against spear users, but if that user is heavily armored, that still won't lead to much damage.

Additionally, archers are extremely effective against flying units, and magic units are extremely effective against heavily armored units. When we say "effective", we mean they are sometimes capable of taking out rival troops in a single action. When using these unit types, you need to be extremely careful!
The Break System - Break Your Opponents And The Game

One element that is new is the break system. If you attack an enemy who is equipped with a weapon that is weak against the weapon your trooper is using it will break them, meaning they aren’t capable of countering for the remainder of that turn. It will also mean that if that attack lands, you won’t have to worry about a counter (letting injured characters still play an offensive role in certain instances).

Martial attacks will break mages and archers. This is a fantastic way of mitigating their ability to severely damage your mages and archers while they try to take them out. It is the sterling example of how damage is sometimes less important than breaking an opponent.
The Engage System - An Engaging Way To Power Up

The Engage System is obviously a pretty important component of the game. First and foremost, it is a system that allows players to modify their team in unique ways. You can expand your troop's mobility with Sigurd, or you can use Celica to provide Mages with the ability to attack twice with magic. Each Emblem is able to provide immense power to the unit they are tethered to. And as you increase your bond with an emblem, your units will even be given the opportunity to take some of their skills and use them on their own. In this way, the system encourages players to swap rings frequently.

But these unions aren't based solely on passive skills, emblems also provide tremendously powerful skills that can turn the tide of battle in the blink of an eye. From being able to warp across the map and cast a devastating spell, to being able to give every allied unit surrounding you a second turn, these abilities are incredibly potent. The kicker is that these Emblem attacks can only be used once per Engage. So use them wisely. Of course, the abilities all change depending on the Emblem, so make sure to experiment with the different combinations.
You can use the Engage attacks more than once in a single battle, but that requires you engaging more than once.
The process of summoning an Emblem is pretty simple. They are tethered to a meter. At the start of the battle, your meter will be full. After using the Engage command, you will stay fused with the Emblem for three rounds, then you will return to your normal state. You can build this meter by landing attacks, but the most effective way to refill it is to spend a turn sitting on an Emblem Energy Pool. Thankfully, you start every battle with a full bar of meter.
Battlefield Traversal - From Point A To Point Bleed
Terrain

Let's start by covering what Fire Emblem doesn't implement. It does not have any interest in height. So, elevation is meaningless here. What isn't meaningless, however, are things like ground type, and buildings. You can dramatically increase your evasiveness by using ground types to your advantage. There are other benefits as well. Some pieces of terrain will also provide benefits, such as healing any troop who ends their turn here. This type of terrain is remarkably potent when paired with a Qi Adept who has the Chain Guard ability. As it means that they will be able to use Chain Guard multiple rounds consecutively.
It is worth noting that Thief class characters get extra bonuses for being on special tiles, while flying units aren't affected by them at all.

Some terrain types will affect your units negatively. In those instances, you are best off using abilities that will clear the terrain type, or replace it with another. Or, you can use your enemy's aggression against them and bait them into a position that provides you with the advantage, and forces them to stand on a tile that gives them a disadvantage. Positioning is key in these situations.
While not quite a terrain type, some maps will also have a light mechanic, which will allow the darkness to conceal enemy troops. Use torches to beat back the darkness in these instances.
Moving Through Units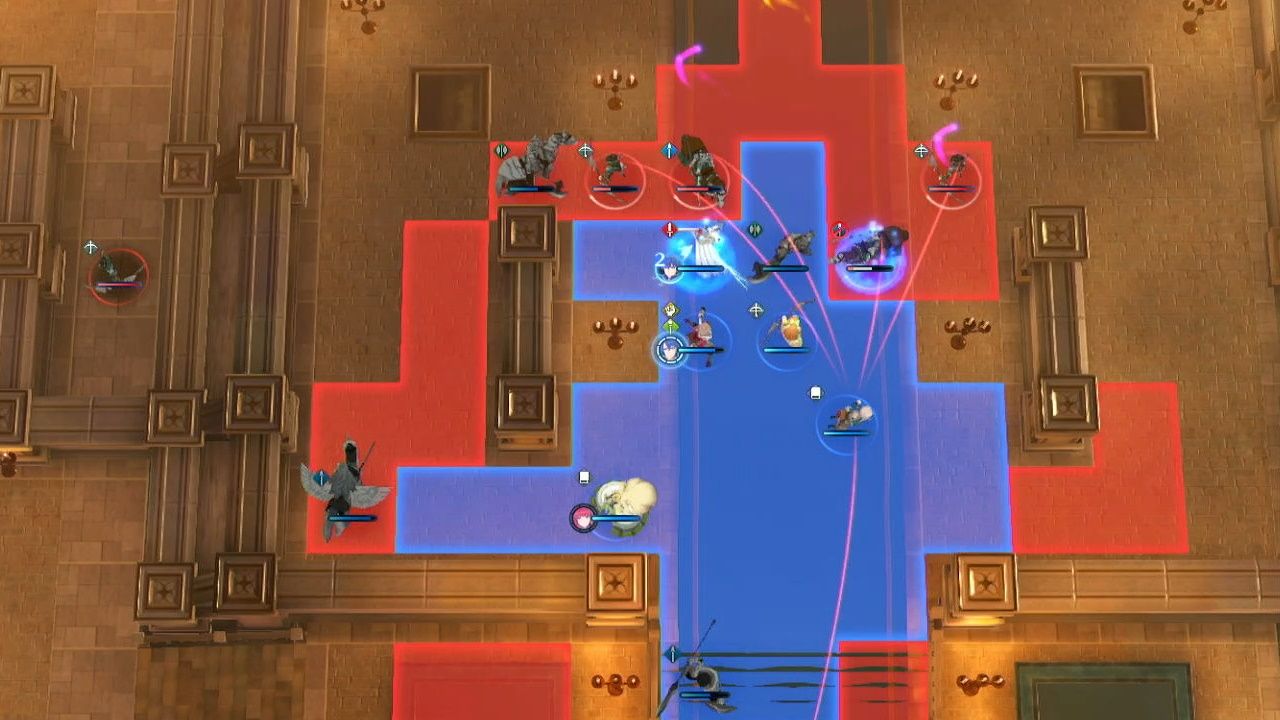
Another aspect of navigating the battlefield involves moving through troops. Which is to say, that you typically can't do that. This is extremely important, as you boxing your enemies in is how you keep your mages alive! Mindfully placing your sturdier units on the board is the only way to keep your squishier units alive. That being said, as we alluded to, certain units can bypass this altogether. There are even grounded units, like Thieves, that are capable of doing this.
Emblem Energy Pools

Finally, one of the most important things to track is where the Emblem Energy Pools are. If you end you turn on these spots, they will completely refill your emblem energy. Needless to say, this means that if you are nearby one of these pools, you can use your most potent Engage attacks, and then get an instant recharge. Some of these moves are absurdly powerful, so this can be a monumental momentum shifter!
Attack Radius - Stranger Danger!

This is one of the most important things to get a handle on when playing Engage. If your troop is in range of an enemy's attack, then a red line will connect your troop to the aforementioned enemy. This is a quick and easy way to keep track of how vulnerable a character may be. Here is the tricky part, though: the attack radius lines take into account all current obstructions. This means that you may place a troop in a position that seems safe, only for a wall to be broken down, leaving them open to multiple attacks.
You need to keep in mind how shifting your troops around may expose previously safe members of your party. Because, sure, your squishy mage may have been perfectly safe when you moved them into position, but if you move the people around them after the fact, you could very well expose them to attacks. And it isn't always as obvious as the person beside them, either. Someone off to the side may have been just enough in the way to disrupt any enemy's path to your mage. Shifting that troop away could instantly lead to your mage's death. It can be tricky juggling all these variables, so, make sure to use the Danger Radius (mapped to the ZL button) for a bigger picture of all the threats that surround you.
Armored Units - Your Resident Brick House
These soldiers are, for all intents and purposes, moving walls. They will often completely shrug off most physical attacks. Archers will typically be completely incapable of dealing damage to a heavily armored unit. However, while these troops can seem almost indestructible, they instantly crumble when struck by magic. They also tend to have some of the worst mobility in the game. Still, if you make sure to take out the mages before pushing them to the front line, they are absolutely invaluable.
Flying Units - Death From Above

These are to mobility what Armored units are to defense. They do, however, very effectively mash mages. The big comedown is archers will kill them very, very fast. However, if there are no archers around, a flying unit gets to completely ignore the terrain. Which is absurdly potent.
Make sure to provide your flying units with a ranged weapon. This will allow them to hover over impassible terrain, such as water, and snipe troops. Troops that don't have a ranged ability will be completely incapable of attacking them if you do this!
Chain Attacks - There's No I In Team

Chain Attacks essentially give you a free, albeit weak, attack when a backup-type unit is positioned near other units. If a unit with the Chain Attack ability is positioned beside an enemy, then it will be hit with a Chain Attack every time they are attacked. This includes when they are attacked at a distance. Better yet, the effects of Chain Attacks will stack. So, if you have multiple units with this ability in contact with a single unit, they will be hit by each unit.
The chain attacker adds on damage without fear of being countered. So, worry not, each of these attacks is completely without risk for the chain attacker.
One thing to keep in mind is that Chain Attacks do not break. They are just add-on damage! The damage is also a set amount. So, if you have backup units positioned around an armored enemy, they will deal damage, even if their normal attack is typically completely nullified by the unit type. They do, however, take into account accuracy (determined by stats like hit and avoid as well as the terrain). So, a Chain Attack can miss. Another important thing to note is that if a backup unit is in attack range, they will perform a Chain Attack. This includes units that are using ranged attacks as well!
|
Chain Attack Example |
|---|

There are two enemy units positioned above you. On the left, there is a swordsman, on the right, there is a berserker. There is a space between them, so you move Boucheron (the first character to join your army with access to the Chain Attack) right between the pair. Now, if you attack either of these enemy units with any other attack, this will cause Boucheron to hit them for a few points of damage.
So, if you move Alear into position, and attack the berserker, you will break him, AND Boucheron will add on to the damage. If you follow up with an arrow shot from Eite, the berserker will be hit by the arrow, and Boucheron will, once again, take a weak swipe at them. You can keep doing this with every troop you have at your disposal until the enemy is dead.
Chain Guard System - Taking One For The Team

Much like the backup unit's Chain Attack, the Qi Adept troops have access to the Chain Guard. This is a means for providing support to fellow units, but that is where the similarities end. Unlike Chain Attacks, you need to activate the Chain Guard ability. What it does is take a hit for another unit. The damage will be twenty percent of the Qi Adepts' health. However, there is a serious catch; you need to be at full health in order to use this ability.
Certain items and Emblem Rings will give you the ability to gain life passively or while attacking. Qi Adepts benefit greatly from this type of setup.
One use of the Chain Attack means that it is used up for that turn. While this does make the Chain Guard a more limited ability, that isn't to say that it isn't still potent. The best use case is for when a unit is left exposed with an enemy nearby who is primed to target their weakness. In this instance, a Chain Guard can save a unit from almost certain demise. This is why you may want to keep your Qi Adept characters last in the lineup when possible, as they can help rescue you from unfortunate situations.
When the enemy is using the Chain Guard ability against you, your best tactic is to hit the Qi Adept character. Not only will any damage disrupt the Chain Guard, but the Qi Adept's Chain Guard ability doesn't apply the damage reduction to them; so, they will take the full weight of the hit.
Draconic Time Crystal - We Have To Go Back!

The final piece of the puzzle is, of course, your ability to wind back time. When you make a bad call, this allows you to go back and try again. This is a godsend for people playing with permadeath activated. However, there is one important element that the game doesn't tell you about... there is a limit to how many times you can turn back time. There will come a point where it won't let you take any more moves back. So, make sure to save during battle as well, this will give you an anchor point that you can reliably fall back on.
One thing to note. If you miss a shot, you can't simply turn back time and try again. You will just keep missing. The game knows your cheesy ways and is actively preventing you from using this system to get free re-rolls! However, you can try a completely different action. That will receive its own success or fail rate.