Quick Links
Following the easier second chapter of Fire Emblem: Engage, the third installment of the Fell Xenologue is a sudden difficulty spike that can catch up with the unaware most painfully. In a narrow map filled with long-ranged, poison-stacking foes, powerful summons, and pincer-attacking flying menaces, your ability to improvise will be tested.
On top of the standard map difficulty, you'll be tasked with protecting your infuriatingly weak Forced Deployments - especially Nil. Gregory, your newest ally and Griss's double, is also a bit of a drag, so you'll need to break out your most strategic mind, your best Emblems, and this guide.
Unit Selection And Battle Preparations

The largest difficulty you'll face on this map is the survival of your two dragons and making use of Gregory despite his horrendous Hit Rate.
Additionally, Zelestia's prowess in the previous map doesn't translate well here with the abundance of snipers in key positions and quick foes.
Your best bet for creating a solid team relies on these preparations with the Force-Deployed units:
|
Character |
Setup |
|---|---|
|
Alear |
Apply Emblem of choice. Add Levin Sword, Wyrmslayer, and Killing Edge to Inventory. |
|
Nil |
Apply Emblem Micaiah. Trade over a Physic and Restore staff on Turn One. |
|
Nel |
Apply Emblem Camilla or Emblem Marth. Trade over a Spear on Turn One. |
|
Zelestia |
Apply Emblem Chrom or Emblem Roy (for Hold Out). Trade over either Elfire (or Elwind if using both Pandreo and Veyle) on Turn One. |
|
Gregory |
Apply Emblem Celica. Trade over a Restore staff or Fortify staff if needed. |

In addition to these Forced Deployed units, you'll get your choice of four guests.
Your abundance of mages in the Forced Deployments will mean you don't need as many in this map, so don't take more than one.
The only exception to this rule should be if you have a strong Soren user like Jean or Pandreo who can use Bolting and Assign Decoy to control this map (a solid strategy).
Although there are several lance units on this map, almost all of them will be Generals, so your mage units and Alear's Levin Sword can do most of the work there. Instead, focus on the sword units.

You'll want at least one good lance tank. Having Canter on them is recommended to take care of enemies and move your tank out of the mage cannoneers' range.
Additionally, recruiting a unit like Chloe with Canter can mean being able to fly to the mage cannoneer towers, hit with a Spear, and retreat out of the sniper's range. It's a good strategy, but it can also be replaced by:
- Using Astra Storm
- Using Bolting

Either way, you'll want at least two units that can deal with the distant mage cannoneers on the towers on either side of the map. Ideally, you'll also want an archer to deal with the pesky flying reinforcements.
Otherwise, any unused team slots should consist of units you are most comfortable with and who can bring max-bonded Emblem rings.
To recap, your ideal team should have the following:
- Two units that can reach and defeat the tower mage cannoneers
- One archer
- One lance tank
Veyle and Veronica is a fantastic combo on this map due to the lack of good units and the stunning number of enemy reinforcements on higher difficulties.
With her Fell Child unique ability, Veronica's Summon Hero can be consistently used as needed on this map, giving you one extra unit to play with and even sacrifice.
Fortify+ will also remove any poison stacks from Alcryst's Mage Cannoneer friend.
Marching Across The Bridge – Beginning Battle

|
Enemies |
|
|---|---|
|
First Reinforcements (SE) - x2 Griffin Knight (Sword) |
|
|
Second Reinforcements (SW) - x2 Wyvern Knight (Sword) |
|
|
Third Reinforcements (E) - x2 Griffin Knight (Sword), x1 Griffin Knight (Lance) |
|
|
Diamant's Summons - x1 Marth, x1 Sigurd |
|
|
Final Reinforcements (Two Rounds) - x4 Griffin Knight (Sword), x4 Wyvern Knight (Axe) |
|
|
Levels are set around Advanced Class 1 |
|
|
Deployment Allowance |
4 |
|
Forced Deployments: 5 - Alear, Nel, Nil, Zelestia, Gregory |
|
|
Victory Conditions / Defeat Conditions |
Victory: Defeat Diamant |
|
Defeat: Alear, Nel, or Nil is defeated |
|
|
Treasures |
None |
|
Difficulty |
★★★★★★★★☆☆ (8/10) |
|
Top Recommended Units |
Veyle and Veronica, Alcryst, Any Good Lyn user, A Flying unit with Canter/Canter+ |
The tight corridor of the bridge requires you to traverse upward through several barricades while avoiding the mage cannoneers firing down on you and the multiple flying reinforcements sweeping in from either side.
This map introduces the concept of almost endless flying reinforcements, and this map is the gateway to several chapters where this idea is implemented and multiplied to extremes.
If you're not a fan of or struggle with obscene flying reinforcements, it's recommended to either stop the Xenologue or lower the difficulty.
There is one mage cannoneer on a tower on either side of the bridge, and each mage cannoneer is guarded by one sniper with a Longbow and two flying sword units.
The snipers are each there to ensure you won't be able to sweep in with a flying unit of your own easily.

To begin this map, you'll want to first take out all three ground units directly in front of your spawning point if you can.
The General is easily dispatched with Alear's Levin Sword and a follow-up attack from your lance unit. Likewise, make quick work of the archer and then cautiously approach the Halberdier on the left.
The Halberdier is guarded by the Mage Cannoneer on the left side. He has a Silence Blast to watch out for, so you shouldn't send your mages in against the Halberdier if you're not certain you can take care of him in one turn.

Once all three units are dispatched, the second goal is to move forward, take out the flying units on either side and begin whittling down the Mage Cannoneers.
You can destroy the Mage Cannoneers via two methods:
- Attack and flee with a flying unit that has Canter
- Attack with long-ranged attack (Astra Storm/Bolting) - use on tower mages only
Whichever you choose, ensure you take out the tower mages before the swarm of flying reinforcements come in and complicate your fight.

With these out of the way, you'll start dealing with Wyvern Knights and Griffin Knights in equal measure. The Wyvern Knights are strong, but the concern here is more the Griffin Knights, which boast high Avoidance and incredible Speed.
Gregory could theoretically deal with some of these, but his poor Hit Rate and power mean almost consistent misses and leaving enemies with only two HP. Your best bet is a good archer and strong physical attackers.

As you continue, bait down the Swordmaster and the Berserkers in a method you're comfortable with to take care of them. They're standing in your way of the large middle hurdle of this map.
As you bait them down, do watch out for the range of the Mage Cannoneers beside Alcryst.
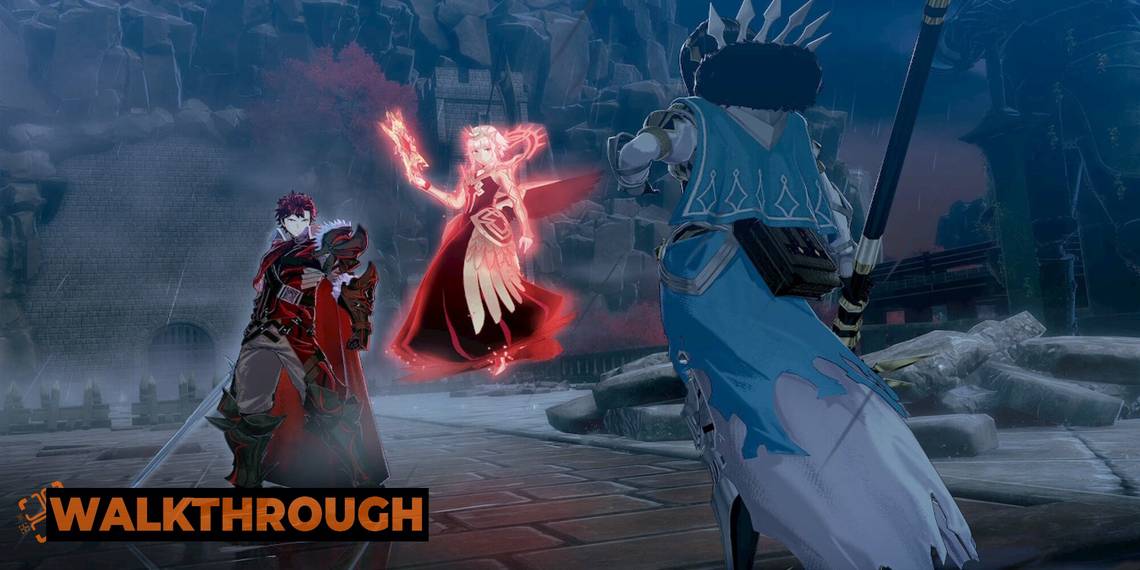
The Hurdle – Facing Alcryst

The greatest difficulty in this map is facing Alcryst and his two buddy Mage Cannoneers.
Alcryst himself isn't too difficult to face, but his Mage Cannoneers and the unfortunate positioning right in front of an aggressive Diamant and his posse means setting up this hurdle the right way is key to victory.
Your cheat? Using long-ranged attacks like Astra Storm and Canter-attacking to deal damage without triggering the final phase of this map.

Your first priority will be the Mage Cannoneer on the right. They have a Venom Blast that stacks poison on your units and Silence Blast to humble your mages.
Their problematic arsenal will cause you the most headaches if not dealt with quickly.
Take out the Mage Cannoneer on the right, and only then deal with the one on the left. Once the Mage Cannoneers are gone, you can deal with the "Brodian prince that isn't Diamant."
If you can manage it, make all of these attacks from range three or higher, staying out of Alcryst's range and refusing to trigger his reaction.

The source of frustration when fighting Alcryst comes from his super high Avoidance rate and the abysmal Hit Rate of your own units in the Xenologue.
With so few capable of hitting anything consistently, Alcryst proves to be a huge challenge for many units.
Your best bet with Alcryst is to use Engage Attacks or flying Canter units that can hit in melee and flee afterward.

Eirika's Twin Strike, for example, will almost always take one health bar away from Alcryst, and you can use Gregory and Celica's Warp Ragnarok to do almost an entire second bar.
The rest of the damage can be dealt with as you see fit.
Once Alcryst has been challenged (whether he lives or not), Diamant and his group will begin moving, so it'll be best to move your units in as far as you can on either side of the barricade to position yourself for a swift defeat in two turns.
All Hell Breaks Loose – Striking Down Diamant

When Diamant begins to move, four key things will happen:
- Reinforcements in the south will begin (two Wyvern Knights and two Griffin Knights every turn).
- Diamant will use the Book of Worlds Wait action to gain "Seal."
- Diamant's Mage Cannoneer will load a Break shot in an AOE attack in the gateway Diamant stands in.
- Diamant will summon Marth and Sigurd on either side of Alcryst's blockade.

With Sigurd and Marth on either side of the barrier, your first and foremost priority should be having units ready to deal with them within one-to-two hits.
Sigurd is weak to himself, thanks to Ridersbane, but otherwise, you can deal with him easily with any ranged unit.
Conversely, Marth is the hindrance thanks to his high Avoidance. You'll likely need a team of solid units with good support ranks and a hint of your own luck to deal with the annoying prince.
Once Marth and Sigurd are dealt with, you can work on the Mage Cannoneers on either side (if you haven't already) to ensure they don't become a problem on your march to Diamant.

As you near Diamant, you'll have several things to account for:
- Anyone struck with Diamant's first blow (without Headlong Rush) will have their movement reduced to zero.
- Diamant and Veronica's Hlidskjalf will never allow for a counterattack when Diamant initiates combat.
- Diamant's power will increase the more damage he takes (Reprisal from Veronica).
- Diamant has two Resurrection Beads, allowing him three health bars.
- The Enchanter will add a Physical Reflect to units nearby, requiring you to defeat certain enemies with magic only.
- The Mage Cannoneers all have Freeze cannons.
With so much happening, it's very likely you may lose units in the mess that follows an assault on Diamant. Thankfully, any units lost in the Fell Xenologue are not permanently gone.
Your first concern in a standard playthrough should be killing Diamant and preserving the dragons rather than protecting every unit in your team.

When facing Diamant, you'll want to first take off any additional enemy units around him before facing the prince himself.
Reprisal will punish you severely in the next Turn if Diamant has taken any damage. Defeat all nearby melee units to ensure all you have to face is Diamant himself.
Move Nil, as needed, to a safe space behind the barrier, and use any spare units not within range of the fighting as meat shields to ensure his survival (he'll need all the help he can get).

With Diamant himself, you'll want to go all out with Engage Attacks. Deal as much unanswerable damage as possible and finish off any remaining health with your weaker units (like Nel).
Diamant is particularly weak to magic attacks, and he has no Range Three weapons, so you can do chip damage with Elthunder tomes and Longbows as needed and deal massive damage with Elfire and Obscurite.
You don't need to face the flying reinforcements since Diamant's defeat will mean the map's end, so focus on Diamant and defeat him three times to bring this bridge battle to a decisive end.