Quick Links
Floppy Knights is an excellent, laid-back turn-based strategy game. It’s the ideal starting point for newcomers to the genre, and it is fun enough for veterans to have a good time messing around with deck building and the occasional Goblin smashing.
If you want a bit more spice in your life, then look no further than the wonderfully challenging, and aptly named, Challenge levels. These unlock as you progress through the game and task you with completing various objectives with a premade deck. These, more often than not, push what you’ve learned in the Campaign to the next level.
Challenge Objective

This challenge is easily the most difficult of the first batch of Challenge Levels. You must make it to the enemy flag and hold it for two turns. Do this, and you win. You must not kill every enemy on the board, however, as that is a failure state.
Understanding You Deck

Like with every challenge mission, you will have a premade deck to play with. This does not mean there is no RNG in this mission, however. The hand you draw per turn will be randomized as per usual. That being said, knowing your deck is the first step to victory.
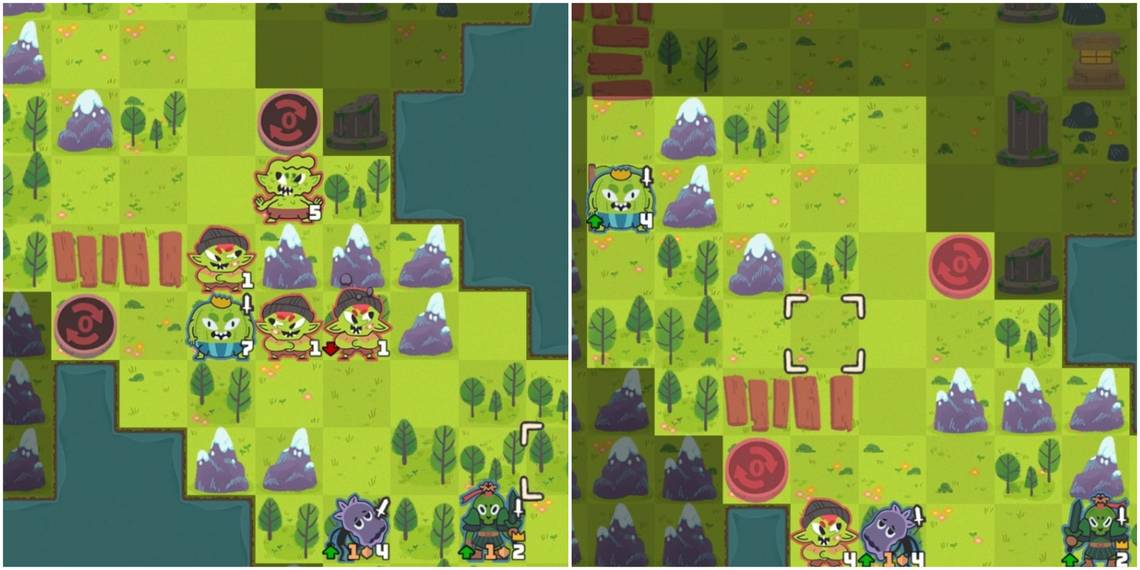
- 1 Captain Thistle (Commander)
- 1 Plow Through (Commander Card)
- 1 Barrel Cactus
- 1 Succulent Kicker
- 1 Bamboomer
- 1 Spitunia
- 1 Grow
- 1 Thorns
- 1 Sow/Reap
- 1 Attack
- 6 Move
This deck is larger than your usual Challenge Deck, has fewer cards that can be burned, and, due to the sheer number of units, will fill with even more cards as you play. This can get overwhelming if units start dying and your deck gets filled with repeats of cards and Waste.
Captain Thistle
Captain Thistle is a really powerful card but is very susceptible to being killed. His health is shockingly low, and his damage, whilst great, isn’t enough to tackle the stronger units effectively. He can kill a Goblin Grunt, but outside of that, he is going to struggle. Heck, he’s also rather slow but can make up for it with Plow Through, his Commander Card.
How you use Captain Thistle depends on your starting hand. Thorns is excellent on him, as it will give him that extra pip of damage, allowing him to kill Sloppy Gobbies in a single hit, and Hyper Snipers in two. The issue is that many cards can benefit from Thorns, and you only get one.
Barrel Cactus
Good old reliable Barrel Cactus. Barrel Cactus should be your nuke. You buff him up and send him in. How you buff him is entirely up to you. Grow will increase his HP, making him harder to kill. Thorns will make his AOE attack more powerful. Poison Shot (from Spitunia) will also help him swing above his weight.
Use him to attract enemies, and then unleash death. Try and make sure he is standing on tree tiles as this will grant bonus Armor as well as the ability to use Roots (from Bamboomer).
Spitunia
Spitunia is an interesting card. It deals bad damage on its own, it has low HP, and it isn’t particularly fast. The upside? Spitunia generates Poison Shot, which is a pretty potent buff that becomes ridiculous if upgraded with Grow.
Spitunia partners well with Barrel Cactus. Together, this duo can effectively kill a Sloppy Gobby. If you keep Spitunia on a tree tile, it can even tank a hit or two, which is nice.
Succulent Kicker
Succulent Kicker is not going to do anything, yet be one of the most useful units in your deck. Succulent Kicker is a bad card. It has low HP, low ATK, and tends to be a throw-away unit. What Succulent Kicker does is generate two cards for your deck - Hop, and Kick. Hop is a fantastic “get out of jail free” card, whilst Kick is a very valuable attack card.
The best use of Succulent Kicker in this mission is to stay in deployment and block enemies from spawning behind you. It’s a thankless job, but it will win you the game.
Bamboomer
Bamboomer is a very powerful card, but it suffers from being very slow, having an awkward range requirement, and being made of paper. You can’t use Bamboomer in an offensive push. There are two Spawn Points behind your Deployment Zone. Bamboomer can kill anything that pops in. Have Succulent Kicker block one of them, and keep Bamboomer in range of the other.
Not only that, in the early game, Bamboomer’s damage can be used to take chunks out of early enemies who are close to your deployment. The final boost this card brings is with the generation of Roots, which grants bonus movement if a unit is standing on a tree tile.
How To Defeat Enemies Effectively

This mission is a war of attrition. Enemy units are being spawned constantly, some powerful Goblins are wandering around, and you need to hold their flag for two turns. If you are going to win this, you need to kill enemies effectively and use target priority.
Goblin Grunt
Firstly, Goblin Grunts are not important. Goblin Grunts don’t deal enough damage to be much of a threat, and they are killed in a single hit from Captain Thistle, or a single hit from a Barrel Cactus who has been buffed with either Grow, Thorns, or Poison Shot. You want to largely ignore these guys and focus on more powerful enemies.
These guys will be spawning constantly throughout this mission, which can be used to your advantage. You can use Goblin Grunts to prevent stronger enemies from getting close enough to attack. Not only that, their AI is very aggressive. They will always move towards you - even if that will leave them open to attack.
Sloppy Gobby
Sloppy Gobbies are a nightmare. They have just enough ATK and HP to be a real nuisance and their AI tends to keep them away from you unless they can get in and attack first. You don’t want to get hit by one of these guys, so instead, stay out of their range, and then use things like Plow Through to get the jump on them.
A Sloppy Gobby can be killed in a single hit from a buffed Captain Thistle, a buffed Barrel Cactus, or a combination of Barrel Cactus and Spitunia.
Bop Goblin
Bop Goblins are one of the most dangerous enemies you will face in this mission. They have a lot of HP, they deal good damage, and they can displace your units. These need to die as a priority. You will be face-to-face with one at the start of the mission.
This Bop Goblin will largely decide how your deck will function as you need this Bop Goblin dead turn one. This may require buffing units you don’t want to buff, or playing ineffectively on the first turn to ensure it dies. If you can’t kill it, then restart the mission.
There is a second Bop Goblin later in the mission that you will need to deal with too. This one is much easier to tackle as you should have your units all set up and ready to kill. They have 12HP, which is always awkward to deal with.
Hyper Sniper
Hyper Snipers are brutal. They are ranged units, with a lot of HP, and they deal a decent chunk of damage. You need these things dead. Thankfully, there are only two of them in this mission, and they can be killed in two hits from a buffed Captain Thistle, or a combination of Thistle, Spitunia, and Barrel Cactus (your attack force).
Remember that Goblin Grunts will be replenished. The more powerful units will not. Every time you kill one of these specialist units, they are gone for good, and the mission gets much easier. Sometimes trading your units to get a kill is worth it - there is no time limit, take as long as you need to grind through the hordes.
How To Position Your Units

Positioning is important for this mission, and it can be split into two categories - deployment and in-game.
Deployment
Deployment is fairly simple in this mission. You want to position Captain Thistle one tile down from being in line with the Bop Goblin. This is so you can potentially place a Spitunia in range of the Bop Goblin without having to move it, thus saving Energy.
You will want to place any Bamboomer you draw (and decide to place) at the top of the Deployment Zone. This will allow you to fire on the Bop Goblin, whilst also being in the perfect position to attack any spawning enemies from the bottom spawner.
Succulent Kicker can be played, but shouldn’t be used to attack at all due to his low stats. Deploy it anywhere, and then move it to the top spawner when you have spare Energy.
Barrel Cactus should be positioned to move in and attack the Bop Goblin.
Remember, the main objective of deployment is to kill the Bop Goblin. This takes precedence over everything else. If you can kill it just with Captain Thistle but it takes all of your energy to do so, then do it. You can summon more units later as you have dealt with the immediate threat.
In-Game
You want to keep Bamboomer on the top deployment tile and have Succulent Kicker planted on top of the top-most spawner. This will prevent enemies from attacking you from behind as Succulent Kicker will block half of the spawns, and Bamboomer can instantly kill the rest.
Captain Thistle is an important part of this mission as his damage is too good to pass up, but he is vulnerable. Move him in conjunction with Barrel Cactus. Wherever possible, block enemy movements and keep your Commander safe.
Sick to the trees. They provide a nice boost to your durability, and you can use Roots to gain bonus movement.
You will want to get Barrel Cactus onto the enemy flag as it has the most HP, and can hold off against anything the enemy throws at him. You will need to kill all the non-grunt enemies to pull this off, however.
Completion Rewards

You gain 50 Coins for completing this Challenge. Make sure to spend those Coins on crafting new cards and upgrading your deck for the Campaign.