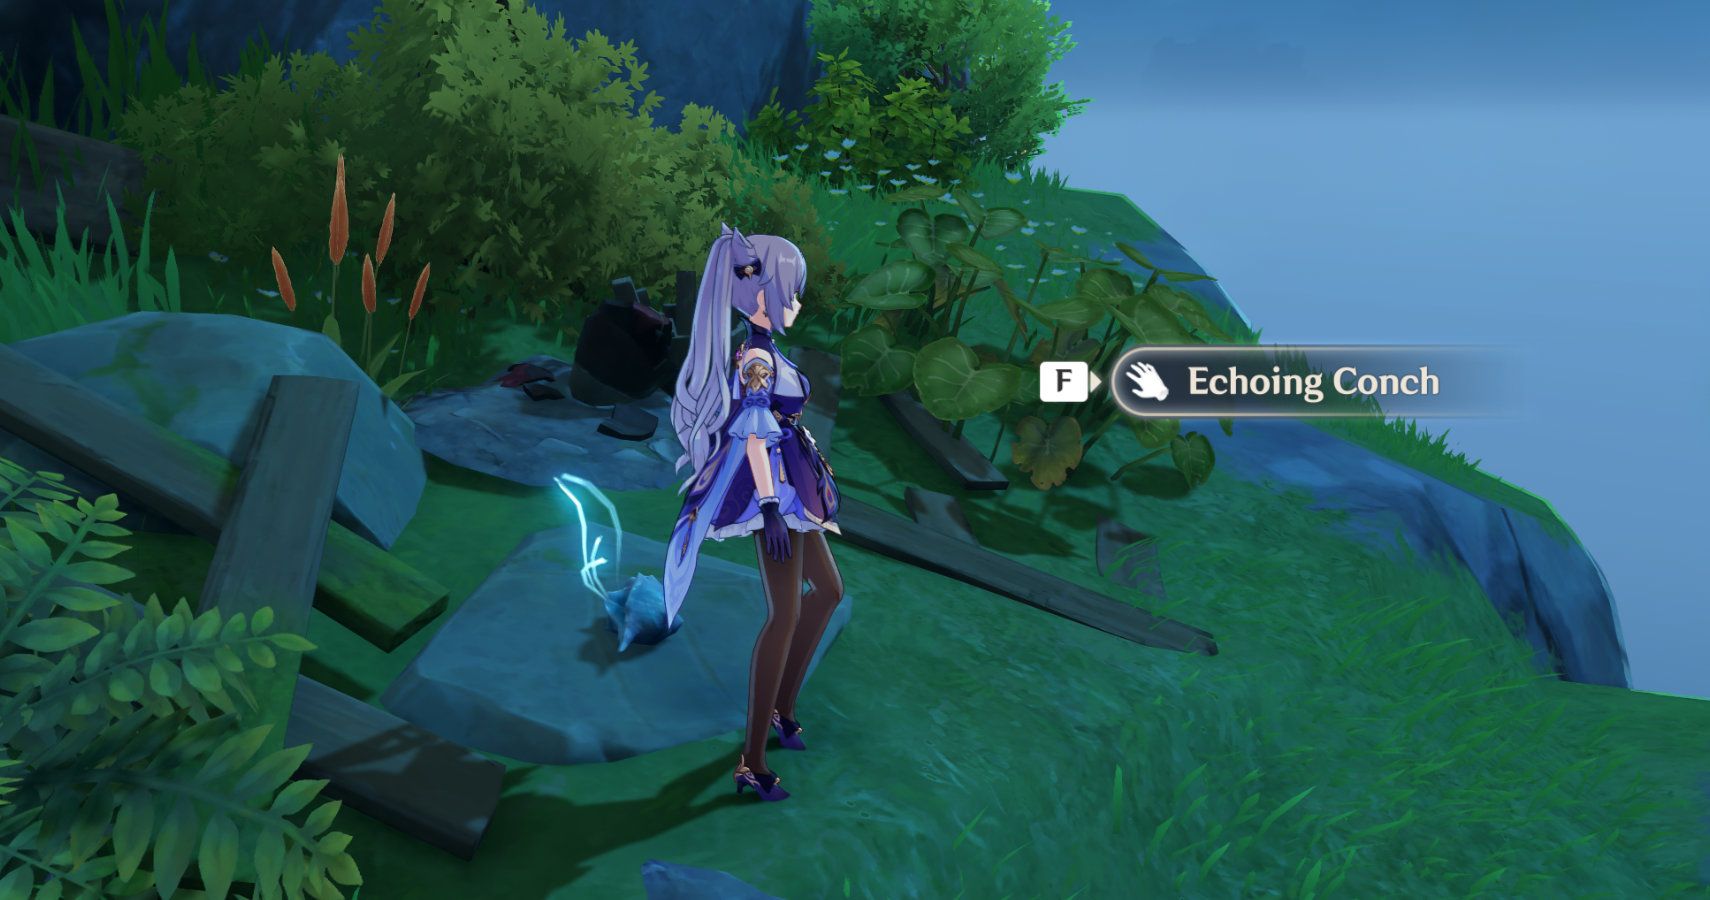
Once you've unlocked the Golden Apple Archipelago by completing Genshin Impact's new Midsummer Island quest chain then you'll be able to collect echoing conches. These are required for the Echoing Tides event that unlocks Barbara's summer outfit.
At the end of the first questline; Klee, Traveler, Barbara, and Jean will be dropped onto a small island and will need to follow a trail of buoys to uncover waypoints. As you unlock the different waypoints, you'll notice some shell icons on your minimap. These show the locations of echoing conches.
The markers are a good indicator but the conches can still sometimes be difficult to spot. This guide serves as a walkthrough for all the locations, showing you exactly where to pick up Echoing Conches.
Important Note: As the event unlocks in stages we'll keep this guide updated as new conch shells become available.
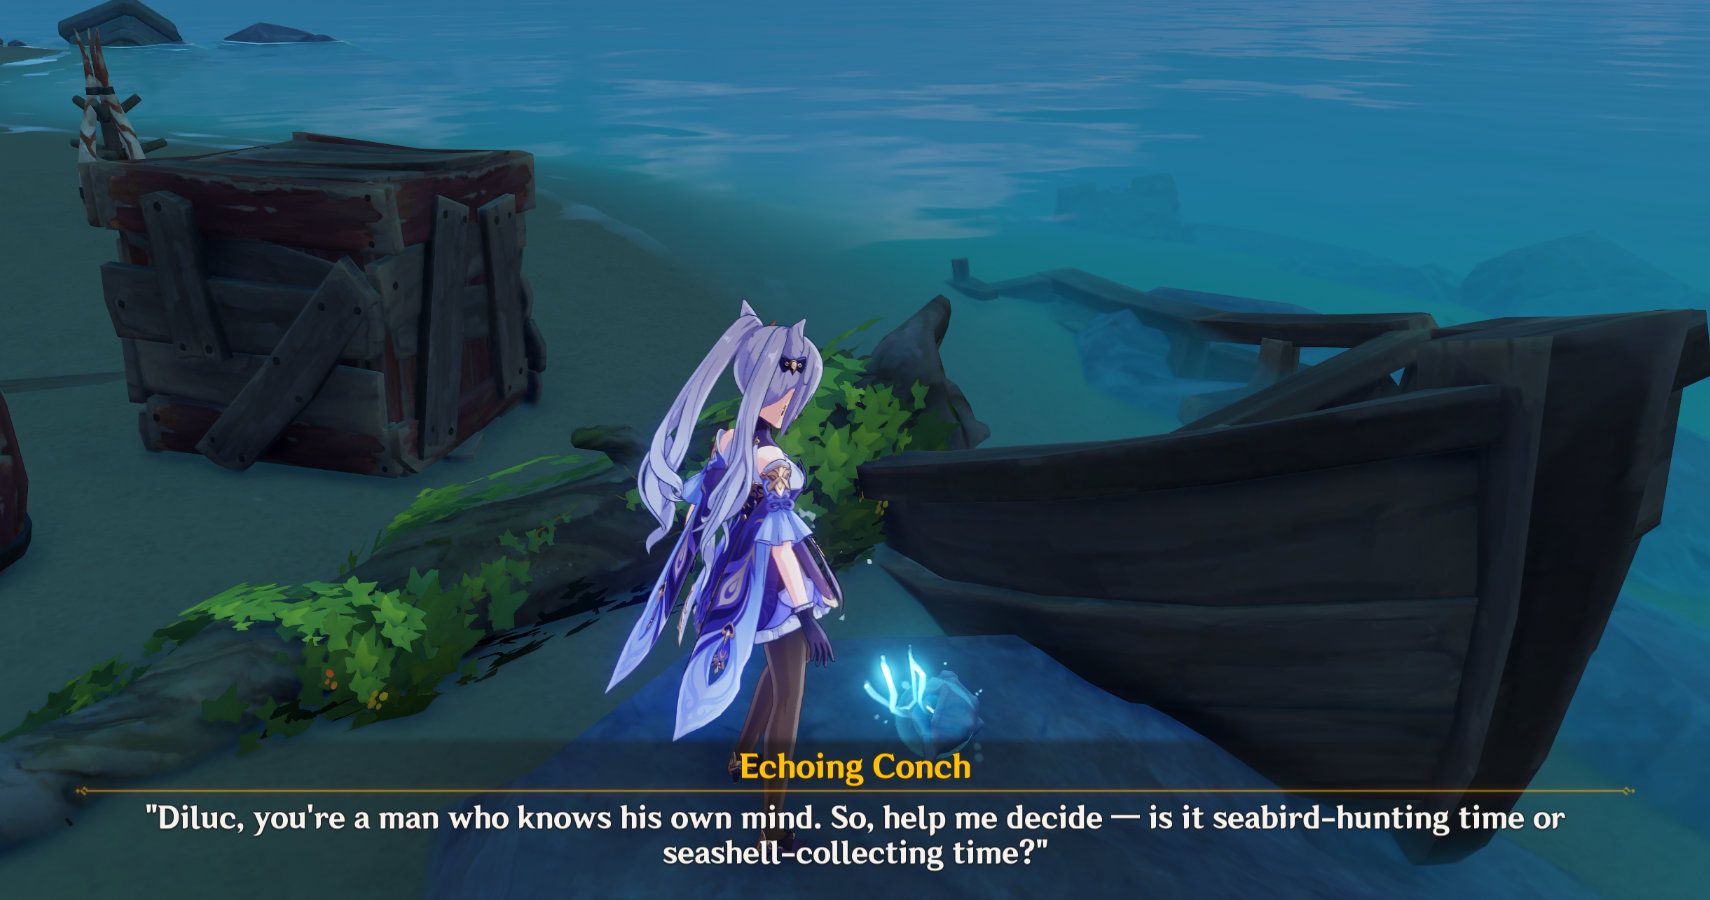
Last Updated June 17, 2021 by Helen Ashcroft to include the final conch locations.
Locations Of The Day One Conches In Golden Apple Archipelago
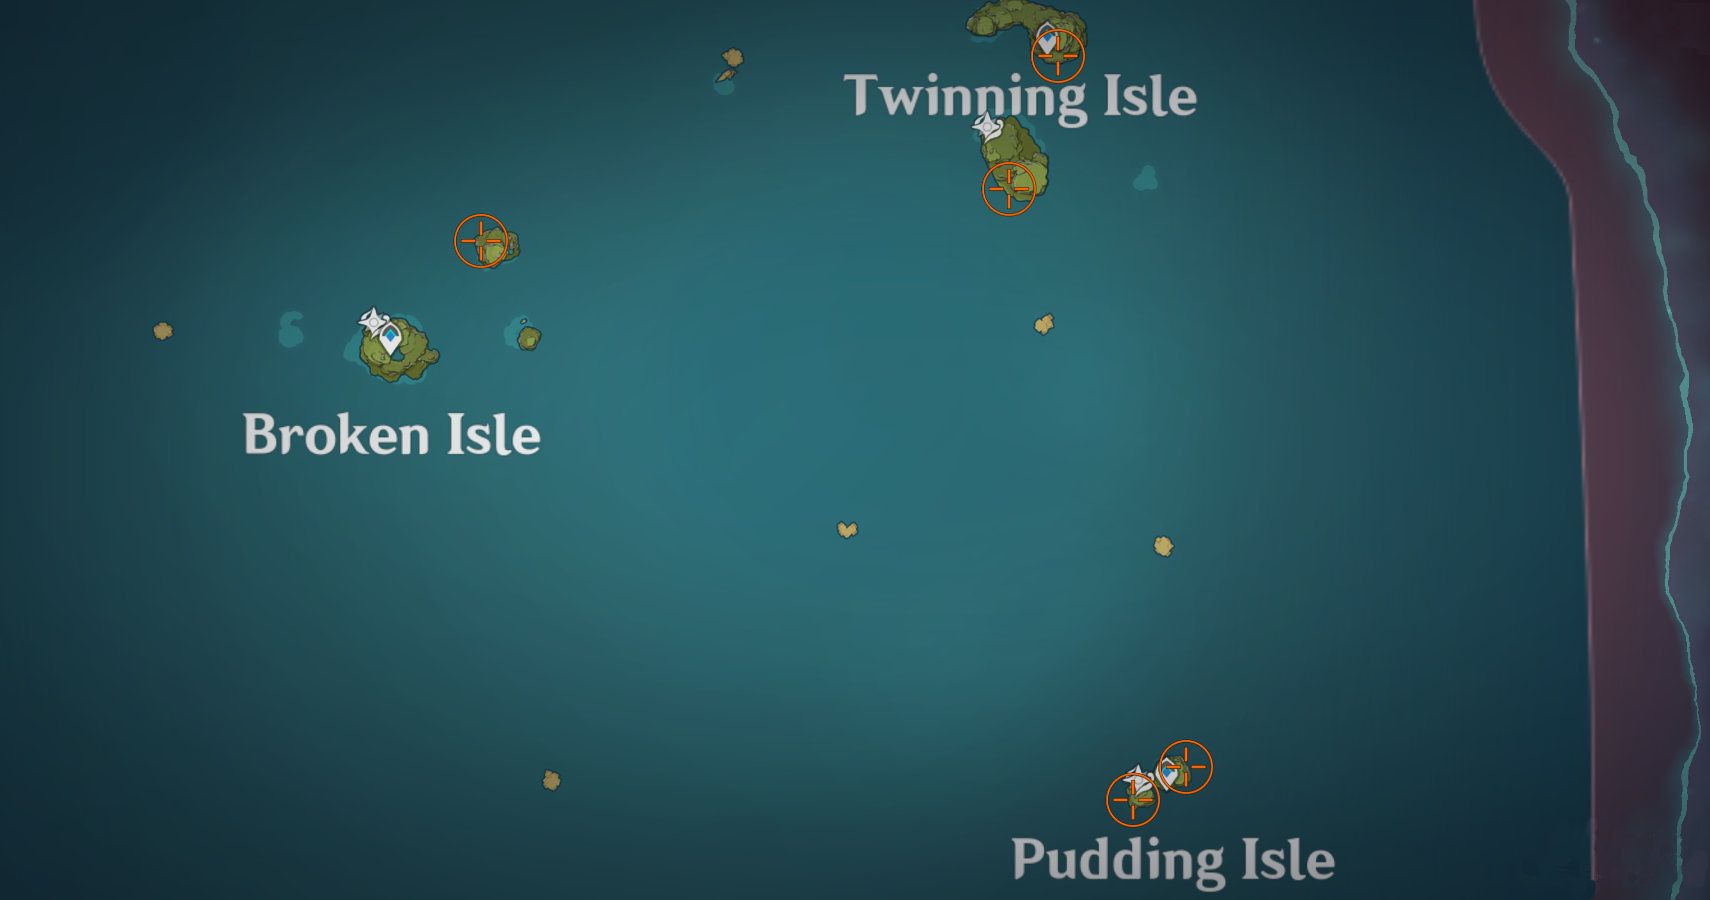
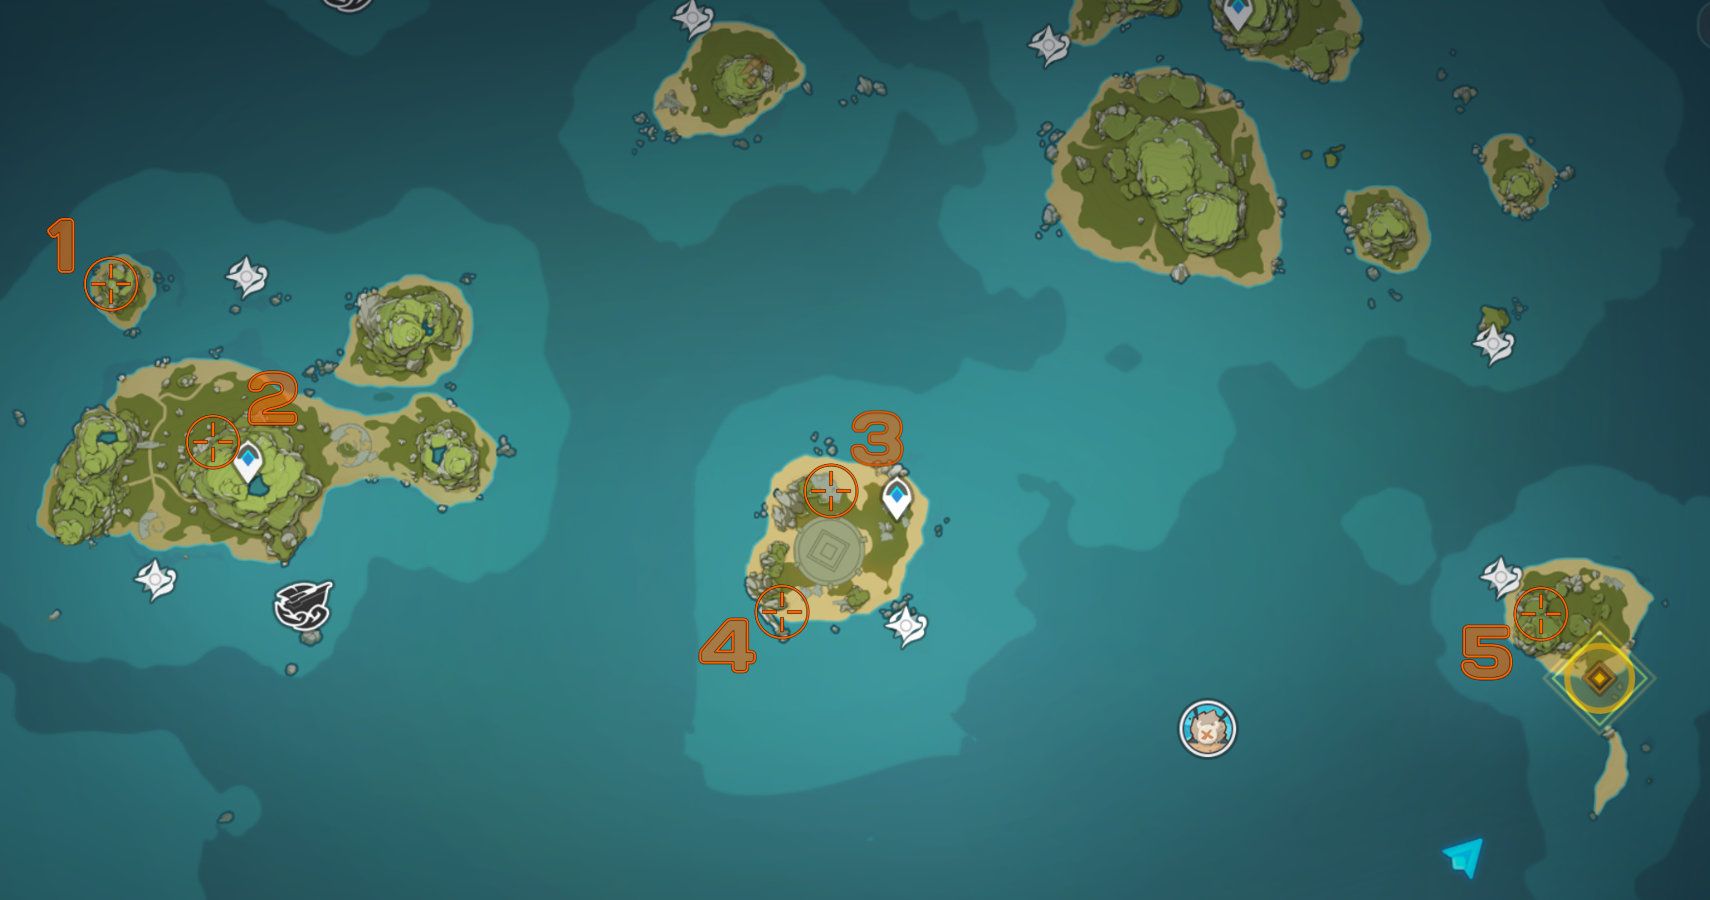
The first day of the event has unlocked five echoing conches. The map above shows their approximate locations. There are two on Pudding Isle, two on Twinning Isle, and one near Broken Isle.
A couple of these are close to the Waypoints and you're likely to spot them as you unlock each marker. The others are a little trickier to find.
Broken Isle Echoing Conch Locations Part One
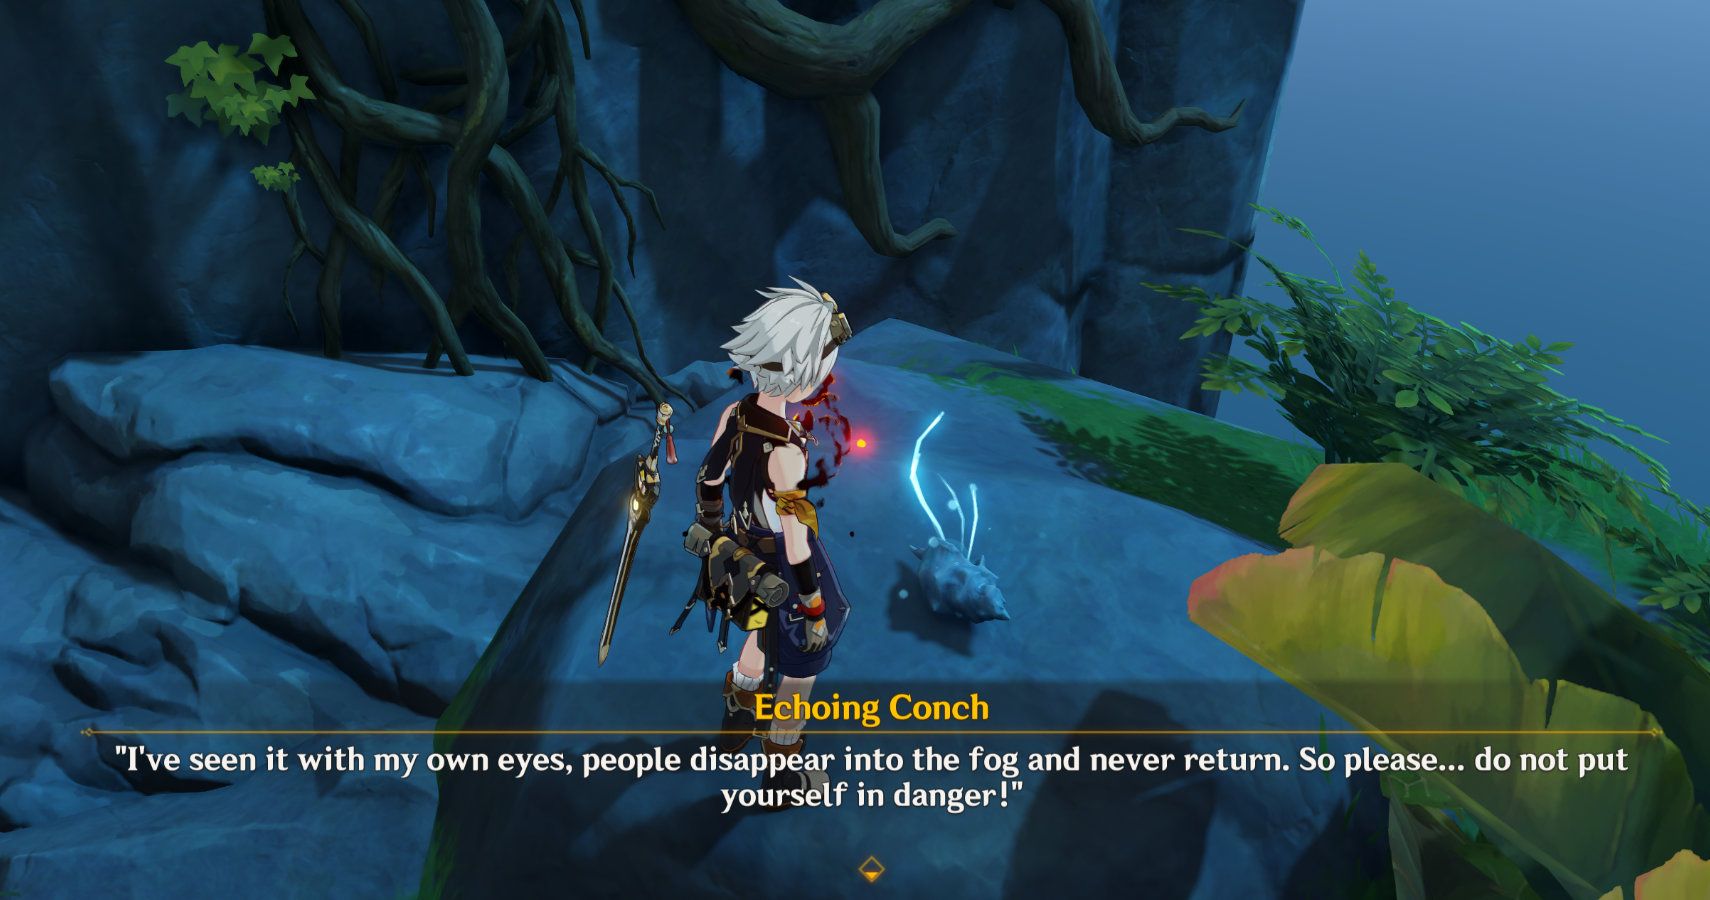
Echoing Conch Of None Return
This conch is not actually on the Broken Isle itself. Instead, you'll need to go to the Broken Isle compass point to summon your waverider.
Once you have boarded, head North-East until you see a tall island. Once you've climbed the cliff you'll spot a fire puzzle, requiring the lighting of four torches to unlock a chest on top of the largest cliff.
Three of the torches are on the flat top of the tallest cliff or just over the edge. Once you light these you'll need to go over the lower area you can see on the west side of the island. Once you jump down the torch will be in front of you and the conch is just by the tree roots you'll see in front of you on top of the flat rock.
Pudding Isle Echoing Conch Locations Day One
Price Of Experimentation Echoing Conch
This conch is easy to find since it's close to the waypoint on Pudding Isle. All you need to do is turn to face the North East and you'll see an abandoned camp in front of you. Go towards the camp and head over to the left-hand side behind the shelter. You'll find the conch on a rock next to some boxes.
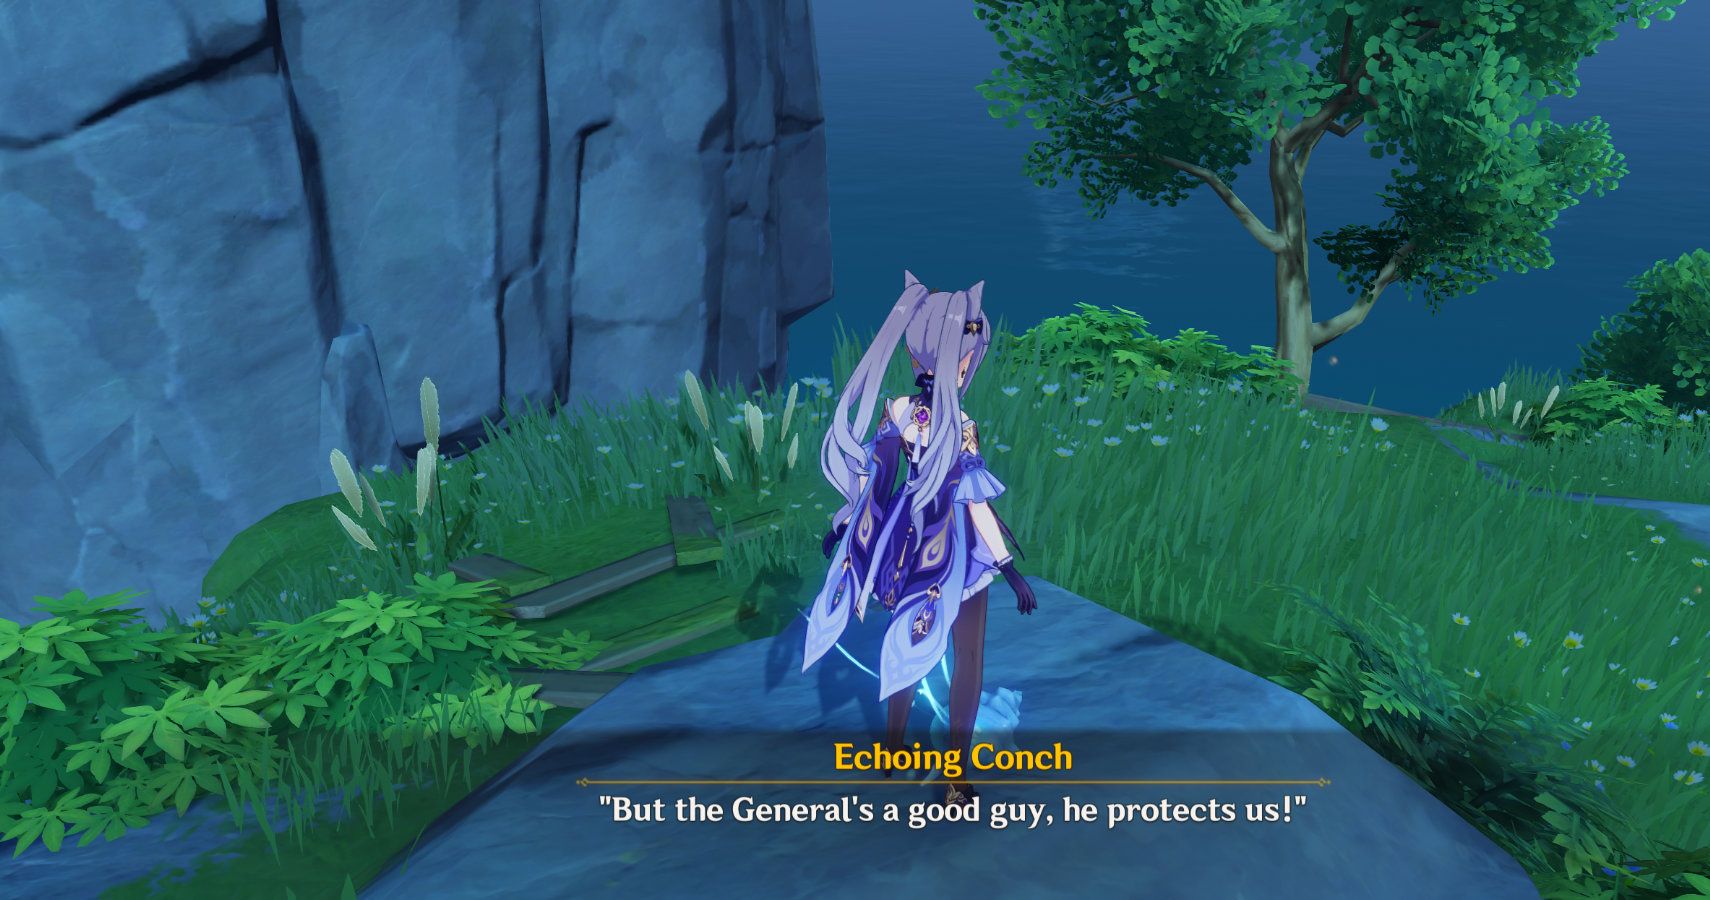
Echoing Conch Of The General
To get to this conch you'll need to walk back from the camp in a South-East direction, towards the waypoint. Keep going until you reach the edge of the cliff and you should see a small island just in front of you.
There is actually a small gap between these islands so don't just drop down! You'll need to glide forward a little before dropping into the middle of the area. The conch is on a large flat rock just to your right as you land. There's a broken fence just behind it.
Twinning Isle Echoing Conch Locations Day One
Four Winds Bring The Sound Of Joy Echoing Conch
To get this conch you'll need to turn around and look for a tree just beyond a pile of wood next to the waypoint.
Head into the gap between the pole and the tree and you should be able to look over the edge to see some large ledges. The conch is underneath the tree so you'll need to drop down a couple of ledges to get to it. It's on top of a rock just to the left of the tree near some bushes.
One River Flowing Down The Middle Echoing Conch
Turn around from collecting the last conch and head South-West. You'll soon see a large island just across the ocean.
The gap looks large but it's easy to glide. After you take off head for the highest point on the left-hand side. On top of this cliff is a group of trees and wood. The conch is inside on a rock.
Locations Of The Day Two Conches In Golden Apple Archipelago
Once you've completed the second stage chest chain, the Golden Apple Archipelago increases in size.
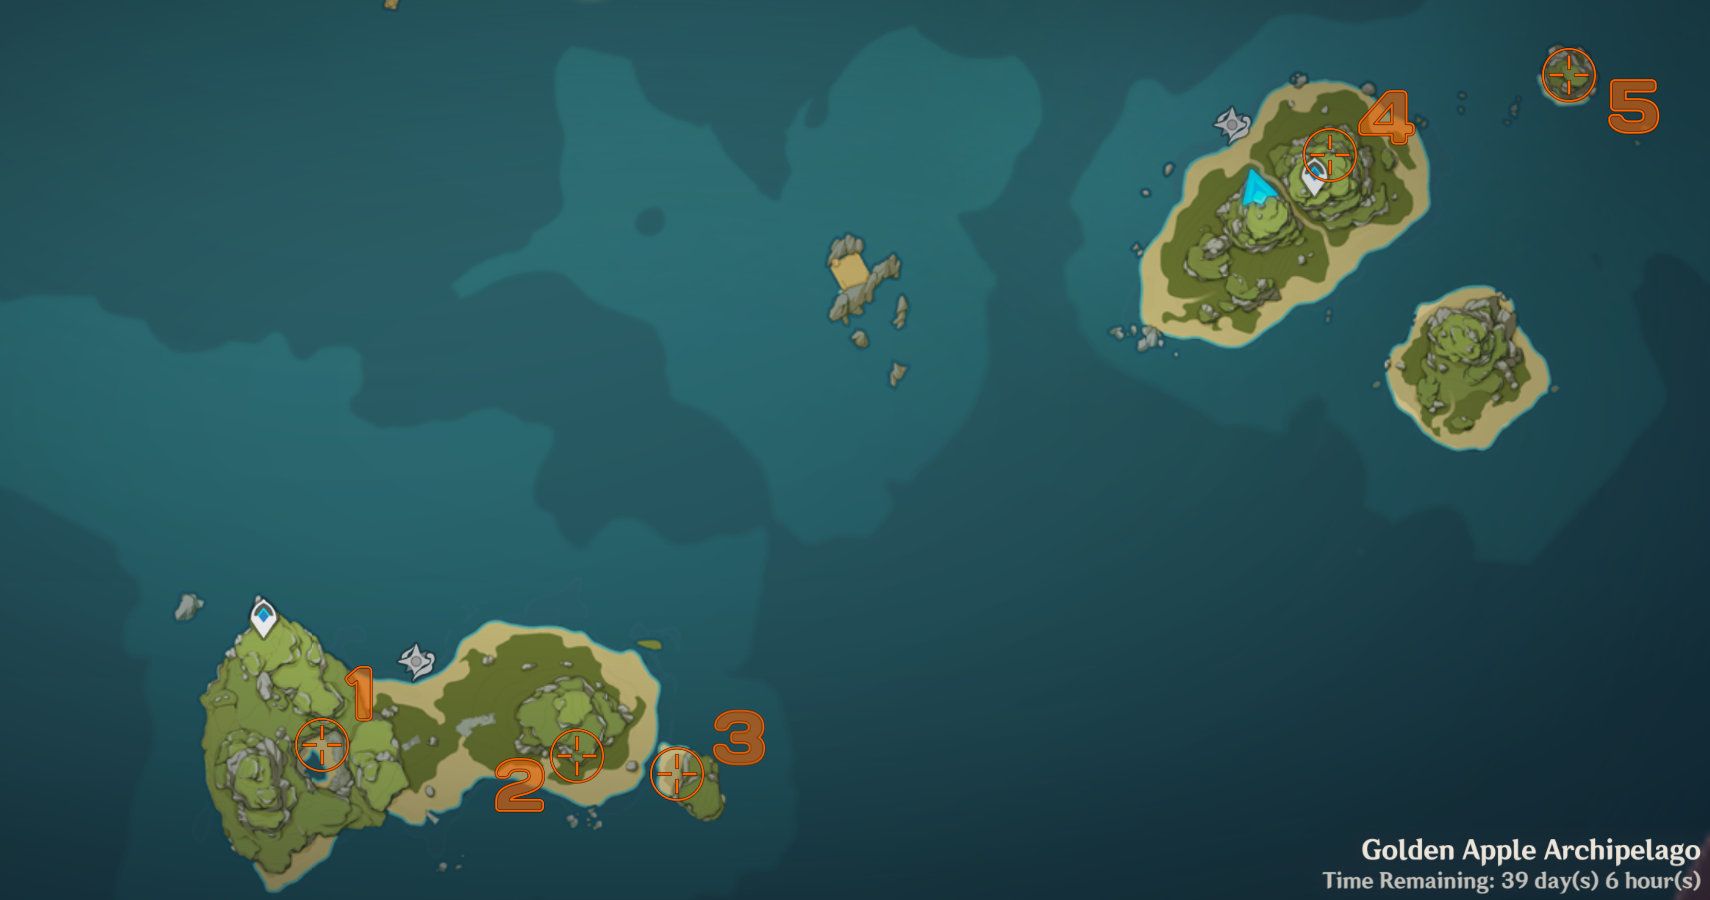
As new islands are revealed you'll discover 19 more conches. Collecting them all will unlock Barbara's summer outfit, as well as various other rewards including Primogems.
Broken Isle Echoing Conch Locations Day Two
Conch One
This conch is right on top of the cliff. It's a tall cliff but the climb is relatively easy as there are a lot of ledges. Just find an area that looks as flat as possible and you'll find the conch at the top.
Conch Two
You'll need to float slightly down from the top of the cliff just North of the waypoint to find this on a ledge.
Conch Three
This conch is nestled in some shrubbery behind the large inactive mechanical head you find in the center of the island.
Conch Four
This conch is just along the beach to the left of where you land when you come over from Pudding Isle on the quest. It's between two rocks.
Conch Five
On a cliff in the middle of the island, you'll see a shipwreck. There's a plank of wood around here to collect and the conch is just to the left. You'll need to watch the hilichurls in this area.
Pudding Isle Echoing Conch Locations Day Two
Conch One
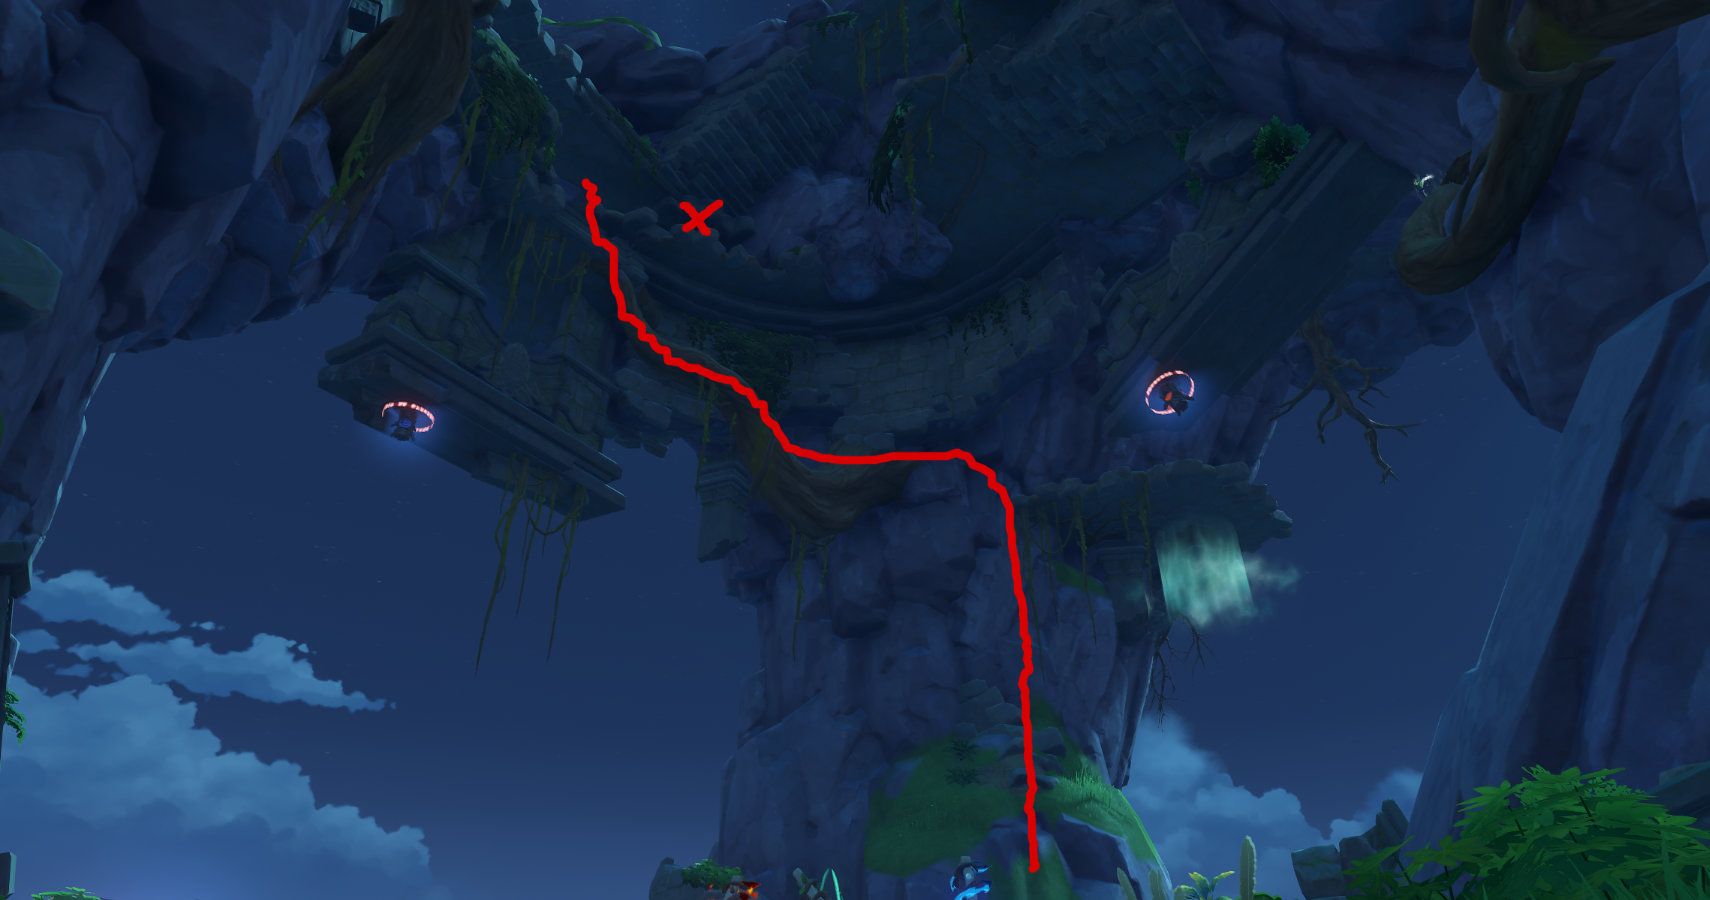
This conch is a pain to collect. You need to climb up the ruins. Stand in the water you can see on the map and face North. There should be an upside-down ornate archway with a totem on the left-hand side of its base.
There is a similar archway to the right but it's smaller and has a ledge underneath the totem. You need the large arch with nothing underneath but you'll need to climb the gap between them. The map below shows the path you can take.
Climb up the wall towards the platform. There's a wind current you can use to give you a boost or you can just go up the sloped cliff edge. Once you get to the platform you'll need to head left along the tree branch.
At the top of the branch, you can climb up into a gap directly above the middle of the arch to reach the platform. Be careful as you go up as there are hilichurls up here. The conch is to the right.
Conch Two
Head up the slope and you'll the conch on a ledge sticking out from the side of the cliff. Just climb up and you'll reach it, or glide down from the top.
Conch Three
This conch is easy to spot. Just go across to the small island and it's near a chest on the beach.
Conch Four
This conch by the waypoint is a regular empty conch that you can't pick up. No, we don't know why either.
Conch Five
Near the hilichurls boat is a wind current that will take you up to this conch that's on top of the cliff.
Twinning Isle Echoing Conch Locations Day Two
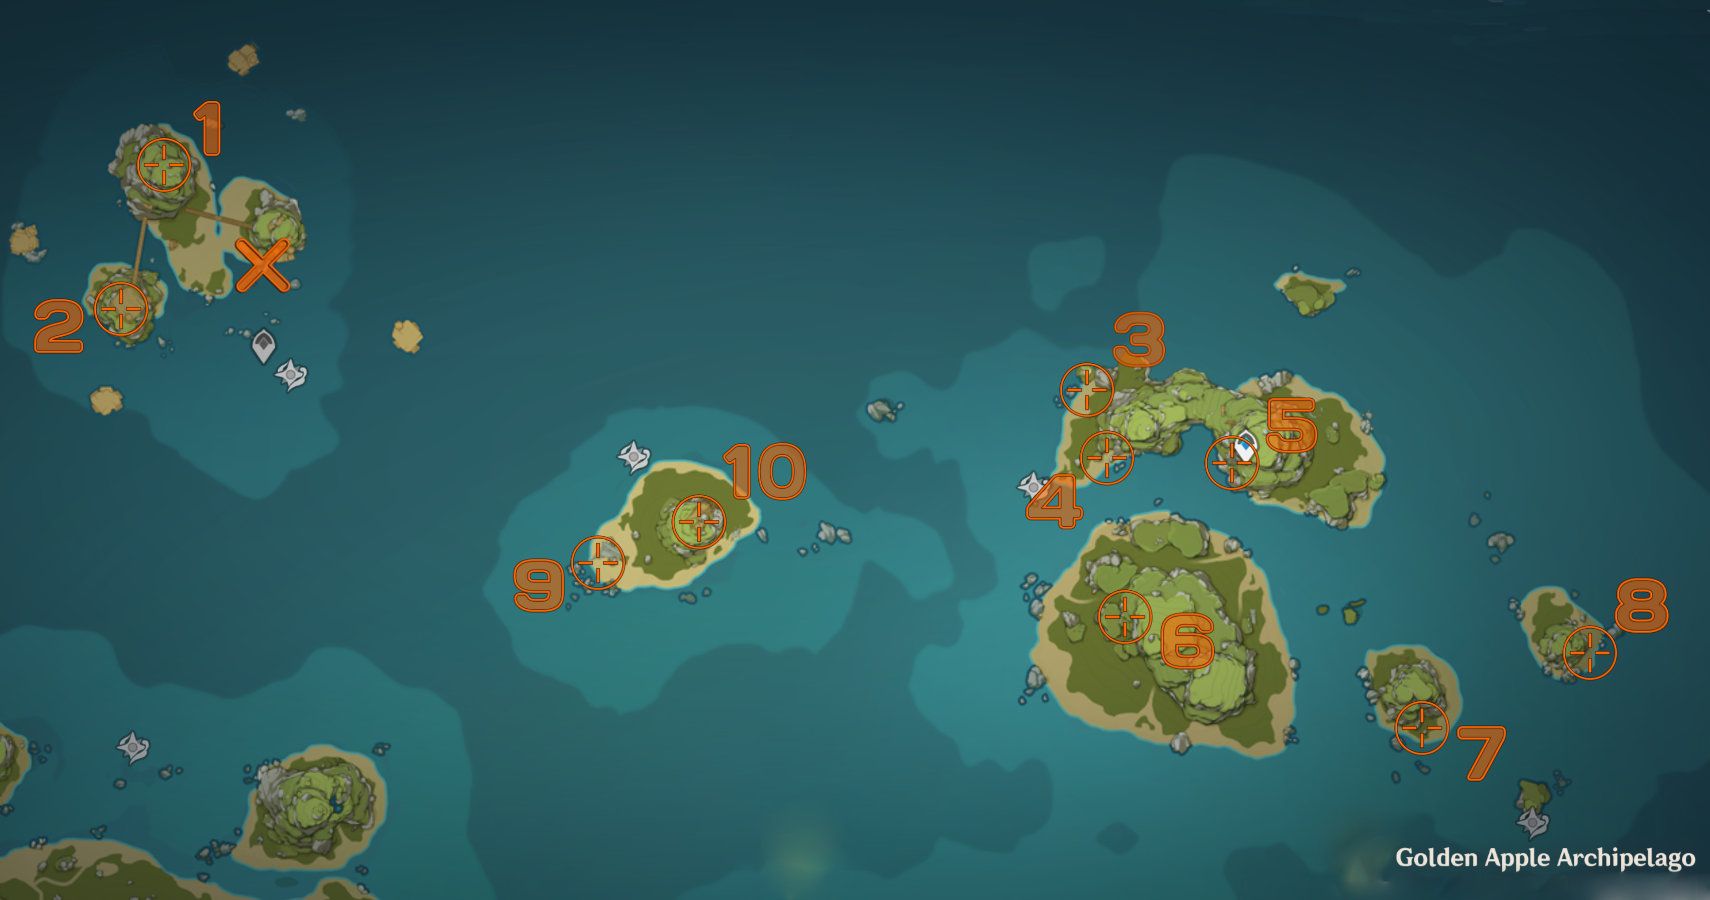
The island in the top left is entirely new and you'll see it come into view as you travel across on your waverider. You will need to open the waypoint then head towards the x marker which is a set of wooden stairs.
Conch One
Use the wooden stairs and vines to climb to the top of the cliff. There are hilichurls on the way up so make sure to kill these as they will knock you off otherwise. You can blast them off the ledges but sometimes they get stuck and you can't get out of combat.
Once at the top, head across the bridge and you'll see a ladder. Climb this as well as the ladder on the next platform. You'll see the conch just along to the right near a hilichurl.
Conch Two
You can glide off the top of the cliff towards the third island. Once here climb the ladders and platforms if you've not managed to land at the top.
At the top are some hilichurls that need killing. Doing this will open a chest. You'll also be able to grab the conch from a wooden cell on the left-hand side.
Conch Three
On the beach is a large rock shaped like a shell. If you head around it and into the water you'll see an entrance that takes you into the shell itself. The conch is inside.
Conch Four
If you jump off the top of the cliff you'll see this conch on a ledge below. Simply land and grab it.
Conch Five
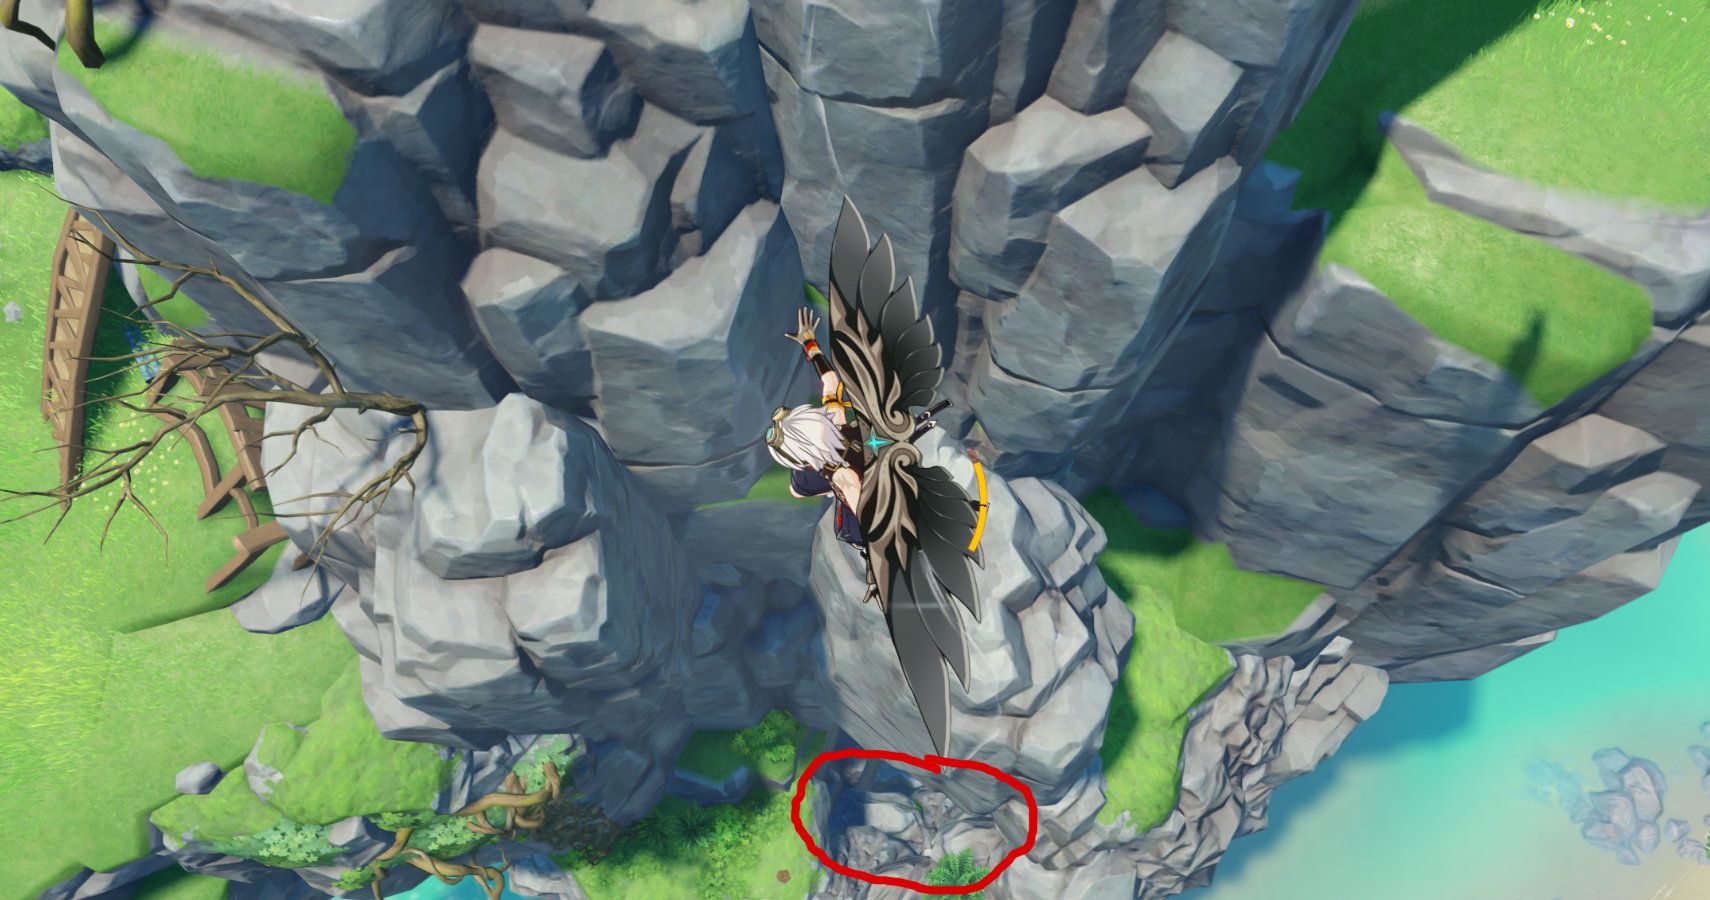
This can be confusing as you can't see this conch. You need to jump off the cliff then face it with the lower island on your left. You'll see a ledge going into a deep hole. Land here.
Climb into the hole then hit the rocks to break them. The conch is inside this secret passageway.
Conch Six
This conch is easily located just on the beach. Just watch out for hilichurls in the area. If you face the cliff you'll see it. Use the shell icon on the minimap if you get confused.
Conch Seven
This conch is on the south of the island next to the mini-game board. Face the cliff and you'll see it just to the left.
Conch Eight
This is another conch easily spottable on the beach so don't try and climb the huge cliff!
Conch Nine
If you head towards the ruin you'll see this conch underneath on the beach.
Conch Ten
This conch requires another climb as it sits atop the cliff. It's by the shipwreck which you'll also need to collect a plank from. This is the other half of the boat you found earlier.
Collecting all these conches will unlock Barbara's outfit but there are still more to come. Keep an eye out for the final stages.
Locations Of The Day Three Conches In Golden Apple Archipelago
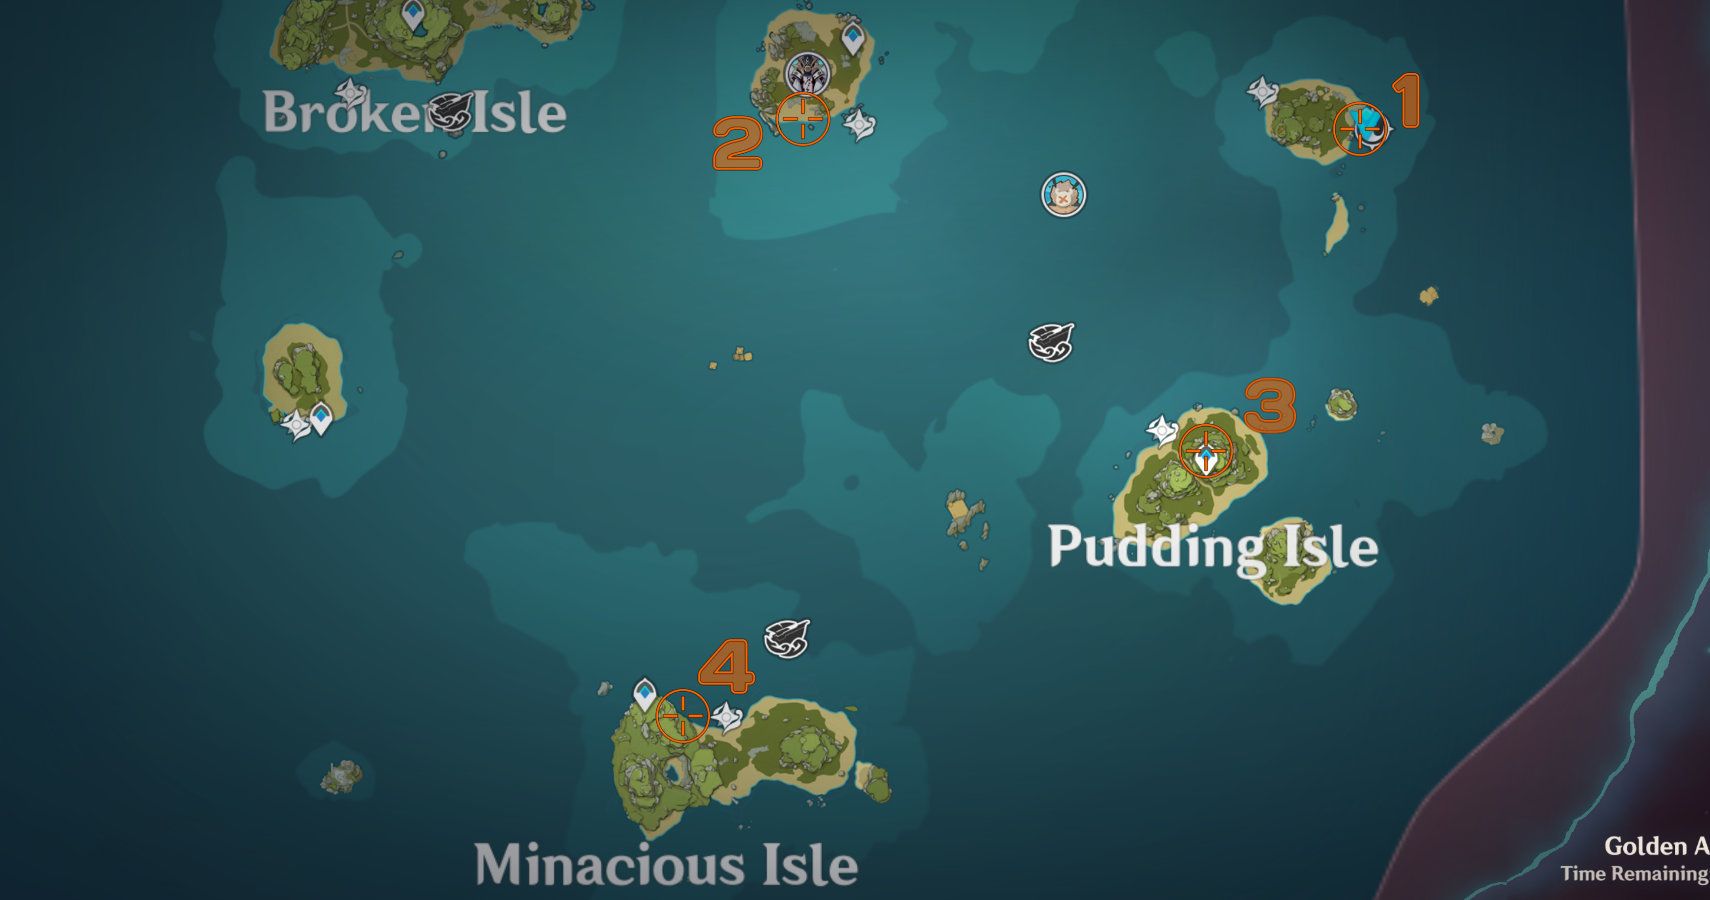
You'll need to complete the next stage of the main quest chain to unlock these conches but the islands remain the same size.
Conch One
This conch is right by the beach on the opposite end of the island to the waverider waypoint.
Conch Two
This echoing conch is on the middle isle, just West of the waverider point. You'll find it on top of a small hill.
Conch Three
If you face South while at the waypoint you'll see a small ledge in front of you. Jump onto this to pick up the shell.
Conch Four
From the waypoint head towards the waverider point. You'll easily spot the conch on the beach midway between the two markers.
There appears to be one more set of conches to collect but completing these four will reward you with some more primos and offer some interesting information about your companions.
Locations Of The Final Echoing Conches In Golden Apple Archipelago
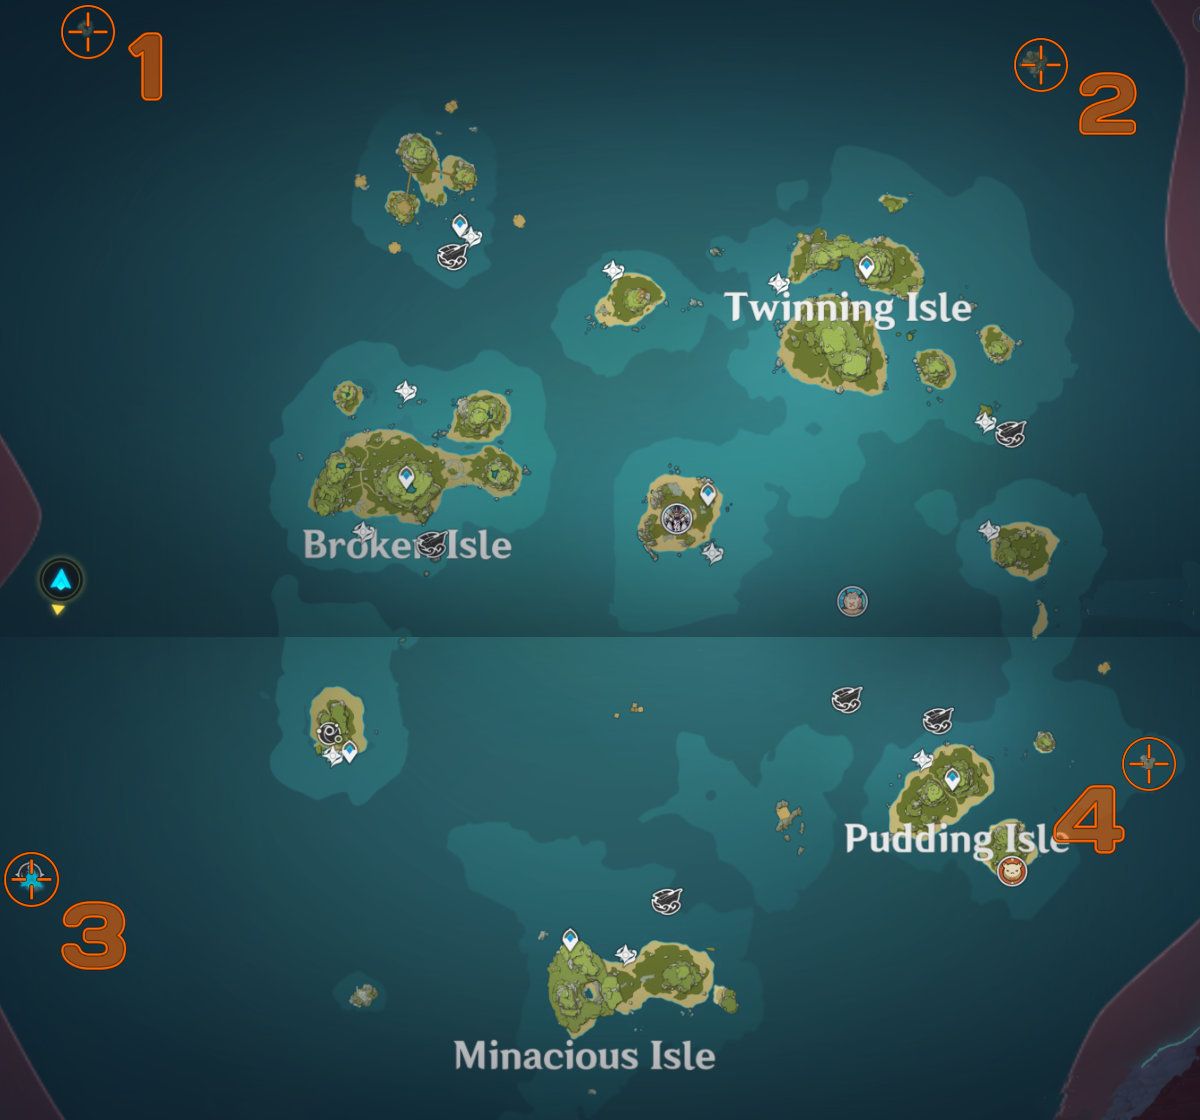
Once you've uncovered all the islands and gotten further through the quest chain you'll notice new islands far out. Here's where the final echoing conches are.
Conch One
This conch can be found on a cliff-like island in the top left of the map. Head out on your waverider and look for an opening in the cliff. Inside there is a cave-style space with the conch in.
Conch Two
This island is called the unnamed island and it becomes accessible after you read a notebook found in the cave you entered getting Conch five from Twinning Isles on day two. It's easy to spot on the small island.
Conch Three
This is a hole you need to make yourself inside the cliff. Drop down from the top and you'll see a space on the left that you can break.
Inside here is the conch.
Conch Four
Once again this conch is fairly easy to find on the island.
At this point in the event all the conches are unlocked and you can now gain all the rewards.
How To Unlock The Locked Treasure Chest Using The Conches
Four of the conches are named with numbers in the title.
These spell the code: 5214.
This code unlocks a treasure chest you'll be led to on your travels. It's located on a small island just under the I of Twinning Isles on the map above.
This appears to be the final reward, along with the rewards you get for collecting all the conch shells.

