The world of Teyvat is packed with monsters in Genshin Impact. While some of these monsters are smaller encounters, there are a select few that are considered bosses within the game. There are currently ten boss enemies, all of which give out a unique elemental ascension item that players will need to finish raising the level of their character to 90.
Players should expect to fight bosses regularly, and depending on their team, they may find themselves stuck fighting the same enemy several times a week. This guide is here to help players understand the boss fights and win.
Updated on August 13, 2021 by Jessica Thomas: With the introduction of the Inazuma region, Genshin Impact has really expanded its boss roster. There are new Hypostsasis cubes for you to take on and even a samurai that uses dual elements during its fight. The guide below is here to give you a quick rundown of each boss and a couple of tips on how to beat them.
For the most part, these boss fights aren't hard once you learn the trick for each one. Keep in mind that reactions can also play a huge role in helping you to beat a boss in a matter of minutes.
Oceanid

The Oceanid is perhaps the most infamous boss in the game. Instead of fighting it head-on, the creature summons water minions to battle the player. These creatures are made of water, so hydro attacks will not work and will even heal the boar enemies. Here are the minions summoned by the Oceanid:
- Boar – Charges players and heals when attacked with or standing in water.
- Crane- Heals enemies but has low health.
- Squirrel – It attacks nearby opponents and can also heal from water sources.
- Finch – Performs a jump attack with high damage and a large AoE area.
- Frog – Can shoot water and ram into and tackle close by opponents; it explodes hydro damage when killed.
- Crab – Spawns in pairs and has quick sideways movement. It will continuously move around the player while shooting a beam of bubbles.
- Mallard – Summons a hydro vortex and follows the player.
- Raptor – Summons in pairs of three and will swoop down quickly from the air to attack players. It must be killed with a bow or catalyst user.
For the Oceanid, the best strategy is to use cryo and electro as a combo. Bow users like Fischl, Ganyu, and Diona are highly recommended. Enemies automatically have the hydro effect applied, so performing reactions is easy. The Oceanid will also sink platforms over time, but this isn't a huge issue as the battlefield is still quite large.
Regisvines – Pyro & Cryo
re

Regisvines are pretty easy to deal with as long as you put together a proper team. The Regisvine will be extremely resistant to damage at first, but attacking the corolla of the plant will stun them, causing them to fall to the ground. The corolla appears in two spots on the bottom of the plant and then in the middle of the flower. These two positions switch back and forth in the match, with the first always forming on the bottom.
Regisvines deal elemental damage, so it's best to counter with elements that they are weak against and react to. Unlike the Oceanid, the Regisvine won't automatically have an element applied. Here are some characters to take into each Regisvine fight:
Pyro
- Fischl
- Tartaglia
- Barbara
- Xingqiu
- Ganyu
- Diona
- Lisa
- Kokomi
- Raiden Shogun
- Sara
- Mona
Cryo
- Amber
- Diluc
- Lisa
- Xiangling
- Razor
- Fischl
- Klee
- Hu Tao
- Yanfei
- Yoimiya
- Xinyan
Both plants will attack by doing close-range spin attacks, slamming their face into the ground to send out an elemental wave, and shooting elemental lasers. The cryo plant has a nasty move where it circles the field with a large cryo laser, while the pyro plant sends out homing missiles and bombs. It's best to attack the corolla with catalysts and bow users while standing at a distance to avoid attacks.
Occasionally, they will both summon an attack that summons circles on the ground that will chase players around. Keep moving to dodge these and when you finally stun the Regisvine, use a powerful DPS character to attack.
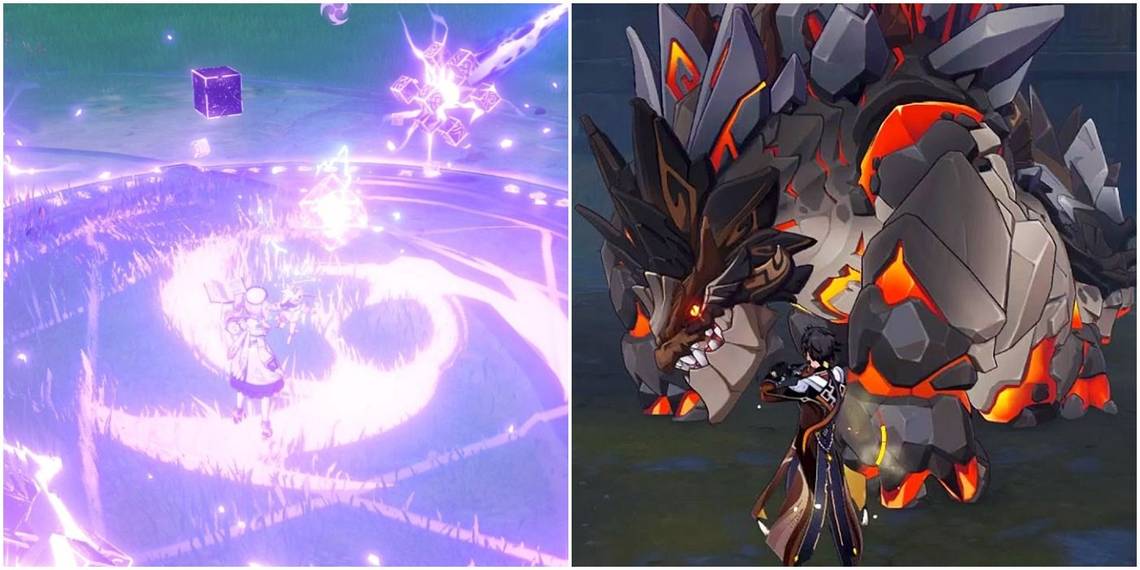
Hypostasis

Hypostasis cubes are generally the easiest type of boss to deal with. While each one of them has its different attack methods, the idea behind defeating them is the same. Wait until the center of the cube is exposed, and then attack it as much as possible. Each Hypostasis has attacks that involve charging the player with wide AoE attacks and sending blocks hurling at them.
Electro

The electro version starts off by changing forms into multiple objects and charging at players; this is easy to dodge. It also has an attack where the core centers itself and uses the cubes to make a rotating batch of razors. To combat this and the similar cube wave attack, run to the middle of the field and attack the core. There is also a move that can trap you in an electro circle, running out of any circles that form beneath you.
At the end of its life, it will summon three diamonds, hit them with elemental damage to defeat them. Each remaining diamond will help to restore the Hypostasis health.
Anemo

The Anemo Hypostasis uses several air-based attacks that will be familiar to anemo fans. It can summon tornados onto the field or cyclones that will try to pull the player in and hurl them into the air. It can also grow wings to fly high into the air and shoot its cubes at the player.
Along with this, it also can throw missiles and make a close-range clapping attack like the electro version. These are all simple to dodge by ensuring that you keep moving. Once the Hypostasis is almost out of HP, wind currents will appear on the field along with anemo sigils in the air. Quickly glide around to collect the sigils as this is what the Hypostasis will use to heal itself.
Geo

The Geo Hypostasis can be the most annoying of the bunch for those who come unprepared. This enemy summons towers that it stays on top of while hurling cubes at the player. The best strategy for this is to bring a bow user and claymore user to deal with the towers. During the last bit of the battle, the Geo Hypostasis can use the towers to regain health, so make sure to quickly destroy them all.
Cryo

The Cryo Hypostasis can be found in Dragonspine, meaning that you will need to deal with both the boss and the chilling effects of sheer cold. Luckily, there are places to warm your character sprinkled around the battlefield, and the Cryo Hypostais can quickly be taken down using a pyro character. Be sure to avoid its homing missiles.
At the end of the battle, the Cyro Hypostatsis will launch frost fruit and deploy a shield. Hit the fruit with a charged attack to hurl the frost fruit back at the boss and break its shield.
Pyro

The Pyro Hypostsasis battle starts out quite differently than the rest. The boss will start the battle with a shield and as long as the shields up, he will barrage you with a series of powerful attacks. To negate these, use a hydro character like Barbara to quickly extinguish the shield, leaving him with only a couple of attacks that are easy to dodge.
He will occasionally launch embers to try and help himself, extinguish them with hydro to keep his shield down.
Perpetual Mechanical Array

The Perpetual Mechanical Array isn't really an elemental boss, but you will need to beat it to get ascension materials. This boss uses lasers, homing attacks, and deploys mini-mechanical enemies to disrupt the battle. Watch for signs of attack and run out of the way; when he deploys minions, attack the one that has a health bar displayed over its head to resume the main battle.
Maguu Kenki

Maguu Kenki is an enemy that can deal both anemo and cryo damage. He can quickly dash at you from across the field, and you should avoid getting close to him at all costs until there is an opening. He can even create a clone of himself and do damage in two separate areas of the battlefield at once.
The key to the battle is to read the Maguu Kenki's movements, keep your distance until it's safe to strike. It's best to fight with a close-range character as it's harder for Maguu Kenki to parry your character.
Primo Geovishap

The Primo Geovishap will take some time to defeat. The Geovishap hits incredibly hard regardless of world level and has several close-quarters and wider range AoE attacks. The best way to deal with him is by using a bow user to keep your distance and popping a shield when the game prompts you to deal extra damage to the boss. The Geovishap will occasionally go underground and charge at the player. To deal with this, let him get close enough to pop up and then quickly run away.
Keep in mind that the Geovishap changes elements often, and before starting the fight, observe what color he is glowing. You should also add in a shield user to help make damage less critical during the match.