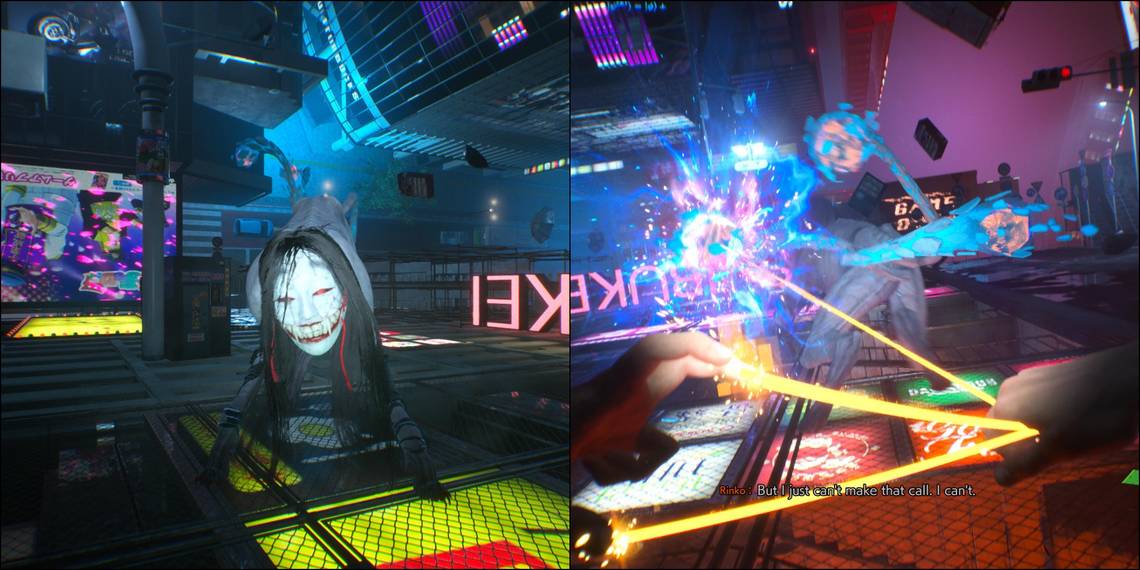
Ko-omote is the second boss you will face in Ghostwire: Tokyo. This is actually Erika (or at least a “part” of her), the girl who was close to KK and Rinko. She’s also one of the masked enemies introduced at the beginning of the game.
You’ll fight Ko-omote at the end of Chapter 3: Connection. She will become a Byotara, a unique yokai with strong resemblances to a feline. Don’t let your guard down as she’s deadly and can one-shot you pretty easily. Check this guide to learn everything about Ghostwire: Tokyo's second boss.
Learning Ko-omote Attacks
.jpg?q=50&fit=crop&w=740&dpr=1.5)
Quite contrary to the battle against KK’s body, Ko-omote is not an actual fight: it’s more of a ‘cat and mouse’ level. You need to avoid being seen by this beast while quietly taking out her cores, located in her tails.
Ko-omote will move slowly around the underworld scenario in a fixed pattern — normally in an inverse-clockwise direction. If she spots you, the Byotara will jump over you, taking your life in a single blow.
After you take one of her three cores, she will disappear for a brief moment, and then start her patrol again. Also, she can produce a temporary fog around her that will gradually deplete your HP if you stand near it. Fortunately, Ko-omote doesn’t have more moves than these, so you don’t have to pay attention to anything else.
How To Beat Ko-omote
.jpg?q=50&fit=crop&w=740&dpr=1.5)
The most important thing about this boss fight is that you approach it as a stealth section. You don’t have to go shooting your magic like it’s the end of the world — that would be an automatic game over. Far from it, you’ll have to be patient and wait for your turn to take one of the beast tails. Furthermore, you’ll be separated from KK during the whole fight, so you won’t be able to use any magic.
You can still use your bow and Quick Purge your enemies while being alone with Akito.
.jpg?q=50&fit=crop&w=740&dpr=1.5)
To make things easier, the center of the scenario has a safe room that functions as a perfect hideaway while you prepare for your next move. This room has multiple ins and outs, and you can see the boss wandering around from inside it. Ko-omote will never enter this place, no matter what you do, so spend all the time you need here.
If you are having trouble locating her, you can always use your Spectral Vision ability, and she’ll be highlighted.
.jpg?q=50&fit=crop&w=740&dpr=1.5)
To grab one of Ko-omote’s cores, get near her back while crouching and take it like you’d take any regular enemy core. Once you do so, she’ll disappear for a few seconds. During this period, you only need to enter the hideaway again and wait for her to do her patrol. You repeat this two more times while avoiding the Byotara’s fog and eyes, and you’ll end the fight without much problem.
You can re-stock your arrows inside the hiding place and shoot the explosive Red Crystallized Ethers when she’s near one to stun her. However, this is an unnecessary extra step that might give you more trouble than simply waiting for your chance to sneak behind the boss.
The Aftermath Of The Second Boss Fight
.jpg?q=50&fit=crop&w=740&dpr=1.5)
After taking Ko-omote’s three cores, she will return to her previous form. During a cutscene, KK will return to your side, and he will help you seal this enemy. Erika's body will vanish and Chapter 4: Contortion will start.