Quick Links
Chapter three of Gorogoa takes the training wheels off and sends you on a journey of puzzles in the stars. In short, you will come across multiple lanterns that overlap with stars to progress through the chapter. However, getting to these pivotal lantern moments is not as simple as you think. There are multiple challenges ahead, including time-sensitive challenges and tests of wits. Primarily, this chapter emphasizes connected frames, so it's helpful to focus on this idea if you get lost.
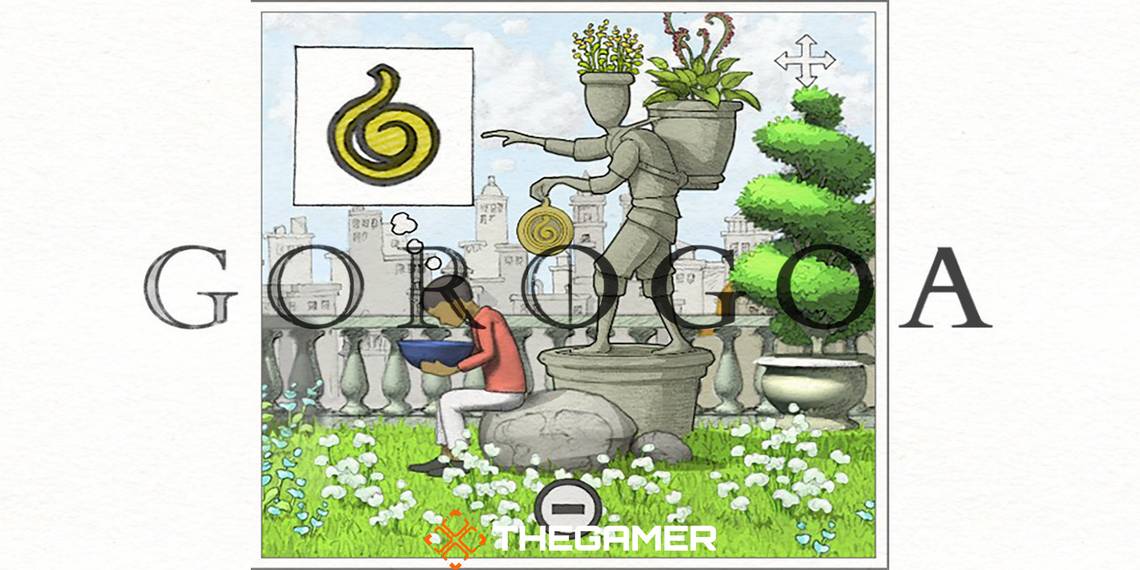
Here's a recap of the last chapter to get you up to speed. You just received the second fruit after passing through the magic door into the garden. So the panels will look something like the image below. You do not need to worry if you haven't found the lantern in the upper-right panel yet. We will discuss how to find it as we work through this guide. So let's start our quest for the third fruit!

How To Get The First Star

Let's tackle finding the initial star. First, zoom out of the bowl panel, then follow the boy to the other side of the garden by clicking the right button. After that point, the sun will start to set in the staircase panel. Once that happens, click the up button to reveal the first star in the sky above the staircase.
Next, you'll need to find the first lantern. So, return your focus to the hallway panel and click the right button until you reach the wooden cabinet. The first lantern is right on the floor, next to the cabinet. Zoom into the lantern and then overlap the lantern panel with the star panel.
How To Get The Second Star

This arc, albeit with more challenges, repeats itself when scavenging for the second star.
The first star takes little time to find. After zooming out of the lantern, you'll notice a mirror on the wall. Click on the mirror, then keep clicking towards the window. And there's the second star shining in the sky! However, you're not finished with this task quite yet. If you zoom out and examine the whole room, you will find a shelf with the second lantern on it. Click on this lantern to zoom in closer.
There's another half to this shelf that you need to find. To do so, we need to return to the garden panel and zoom out. Unfortunately, zooming out of the garden will transport you to a tense war scene in the boy with crutch's decimated room. In the top-left corner of this panel is a shelf with a box of crayons and a hand-shaped candle. Zoom in to this area, then place this panel on the left and the other shelf panel on its right. The two panels will connect.

Now that the shelves are connected, you will have to use it as a see-saw to move the lantern to the other side of the shelf. But, how do you do that? You can change the contents of the two blue boxes by zooming into each and removing their labels. Like so:

So, first, you will remove the labels from each box. Then you will zoom out of the nail and crayon panels to reveal bigger pictures. If you look closely, you'll discover that similar borders surround the objects in each top picture as the box label borders. So by reassigning the labels, you can change the weight distribution on the shelf. In that case, you should zoom into the cotton in the nail panel and zoom into the rocks in the crayon panel. Then, you will replace the blue labels on each respective panel. Finally, zoom out from each box to reveal the full shelf again. The new contents of each box will cause the shelf to lean to the right, and the lantern will slide in the same direction.
Zoom out from the cotton box and drag the lantern over the star in the window. Voila! You now have the second star.
How To Get The Third Star

The second star will draw a moth. Click on the moth's wing to zoom into an intricate yellow pattern. Removing a layer from this pattern will reveal a new location in the story. From there, you need to zoom out of each panel to display a large building and the war-torn boy's room, respectively. Returning to the war-torn boy's room will reveal a new thought bubble that shows the young boy in the park. Click on the thought bubble to return to the park and connect the two panels. The young boy will walk from the right to the left panel and then out of the frame.
To reveal the third star, you need to zoom out of the right panel and return to the war-torn boy's room once more. The war-torn boy will ponder a thought bubble with constellations. Click on the thought bubble to zoom in closer to them. The constellation panel is another perspective-moving panel, similar to the green-eyed/red-pattern moment in Chapter Two. Move the panel to the lower-left-hand corner to uncover the third star.
While finding the third star took a few steps, finding its respective lantern is very simple. Follow the young boy with the bowl in the park by clicking the left button. The panel now will give you a more direct view of the large building. Click on the large building until you enter a young man's office space. The third lantern is right behind the young man. Zooming into the lantern and placing it over the star will trap the third star into the lantern.
How To Set The Moth Free

If you made it this far, you're likely scratching your head asking why the story is not moving forward. It turns out acquiring the third star is not enough in this instance. Notice the moth trapped in the glass dome next to the lantern? Freeing that moth is the key to progressing the story further. However, doing so requires some quick thinking on your part.
First, undo the star and lantern overlap and return to the war-torn boy's room. Then, click and zoom in on the shelf again. A rock will fall out of the box of rocks on the shelf and drop to the floor. This animation continues on a loop. Zoom in on the shelf one more time and then direct your attention to the young man's office again. After that, you'll need to zoom out one more time to reveal a close-up view of the large building. Now, place the shelf panel over the building panel. The two panels will connect, and a Rube Goldberg machine of sorts will initiate.

First, the rock will drop to the building's scaffolding from the shelf. While this is happening, you need to quickly zoom out from the shelf, click the left button, and then zoom into the horse and the angel statue facing each other. Then, place the building panel above the 'horse and angel' panel like so:

The rock will drop from the scaffolding and into the angel's hands. This moment will buy you just enough time to zoom into the third lantern and switch the positions of the two panels one more time. Then, finally, the rock will descend from the angel's hands and smash the glass dome confining the moth in the lower panel.

|
Achievement Alert! |
|---|
|
First Try: Complete the falling rock puzzle on the first try. |
Now that you released the moth, you can place the lantern over the star again, and the moth will fly towards it.
How To Get The Fourth Star

Before going further, you will perform another round of 'mothception' by zooming into the moth's wing, removing a layer, and zooming out again. This un-layering will reveal a nighttime scene in the park. Then you will zoom out of the moth's wing. In turn, zoom out of the young man's office. Then, lastly, you will return to the panel of the boy in front of the building. Place this panel to the right of the nighttime scene. The young boy will walk through each panel and then out of the frame. Follow the boy by clicking the left button in the left-hand panel.
After zooming out from the young boy one more time, you will begin a new part of the young man's storyline. Now that you are in the young man's home click on the young man himself. He will ponder a thought bubble of a diagram. Then, remove a layer to reveal a panel with a briefcase and a clock tower in the distance. Before proceeding, click on the diagram and investigate it further. See how a blue hand points towards about twenty-five minutes and a red hand indicates seven o'clock? Your next job is to replicate the same time on the face of the clock tower.
There are two items you'll need to replicate the required time, a compass and a thermometer. You can reach the compass by zooming into the clocktower face and removing the frame. Zooming out from the clock face again will reveal a table of items, including a pocket watch and a compass. Click on the compass to zoom into it. The thermometer is in the office of the large building, in the upper-right-hand corner.
Now that we found both tools let's focus on changing the compass hand first. First, place the compass panel in the upper-right corner. Then, zoom out from the young man slumped over his desk. Doing so will reveal a globe with a star-shaped magnet on top. Click on the magnet to zoom into it. Finally, place the magnet in the lower-right corner. You want the compass to point southeast. Then, before moving on to the thermometer, zoom out of the magnet to no longer affect the compass needle.
Next, you need to raise the thermometer's temperature. Focus on the young man's room again. The frame will pan towards a fireplace after you zoom out from the globe and click the right button. Next, click on the fireplace and zoom in as much as you can. After that, you will return to the office building and zoom into the thermometer enough that it cuts the gold part of it in half. Then, connect the thermometer's top half with the cauldron's bottom half over the fireplace. The heat from the fire will raise the thermometer's temperature to the proper position. From there, you can zoom into the thermometer one more time, so it focuses on the face.
The last step is to put the clock together. Place the thermometer face over the compass face, then place the clocktower frame over the new clock face. Once you zoom out from the clock tower, the time outside will change. The setting sun will reveal the fourth star.
|
Achievement Alert! |
|---|
|
Right Wrong: Set the clock tower to the right wrong time. To unlock this achievement, you need to use the mechanics we learned in this section to set the clock time to 7:30 PM instead of 7:23 PM. You can accomplish this by placing the compass directly above the magnet, so the clock's minute hand points straight down (south). Zooming out of the clock tower in this situation will reveal a fun secret! |
To find the fourth lantern, zoom out from the fireplace and return to the globe. There is a small lantern attached to it. Then, zoom into both the star and the lantern, and overlap the two. You now finished the fourth-star puzzle.
How To Get The Third Fruit

So, you already did so much work. What could come next? That's right, another round of 'mothception!' To begin your journey to the third fruit, zoom into the moth wing and remove the top layer as you have before. Underneath that layer is another nighttime scene in the park.
After that, you need to complete the night scene that you just uncovered. First, return to the young man's room window and zoom through it to the park. Then click the right button to pan the scene in that direction. Next, you will align the panels so the angel statue is on the right and the sad tree is on the left. The young boy will then walk through both panels and out of the frame. Finally, the constellations will align and reward you with the third fruit once you follow the boy by clicking the left button in the left panel!
|
Achievement Alert! |
|---|
|
Third Fruit: Complete Chapter Three |