It has been almost a month since the release of Outer Wilds, and it has been a wild ride from beginning to end, to end, to end. Well, there is no end, is there? Twenty-two minutes of solar system exploration, and then everything goes out in a burst of solar glory before we dash off again, forever stuck in this wonderful loop of time. Or a horrid nightmare of unending pointlessness. I suppose it depends on your perspective.

How To “Beat” The Game
From early on, we know that our objective is to discover what happened to the Nomai, and the mystery of why we are stuck in this infinite time loop. Strictly speaking, if one picks up the game for the first time, and then does only the steps listed at the end of Part III of this guide, they would finish the game. However, this would earn you a “bad” ending.
To get the best ending, we should aim to learn all the secrets of the Nomai, and find all the explorers scattered on different planets. Note that although this is a “guide” to experience as many secrets as the game has to offer, all of the steps cannot be completed in one sitting, unless some godly speed runner proves us wrong.
For the most part, these steps can be completed out of order. However, some are directly connected and offer clues on how to bypass obstacles later on. How you choose to explore us up to you, and this order is a suggestion to get through it all in somewhat of a coherent manner.
Timber Hearth
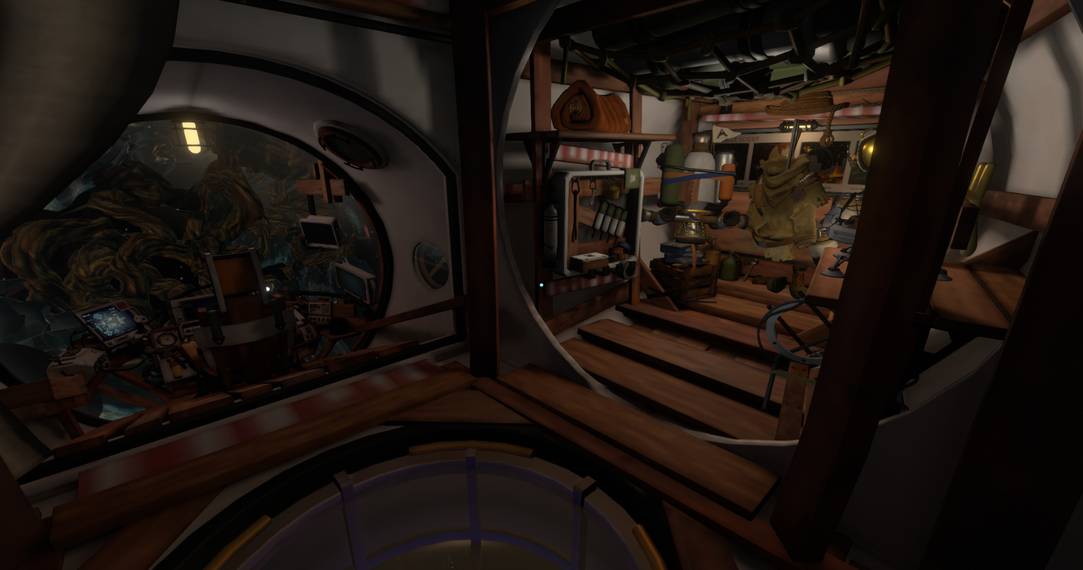
Our starting area is a tranquil village with NPCs to give us a great feel for who you are in this universe. Asides from chatting with the community for some backstory, the only things you really need from this area are the Launch Codes from the Observatory, which will also trigger our first encounter with the Nomai. The Cave is a perfect spot to play with the zero-gravity environments you’ll soon be facing. There is also a spot to practice using the Scout camera. Take a moment to familiarize yourself with this, as it will eventually be one of the most important tools you have. When you have spoken to everyone and have the codes, head back to the starting point to rise in the elevator and take off.

Attlerock
As one of the nearby asteroids orbiting Timber Hearth, this is as good a place to start as any. Find the Signal Locator and play around with it. You’ll notice there is one option that does not work like the others. Head down beneath the Signal Locator by taking a set of nearby stairs. Inside are trees to refill your O2 tank, along with our first set of Nomai writings on the wall. Use your Nomai translator here (Hold RB) to decipher the text. Pay attention to what comes up on the decoder, as it is the first big clue about what you are setting out to do, and that is to find the Eye of the Universe.
Right across from the deciphered text is an interactable spot in the wall. Take a nearby scroll from a shelf and insert it, providing you with a clue as to what you need to do. The information will reveal that Ember Twin contains a Quantum Moon Locator, but due to difficulties, the Nomai built another on the South Pole of Brittle Hollow. Note that this will be the crux of most gameplay investigation: enter a new area, look for text to decode, as well as scrolls or interactable objects that reveal more than meets the eye.

Head back to the surface and locate Esker’s Camp in the North. Speak with him and read his writings to learn a bit more, check out the Lunar Lookout, and get ready to head out. If you follow the clues you have learned, you are being led to Brittle Hollow next.
Brittle Hollow
This place often seems a bit overwhelming at first because of the size of the planet, and the discovery that far more lies beneath the crumbling surface than on top, all of which surrounds a Black Hole that can fling you clear across the solar system if you happen to fall in.
First, find Riebeck, another explorer who is near the center of the planet. Head to the Tower of Quantum Knowledge, down the stairs on the outer part of the towers, and you will see a blue elevator. Inside the tower, you will find another transport with a switch. Take a look around to access information, which will reveal its importance later on (Hint: You should find information on the third rule to access the sixth location and the Quantum Moon). This is not the only time you will come to the tower, but for now, you can only access certain parts.

Activate the object to switch the direction of the transport, and head on through. Don’t worry, it will keep you within its field, and you will not drop to an untimely doom. When you reach a platform, you’ll hear the familiar melody that seems to be known by all of the explorers in the game, and Riebeck will be strumming his banjo at his camp to the left. Chat with him to learn more.
The Nomai writings here are several, beginning with the North Pole with a set of decaying ruins. There is a floating ring close to a glowing yellow symbol of the ground with our first clue here, and the second is in the nearby building with a hole in the ground and another ring inside, as well as some on the wall. From these clues, you learn of a Hanging City beneath the ground, and curiously, what appears to be an impossible timestamp. How is it that something left a place at one time, only to return at an earlier time?
Visit The White Hole Station
Eventually, you do want to head into the Black Hole, with your ship preferably, in case you need oxygen before you can complete your next task.

Once you’ve gone through the black hole, you'll notice two things. First, on your system map, you are now far, far away at the edge of everything, in a location that is not listed on the map as having anything there. The odds of simply stumbling across this location are quite slim. Second, once you emerge in space, you can turn to now see a White Hole, which you can return through later on.
Nearby you should see a large cylindrical object connected so what might appear to be a half-moon shaped rock formation. Land on the cylinder and head inside to complete a puzzle by moving a point of light around a pentagon. Once complete, the door to the tower will open.

As long as you completed the puzzle fairly quickly, oxygen should not be an issue. Inside the large room are two transporting beams, some Nomai text on the wall, and a symbol of the station with a leftwards pointing arrow to another symbol for Brittle Hollow.
Return To Brittle Hollow
Using your trusty language decoder, you learn that this is a warp tower that can be used to get back to Brittle Hollow, but currently, it is out of position. Head to the transporting beam that takes you to the level below the platform and move the ball of light into the center to trigger the tower’s rotation to where it needs to be. Back up on the main level, you will see the symbol rotating in real time with the station. Looking up when the symbol matches up will take you back to Brittle Hollow, so grab the Projection Stone and get to it.

Once back on the Brittle Hollow, you can look around to find the place to insert the Ember Twin stone, providing more information to decipher. You learn that the Nomai could not reconcile this impossible timestamp, so they needed to run more tests at the High Energy lab for our next big clue. You learn that the Nomai had to rush over there, near the canyon on Ember Twin’s equator, as some massive event had occurred. You too will head there, but not right now, because you have more work to do nearby in the Hanging City.

Visit The Hanging City, Get To The Black Hole Forge
Here, you’ll need to visit a few places, all still on Brittle Hollow, before you get to leave. First, check out the equator with your Signalscope. Using it to guide you, you will come across a large Nomai spacecraft.
Decoding the audio from a distress beacon outside (connected by a long wire), the Nomai audio recording will describe how they landed the pod nearby and sought shelter at the planet’s Southern end. Inside that, a pole describes the crash of the Spaceship, with three of the escape pods deployed.

Here is where it gets a bit tricky. Deep inside the Escape Pod is a hatch with a similar ball pattern that unlocks with your cursor. The decoded text above the door says, “Emergency Escape Hatch.” When the puzzle completes, the door will fly off, and you will have access to a massive chasm below with wooden platforms that jut from the sides of the walls.
Ever so carefully, use these to descend, as falling will send you into the black hole, until finally, you discover the Old Nomai settlement. As the messages on the walls state once decoded, this space offered some refuge from the danger of Hollow’s Lantern up above. Keep reading to learn more about the Nomai and the need for a more permanent settlement there.
And then, a little way down, you'll casually come across the main objective for the entire game, in a drawing representing The Eye of the Universe.
You will find the symbol of the Eye with information regarding how the Nomai became aware of a strange signal, but were perplexed by its age, which is to say that the Eye is somehow older than the universe itself. As this is surely impossible, continue checking the area to learn what happened to the ship, and where the problem truly lies.
When finished, find the wall with a series of gravity crystals, which will grant you access to the Hanging City by hopping from one to the next. Landing close will keep you within its small radius of gravity, while missing or stepping too far will make you plummet. Following the crystals forwards and later upwards will eventually get you to your destination. Note that there are other ways of getting into the Hanging City, but this will suffice for now, and you can always explore to find the others.
The City is split into four districts. Take some time to explore one through three, for decoding messages there will give you some great background on the Nomai, to say the least. However, you are most interested in the fourth district, where the Black Hole Forge awaits.
From the second district, known as Meltwater, head to the stairs that lead downwards to a switch on a cylindrical wall. Like other cursor doors, this will raise the Black Hole Forge over-top of the City.
Of course, you cannot access the Black Hole Forge from here, nor from this planet. That would be far too easy.
Check out Part II of this guide to continue onward in your quest to discover the Eye of the Universe!