There is only one collectible in Hellblade: Senua’s Sacrifice called Lorestones. To collect them, you simply have to focus on each marker. After you zoom in, a memory voice-over from your friend Druth fades in, and he will reveal some Norse mythology. There are a total of 44 Lorestones in the game, and unfortunately, they are missable.
Also worth noting is that collecting all 44 Lorestones affects the ending, so be sure to find them all to see the true ending. If you end up missing one Lorestone, you likely cannot go back and get it. Therefore, you will need to restart the game from the beginning and try again. Fortunately, Hellbalde: Senua's Sacrifice is short, so it is not the end of the world, but it can be frustrating if you miss a Lorestone towards the end of the game. This guide will help you find each Lorestone starting from the beginning.
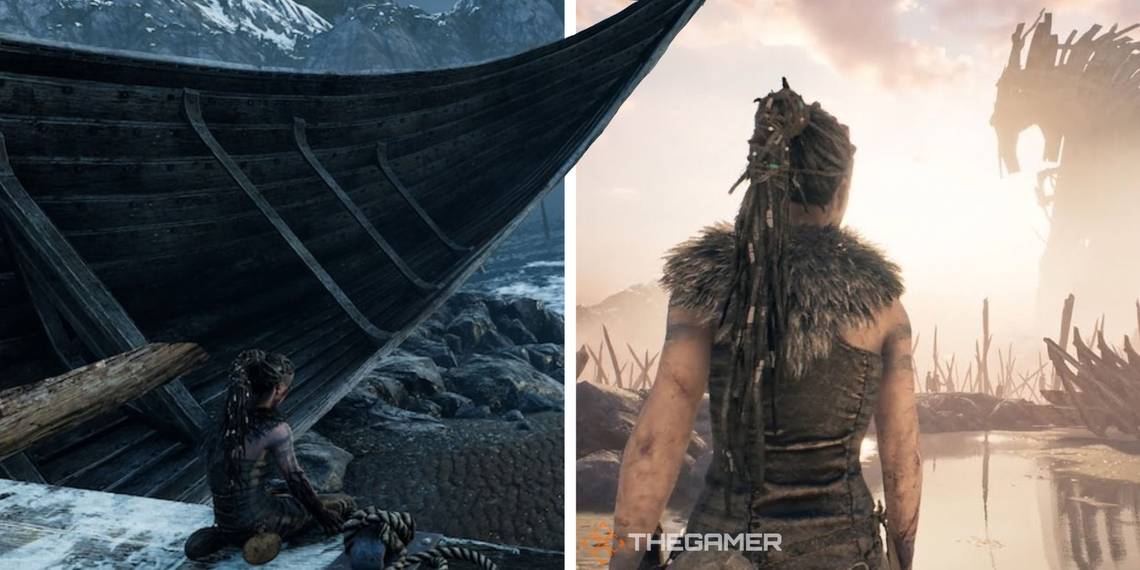
12 The Road to Hel
Right At The Start

Right at the start of the game, you'll see a Lorestone. It's just as you get off the boat and is pretty hard to miss.
The Waterfall

The second Lorestone is not too far away from the first waterfall. Once you've started climbing the rocks and head to the base of the small waterfall. You'll see the Lorestone getting soaked, the stairs up should be to your right.
Tightrope Walking

This Lorestone is pretty challenging to get hold of due to the small part of parkour you'll have to do. Nevertheless, you can find this Lorestone by crossing over the narrow beam on the cliff above the shore just after passing through the Rune Door.
Valravyn and Surtr

The last Lorestone of this section is in Gate to Hel room, which you enter after crawling through a cave. You will have to face off against a few Northmen, and it’s located on the right side of the room if you are looking at Valravyn and Surtr’s doors.
11 Valravyn's Keep
From The Beginning

As soon as you enter Valravyn's Keep, stick to the right and head toward the stone ruins. Inside you will find the first Lorestone.
Tougher Than Nails

Annoyingly, this is one of the hardest Lorestones to get. You'll need to look out for the area where you need to find the Raven Symbols. Once you've chanced the Valravyn and removed the wall you need to unbar the door and bring back the wall. After this process, you can enter ruins through the door and climb the hill to get to the Lorestone.
Fight To Win

After you go through the second Raven Symbol door and defeat the wave of Northmen, you will find the third Lorestone on a ledge near the arena.
The Illusion Gate

This Lorestone is in the large ruin area before the third Raven Symbol door. When you enter this large area and find the first illusion gate, turn around, and you will spot the Lorestone amidst some ruins.
The Ladder Of Success

The last Lorestone in Valravyn’s keep is also in the large ruin area. At one point you will see Valravyn standing on top of a small fort. Use the nearby illusion gate to open the wall and go through the opening near the ladder to find the Lorestone.
10 Surtr's Domain
The Cave Past The River

The first Lorestone is down the path to the right immediately after entering Surtr’s Domain. You will come across a cave opening, and the Lorestone will be inside.
Past The Fire Door

This Lorestone can be grabbed just after you've gone through the first Fire Door. Head down the path and it should take you to a bridge you can't get past. Then take a left and head down. On the left of the bottom of the slope, you'll see the Lorestone. It's hidden in a corner so keep an eye out.
The Fire Door 2.0

Just after getting the previous Lorestone, you'll want to start looking for the next since they're really close together. When you're doing the puzzle to open the second fire door and looking for the second slap you need to head right instead of going left into the tunnel. Heading right will reward you with the Lorestone.
The Ruined Building

The Lorestones in Surtr's Domain are pretty close together, which is helpful but also a little challenging since you can wander past one without even realizing it. As for this Lorestone, you'll find it just after passing the second Fire Door. Walkthrough the ruined building on the right, and you'll find the Loresotne just under an attic on the ground floor.
On The Balcony

Most of the Lorestones are around the three Fire Doors. The last Lorestone in this location is in the final area, just after the third Fire Door. There are two large buildings in this final area. Cross the first building to the second building and then head left towards the balcony. The final Lorestone sits on the right side of this balcony.
9 The Bridge To Hel
On The Balcony

The first Lorestone is right beside the first Rune Door. Look towards the right, and you will see the Lorestone on a balcony area.
In The Garden

There are only two Lorestones on The Bridge To Hel and the second one is accessible after you find the lase rune. Climb down from the second floor, and you'll find yourself in a courtyard of sorts that's on the left of the Rune Door itself. The Lorestone is in there.
8 Shipwreck Shore
Ledge Dropping

The first Lorestone in Shipwreck Shore can be located just after you drop down from the high ledge onto the beach. All you need to do is look around for a wooden plank that's placed into the shore and the Lorestone will be right by it.
Below The Bridge

In the next beach area, you'll see a locked gate. If you look around near that locked gate, you'll see a bridge with the Lorestone just below it. The Lorestone is embedded into the shore just in front of some sizeable rocks.
The Rocky Archway

Once you've gone through the locked gate, head over to the shoreline on the left, then walk along the beach until you see an archway ahead, which will signal the Lorestones location. Look to the left of the archway, and the Lorestone will come into sight.
Behind The Ship

This lorestone can be found just around all the ruined ships. Move through the shipwrecks until you find a tunnel with a tree at the end of it. Head towards that tree and turn around from the corner. Just behind the ship, you'll see the Lorestone.
The Great Tree

It's worth mentioning that there are two different Lorestones around this location so keep an eye out. For the first one, you'll need to get to the Great Tree. Then head to the left side of the tree and look between some metal runes, and the Lorestone will be there.
The Great Tree 2.0

The second Lorestone in this location can be found if you go the other way around the great tree. Head to the back right of the tree, just past a metal runestone, and the Lorestone will become apparent.
7 Blindness Shard Trial
There are no Lorestones in this trial. Also, there is no particular order to these trials, so do not worry if you do the Swamp Trial before the Tower Trial. You will have to do every chapter anyways, so they are unmissable.
6 Labyrinth Shard Trial
Along The Shoreline

This Lorestone is hard to miss. It will be unmistakably sticking out of the shoreline after you drop down onto the beach from some ruins.
Look To The Light

Most of these Lorestones are found inside the actual Labyrinth, and it will require some wandering around and a few instructions due to it being, well, a Labyrinth. So for the second Lorestone, you'll need to enter the Labyrinth, head left three times, and you'll find a room with a beam of light that's on the right of that room. Head through there and look to your left at the dead end. The Lorestone will be there.
The Map On The Floor

To get the third Lorestone, you'll need to get to the beginning of the Labyrinth and take the correct path. If that's something you want to figure out on your own, skip to the following Lorestone location. Just look for a crossroads with a map on the floor, and the Lorestone is there.
If you want to know how to go the right way, go left, then right, and reach the next crossroads. Look for the map on the floor, and the Lorestone will be right in front of you.
Go The Wrong Way

Annoyingly enough, you'll need to go back to the beginning again and take the wrong way. So go the opposite way to the last Lorestone and make sure you light torches along the way, so you know where you've been. Once you reach a dead-end, the Lorestone will be clear.
5 Tower Shard Trial
The First Rune Gate

This Lorestone is located on the tower in the Past World. Just head over to the Rune Gate and look to the left. The Lorestone should be relatively easy to find.
The Main Floor

Once you enter the building, you will find the second Lorestone in the Past World to the left of a staircase.
Open The Rune Gate

The next Lorestone is also in this area but in the Present World. You can find it after you open the Rune Gate, and it will be in the back left of the room.
The Second Floor

After you climb to the second floor, you will find the next Lorestone in the Present World sitting near a collum.
The Top Floor

Located in the Past Time, this Lorestone is on the top floor of the tower. Head to the top floor and find the balcony. The Lorestone is located between the doors of the left balcony.
The Top Floor 2.0

The final Lorestone is on the third floor on a balcony behind a locked metal gate. After solving the puzzle by going back and forth between Past and Present, you should be able to reach this last Lorestone.
4 Swamp Shard Trial
The Third Illusion Gate

The first Lorestone is relatively easy to find. Head to the swamp and look towards the third illusion gate. The Lorestone is just behind that gate.
Don't Touch The Gate

The next Lorestone is in the main building in the swamp. You'll have to wait until you've managed to get inside the main building, but it's important to make sure you don't touch the Rune Gate. Head right instead, and you'll see the Lorestone.
3 The Sea Of Corpses
There are no Lorestones in this chapter.
2 Helheim
Front And Centre

When getting to Helheim, it's vital to be vigilant. The first Lorestone can be found directly after entering. The Lorestond is pretty easy to spot, but it can blend into the stones a little if you're not searching for it.
The First Rune Door

After entering the hallway with the beast and finding the first Rune Door, take the nearby stairwell down to the basement. You will lose your torch and have to run to another torch. Once you find the new torch, head back into the basement area and stick to the left of the cave. You will find the Lorestone along the wall.
On Your Left

Keep an eye out because after leaving the cave, you'll be near the third Lorestone in Helheim. When you leave the cave through the stairway, stop. Don't exit. Instead, look left of the door, and you'll see the Lorestone hidden in the wall. It's a sneaky one but make sure you don't go through the door without looking left.
Among The Dead

A bit later, once you go through a waterfall that douses your flame. You will come across a prison cell with a bunch of corpses. The next Lorestone is in there.
The Final Rune Door

This one isn't too hard to spot. It's found near the final Rune Door while you're on the way to Fenrir's lair. When approaching the Rune Door, keep your eyes on the left, and the Lorestone will become clear.
The Final Rune Door 2.0

The final Rune Stone is hard to miss, and it is after you solve the Rune Door puzzle. Once you go through the door, you will walk down a tunnel to Fenrir's Lair. In that tunnel, you will stumble across this Lorestone.
1 Hela's Sanctum
Climbing Up The Pit

After defeating Fenrir and climbing out of his lair, follow the path and turn right towards a stairwell. The first Lorestone in this chapter is at the base of the stairs.
The Entrance To The Bridge

After grabbing the Lorestone by the stairs, you won't see another until you walk to the final bridge on the way to Hela's Gate. When you get to the beginning of the bridge, heading to Hela's Gate, turn around to the barred door behind you, and you'll see the Lorestone to your right.
The Illusion Gate

To get this Lorestone, you'll need to wait until you open the illusion gate. Head towards the prison area and make sure you look to the right. Along your travels, you should see an open door with the Lorestone inside.
The Final Bridge Piece

The last Lorestone in Hela's Sanctum is located just after the prison. Head up the spiral staircase to the top, and the Lorestone should be right in front of you. If you're a little confused, keep an eye out around you when you're looking at assembling the final bridge piece.