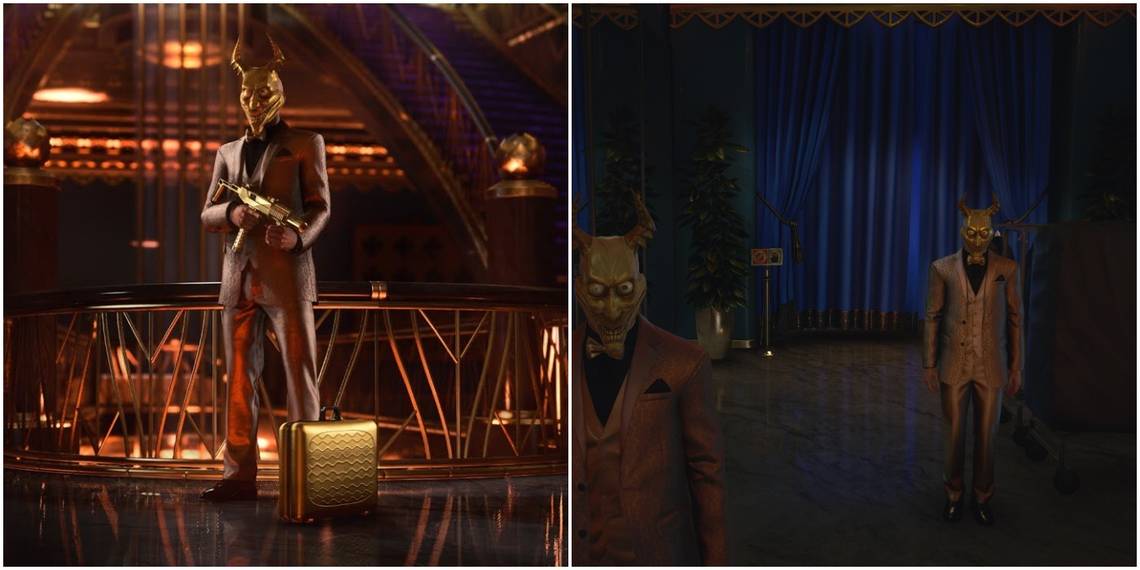
Most of the time, Hitman 3 rewards completed challenges with a simple sense of accomplishment. And, in fairness to developer Io Interactive, that's usually more than enough for the fans. However, with The Asmodeus Waltz escalation, they elected to pile on the rewards: a golden briefcase, a silenced SMG, and a bizarre-looking outfit.
The catch? You have to win an escalation that puts the escalations from Hitman 1 and 2 to shame. Many have given up and decided that it's nice to dream about getting such rewards, but this one is too hard. This guide aims to turn those fears into excitement as the right tactics can make all the difference in the world and make for a smooth run.
Level One
- Start with a restricted loadout.
- Targets: Basant Pai, Mahmood Salmon, Mariam Amir

The only thing you'll begin with is a camera, but there's nothing stopping you from taking somebody else's disguise and weapons. Go up the stairs and climb the vine to get into a security area.

There are two security guards here and you should kill them both, pick up their silenced guns, and take a uniform. This will make it so you're much freer to roam around and strike the targets without suspicion.

While you're here, peek through the window and shoot the security footage, thus disabling all of the cameras and adding another layer of protection for your antics.

After the guards in the room have calmed down from losing their video feed, look across the way and headshot your first target as he leans against a wall. If you miss, just keep firing until he goes down, he doesn't have any friends next to him to back him up.

Thanks to your outfit, you can cut right through security and move to the exact location that you killed your first target. From here, you've got a perfect shot on your second target as she leans over the balcony.

Now cut back in the opposite direction and go to the bathroom on the left side of the map. Activate the panel on the left stall and an NPC will come to check it out. Kill him quietly. Then activate the panel on the right stall and take out that NPC as well. and that leaves you with only the target in the restroom. Blast him, find an exit, and it's on to level two!
Level Two
- Start with a restricted loadout.
- Take out Mariam Amir with an explosion.
- Take out Mahmood Salmon with an accident.
- Take out Basant Pai with a fire axe.
- Take out Oscar Malm by electrocution.
- Take out Roberto Franculitta by drowning.
This is the hardest level of the escalation because it specifies how each of the five targets must die. Repeat the same process as level one step-by-step until you get to the point where you're supposed to headshot the first target. This will get you a disguise, a gun, and freedom from security cameras for the remainder of the mission.

Instead of headshotting this guy, make your way over to him through the security room, just like last time, but grab the banana on the desk. Also in this room are a key and two keycards, pick them all up.

Toss the banana by the railing. After the target goes to investigate, give him a boost over the side of the railing. If he won't go all the way to the edge, subdue him, then toss his lifeless body over, it will still count.

Head to the art installation backstage area (it's labeled on the map) and pick up the screwdriver. Your next target here is a technician that needs to be electrocuted. Stab the other NPC in this room with the screwdriver.

Subdue the target, drag him to the outlet, tamper with the electrical outlet, and punch a hole in the water tank. That will give you credit for the electrocution that you need.

Go to the storage room and grab some rat poison. This will help us with a target down the road.
Go to where the third target was in step one and repeat all of the same steps except subdue the target instead of shooting him. It's time to find an axe to polish him off with.

The fire axe is just outside of the storage and laundry rooms. Pick it up, head back to the third target, and finish the deed.

It's time for an upgraded disguise. Head to the control room and grab a propane tank while you're there.

Use the control room to get to the restricted floor.

A lonely guard patrols back and forth. Shoot him with your silenced pistol and take his uniform.

Find your fourth target through the server room. She's not alone, so you'll have to kill her meandering counterpart. Then subdue her, place the propane tank next to her, and shoot the tank twice for an explosive kill to fulfill the challenge.
One of those keycards you grabbed earlier will get you into the penthouse. Head upstairs for the fifth and final target, a chef working in the kitchen and taking frequent sips from a bottle.

As you approach, he'll engage in a heated argument with a guard. Wait for this to finish before you do anything because the guard has to back off for this to work. When he does, place a gun on the counter for him to pick up.

After the guard is out of the picture, wait for the chef to check the stove and then poison his water bottle.
Follow him to the restroom, drown him, and find an exit! Whew!
Level Three
- Start with a restricted loadout.
- Take out Mariam Amir, Mahmood Salmon, Basant Pai, Oscar Malm, and Roberto Franculitta with the DAK Gold Covert.
- Do not change outfits.
The biggest drawback here is that you have to wear a starting disguise and keep it on the entire time. The colossal advantage is that you can kill everyone the good old-fashioned way of shooting them with this sweet new suppressed SMG.

Make sure to hide your SMG in your briefcase when you aren't using it.

The first four targets are rather simple. Follow the steps in level one and add on the person you electrocuted in level two, only staying in uniform and substituting the SMG instead of the other various methods. That only leaves Roberto Franculitta, the chef, to contend with.
Note: If things get messy, it's totally fine to wipe out everyone. You can take this route in this guide and not alert any guards at all, but it's probably faster to shoot down any guards in your way. It doesn't seem very "Hitman" but this level is intended to be different, so just roll with it.

For the chef, take out his assistant before going into the dining room. Then take out both guards. Save the chef for last as he'll be petrified for a few moments before actually running away. Eliminating these four enemies in this order means no backup will come and stop you.
Now just find an exit and enjoy your new gear! By the way, horns look great on you, 47.