You’ve finally made it. After piecing together ancient artefacts, defeating Skeleton Lords and overcoming everything else the Sea of Thieves likes to throw you (like that pesky Kraken), you can finally make your way to the Shores of Gold.
This hidden land promises gold and glory but it comes with plenty of danger. Although you will be far away from the players and other monsters that roam the Sea of Thieves, you will be in plenty of situation where a second pair of hands would be very useful. Grab the friend and get ready to set sail as this guide walks you through everything you need to know to complete the Shores of Gold Tall Tale.
How To Begin The Shores Of Gold Tall Tale

To start your voyage to the fabled island, you’ll need to start the final Tall Tale in the Shores of Gold Arc. You can do this by finding Gracie at Morrow’s Peak Outpost in the Devil’s Roar. She’s the one wearing the red glowing clothes outside the tavern. Obviously, you will have had to complete the previous eight Tall Tales to begin this one, starting with the Shroudbreaker.
In the cart next to her is the Tall Tale book that over half the crew will have to vote on in order to begin the voyage. Once you do, Gracie will tell you how she used the Shroudbreaker in the past, and wishes you luck going out further than she did. She’ll lash the Shroudbreaker to your ship so that you can finally reach the island.
She’ll also bestow on you a journal of Briggsy, the Skeleton Lord that once made it to the Shores of Gold before succumbing to the curse that you defeated in the Cursed Rogue Tall Tale. This is everything you’ll need to begin your journey.
How To Reach Tribute Peak In The Shores Of Gold Tall Tale

Looking at the journal you’ll find out that the Shores of Gold was actually called Tribute Peak by the ancient that roamed these waves before the pirates ever arrived, but reaching it isn’t too difficult. You should see the Shroudbreaker lashed to the railing next to the helm of your ship so now all you need to do is find the island itself.
From Morrow’s Peak Outpost you need to head due north to find the isle, and if you look at the map table you should see its name written over the edge of the sailable world. Head in that direction until the seas turn red. If you’ve sailed off the map before you know what this means. In normal situations your ship will start to take damage and soon sink unless you make it back to the safer waves. But thanks to Shroudbreaker you won’t have that issue.
Look to the horizon and you should see the outline of the island, head towards it and let the Shroudbreaker do the heavy lifting. Once you’ve made it to shore, the apocalyptic red will dissipate and the island will look far more friendly. Congratulations, you’ve made it to the Shores of Gold.
How To Complete The Southern Vault In The Shores Of Gold Tall Tale

Reading through the journal, you’ll see that Briggsy discovered that you must complete four vaults to delve into the heart of the island. Each one can be spotted as they built into the jagged rocks at the north, east, south, and west. And since you’ve arrived from the south, you’ll probably come across this first.
It's also one of the easiest ones to complete. Find the cave entrance near the coast and you’ll come into a familiar looking vault. Light the fires and you’ll be sealed in until you complete the column puzzle, or drown in the water.
To avoid the latter fate, you’ll have to use the journal. You’ll see there are three sets of ancient images. Starting with the left image, you have to rotate all the columns so that they match the whole set. The trick is that one of the columns doesn’t move. So you have to make sure that each column is displaying an image unique to that one. Once you’ve aligned the set, hit the button on the altar and the next set will appear.
Rinse and repeat three times and the water will empty, the door open, and the Shark token should reveal itself.
Each token must be placed in a fancy mural at the Compass Vault. You can reach it by heading towards the central mountain from the south and following the cave trial around until you cross over a makeshift bridge. Follow the path from there and you’ll come to the mural where you can place the token.
How To Complete The Eastern Vault In The Shores Of Gold Tall Tale

Head towards the Eastern Vault and you’ll find another vault lay out. Before lighting these fires though you should look at the banner draped over the final chamber. The golden key is the emblem of the Gold Hoarders and it might be worth thinking about, and maybe breaking it down into four distinct segments.
Once the fires are lit you’ll again be sealed in and need to rotate the columns before drowning. But rather than the typical ancient images this one will have the components of the Gold Hoarder key icon. Remember that the little dot at the end of the key also has to be included, and that you might have to make the key from right to left.
After you’ve got the symbol built the vault will open and you can collect the Warrior token.
How To Complete The Northern Vault In The Shores Of Gold Tall Tale

The Northern Vault will stand out from the last one thanks to the suspicious looking wood scattered around the ground. The journal tells you that you’ll have to align all the columns to show the same image but that isn’t the hardest part.
Once you’ve lit the fires those strange wooden planks of the floor will erupt with wooden spikes that can immediately kill you if you touch them, so its best to stand on the altar to light them up. The spikes will come up in a circular pattern so you’ll have a couple of seconds to spin a column before they come back around. Remember that touching the spikes at all will kill you and the spikes move too fast for a crewmate to safely pick you up so wait until they are fully retracted before you jump out.
You’ll have to arrange each column to be the same image, but before that you’ll have to find out which image is shared on each column. Take your time with this one and make sure to find the pattern. You’ll have to repeat it a couple of times before it completes, but once it does you’ll have the Kraken Token.
How To Complete The Western Vault In The Shores Of Gold Tall Tale

The final vault in the west is the most difficult, as it requires you to explore the entire island and uncover a few hidden secrets. Once you’ve started the vault at the bottom of the ladder, you’ll see the altar transform into a map of the island with four markers. Each marker leads you to the location where you can find one of the images you need to align on the column, with the first marker for the leftside column and so on. Below we note how you can find each image, but if you’re struggling you might just want to look at the pictures and try these.

The first marker takes you to clifftop where large button plate on the ground. Stand on that and you’ll hear something happening, but you might not be able to see what it is. Look out to the rocks in the shallow water and you’ll spot one emerging from the ground when you hit the button. Use your spyglass to determine what image it is.

The second marker is pretty simple. You can find this small altar near the shipwreck to the south of the island. Flip both switches on the neighbouring columns and the mouth will open to reveal an image.

Not far from the first marker is the third. This one is more obvious but a little more tricky. When step on the plate a large column will emerge down by the coast but the image is on the far side. If you’ve got some friends nearby they can stand and see what image appears. If not you’ll have to sprint down to catch a glimpse before it descends again.

The final marker takes you to the strange circular ruin that Briggsy marked on her map with some question marks. To solve this puzzle you must flick the switch half way down the central stairs that will partly uncover a map of the ruins. This will point you towards which ruin you need to use to find the last image. From there stand on the plate in front of the right ruin to see its mouth open and an image reveal itself.
Once you’ve got all the images simply rotate the columns back at the vault to open the door and gain access to the Boat Token.
Where To Use The Gold Hoarder's Coin In The Shores Of Gold Tall Tale

Once you’ve placed all the Tokens in the mural a secret door to the left will open up and reveal the Gold Hoarder’s Coin. This is what you need to gain access to the bowels of the island, but there isn’t anywhere to use it nearby. Looking at the journal, you can see Briggsy mention an attempt to make it to throne though.
Head over to the grand corridor of throne statues to the north east and look for the headless one. At the base of this statue is a door, but its sealed on the other side. Leave the coin here and bring your ship around to the bay north of the statue. If you’ve tried getting some of the thrones hidden on the other islands before you’ll know what’s coming.

Align your boat so you can point your cannons at the statue and fire yourself so you can land on top. From there you should find a hole in the floor that lets you drop down and open the door. Now you’ve got access you can collect the coin and descend into the island.

From here you’ll have to navigate deadly traps and spooky caves. Follow the trial but move cautiously as there are traps everywhere and most will instantly kill you. If you do die don’t worry though, the creepy mermaid statues act as checkpoints so you won’t be sent all the way back to the ship.
There is a large dark chamber where you’ll have to navigate over the wreckage of a ship, use your lantern to find the way, and when you get to the capstan you’ll have to turn it to align the sails so you can travel over.
After that there will be a few more rooms that require you to turn a capstan but several will be filled with permanently respawning skeletons that you will have to contend with. Have some of your teammates battle the skeletons while you turn it, then group up and run through before the door falls back down.
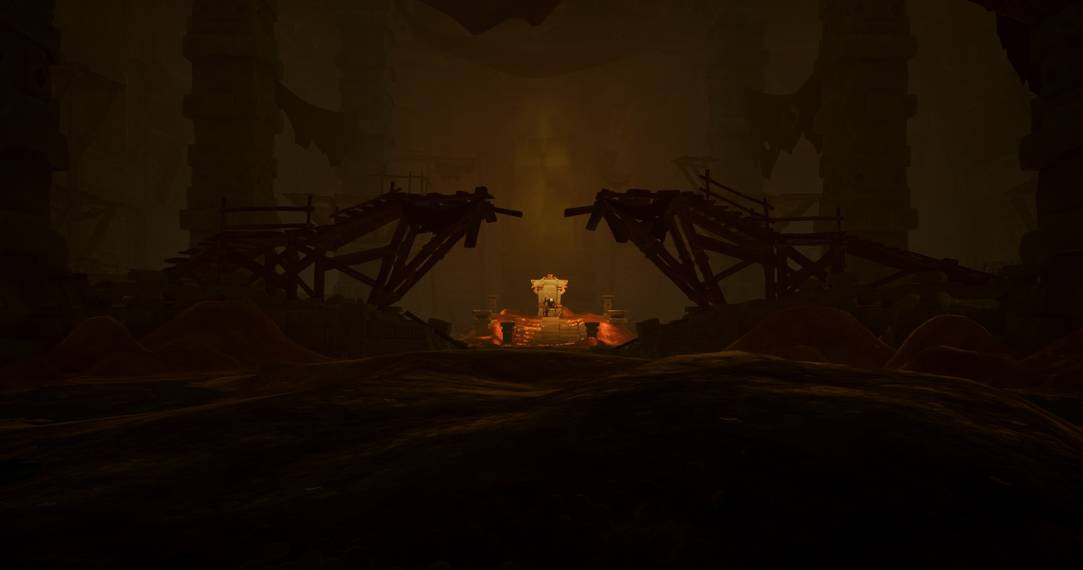
Once you’re past them you will have found your way to the throne room.
How To Defeat The Gold Hoarder In The Shores Of Gold Tall Tale

Here you’ll meet the Gold Hoarder, a greedy and aggressive Skeleton Lord. He is not happy to see any adventurers. Like the other Skeleton Lords he can teleport, spawn mobs, launch area of effect attacks as well. There are barrels scattered around the room and if you die you’ll respawn in the room so its not the end of the world.
Make sure you’ll dealing with the mobs before they overwhelm you, and you’re running away when he starts to trigger his larger attack. You’ll also need to make sure he’s not healing himself, so you have to keep the pressure on, especially when he teleports.

Once the Gold Hoarder is defeated, you’ll have his skull and at the throne the Pirate Lord will congratulate you for the adventure you’ve had. His glorious speech will signal the end of the Tall Tale and indeed the Shores of Gold Arc.
Despite all the treasure left in the room, you won’t be able to take any with you unless you want to turn out like the Gold Hoarder himself. Instead take his skull and find the exit on the left-hand wall that will take you back up the waterfall.
Head back to the boat and sail back to the Sea of Thieves proper and the Shroudbreaker will disappear once you’re out of the red water. Head to an Order of Souls representative and you can sell the Gold Hoarder Skull for 10,000 gold.