Quick Links
The fourth level of Iratus: Lord Of The Dead are the Catacombs. Home to the Order's spellcasters, it's filled with enemies who make heavy use of magic both on offense and defense. You'll also see plenty of enemies who have ways of disrupting your tactics like never before, including stealing your Mana.
The generally high Resistance of the Catacombs' denizens mean that you'll have a hard time inflicting Stress damage on them. Instead, you'll need to bring magic defenses of your own and rely on physical attacks to reach the boss fight against the Pyromancer. Below are all the enemies you'll find in this area, along with tips on how to beat them.
Spellthief

Spellthieves have an exceptional Resistance but no Armor, making them a noticeable departure from the enemies back in the Mercenary Barracks and the Dwarf Tunnels. They don't hit very hard, but they can quickly drain Iratus' Mana while they're alive. They also reduce your Spell Power each time they do this, so groups of them can render your magic effectively useless.
A Dark Knight that has been taught Dark Cleaning can help restore your Mana and dispatch these enemies with his sword, but if there is more than one Spellthief you might want to bring a Shade to keep you topped up.
Living Armor

Unsurprisingly, Living Armor are extremely resistant to physical damage. You can bypass or remove their protection with Skeletons, Werewolves, and Zombies, or you can use magical attacks from Wraiths or Dhampirs, but be extremely careful about your tactics when fighting them. Living Armor get a stacking fifty percent bonus to the damage they deal each time Iratus casts a spell. It's best to avoid using magic altogether
Living Armor are mindless constructs, so they'll never flee, and Stress damage is useless against them. They can, however, be set on fire.
Living Armor can make multiple mid-strength attacks per turn, so the best defensive counter against them is to respond with armored units of your own. Evasive units, especially Shades, can also take advantage of the Living Armor's mediocre Accuracy.
Warden

Wardens have high Armor and Resistance, so you'll need a means of dealing with either or both. Since they're immune to debuffs, the usual strategy of having a Werewolf reduce their defenses to zero won't work. Since Zombies ignore both defensive stats, having one along can make a Warden much easier to dislodge.
Note that Wardens are also immune to being set on fire, some Minions may need to find other ways of dealing consistent damage. Your higher-level Minions may have attacks capable of dealing hundreds of damage in a single strike with the right buffs. A Lich's Dominate Undead powering a Werewolf's Ambush should finish a Warden through sheer brute force.
Sorceress

This spell-casting support unit doesn't attack your Minions, but she has a team buff that allows all her allies to deal thirty percent more damage with their attacks. She can also heal her entire team and remove their debuffs at the same time, so getting rid of her quickly is important if you don't want the fight to be drawn out too long.
A Ghoul that's been upgraded to learn Restrained Slaughter can pounce on the Sorceress almost immediately, removing all of her Blocks and paving the way for a Bride, Werewolf, or other back-row threat to finish her off. A Dhampir can also make short work of the Sorceress' defenses, so hopefully you were able to recruit at least one in the Mercenary Barracks.
Ghouls require damaging your own Minions to unlock, so one slightly cheesy way to get them is to start a new save file and have a Lich continuously cast Rain Of Fire until you've racked up enough damage.
Blade Mistress

Like the Scout in the Mercenary Barracks, the Blade Mistress is able to mark a Minion for execution, dealing enough magic damage on her previous turn to kill nearly anything. Thankfully, she is less likely than the Scout to lurk in the rear of the party, making her much easier to interrupt and destroy.
All of a Blade Mistress's attacks ignore Resistance, making them dangerous to Minions like Zombies that can normally shrug off most magical attacks.
The Blade Mistress's normal attack hits two random Minions at once, dealing moderate magical damage to each. In the best-case scenario this will chew through your team's Wards quickly, leaving you exposed to the Blade Mistress or her allies on subsequent rounds.
This enemy's main weakness is that she lacks both Armor and Resistance. Take advantage of this fact to pick her off before she can get rolling. Blade Mistresses often travel in pairs, so Minions like the Blood Phantasm that can attack two foes at once work well to take them down simultaneously.
Shadow Elf

Shadow Elves also appear in the Catacombs, and deal moderate magic damage with their attacks. Their true danger lies in the fact that they recover Vigor equal to a quarter of the damage they deal. With attacks that hit your entire team, this gives them a healing factor akin to a Dark Knight.
That would be bad enough, but they can also buff their allies to heal Vigor equal to the damage they deal. On heavy hitters like Blade Mistresses, this is a terrifying combination. Take advantage of the Shadow Elf's relatively weak defenses and take him out early to save yourself a lot of pain.
Golden Golem

Compared to the other advanced foes in the Catacombs, the Golden Golem is fairly straightforward. Like other constructs, she is unaffected by Stress and cannot be set on fire. She hits moderately hard but can be dangerous if buffed by allies, and her exceptional Resistance can make it difficult for magic-focused Minions to deal damage to her.
Physical attackers will have the easiest time wearing down a Golden Golem's impressive reserves of Vigor. Be prepared to take physical damage yourself, and be aware that the Golem's attacks can remove buffs and reduce your Minions' attack. A Blood Phantasm in the third or fourth position, protected by tanky Minions like the Bone Golem, can repeatedly use their Chains Of Anger attack to deal heavy damage. This is also a great way to turn the Golden Golem's buffs against her!
Conjuress

The Conjuress is an extremely disruptive spellcaster; her singular goal is to thwart your strategy, whatever it may be. She can stun your Minions, randomly swap their positions, and deal heavy persistent damage by lighting your troops on fire.
The best way to deal with a Conjuress is to kill her before she has a chance to get going. A Ghoul or Werewolf can easily reach her usual spot in the back of the enemy formation, and since she's unarmored their attacks will deal the full extent of their potential damage. Don't bother using magic or Stress attacks unless you have some way of removing or ignoring her amazing Resistance stat.
Before going into battle against a Conjuress, check your Artifacts. Equipping gear such as the Unstable Armor that provides Wards, even temporary ones, could give you just enough defense to get through the fight relatively unscathed.
If you don't have a team capable of eliminating a Conjuress within the first two rounds, focus instead on magical defense. Zombies, Wraiths, and Liches can all withstand several rounds of magic attacks, and if you can get a Minion such as a Dhampir to eliminate the Conjuress' Resistance they can all strike back at full power.
Failed Experiment

This mutant horror hits hard and is tough to kill. With over two hundred Vigor and Sanity and decent defensive stats, it will take a concerted effort by your Minions to destroy a Failed Experiment. Meanwhile, the creature will be buffing itself to land critical hits more often and deal even more damage when it does! Thankfully the Failed Experiment's Accuracy is quite low, so Minions with high Evasion such as the Shade can usually survive an encounter with one.
If the Failed Experiment has less than a quarter of its Vigor remaining at the start of its turn, it will self-destruct, dealing heavy magic damage to your entire team. The easiest way to avoid this is to have a Ghoul ready to devour it with her ultimate ability. Be sure to save your Wrath so that the hungry hellion is able to use Lunch Break when the time comes.
Storm Caller

The Storm Caller can punish your Minions for using careless or indiscrimate attacks. When he marks one or more allies, any Minion that attacks that target is hit with a powerful jolt of magical damage. Be especially careful if he marks a Warden, whom your Minions can be forced to attack if in guarding stance.
Purging Current remains even if the Storm Caller dies, so you'll need to wait for it to expire before you can resume dealing damage. The most effective way to use this time is to heal and lay down any buffs that are available. Delayed attacks such as the Werewolf's Ambush or Zombie's Bombardment that will take effect after the aura expires are also useful in this situation.
Pyromancer

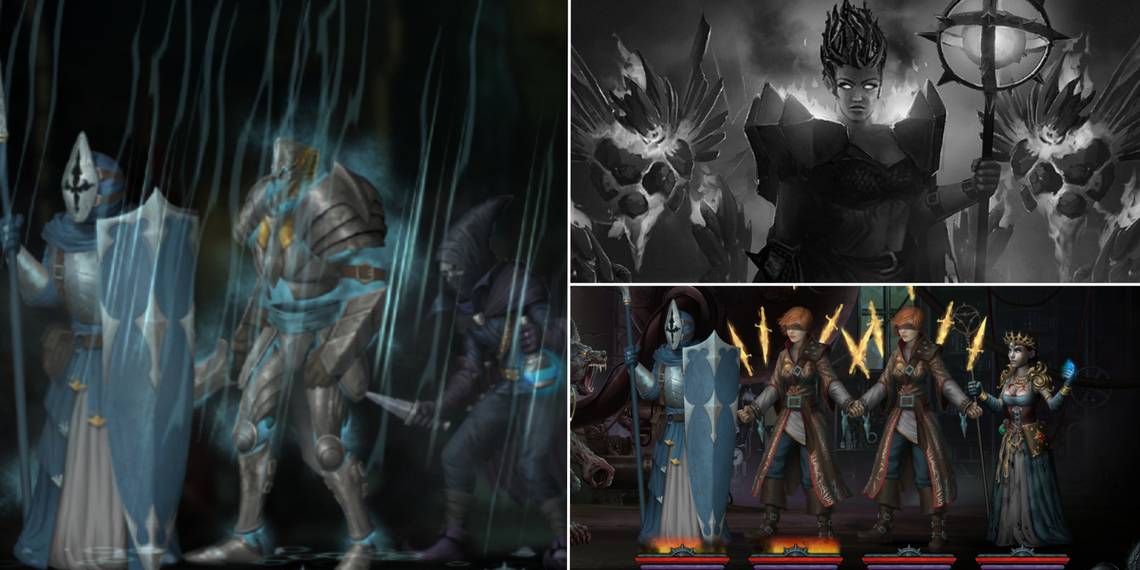
As the boss fight intro states, the Pyromancer is the world's most dangerous spellcaster. The fact that the Order is willing to risk having her around at all shows how desperate they have become to defeat Iratus. Be ready to put out fires when dealing with this boss, both literally and figuratively.
The Pyromancer is accompanied by Fire Elementals, which she will continuously summon throughout the battle. These temporary terrors explode after two rounds, interrupting stances and ignoring any defenses on your Minions. This fight therefore requires a balance between quickly picking off Fire Elementals and dealing damage to the boss herself.
In addition to plenty of Wards, you'll want to enter this fight equipped with artifacts that increase your Wrath generation. That way you'll have easier access to ultimate abilities that target the entire enemy team such as a Bride's Rose For A Lady. Since the Pyromancer can only summon one Fire Elemental at a time, taking them all out at once gives you a lot more breathing room.
Any attack that would ignite an enemy, such as a Bride's Flames of Love or a Blood Phantasm's Hate Eternal, will deal no damage to the Pyromancer.
A good strategy for fighting the Pyromancer is to divide and conquer. Have two of your Minions focus on thinning the ranks of Fire Elementals while the other two aim for the boss. A Dhampir or Werewolf can eliminate the Pyromancer's stellar Resistance stat, rendering her susceptible to magic damage. As with most boss fights, Stress isn't as useful as simply hammering away at the enemy's Vigor, so bring Minions built to kill rather than to scare.
When the Pyromancer's health is low, you can turn your attention to eliminating her before the current batch of Fire Elementals explodes. If you prefer to play it safe, you can simply stay the course and spend an extra round or two finishing the battle - just be sure you can take the extra damage that will be inflicted during that time!