Quick Links
The second floor of Iratus: Lord Of The Dead is the domain of the Dwarves. They may have abandoned their traditions in pursuit of profit and power, but these fantasy staples are still tough as nails. Be prepared to deal with heavy armor and powerful attacks in equal measure.
By the time you're through the Dwarven Tunnels, you'll probably start unlocking some of the game's more advanced Minions. Don't be afraid to take the long way around if it means you'll have more options available after clearing the map - the Dwarven Tunnels are a great place to experiment with team compositions against a variety of foes.
Dwarven Warrior

These armored soldiers are fairly basic in most respects - they deal decent damage and can take weaker attacks on the chin thanks to their moderate Armor and Resistance stats. They also start each battle with a Block, meaning the first physical attack they take will be negated.
As with most armored foes, Skeletons, Werewolves, and Zombies are all excellent choices against Dwarven Warriors. Pay attention to the other members of the Dwarven team, and bring an armor-breaking Minion that complements the others you'll be bringing.
The basic Dwarven unit does have one hidden trick up his sleeve, however. Dwarven Warriors can deal damage based on the target's Armor and Resistance, so Minions such as the Dark Knight and the Head Hunter could be in trouble when facing them in large numbers.
Berserker

As you might expect from their name, Berserkers hit hard and fast. They can adjust their stats with their Frenzy buff, changing to a defensive or offensive strategy as they deem necessary.
Berserkers become much more dangerous the longer they remain on the battlefield. They have a high Sanity, but lose a chunk of it each turn. Considering that they deal an extra point of damage for every ten Sanity they're missing, they can quickly become strong enough to kill your Minions.
A Banshee can make use of the Berserkers' Sanity drain by using Absorb Fear. This fully restores the target's Sanity (removing the Berserker's bonus) and restores Iratus' mana at the same time. Her Soprano can also help negate the Berserker's bonus, causing him to suffer the effects of low Sanity without his normal benefit.
If you've unlocked the Shade, this ghostly Minion can make short work of Berserkers. Its Gloom Claw ability deals damage based on how much Sanity the target is missing; as the Berserker becomes more enraged, the easier it becomes for a Shade to simply one-shot him.
Alchemist

Alchemists are specialized Dwarven troops that provide buffs for their allies. They can grant a fifty-percent damage boost or a Block and a Ward, bolstering their team on both offense and defense.
If your strategy relies on maintaining formation, Alchemists can throw a wrench in the works as their attack swaps the positions of two adjacent Minions while dealing a small amount of magical damage. Be ready to use spells or movement abilities to get your troops back into their proper places if this happens.
Alchemists don't have any real defenses, so unless another unit buffs them you should be able to dispatch them fairly quickly. If you have ways of getting around their enhancements, such as upgraded abilities that ignore Block, you can safely ignore the potion-wielders and focus on heavier threats.
Treasurer

Treasurers stand at the rear of the Dwarven formation, providing buffs that make the bearded fighters even more dangerous. The Treasurer gives all of his allies a bonus to Accuracy and Luck, ensuring that their attacks hit and increasing the likelihood that they'll deal critical damage. Worse, he can scatter coins at your Minions' feet, reducing their Accuracy and Luck!
His position at the back and his two starting Blocks and Wards make dealing with the Treasurer a tricky proposition. In most cases your best bet is to ignore him and eliminate the other enemies before they can do too much damage. Dark Knights and Skeletons both have abilities that are enhanced by the number of buffs on the target. Use these Minions to punish the Dwarves for their numerous buffs!
If you have a Dark Knight, try to have him use Futile Hopes before the Treasurer's first turn. When the Dwarves receive their Motivation enhancement, they'll also suffer some Stress damage. If they give themselves additional buffs, such as the Berserker's Frenzy, so much the better for you!
Musketeer

With a high attack power, Accuracy, and Luck, the Musketeer can snipe even your fastest Minions. This alone is a good enough reason to eliminate him early, but this gun-toting Dwarf has a few other tricks up his sleeve as well.
His Baleful Eye marks a Minion, ensuring that the Musketeer's next attack can't be dodged and will deal more damage. Luckily, you have an easy way out if you don't mind changing your formation. Simply use one of Iratus' movement spells to shift the affected Minion one space, and the Baleful Eye will disappear.
The Musketeer can also reduce the Accuracy of your entire team by shooting a flare. Combined with debuffs from the Treasurer, you may need to counter with buffs of your own while you wait out the blinding effect.
Oracle

The Oracle doesn't hit especially hard herself, but she can imperil your Minions if she has the right units backing her up. Her Doom ability doubles the damage dealt to the marked target. In a place full of hard-hitting Berserkers, Musketeers, and more, that's a disaster waiting to happen.
The Oracle is also one of the first healers you'll encounter in your quest for world domination. She can give her allies Regeneration, allowing them to regain VItality each turn. Between these two abilities, the Oracle should always be a priority target when she appears.
If you've unlocked the Blood Phantasm, its Transfusion and Mark of Retribution abilities can severely punish Dwarven teams that rely on Doom to deal damage. You may lose a Minion in the process, but such a sacrifice can save the rest of your lineup against a tough formation.
Trader

Traders are not warriors, and it shows when they try to fight alongside their kin. Nevertheless, you should try to eliminate the Trader first when he appears, as his presence makes the other Dwarves particularly resilient.
When the Trader assumes his unique stance, all of his allies become faster and regain Sanity whenever they take damage. Worse, they also lose all debuffs and gain a small Initiative boost. A Bride Of Iratus can temporarily put a stop to this by firing a Warning Shot at the Trader, but he'll keep activating the stance until he's eliminated. It's best to finish him quickly so that your Bride doesn't need to keep wasting her turn.
The Trader's stance can restore Armor that's been destroyed by a Werewolf.
When he's not punishing you for attacking his allies, the Trader can grant a single unit a Block, a Ward, and a permanent attack boost. Keep track of which enemies he's enhanced in this way and make them a priority target once the Trader goes down. A Banshee can help negate the attack bonus with Soprano, but you'll need to remove the Ward first with a spell or another Minion's attack or her shriek will have no effect.
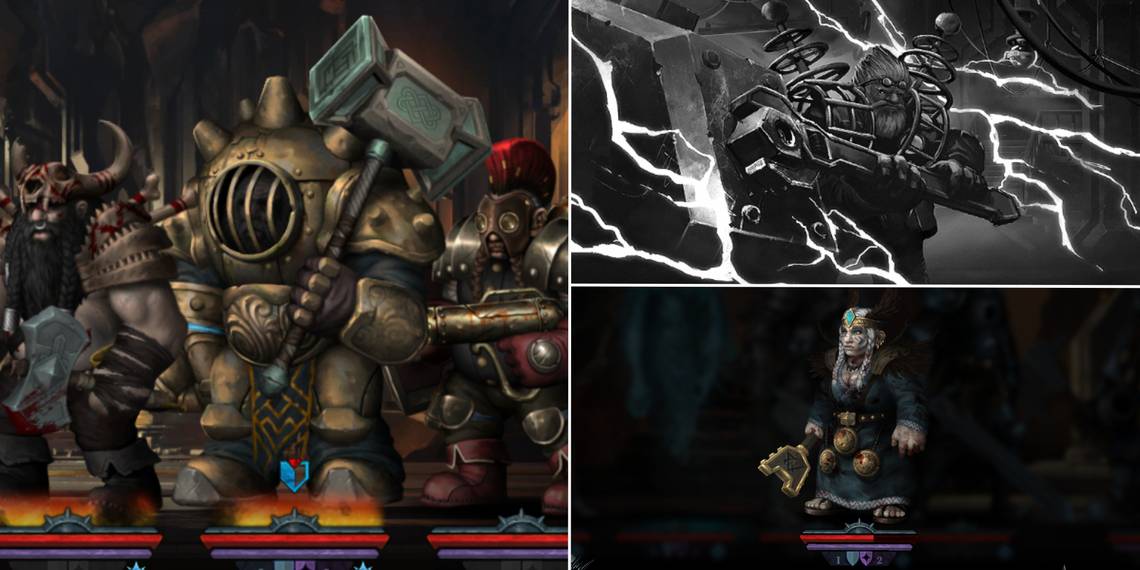
Hammerer

If these steelclad soldiers look dangerous, it's because they are. Like the Stone Golems back in the Mines, Hammerers have a chance to take hits on behalf of their allies, relying on their heavy Armor, Resistance, Blocks, and Wards to survive. Chances are you'll need to go through the Hammerer before you'll be able to reliably hit anyone else.
The Hammerer deals a fair amount fo magical damage with his Galvanic Hammer, so expect to take some hits before you're able to bring him down. This is especially true if he charges the hammer for a strike that damages all Minions with a chance to stun them. Try to keep the Hammerer clear of Wards so that your Bride of Iratus can interrupt his charge with a Warning Shot.
Zombies are ideally suited to fighting Hammerers, as they have a decent Resistance and all their attacks ignore Armor. Charge up your Wrath while having the Zombie prep with More Powder, and fire a Cannonball as soon as you're able. Make sure to clear away the Hammerer's Blocks first, otherwise your carefully-prepared finisher will be a dud.
Heavy Firethrower

Armed with a flamethrower and some of the sturdiest armor available, the Heavy Firethrower is capable of incinerating your squad if permitted to reach the front position. She advances slowly, which will buy you some time, but her impressive Armor stat can cause all but the strongest physical attacks to bounce right off of her.
Use magical attacks like the Wraith's Cold Grasp to deal damage during the Heavy Firethrower's advance. If she reaches the second position, a Werewolf can use Tear Up to destroy her armor, paving the way for the rest of your Minions to gang up and bring her down.
If you're stuck dealing with other enemies, you can easily slow the Heavy Firethrower's advance with a Bride's Warning Shot. This will interrupt the Firethrower's Turtle Advance stance and push her back one position.
When the Heavy Firethrower reaches the front of her formation, she'll unleash a torrent of flame that deals magical damage to your entire team. Preparing ahead of time with Wards is the best way to mitigate the damage if you can't finish the Firethrower off before she shoots. Blocking the flame attack with a Ward also prevents the fire damage each turn from taking hold, saving you even more Vitality loss.
Geomancer

Geomancers use stones to create powerful barriers. One of these wizards can have up to four Blocks at once, rendering him immune to all but the most persistent physical attacks. If he is able to get Wards from an ally like an Oracle, the Geomancer is all but untouchable.
Despite being spellcasters, Geomancers deal physical damage - after all, they're essentially just throwing rocks at you. Minions with even a few points of Armor should be able to withstand everything a Geomancer can throw at them. However, if the Geomancer decides to unleash an earthquake he can randomly shuffle your formation, putting your Minions out of position. A Shade can help fix this by using Trick Of The Eye to swap places with any ally, and both Minions will get a hefty buff to their Evasion as well!
If you don't have a way of getting around Blocks, the best way to defeat a Geomancer is to save him for last then wear him down with magic attacks and Stress.
Inventor

Protected by his Pylons, the boss of the Dwarven Tunnels is effectively immune to normal damage. The key to defeating him is to destroy his inventions one by one. Each time a Pylon is destroyed, the Inventor will lose 100 Vitality; all you need to do is keep smashing Pylons until he succumbs.
There's no need to inflict Stress damage during this boss fight, so you can safely leave Minions like Banshees and Mummies at home. As long as you can deal consistent damage and get around the occasional Block or Ward, the battle with the Inventor is a breeze.
Focus on destroying Offensive Pylons (the ones that look like Tesla coils) first. Without them, the Inventor won't be able to deal any significant amounts of damage. When he's not building or repairing Pylons, he can hit your entire team with magical damage. If the fight goes long this can become a problem, but you can easily reduce the danger by equipping Iratus with a Smoke Bomb before entering the battle. The reduction to the Inventor's accuracy means he will miss with many of his lightning bolts.
Try to unlock the Blood Phantasm before you reach the end of the Dwarven Tunnels; its ability to hit the two front enemies simultaneously is great against the Pylons. Pair the Blood Phantasm with a Werewolf and put your favorite support units in the back, and you can swiftly eliminate Pylons one after the other. If you don't have a Blood Phantasm, a Zombie will do nicely in its place.