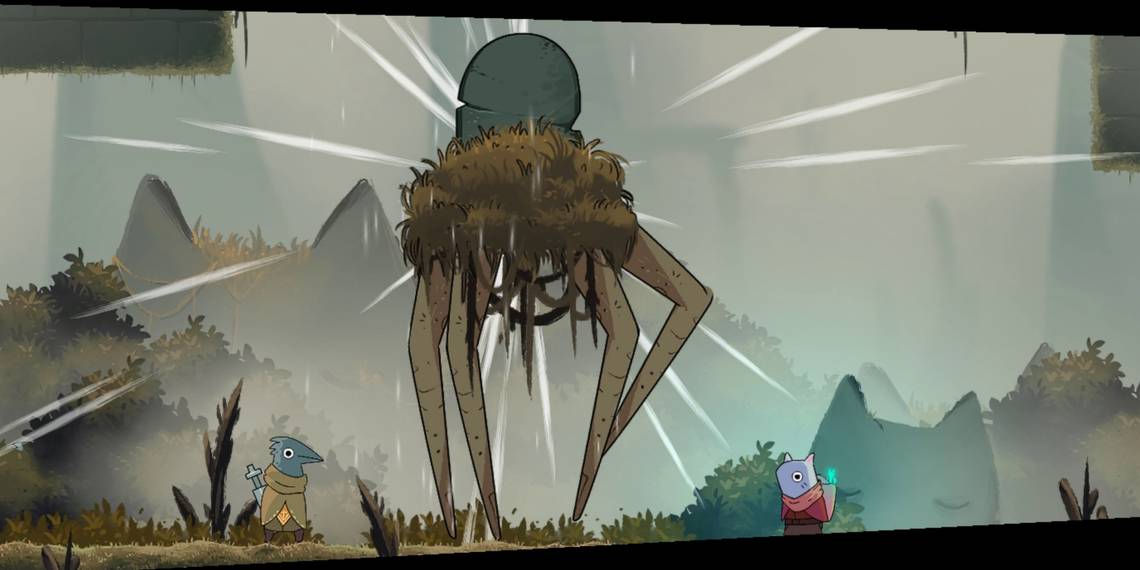
Sometimes, Islets decides to give other characters an opportunity to shine, it's not 'The Iko Show' after all! This time, it's GreyBird's time in the spotlight as our heroes go up against the Forgotten Grave, a boss so frightening that... ah, turns out it's 'The Iko Show' after all.
This is an interesting and fun boss to fight. It's a fight that requires patience and positioning more than outright offense and timing, as others do. You'll need to match the Forgotten Grave's rhythm and seek your damage windows eagerly.
Forgotten Grave's Attacks

The Forgotten Grave has many attacks that revolve around it submerging into the ground and emerging to hurt you. You'll have to pick your offensive moments carefully in this fight if you want to survive.


|
Attack |
Description |
How To Counter |
|---|---|---|
|
Submerge |
The grave leaps up into the air and then dives beneath the ground, causing shockwaves to spread to either side. |
Don't be underneath the grave when it comes back to the ground and jump to avoid the shockwaves. |
|
Angered Submerge |
This is the same as Submerge, but at the apex of the jump, the grave will send out a spiral-pattern wave of projectiles. |
As above, but make sure you avoid the projectiles emitted during the leap. |
|
Spear Wall |
While the grave is underground, it summons a row of spears. They first poke up from the ground a little, before shooting up in a row to damage you. |
Stand still between two spears to avoid all damage. |
|
Emerge |
The grave emerges from underground. It will then spit out two projectiles, which cause shockwaves when they hit the ground. There are two sets of projectiles. |
While this is your best chance to get a lot of damage in, be mindful of the projectiles and shockwaves. The former is easy to dodge, jump over the latter. |
|
Angered Emerge |
This is similar to Emerge, but instead of small projectiles, the grave summons pointed projectiles that shoot out in a straight line. In addition, the floor is covered in spikes, and eight white orbs will appear. The spikes start out harmless and then shoot up, similar to Spear Wall. |
You must try to use the white orbs (by attacking) to stay off the ground to avoid the spiked floor while also trying to time your attacks and double jumps to avoid the projectiles. This is the trickiest attack in the fight. |
|
Enraged Spear Wall |
This attack is identical to Spear Wall, with the addition of the spiked flooring that you'll have seen in the Angered Emerge attack. |
Stay in once place between the spears as usual, but perform a double jump without moving to one side to avoid the spiked floor coming up. |
|
Enraged Barrage |
The grave emerges from the ground and spews out two large blasts of projectiles into the air. |
Dodge roll through the projectiles as they hit the ground. |
|
Enraged Emerge |
This is identical to Angered Emerge but lasts longer. The grave will shoot out three waves of projectiles instead of one. |
You'll need to make far greater use of the white orbs, conserving them so you don't use them all before the end of the attack. |
How To Beat Forgotten Grave

There's a certain rhythm to this fight that comes naturally as you experience it. Eventually, you'll start to notice the best times to attack.
- In the first phase, the best time to go on the offensive is when the gravestone is the only thing sticking out of the ground. You can also get a few shots in during the grave's very slow leaps into the air - especially if you've raised your firing speed with upgrades.
- In phase two, you have some fantastic opportunities to inflict a ton of damage if you have the upgrade that boosts your sword slam with a shockwave. When the grave is walking on the ground, use the sword slam shockwave - the boss will take multiple hits of damage, cutting down its health bar significantly.
- A good rule of thumb to remember for this fight is that you will almost never need to use the dodge roll. Thanks to the significant amount of moving parts in the fight, using the dodge roll is more likely to get you into trouble. Instead, focus on your positioning and platforming. This is most obvious when it comes to the Spear Wall attacks - you simply need to stay in one place to avoid the spears.
- It's common to think that you should go more on the offensive when you enter the second phase of the fight, but this is something of a trap - the fight gets a lot more chaotic at this point, and you should be waiting for the opportune times to strike. Otherwise, you're likely to take unnecessary damage.