Quick Links
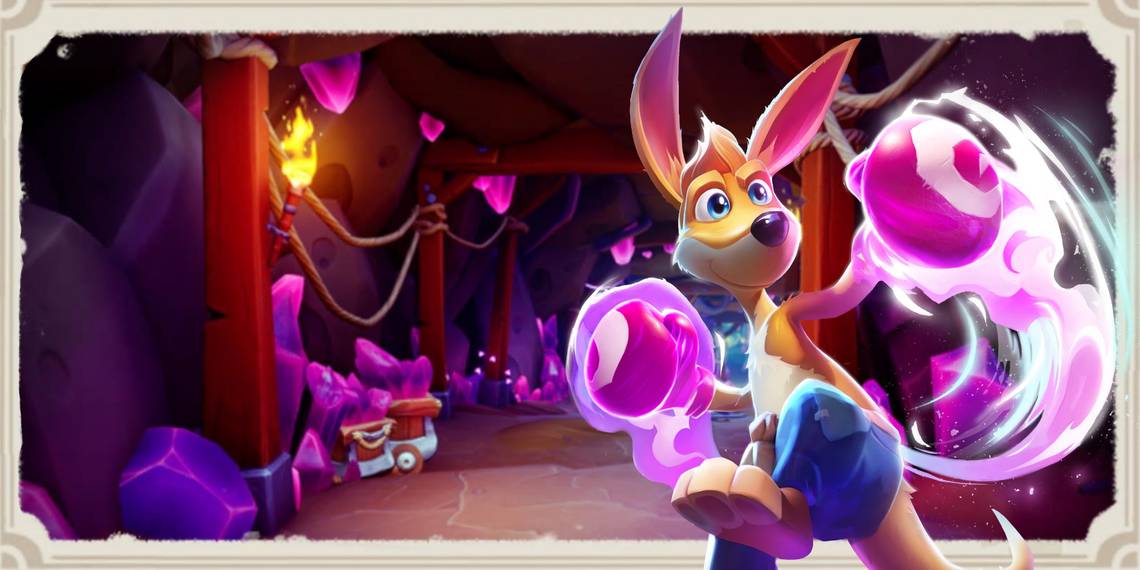
Here it is, after all that platforming, after all the crystal collecting, you have reached Kao The Kangaroo's final stage: The Crystal Caverns. This stage will make sure to have you engage with a number of familiar platforming setups. However, it isn't afraid to throw in a few new tricks while it is at it.
Alongside the familiar dark crystal platforming and rail riding segments, you will now be contending with moving grappling hooks. Not to mention a variety of unique puzzles. The Crystal Caverns is a stage that coils around itself. It has a level structure that allows you to explore different segments in an order of your choosing. It is also crammed with collectibles. Which, of course, we are happy to help you locate.
Step-By-Step Collectible Guide
|
Crystals |
13 |
|---|---|
|
Scrolls |
1 |
|
Runes |
4 |
|
Treasure Chests |
2 |
|
Extra Lives |
1 |
|
Heart Pieces |
1 |

You will begin this stage in a narrow tunnel. Head down the tunnel and you will enter a room with a barred door on your left and on your right. Grab the fire orb and burn the plank barring the door on your right. Once you enter into the next area, jump across the gap. The first crystal (1/13) is just below the fire orb. Use the fire orb to destroy the giant spider web.

Now, climb up. You will encounter a series of falling platforms. Take the leftmost path. This path will lead you to two crystals (2/13 and 3/13). Once you get to the room the path leads to, you will see some carts filled with dark crystals to your left. Climb them like a set of stairs and acquire another crystal (4/13). You will see a wall of tablets. Hit the tablets until the lines connect. Once you do so, the wall will open up and a treasure chest will be revealed.

From the chest, hop up above and grab another crystal (5/13). Then, use the nearby fire orb to heat the boiler in the next room. This will open a door and grant you access to this stage's first rune (1/4). From here, slide down the rail. Use the fire orb to burn the spider web when you encounter it. Now you will be back in the room from the beginning. Open the other door by burning the plank.

There is a lot of tricky platforming here; especially with the grappling section, where you will need to time your grappling according to the moving hooks. After you have swung across the gaps and performed some dark crystal platforming sections, you will end up in a room with some enemies, a boiler, and a stream.

Grab the ice orb and freeze the water, then use the wind orb to yank the giant crate. Jump down where the crate was previously. Follow the route until you encounter the letter K. Take the dark crystal platform back to the room from before. Push the crate so that it is under the boiler, grab the fire orb, and ignite said boiler. This will open the nearby chain-link door.

Grab the next rune (2/4) and jump on the rail. Ride it to a spider web obstruction. Grab the nearby fire orb and burn it. You will now be back in that first room again. Another set of doors will be open revealing an elevator. Take the elevator down. From here, jump on the railing. You will be dumped in a room with a buff monkey: beat it up. In that room, jump on the stack of crates. There is a crystal (6/13) hovering around in the air just waiting to be grabbed.
Once you have obtained the crystal, break the crates. You will reveal a giant hole in the ground. Jump down and follow that path until you find the 14th Eternal Well.
|
Eternal Well 14 |
|---|

Just ride the rail and grab the diamonds as you go. There are some pretty sneaky steam traps, but at this point in the game, you probably have enough hearts that you could take them all on the chin.

Back up to the room. Hit the giant button on the wall. This will open the doors, but don't jump on the trampoline that is revealed! Before you do that, drop down to the right and grab the letter O. Climb back up, and now you can jump on the trampoline. In the next room, there is a heart piece behind a spider web and another rune (3/4). There is also a crystal (7/13) behind some boxes.

Burn the plank barring the door, and you will find three crystals directly on this path (8/13, 9/13, and 10/13). Once you reach the area with the beaksters, you will find the letter O behind a giant crate to your left.

Finally, travel along the tracks, grab the extra life, and the next three crystals (11/13, 12/13, and 13/13) will be directly on the main path (with the final crystal being behind a giant test tube). Now, in the final area, you just need to position all the laser towers correctly.

Just freeze the water and push all the laser turrets around until they are all connected by one continuous laser. Once you do this, you will receive the final rune (4/4). The scroll is off in a side room in this area, so make sure to not complete the stage before grabbing it.
Where To Find The Runes
|
Rune 1 |
|
Found after you heat the boiler at the end of the rightmost path at the beginning of the stage. |
|---|---|---|
|
Rune 2 |

|
Found after you heat the boiler at the end of the leftmost path at the beginning of the stage. |
|
Rune 3 |

|
Found in the room just before the tracks that lead to the final area. |
|
Rune 4 |

|
Obtained after you solve the laser puzzle |
Where To Find The Crystals
|
Crystal 1 |

|
You will find this crystal under the fire orb at the beginning of the stage. |
|---|---|---|
|
Crystal 2 |

|
This is the first of the two crystals you obtain during the section with the falling platforms. |
|
Crystal 3 |

|
This is the second of the two crystals you obtain during the section with the falling platforms. |
|
Crystal 4 |

|
Near the rune wall puzzle, off to the left, climb the hovering crystal carts to find this crystal. |
|
Crystal 5 |

|
Once you have solved the rune wall puzzle, hop up to claim this crystal. |
|
Crystal 6 |
|
Hovering in the air in the room that leads to the Eternal Well. |
|
Crystal 7 |

|
Behind some boxes in the room with the third rune. |
|
Crystal 8 |
|
This is the first of the three crystals near the tracks, before the letter O. It is found on the island to the left of the tracks. |
|
Crystal 9 |

|
This is the second of the three crystals near the tracks, before the letter O. It is found on the island to the right of the tracks. |
|
Crystal 10 |

|
This is the third of the three crystals near the tracks, before the letter O. It is found on the second island to the left of the tracks. |
|
Crystal 11 |

|
This crystal is found on the main path as you head to the final area. |
|
Crystal 12 |

|
This crystal is found on the main path as you head to the final area. |
|
Crystal 13 |

|
This crystal is found behind the test tube containing a monkey just before the final area. |
Where To Find The Scrolls
|
Scroll 1 |

|
The scroll is obtained in the final section of the level. It is in the room with the broken test tube off to the side. |
|---|