The Legend of Zelda: Breath of the Wild features a vast open world with countless possibilities and a plethora of objectives to complete. From helping the locals with side quests to collecting Korok Seeds, there is always something new to discover around every corner.
One of the most rewarding things you can do is look for Shrines - small dungeon-like areas that challenge you with complicated trials and puzzles. Including the Champions' Ballad DLC, there are 136 Shrines scattered across Hyrule, and some of them might feel as difficult as facing Ganon himself. If you want to complete each one to maximize your Health and Stamina, these are the hardest Shrines in Breath of the Wild.
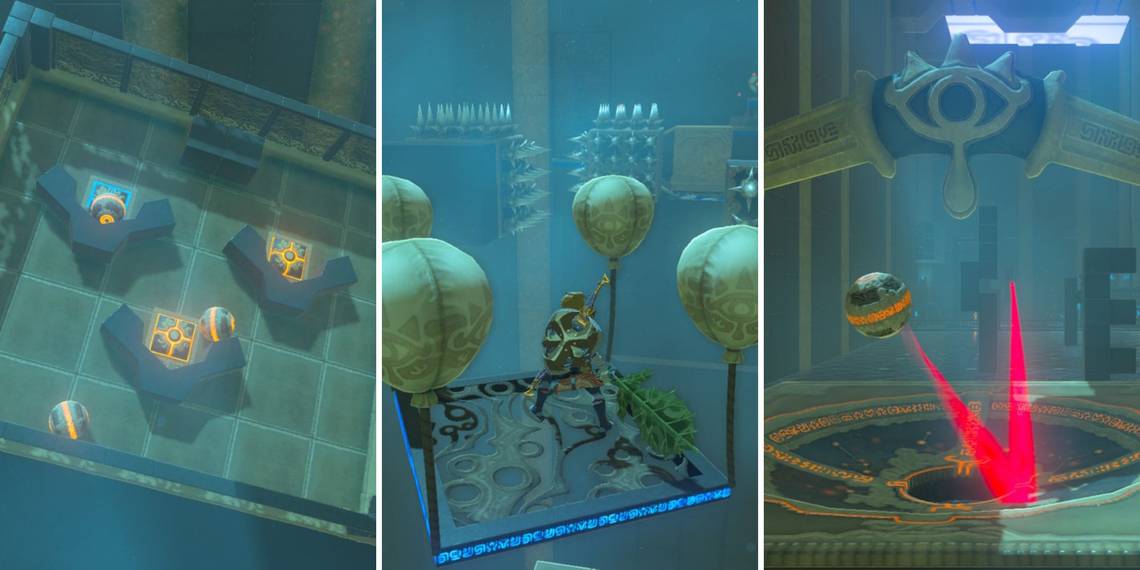
10 Mirro Shaz Shrine - Tempered Power

Golf is supposed to be a relaxing activity, but the Mirro Shaz Shrine makes it one of the more frustrating pastimes in Hyrule. Located southeast of Woodland Tower, this trial features two courses for Link to practice his long game. Fortunately, you only need to complete one to collect the Spirit Orb.
The goal is to use Stasis on a ball and then hit it hard enough to land in the hole across the room. It sounds easy, but you need to make sure the ball is aimed in the right direction and that you're applying the proper amount of power to prevent it from bouncing out.
9 Mogg Latan Shrine - Synched Swing

Magnesis is one of Link's best abilities, and the Mogg Latan Shrine will test how well you can use it. Found on Satori Mountain, this deadly trial requires you to make your path to the end by manipulating swinging platforms and dodging deadly traps.
The first section features metal platforms you can travel across after using Magnesis to swing them back and forth. Then, you'll need to clear a pathway through spiked boulders hanging from the rafters before finally making a staircase by moving platforms around. It's one of Hyrule's most dangerous obstacle courses, but patience will help you get through it without a scratch.
8 Dako Tah Shrine - Electric Path

While some Shrines only feature a puzzle or two before the Spirit Orb, others feature massive areas you'll need to figure out how to maneuver through. The Dako Tah Shrine - found just to the southeast of Gerudo Tower - requires you to carry an electric conductor through an elaborate maze to power up the necessary elevators and platforms to reach the end.
You can use Magnesis to move the conductor around, but you'll need to think a few steps ahead to make sure it's moving the necessary platforms to make progress. To make things worse, a few Guardian Scouts linger around the Shrine, ready to attack as soon as they see you.
7 Tamaka Shiri Shrine - Dual Purpose

There were only 120 Shrines in Breath of the Wild before the Champions' Ballad DLC introduced 16 more for you to explore after freeing the Divine Beasts. The extra trials are some of the best in the game, but a few of them are much more challenging than others.
You can find the Tamaka Shiri Shrine northwest of Gerudo Town. The Dual Purpose trial tasks you with building a bridge using metal cubes that are also needed to conduct electricity and open gates. The second section is like a giant slide puzzle that you must navigate without shocking yourself to death. If you step back and think a few moves ahead, you should finish the trial in no time.
6 Kah Okeo Shrine - Wind Guide

To complete the Kah Okeo Shrine, you'll need to awaken your inner Wind Waker to navigate a series of platforms to the finish line. You can find this Shrine southwest of Tabantha Tower, and it will provide you with the necessary tool - a Korok Leaf - inside a chest near the entrance.
You'll need to use the Korok Leaf to create gusts of wind that can push explosive barrels forward and carry you past obstacles. To make the situation worse, Guardian Scouts littered throughout the Shrine will try to blast you out of the air. Slow and steady wins the race, especially when facing the spike-covered walls toward the end.
5 Shee Venath & Shee Vaneer Shrines - Twin Memories

The Shee Venath and Shee Vaneer Shrines sitting atop the Dueling Peaks are incredibly unique Shrines in Breath of the Wild. When you first enter either of them, you'll see a bunch of orbs on the ground in seemingly random spots. There is a sign which suggests that the memory of one Shrine could be the answer to another, but that's the only hint you get.
To complete these Shrines, take a screenshot of their floor and head over to the other to recreate the pattern. Climbing to the top of the Dueling Peaks to reach these Shrines is challenging enough, but solving one of the game's best puzzles is a satisfying feeling that makes the trip worth it.
4 Ze Kasho Shrine - Ze Kasho Apparatus

Some of the worst Shrines in Breath of the Wild are the ones that require you to use gyro controls to move a large object around. The motion controls are never as accurate as you want them to be, and the only way to reset the positioning is by leaving the Shrine and re-entering. Ze Kasho Shrine is found northwest of Akkala Tower and contains a trial that feels like a scene from Mission Impossible.
First, you will need to use gyro controls to move spikes off a bridge so you can cross it. Then, you'll need to strike a crystal to block lasers from hitting you, with only a few moments before they reappear. Finally, you must use gyro controls again to maneuver three balls into their spots at once.
3 Rohta Chigah Shrine - Start To Stop

The Rohta Chigah Shrine is one of the first trials you'll face during the Champions' Ballad DLC, and it sets the bar for how difficult this quest will be. It's revealed on the Great Plateau after defeating a group of enemies, and the twist with this Shrine is that you only have a quarter of a heart upon entering.
From the spike-covered floors to the giant boulder that chases you toward the end, the Rohta Chigah Shrine feels like the temple from the beginning of Raiders of the Lost Ark. There aren't any enemies to face here, but each room in this Shrine is meant to keep you on your toes as you avoid traps and imminent death.
2 Myahm Agana Shrine - Myahm Agana Apparatus

The Myahm Agana Shrine contains a gyro-controlled apparatus like the one in the Ze Kasho Shrine, but it's more complex and frustrating to solve, especially if you're not patient with it. Located on the outskirts of Hateno Village, this puzzle looks deceptively easy until you realize you've spent at least 30 minutes trying to finish it.
To clear this Shrine, you'll need to navigate a ball through a maze using gyro controls, but uncovered ledges make it easy for the ball to slip off and force you to restart. A slow and steady approach should help, though it's possible to create shortcuts for the ball by quickly tilting your controller upward to launch it ahead of where it should be.
1 Shora Hah Shrine - Blue Flame

Each Shrine will challenge you in one way or another, but the Blue Flame trial inside the Shora Hah Shrine is one of the longest and most cumbersome challenges in the entire game. To clear it, you will need to light a series of torches throughout the Shrine, but a hoard of Guardian Scouts and water fountains makes it more difficult than it sounds.
To make the mission easier, it's recommended that you stock up on arrows before entering the Shrine on the Isle of Rabac northwest of Death Mountain. Aside from lighting all the torches, you'll need to use Magnesis to build staircases, run away from a giant spiked boulder, and have great accuracy with a bow. Shora Hah will test you, but it's also one of the most enjoyable Shrines in Breath of the Wild.