Because Life is Strange is such a narrative-focused game, there's not much to do outside of playing through the story. You don't need to manage your inventory, nor are there any side quests that must be done. But there are still collectibles, and they come in the form of optional photos.
To get one, you typically need to observe something and then hit the prompt to take a picture. Some, however, take a bit of time to find, and a few require some setup. Here is all the information you need to get each one.
If you've already got several but not sure which ones, your achievement or trophy list can help as there's an individual award for them all. To that end, we've numbered them 1-10 per episode as the game does.
Episode 1: Chrysalis
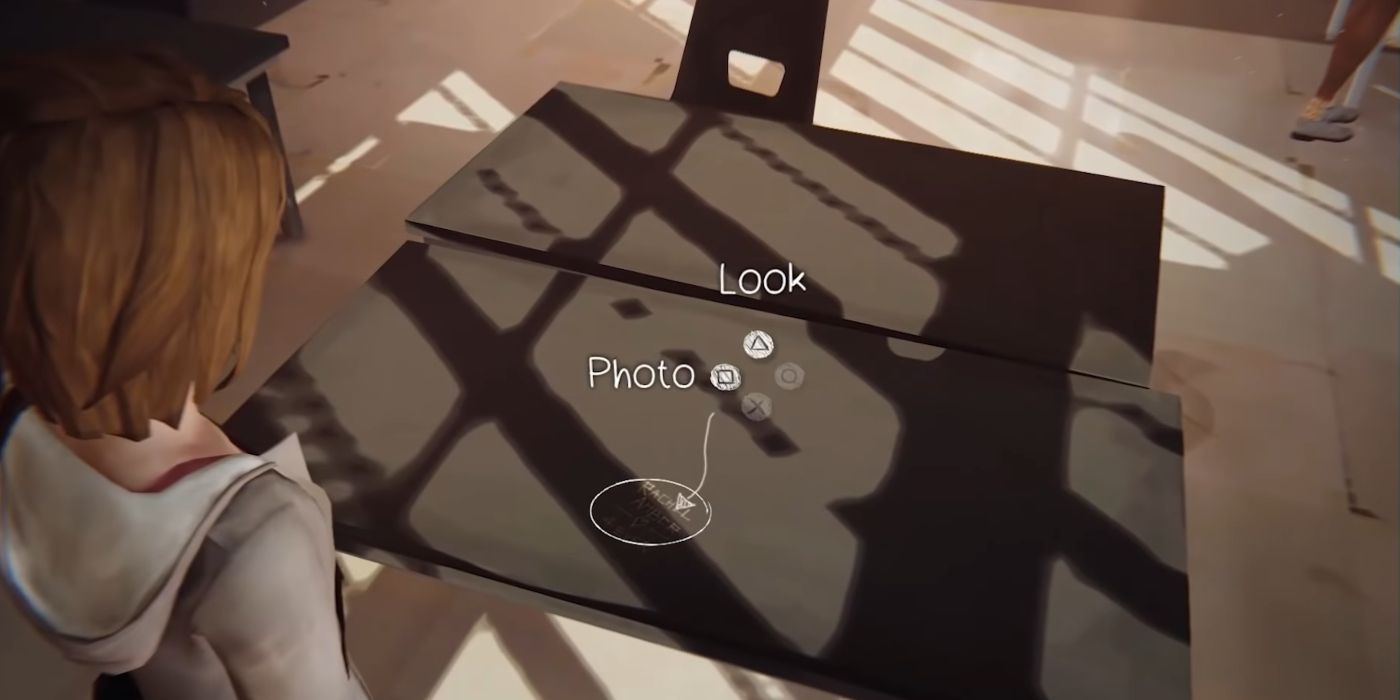
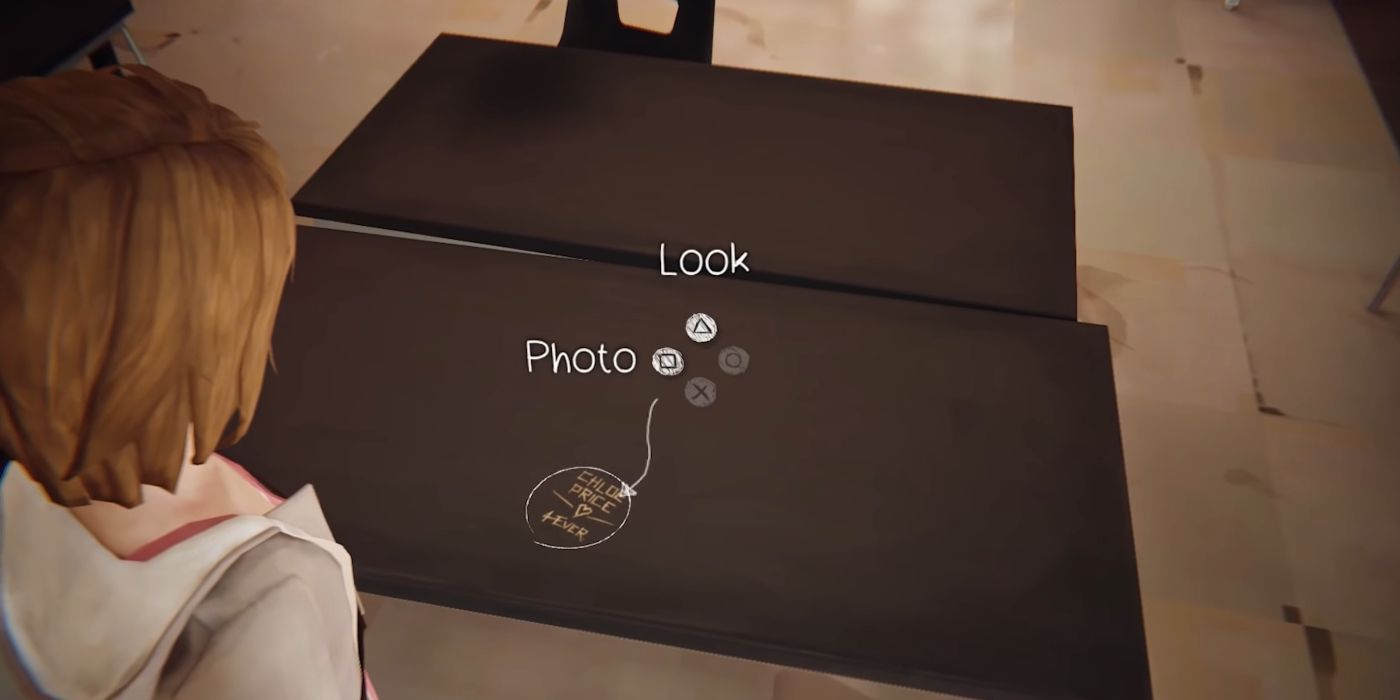
Rachel Amber Appreciation Marked In Desk (Optional Photo 1)
The first photo opportunity is in Mr. Jefferson's classroom right at the start of the game. Once you're able to walk around, simply head to the desk in the middle of the room to find a message carved into the table. The etching is the subject of your first picture.
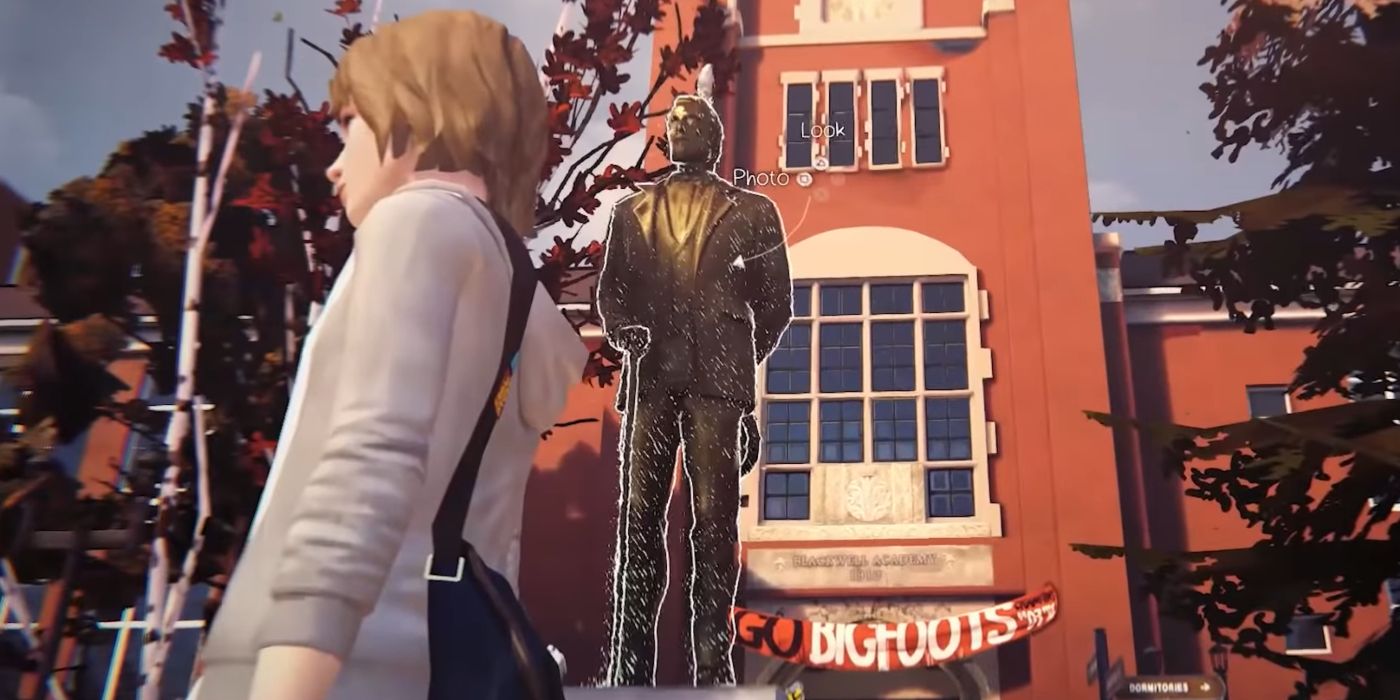
Blackwell Statue (Optional Photo 2)
When you exit the school, you'll notice a giant statue. Go around to the front of it and take a photo.
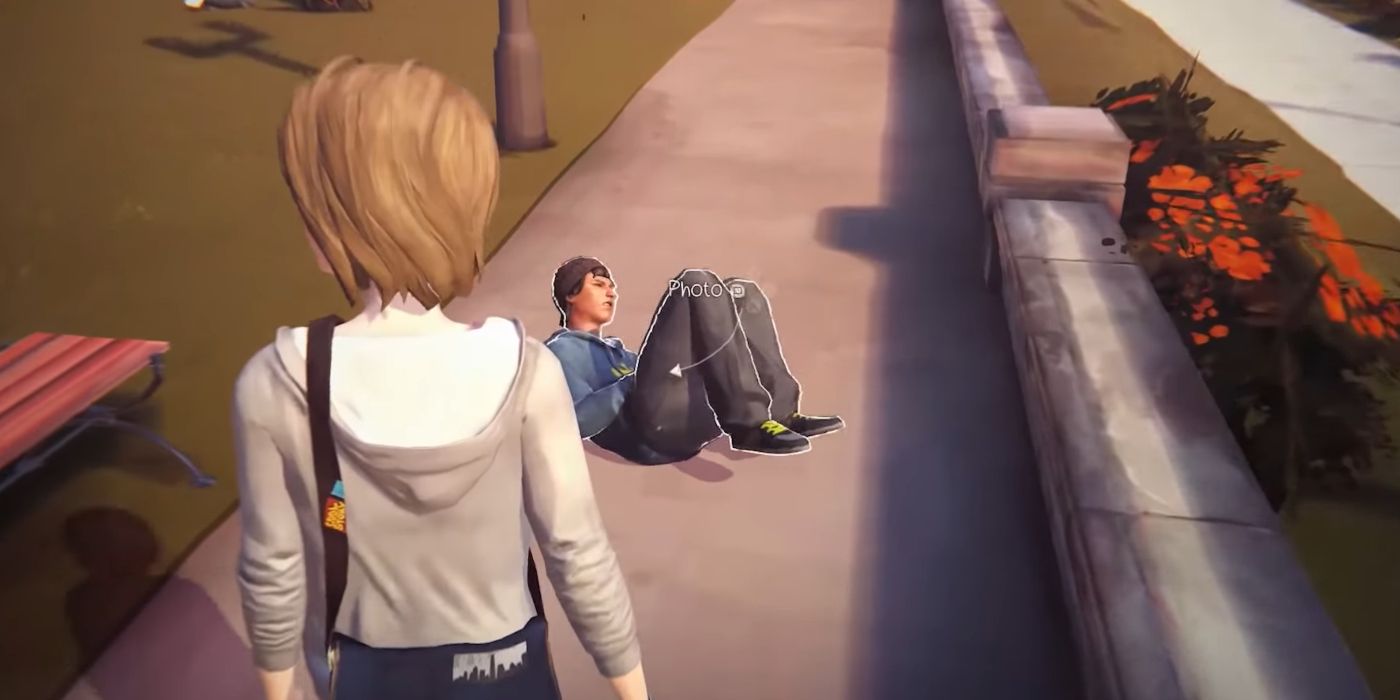
Trevor's Skateboard Fail (Optional Photo 3)
After you've got the statue photo, turn completely around and walk towards the stairs going down to the street. At the top of them is Justin, with who you need to engage in a conversation.
Choose the dialogue option "Thrash?" which will end the discussion quickly. Then you can use your rewind power to speak to him again. In the following conversation, select these dialogue options:
- "I came to Noseslide"
- "Tre Flip"
Eventually, his buddy Trevor will attempt a skateboard trick and fail miserably. Like a true badass heroine, you can walk up to him to take a photo of his embarrassment.
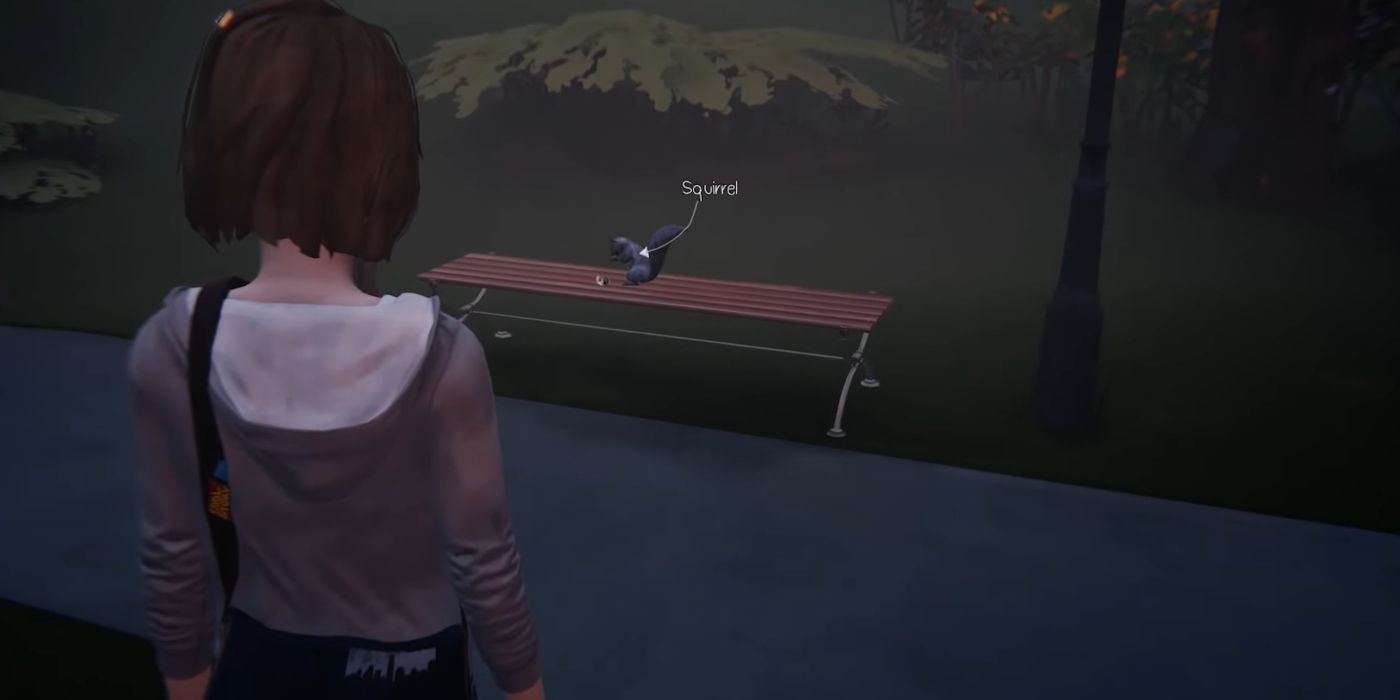
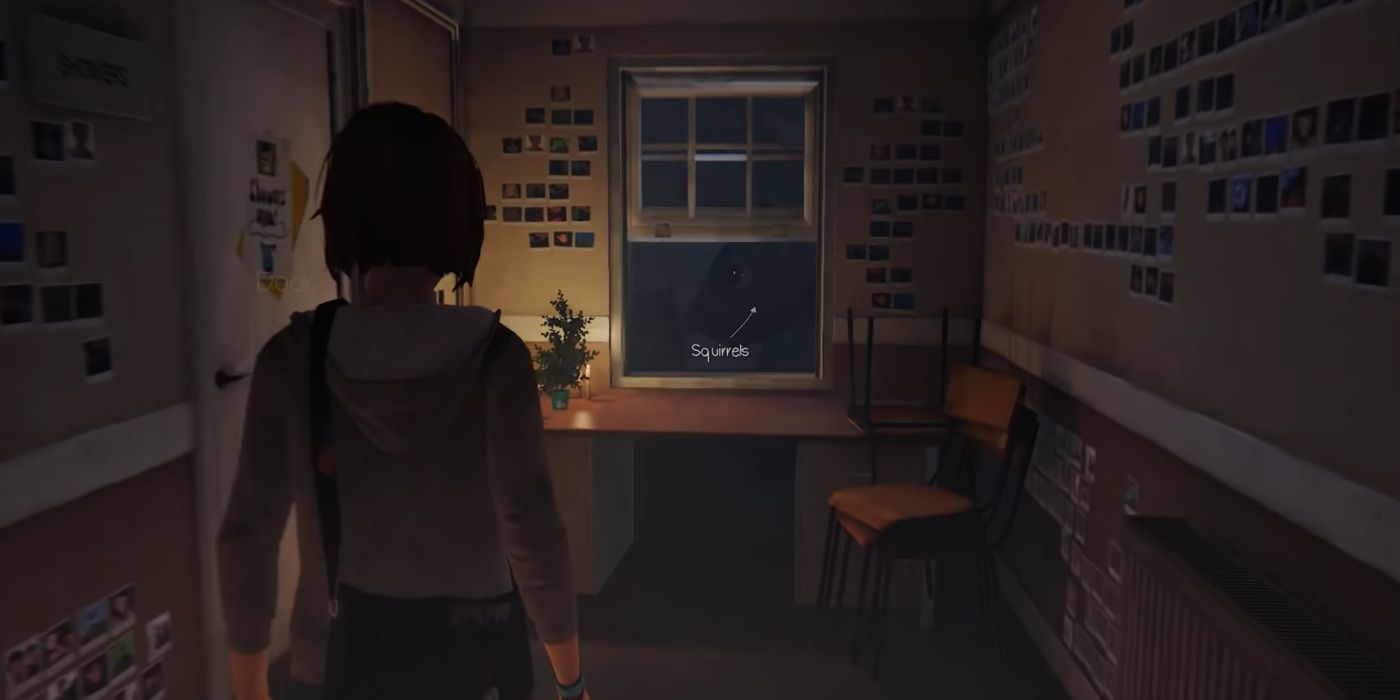
Close-Up Of Squirrel (Optional Photo 4)
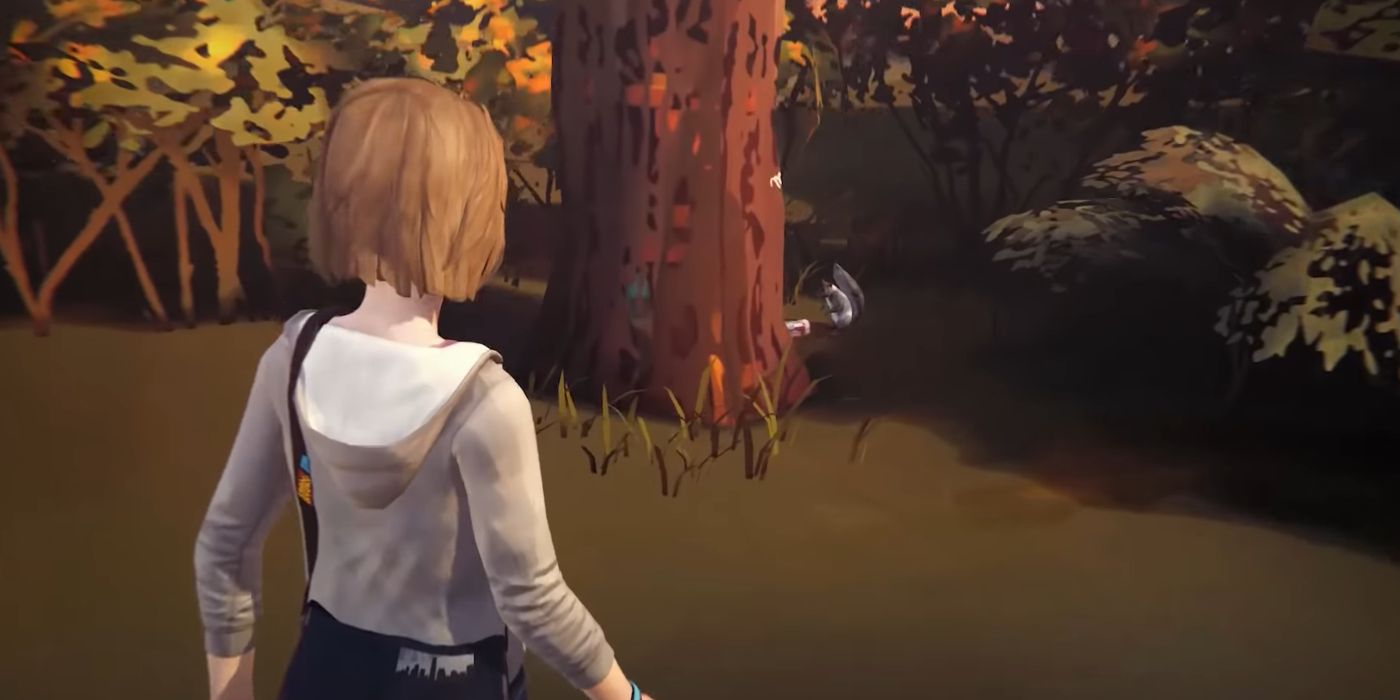
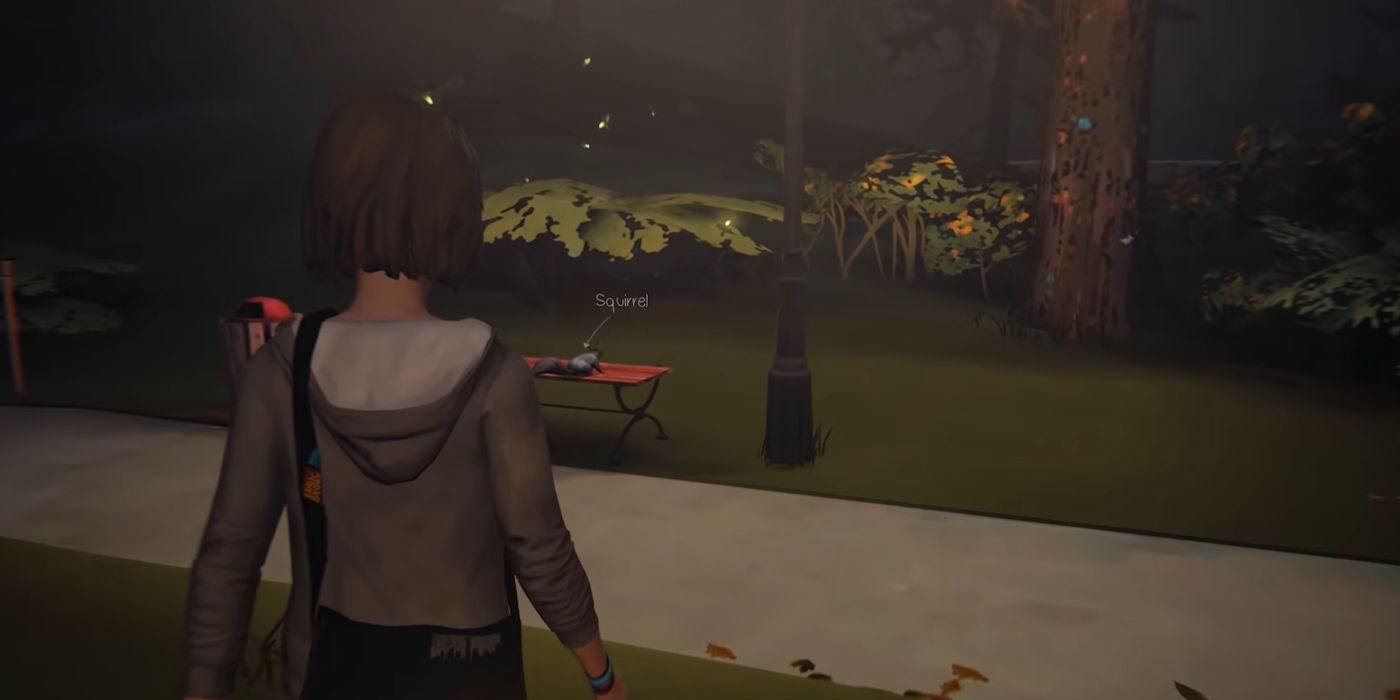
Right before you head inside the dorms, you can see Kate Marsh sitting on a bench on the left side of the area. In front of Kate is a tree, head to the other side of it to find a little squirrel. The animal is your next subject.
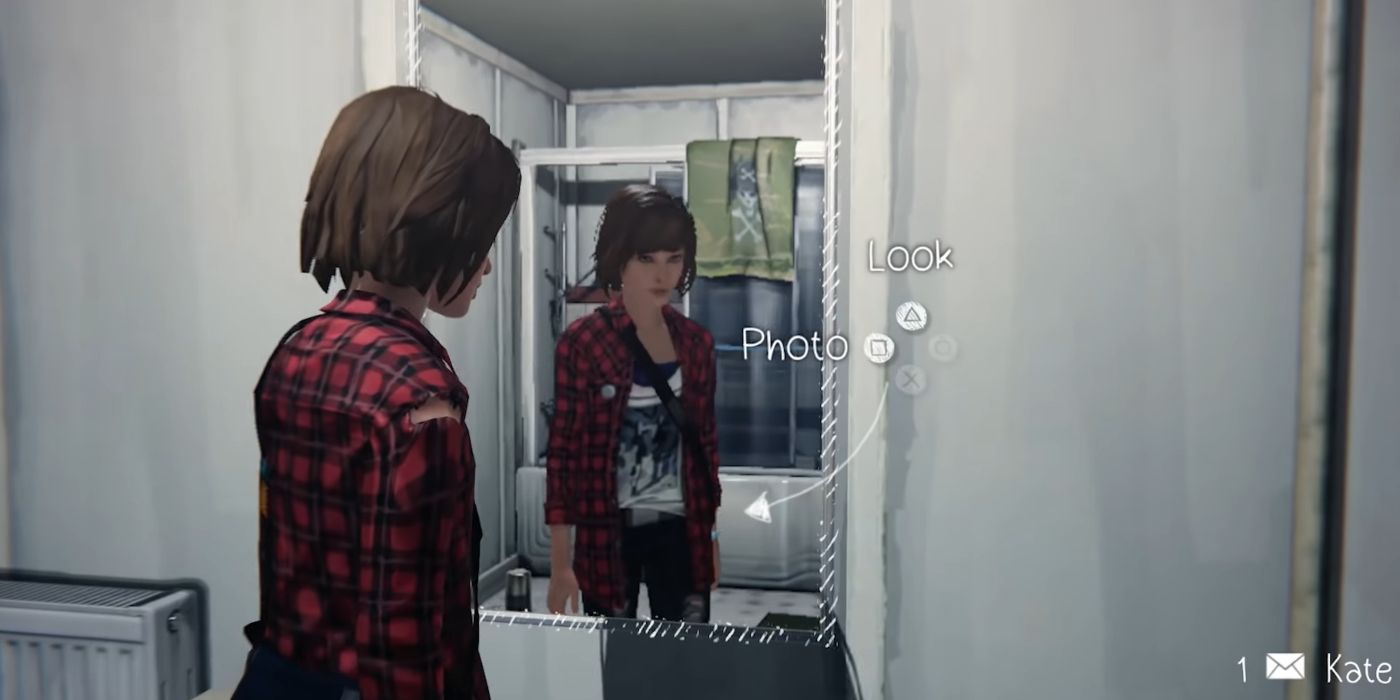
Mirror Selfie (Optional Photo 5)
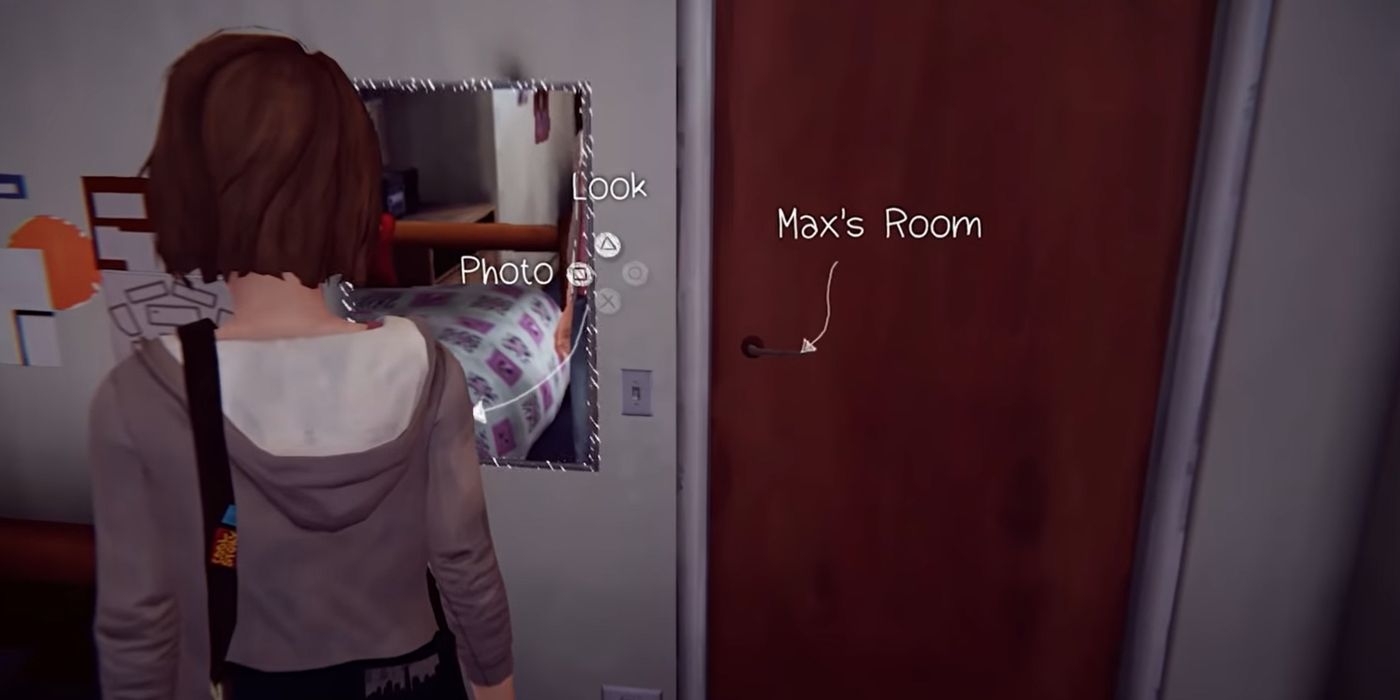
Not long later, you'll find yourself in the dorms. Head inside Max's room and approach the mirror next to her door. Gaze at your reflection and take a selfie.
Victoria's Photos (Optional Photo 6)
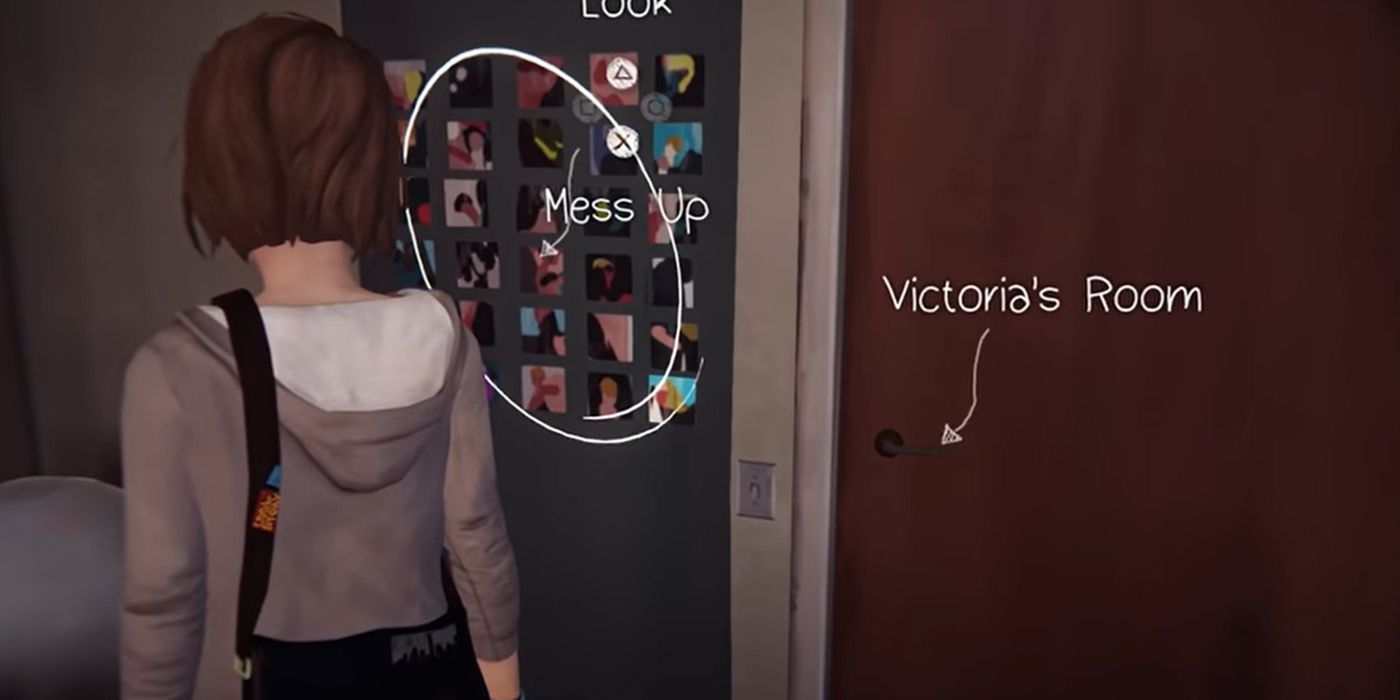
While in the dorms, you'll have a conversation with Juliet before entering Victoria's room. Go to the right of her door to find a collection of photos. Mess her work up to create another photo opportunity. If you feel bad, you can rewind after taking the picture to undo your sabotage.
Damaged Window (Optional Photo 7)
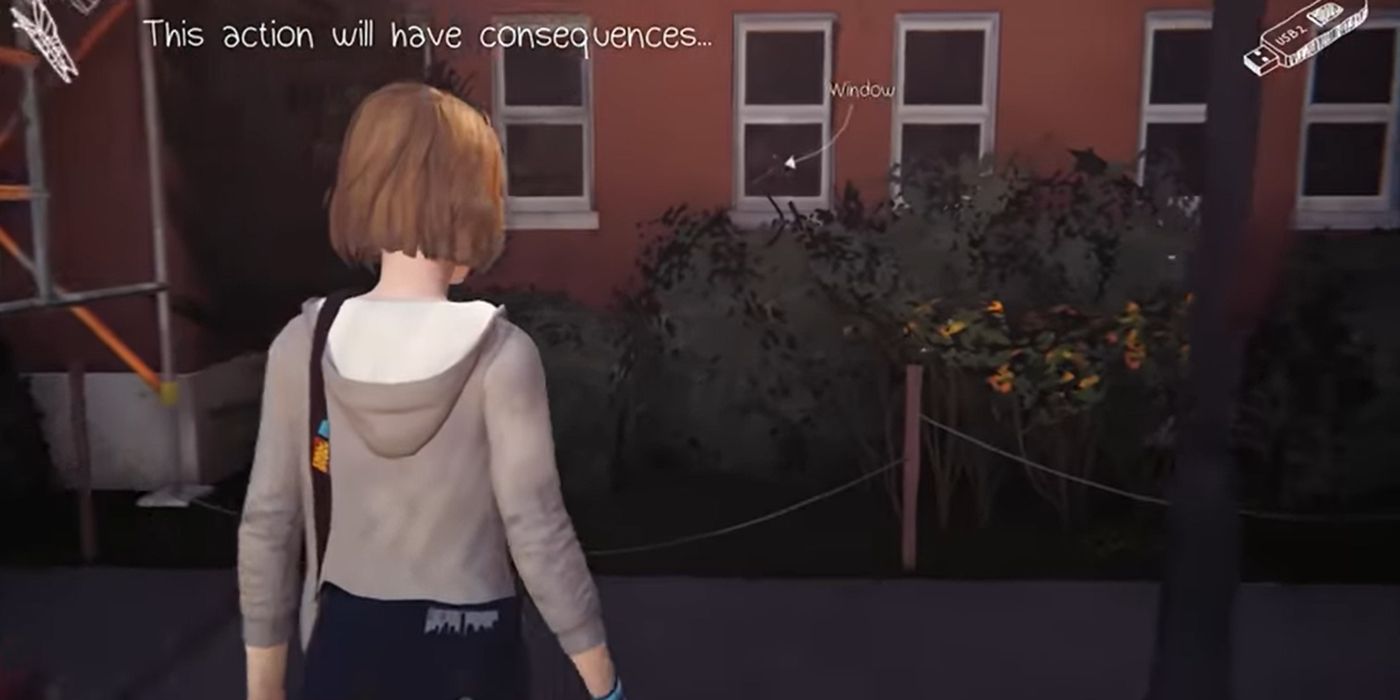
Once you're back outside, you'll see a guy angrily throw a football to the ground, hitting Alyssa in the process. Rewind time so that you can warn the poor girl of what's coming. The ball will break a window instead, which makes for a good photo.
A Picture Made From Dirt (Optional Photo 8)
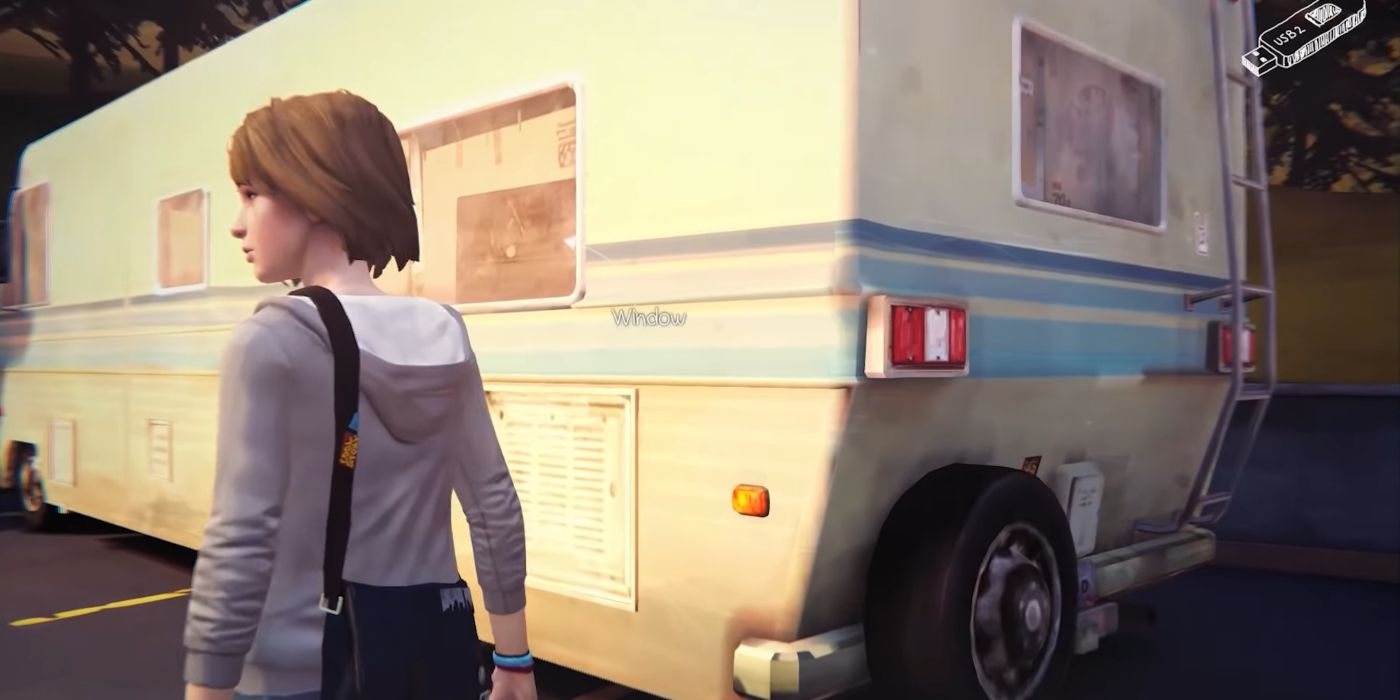
The next photo opportunity is in the Blackwell parking lot. Go to the back right of the area to find Frank's dirty RV. Draw on the large window of the vehicle, and then take a picture of your work.
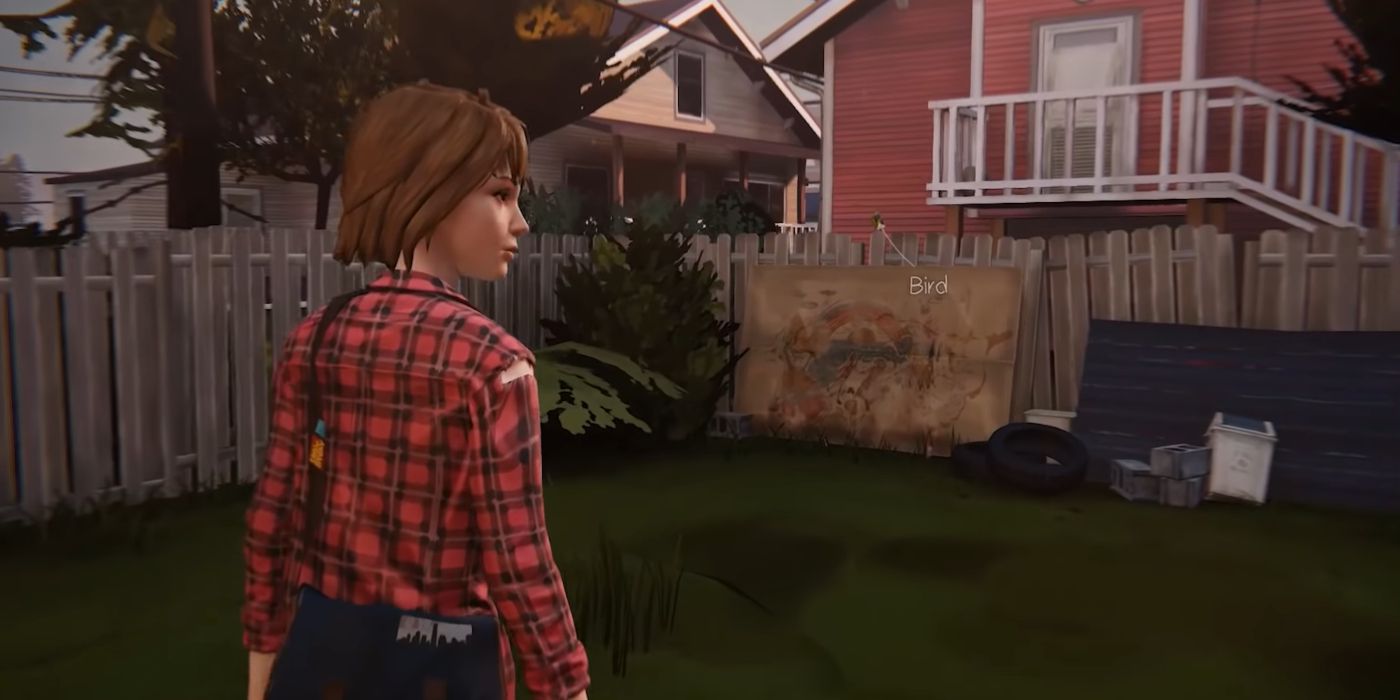
Bird In The Wild (Optional Photo 9)
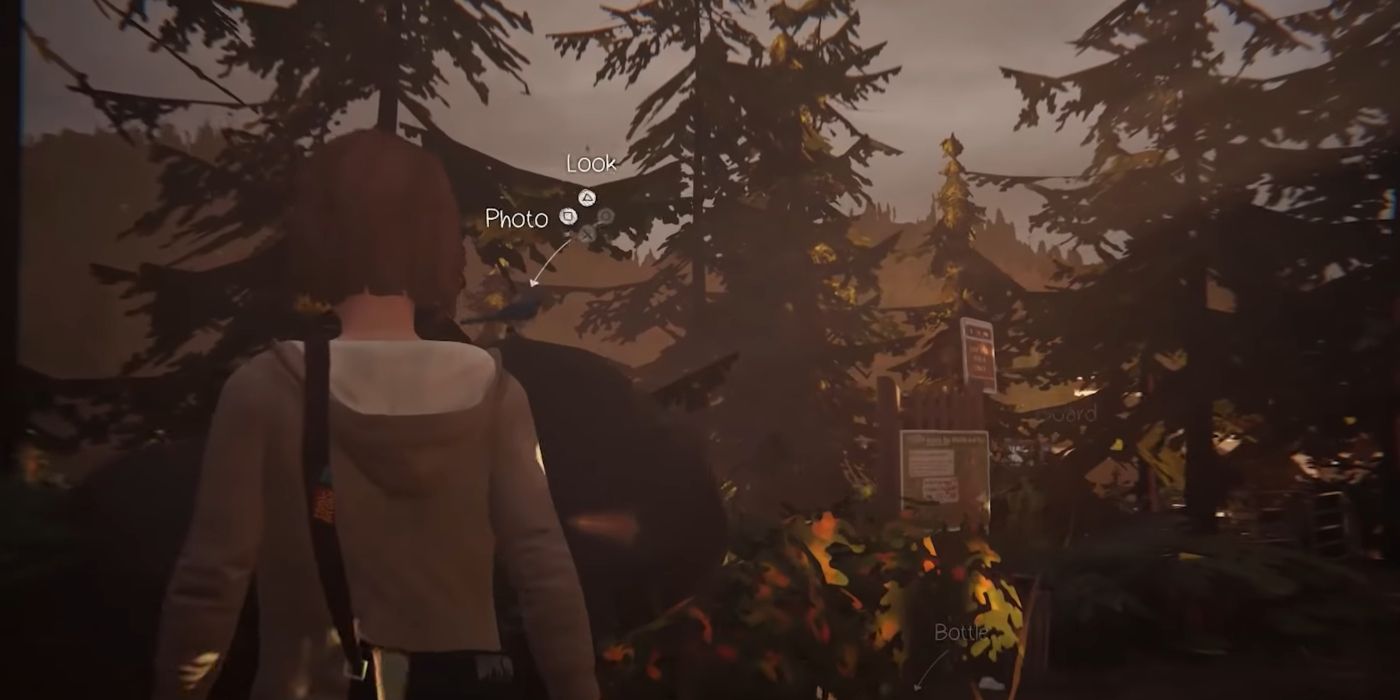
Much later into the episode, you'll be near a lighthouse with Chloe. However, before walking up the hill to meet her, go back down the path. There you'll see a little blue bird on top of a rock. The animal is what you need to photograph. It can be hard to get the prompt to show, but keep trying.
Chloe In Front Of Sunset (Optional Photo 10)
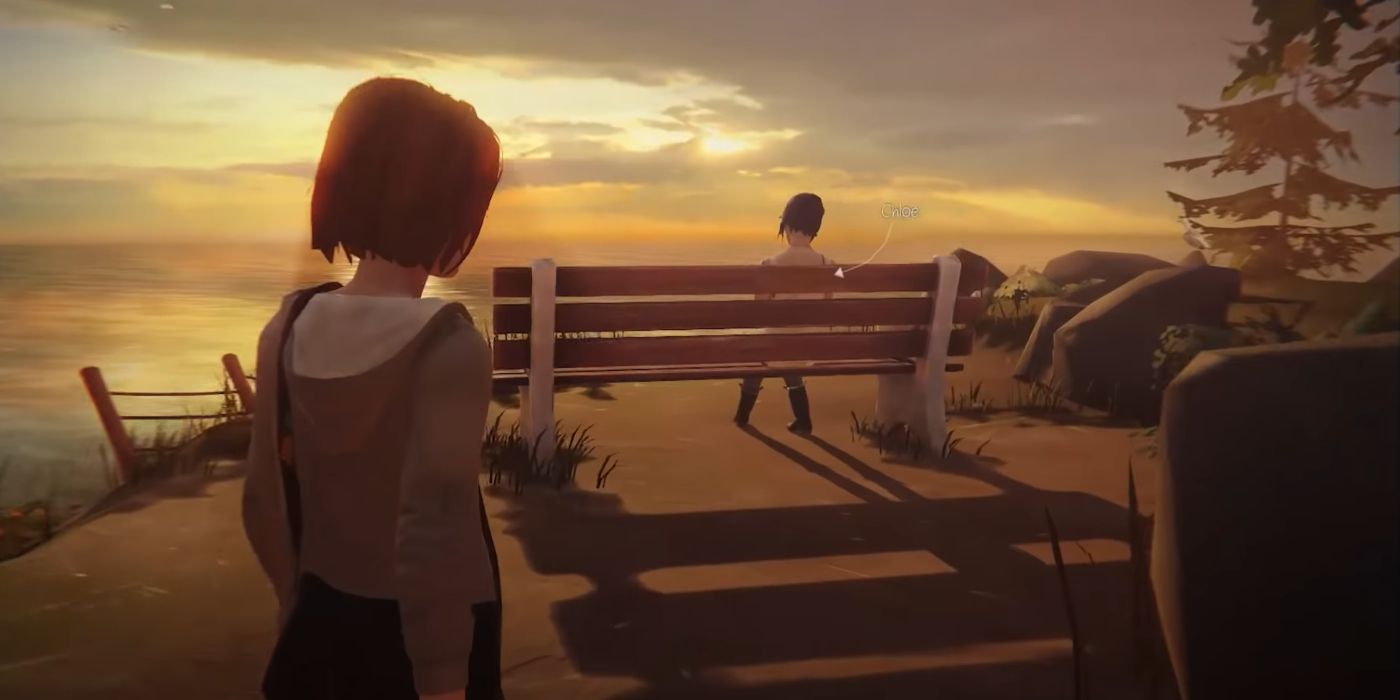
Right afterward, you'll head up the hill to see Chloe sat on a bench. Before sitting with her, you can take a picture of her looking at the sunset.
Episode 2: Out Of Time
Kate's Rabbit (Optional Photo 1)
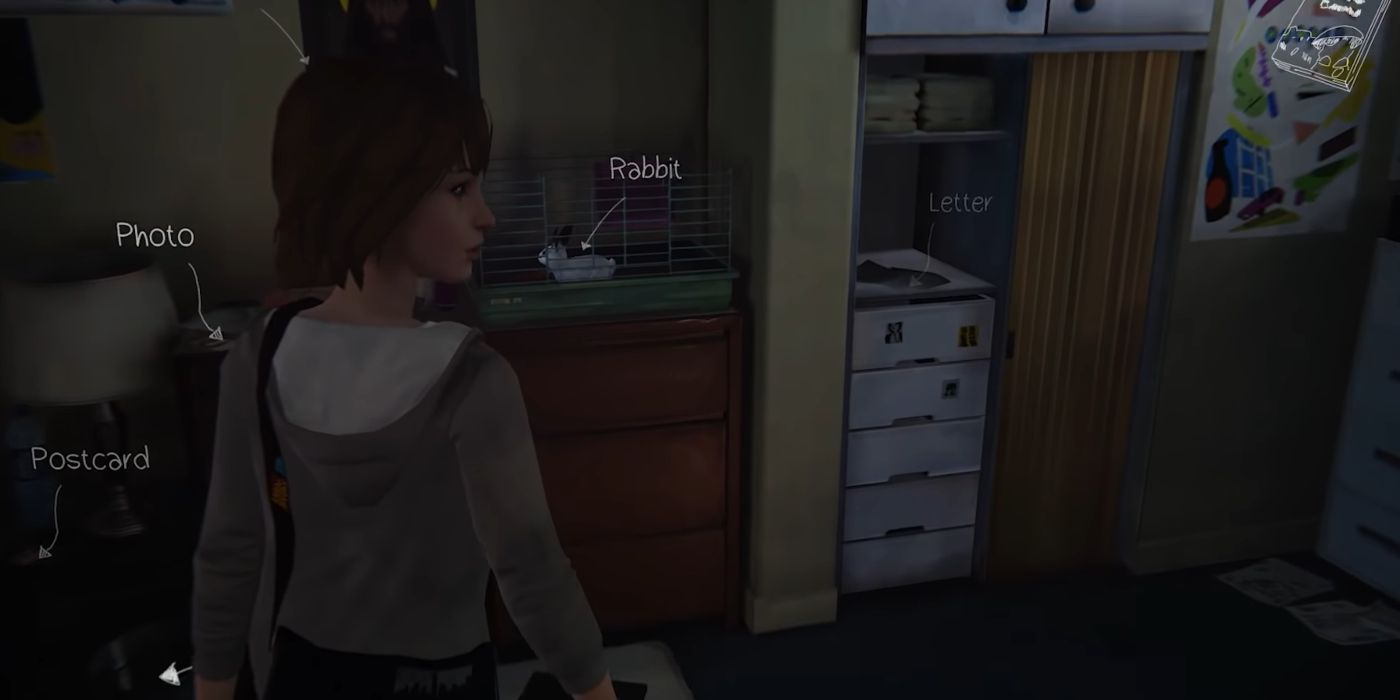
Early in the second episode, you'll go to see Kate. On the left side of her room is a rabbit in a cage. Take a picture of the cute little creature.
Second Photo Of A Squirrel (Optional Photo 2)
When you exit the dorms, head to the bench Kate was sitting on in the previous episode (when you got the "Close-Up Of Squirrel" picture).
Next to the bench is a trash can that you can look at to find a donut. Pressing 'use' will trigger Max to utilize the treat as bait. Then back up a little bit, so the squirrel feels free to go up to it. Once it's eating, walk on over to take a photo.
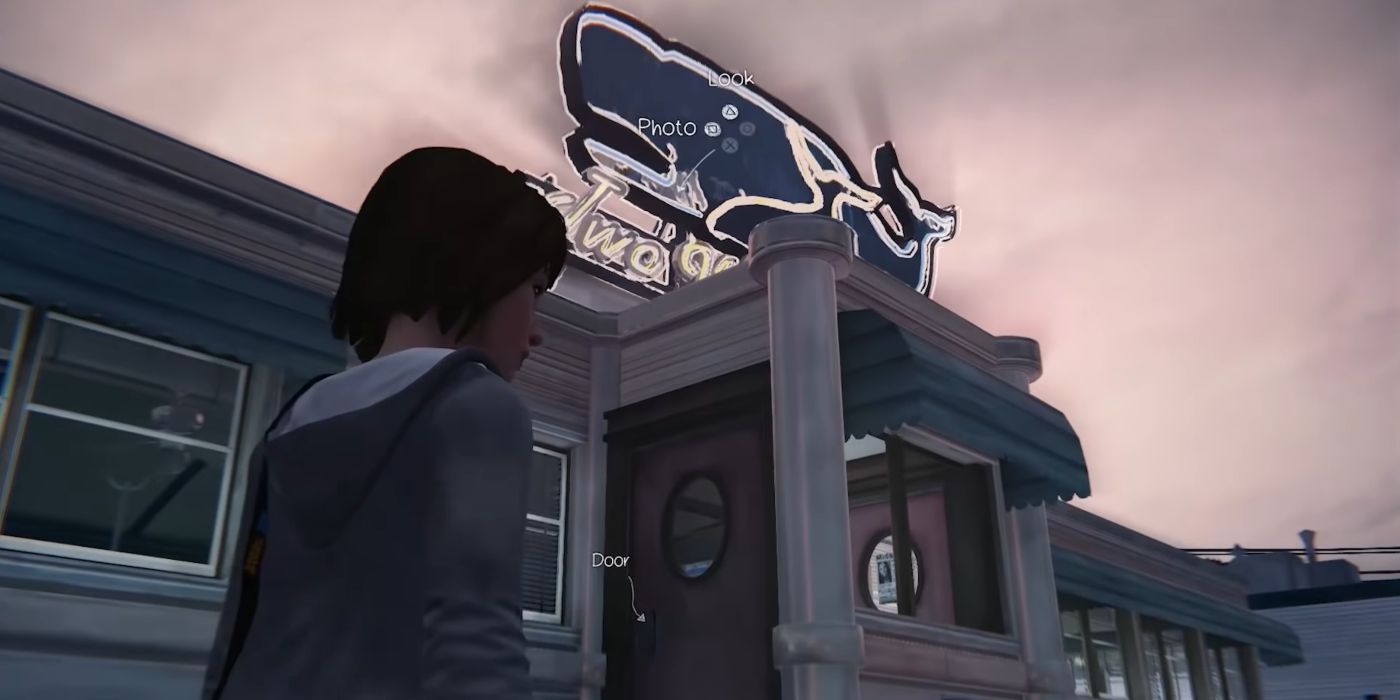
Two Whales Diner Sign (Optional Photo 3)
When you're outside of the diner, look up to the sign to get another photo opportunity.
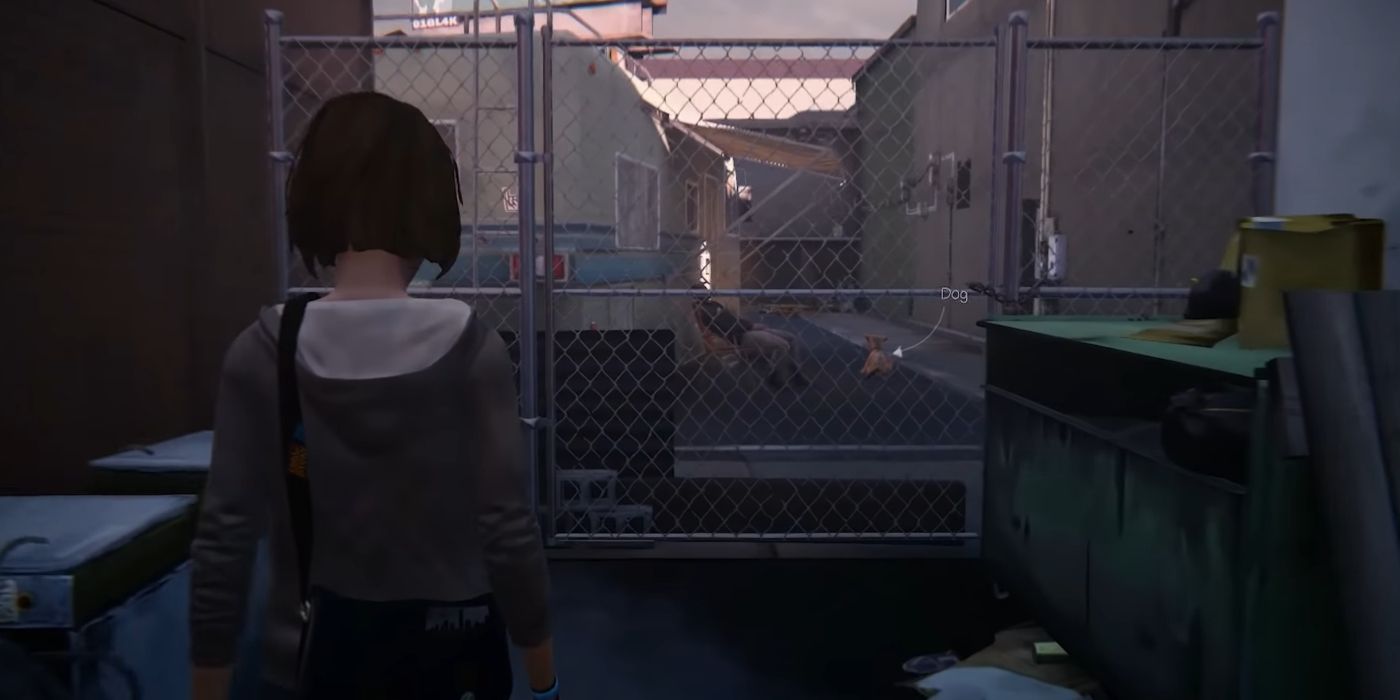
Frank's Dog, Aka Pompidou (Optional Photo 4)
Go around the right side of the diner and all the way to the back. There you will find a chain fence blocking your path. On the other side of it is a dog who is the subject for your next photo.
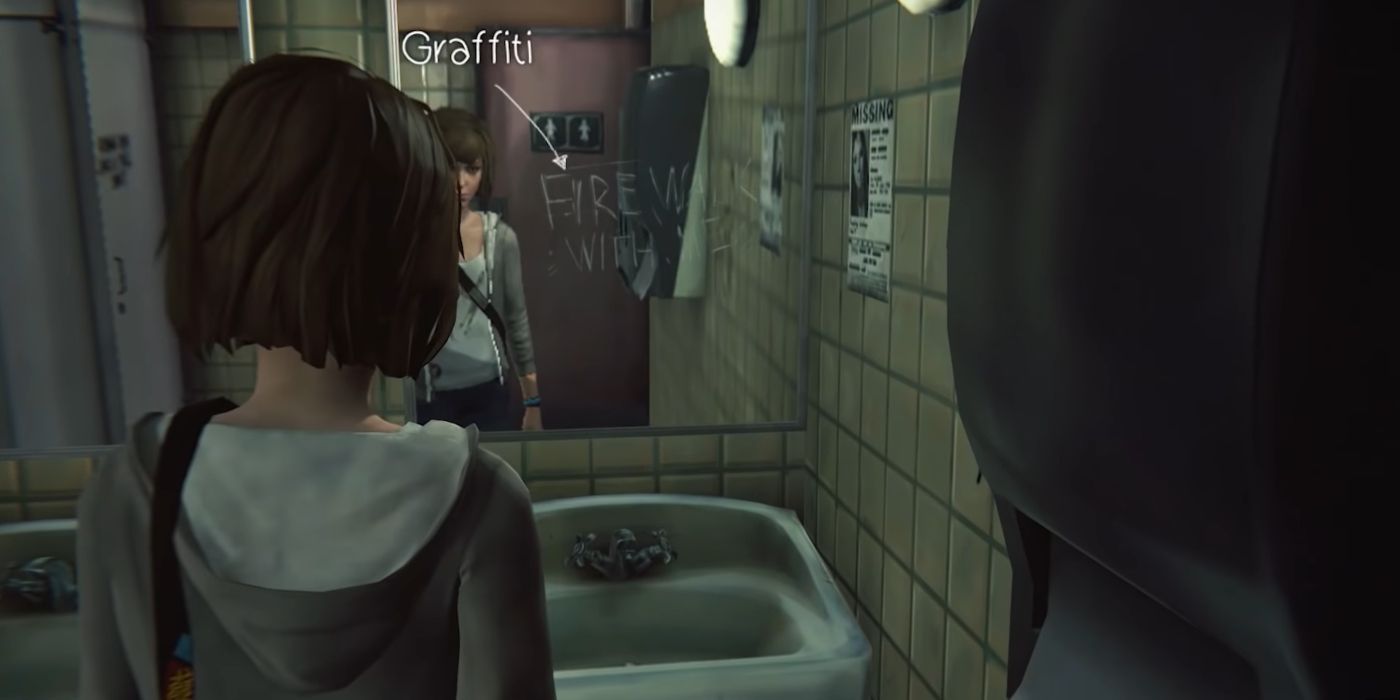
Mirror Message (Optional Photo 5)
After you enter the diner, head to the bathroom that's left of the counter. Inside is some writing on the mirror that reads "FIRE WALK WITH ME." Take a picture of the odd message.
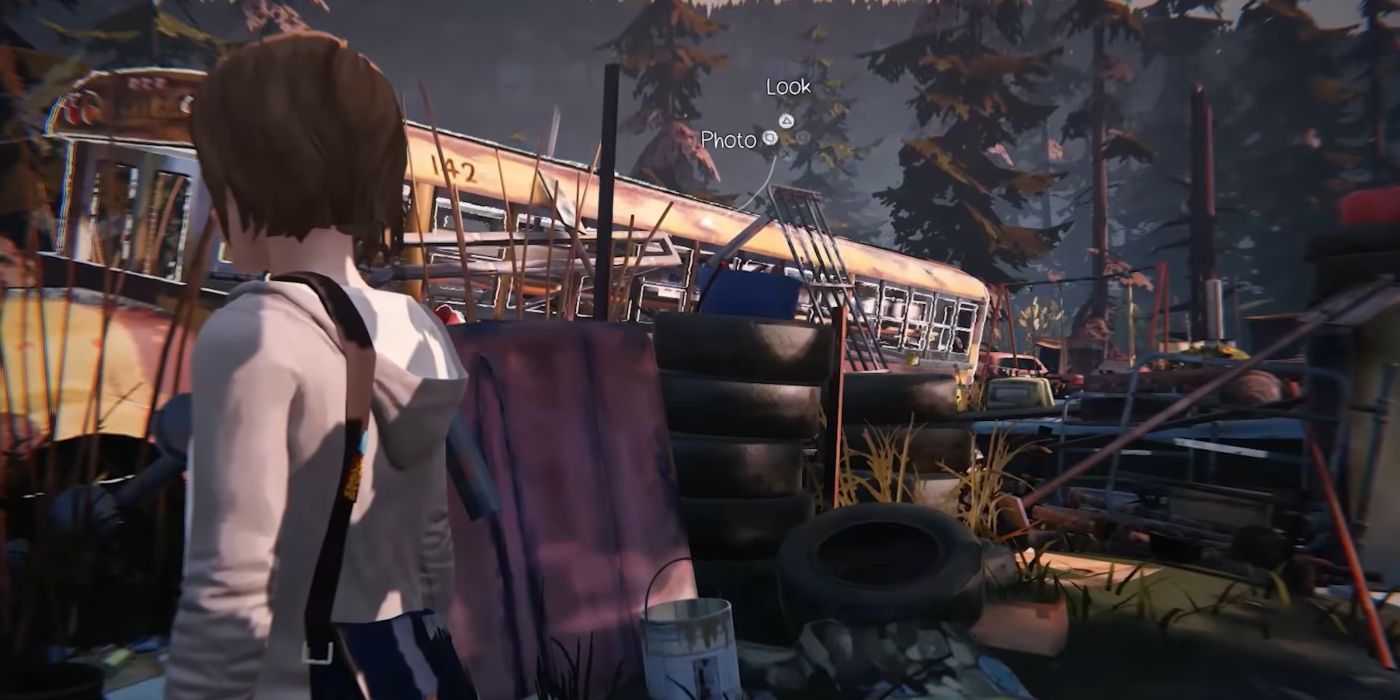
Rusted School Bus (Optional Photo 6)
While in the junkyard, you're likely to see a discarded school bus. If you look at it from the correct angle (as shown in the above image), you can snap a pic.
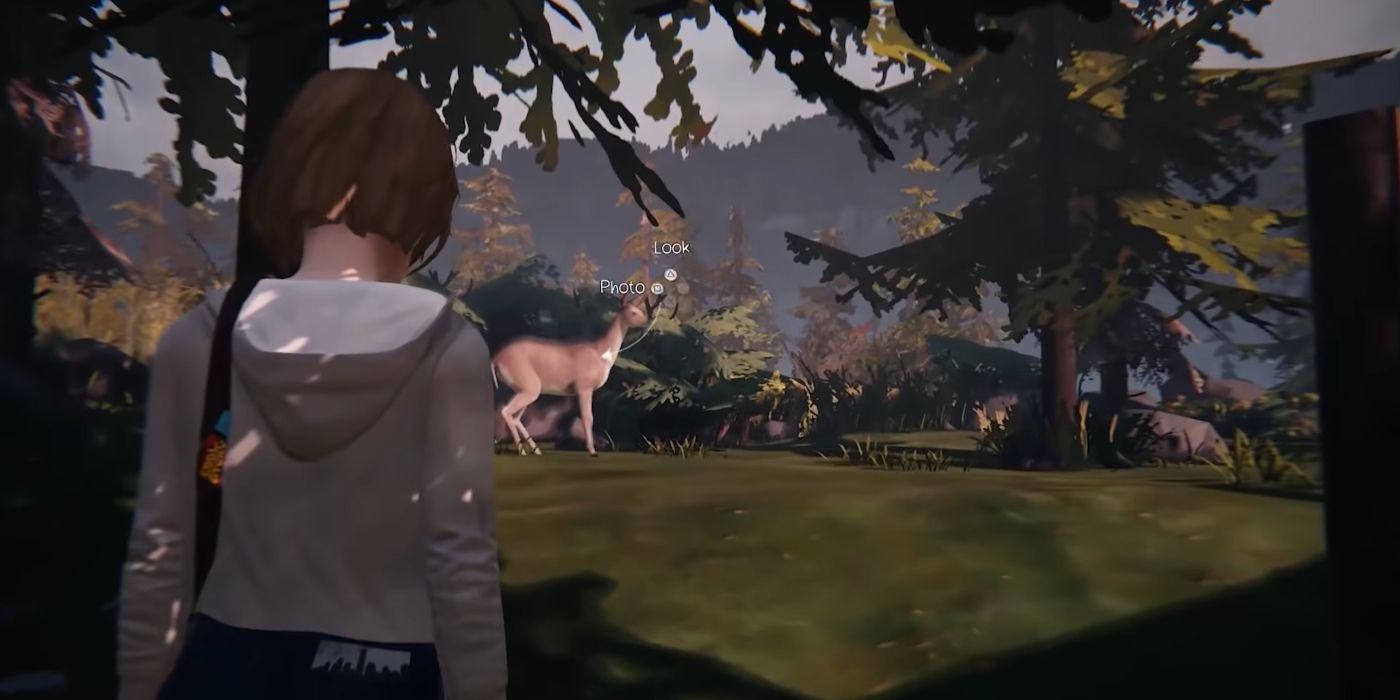
Junkyard Doe (Optional Photo 7)
On the other side of the school bus is the next photo-op. To get there, turn right from where you took the last picture, and keep following the path to the left.
Eventually, you'll come to an opening to go through. Back there is a beautiful doe that'll run away once you approach it. Follow the animal until it stops, and then get a picture of it.
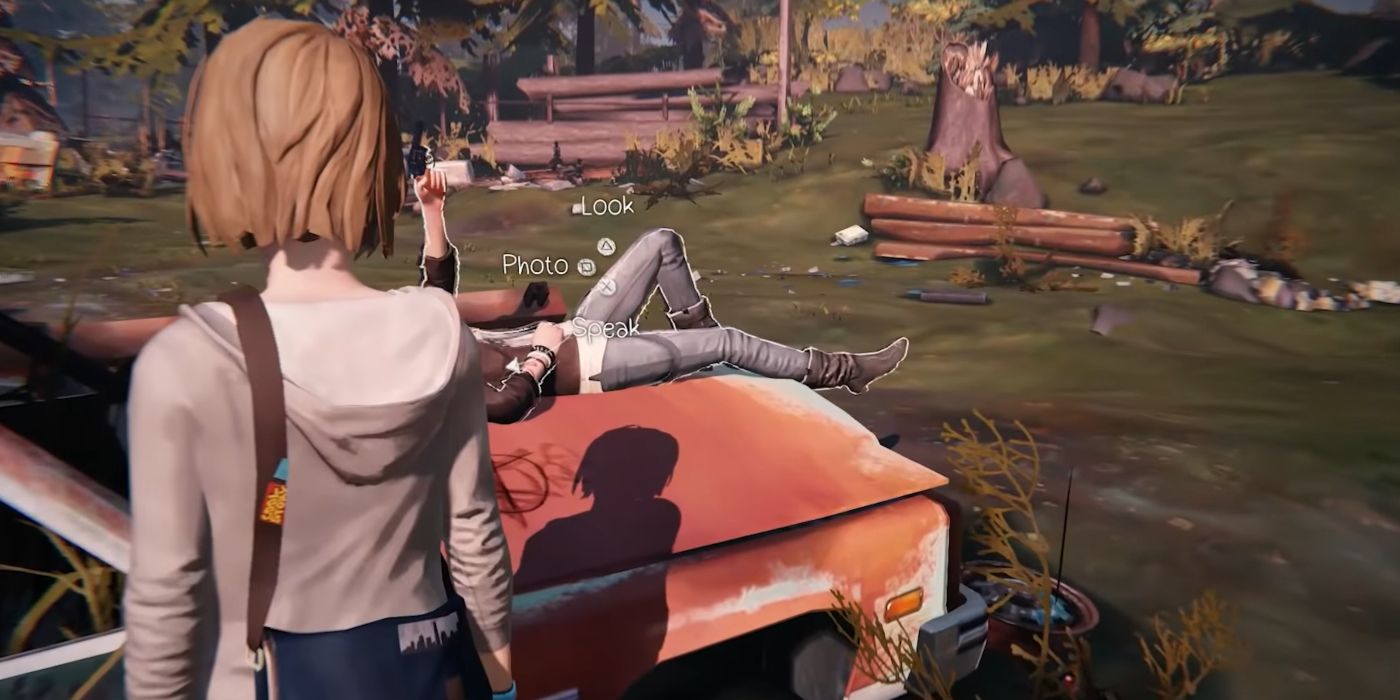
Candid Shot Of Chloe (Optional Photo 8)
Once you've finished finding and shooting bottles, Chloe will lay on the hood of a car. To get in the correct position for the photo, you must go around to your friend's right-hand side.
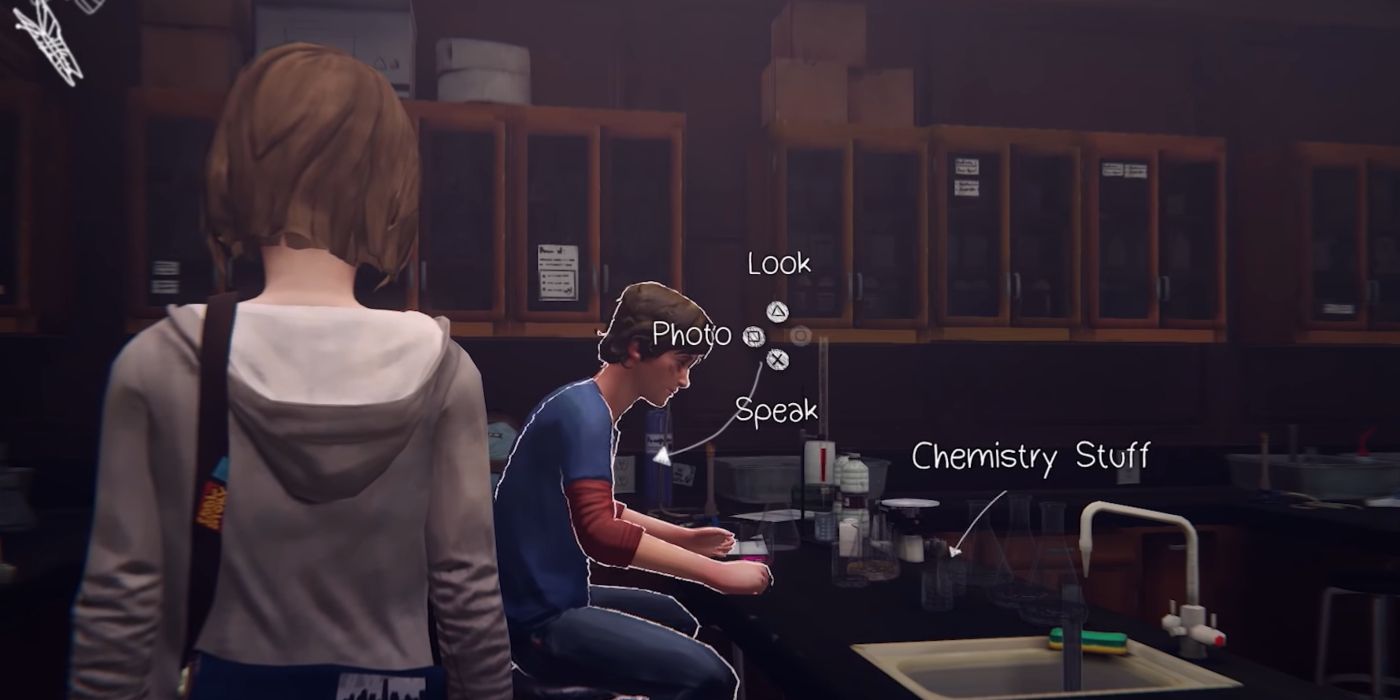
Warren, The Scientist (Optional Photo 9)
Later, while roaming around the school, you can head into the science lab to see Warren — which you should do if you want to romance the guy. To get a good picture opportunity, you need to help him with his project.
After talking to him, he'll ask for your advice. It doesn't matter what you say, as he'll fail regardless. So, rewind time and speak with the teacher at the front of the class. Say "experiment" to prompt her to reveal that Warren needs Chlorine. Tell him the same thing to make his experiment work. You can then get a picture of the proud scientist.
Alyssa Watching The Rain (Optional Photo 10)
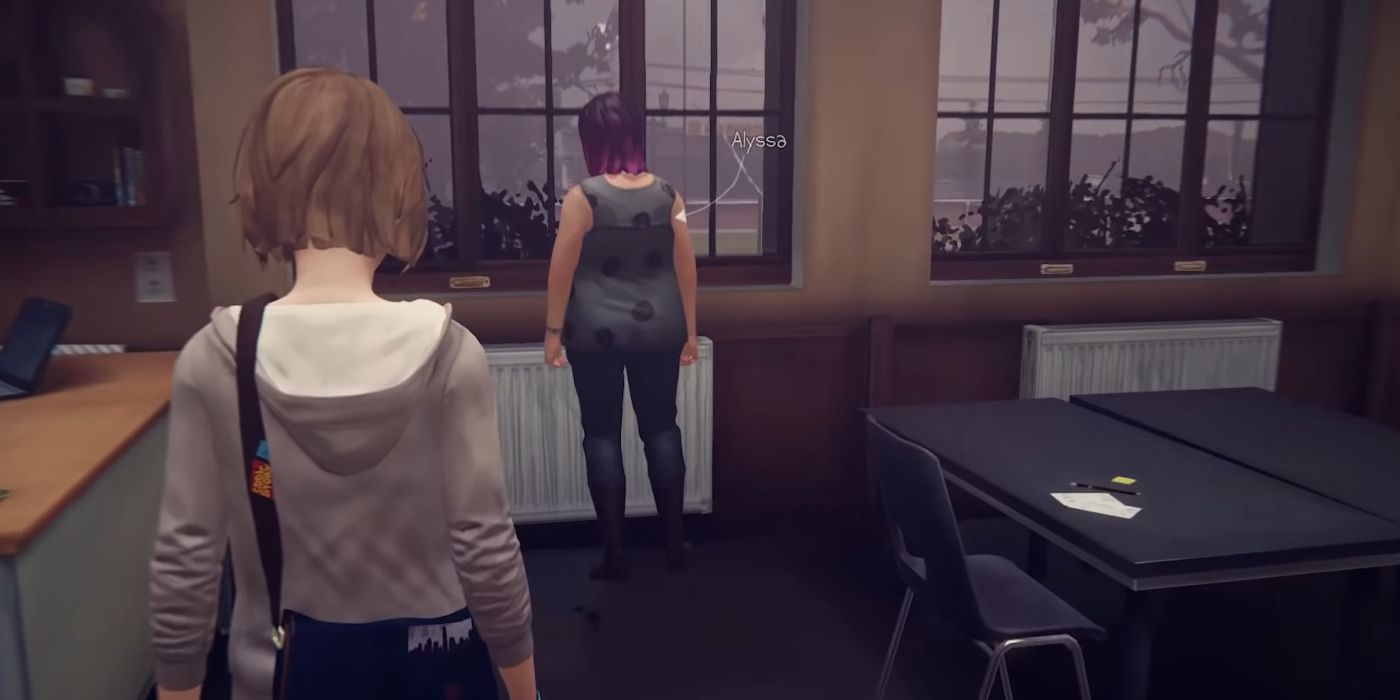
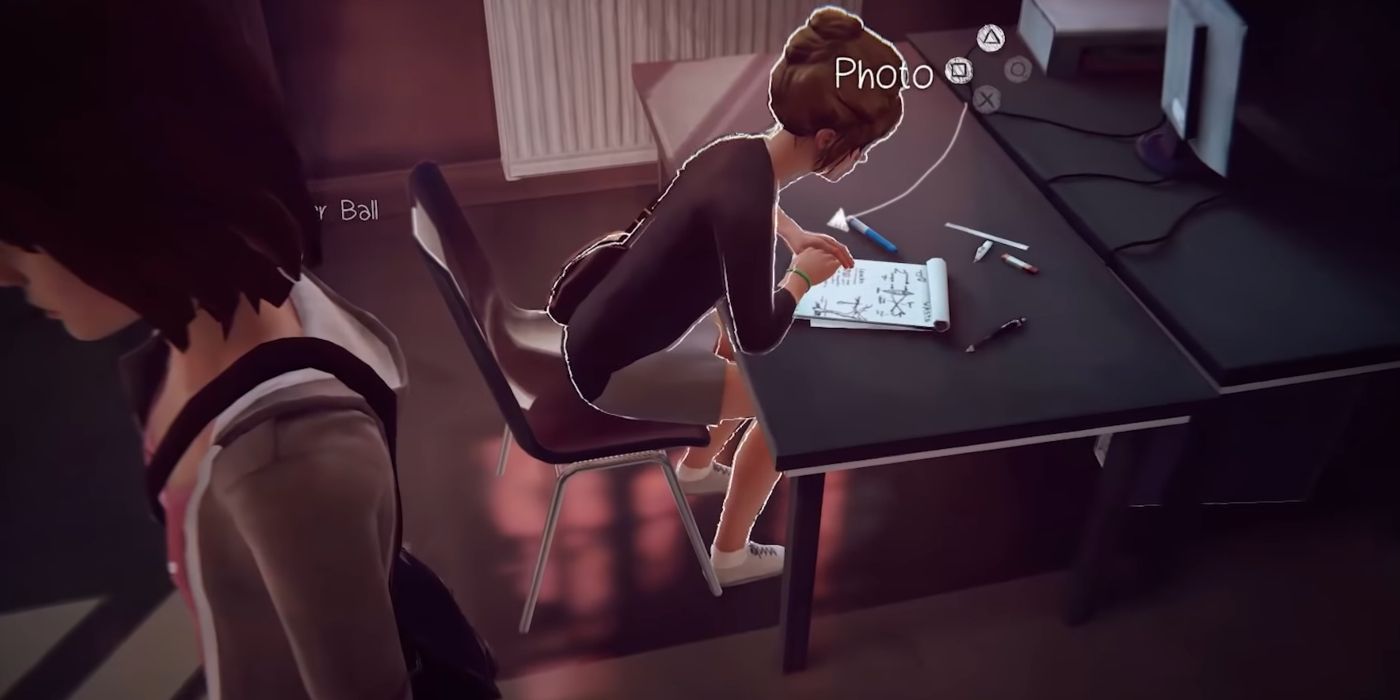
The last photo of episode two can be taken in the art room. From the science lab, go across the hall to Mr. Jefferson's class. Alyssa will be in there staring straight out of the window, watching the rain. Just walk up behind her to get the photo prompt.
Episode 3: Chaos Theory
Illuminated Action Figure (Optional Photo 1)
You'll begin episode three in the girl's dorm, which happens to be the location of the first photo-op. More specifically, your subject is in Victoria's room, but you can only go in there after speaking with either Dana or Taylor. The latter is found in the bathroom.
During the conversation with her, choose the "Comfort Taylor" option. Then rewind to converse with her again and select "Victoria Sneaking Out" instead. This will allow you access to Victoria's room.
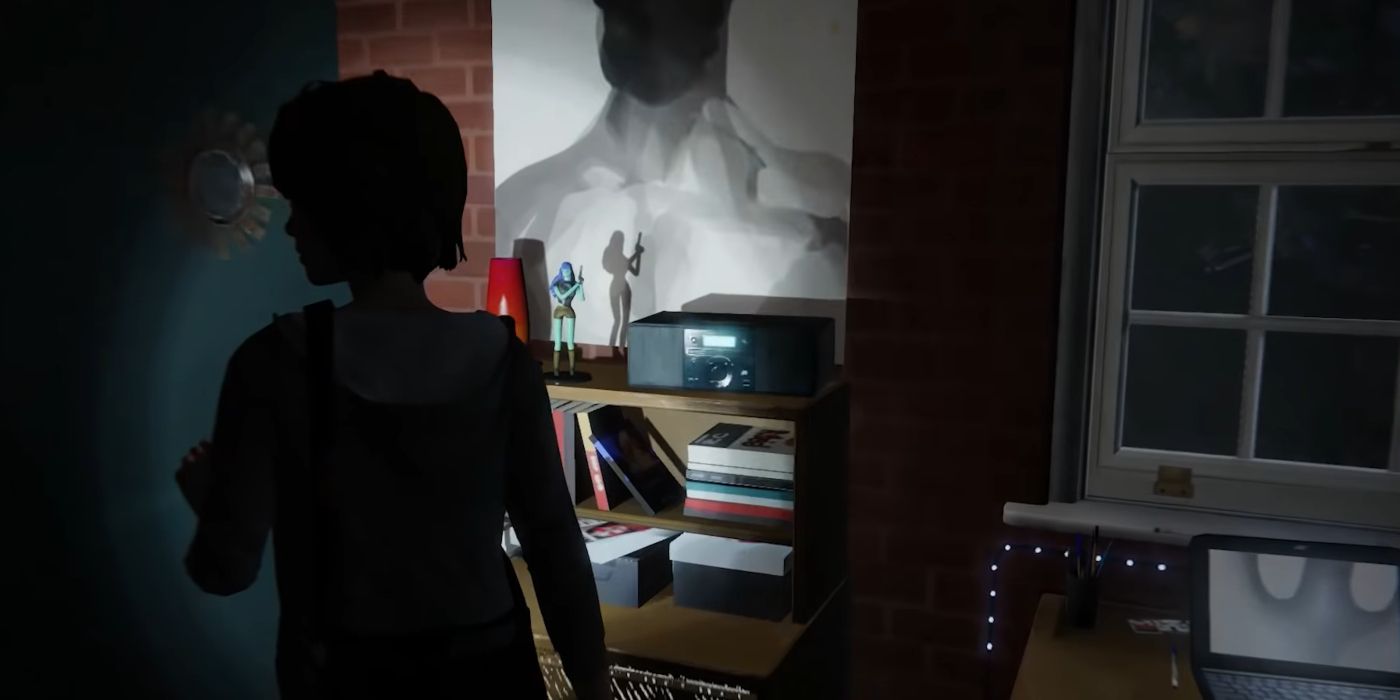
Once there, go to the back wall to find an action figure. Shine your phone light at it for a while until it illuminates — it can be finicky. When it lights up, you can snap the picture.
The Squirrel Again (Optional Photo 2)
After leaving the dorms, turn right to go to the area with the squirrel again. They'll be on the same bench as last time, but they'll run away when you approach. So, rewind time to get a chance at taking a photo.
A Lit Up Aquarium (Optional Photo 3)
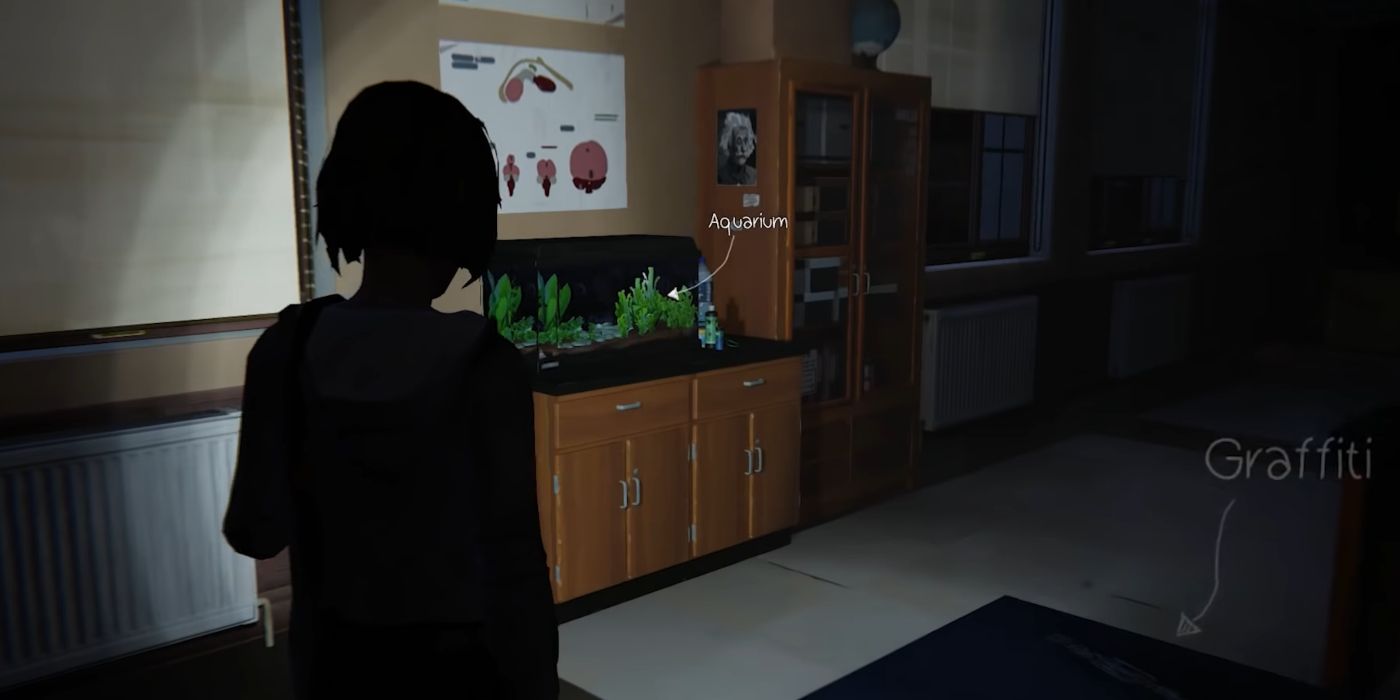
When you and Chloe are breaking into the Principal's office, you'll have a chance to roam around. Go to the science lab, and head to the far side of the room where there's an aquarium. First, choose the 'look' option to get the opportunity to turn on the light. Then once the tank is illuminated, you can get a picture.
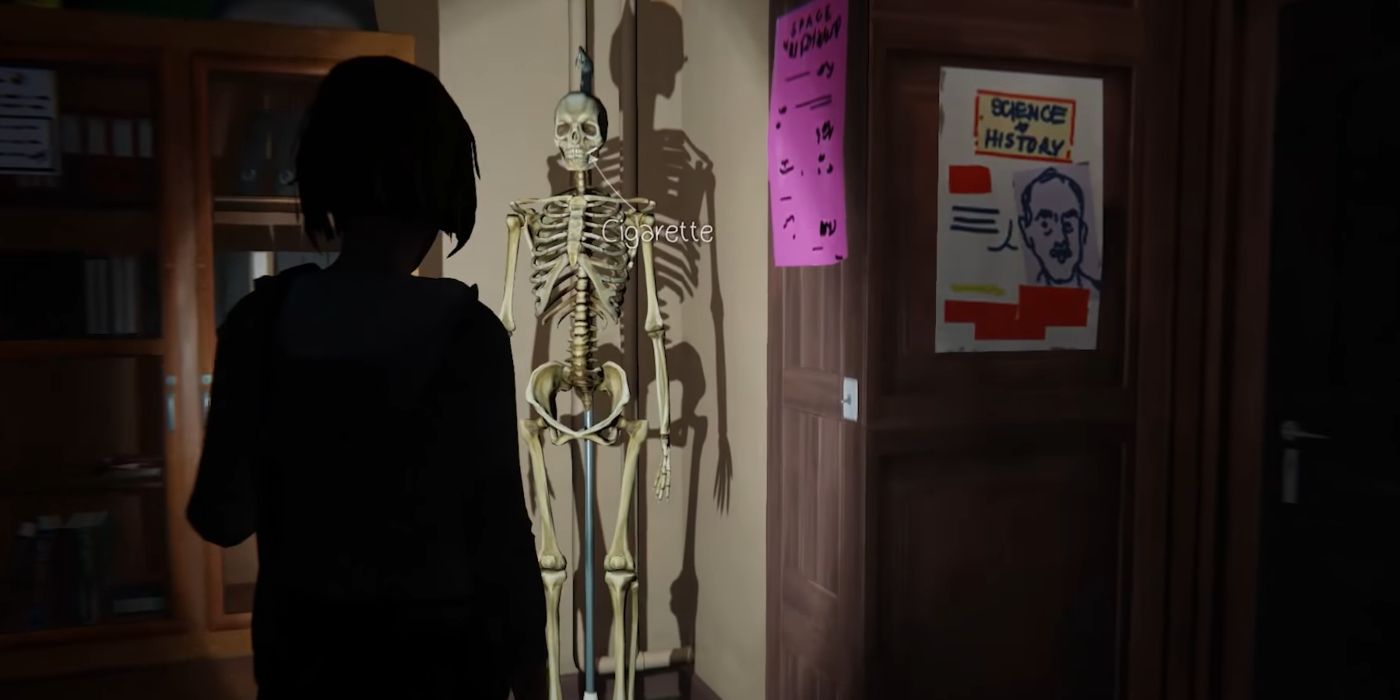
Smoking Skeleton (Optional Photo 4)
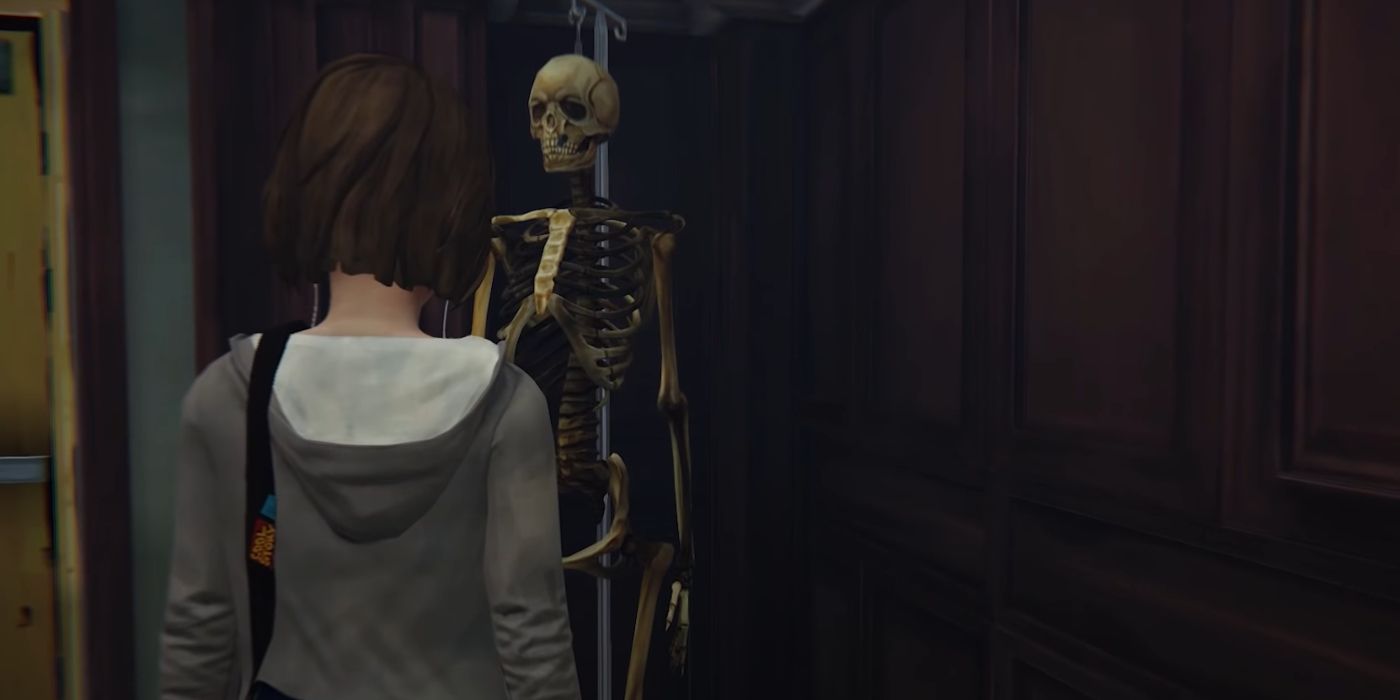
Beside the back door of the science lab is a skeleton with a cigarette hanging from its mouth. All you need to do is take the picture.
Chloe In The Principal's Chair (Optional Photo 5)
Once you finally get into the Principal's office, Chloe will sit in his chair. And you can snap a picture of her, even though it creates clear evidence of your break-in.
New Outfit Selfie (Optional Photo 6)
The next photo-op is at Chloe's house. After getting dressed, head to the bathroom across the hall. Look into the mirror for a selfie opportunity.
Recently Evicted Bird (Optional Photo 7)
While at Chloe's house, give Joyce your breakfast order and then open the window next to the fridge. Turn around to see a bird up in the corner of the room behind you. Go over to the creature to scare it away. It won't leave the house instantly, though. It'll fly to the top of the fireplace. You must spook it again to send it outside.
Now, go to the back garden through the sliding doors, walk towards the corner of the back fence to find the bird, and finally get a picture.
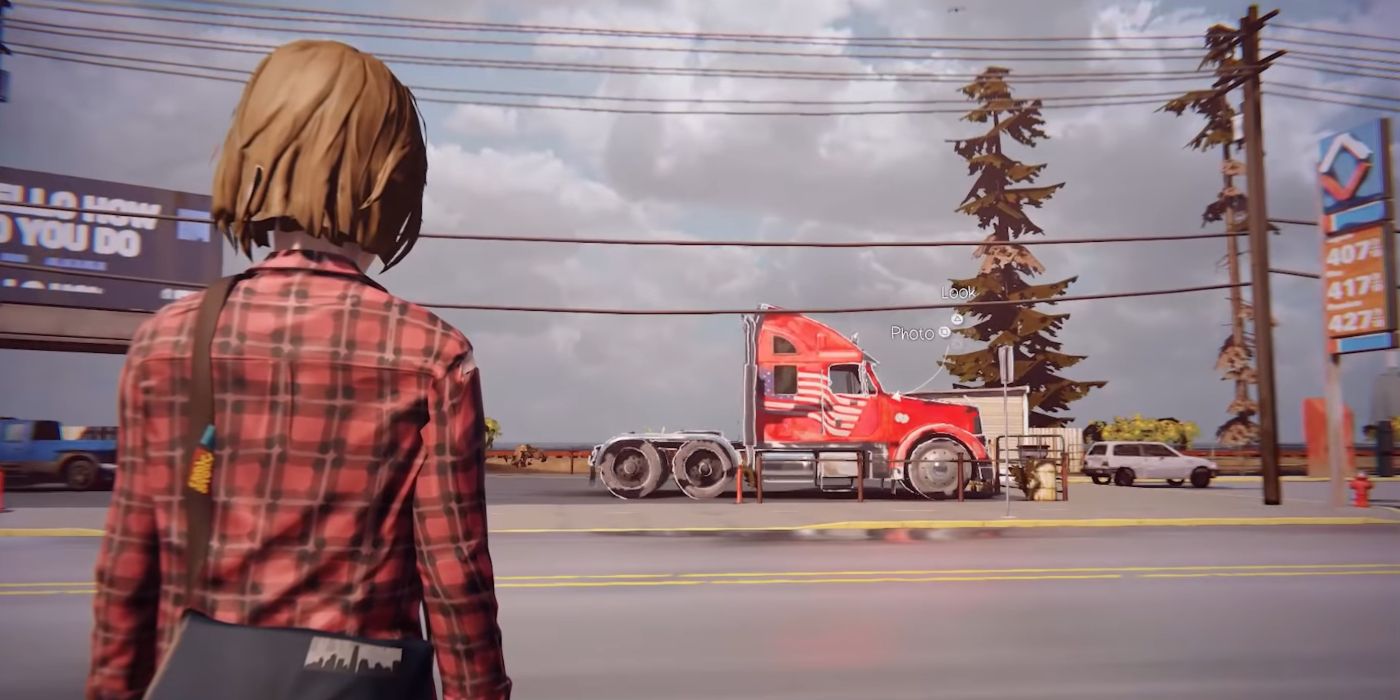
Red Truck (Optional Photo 8)
Outside of the diner, there's a trucker that's willing to talk. In your first conversation with him, your words don't matter. He does, however, give you information that you can use for a follow-up chat, so rewind time and talk to him again. These are the dialogue options you now need to use:
- "1977 Needham"
- "Rachel Amber"
He then gives you permission to photograph his truck that's on the other side of the road.
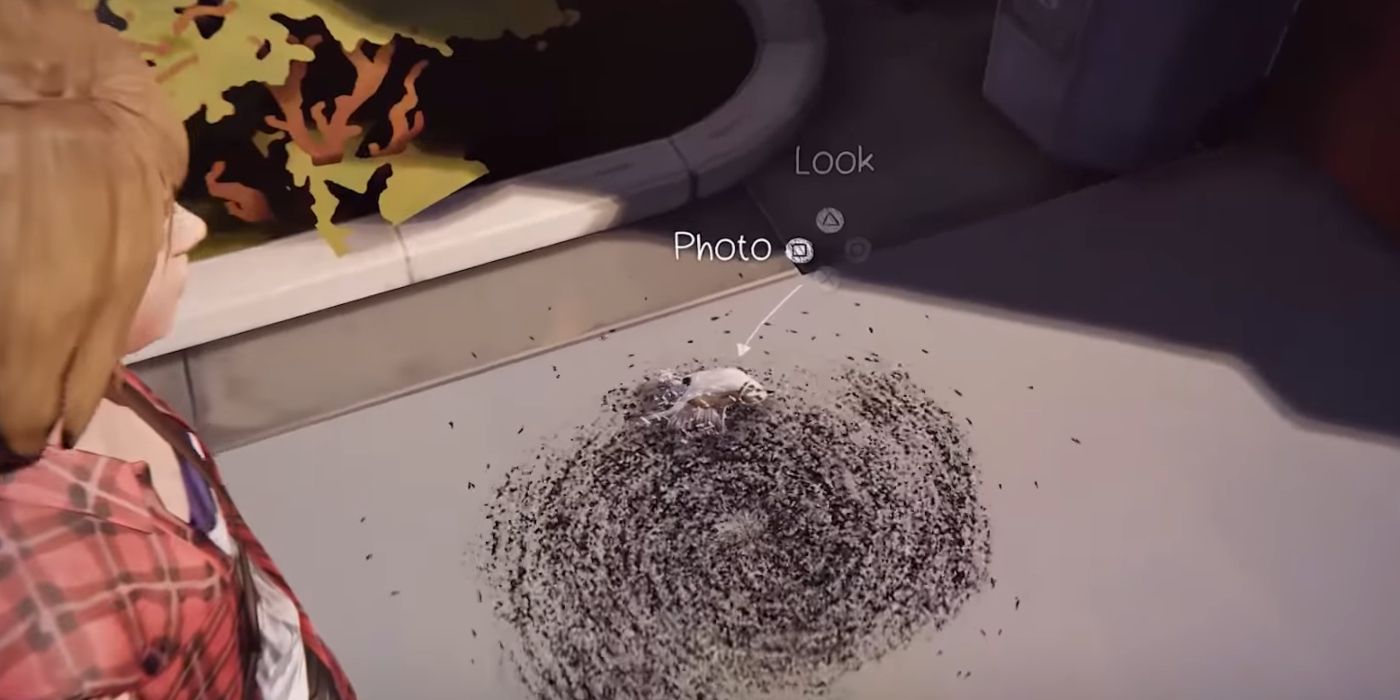
Bird Covered In Ants (Optional Photo 9)
In that same area, go around to the right of the diner to find a pretty disturbing image of a dead bird and a litany of ants. It's gross, but it's also a photo-op.
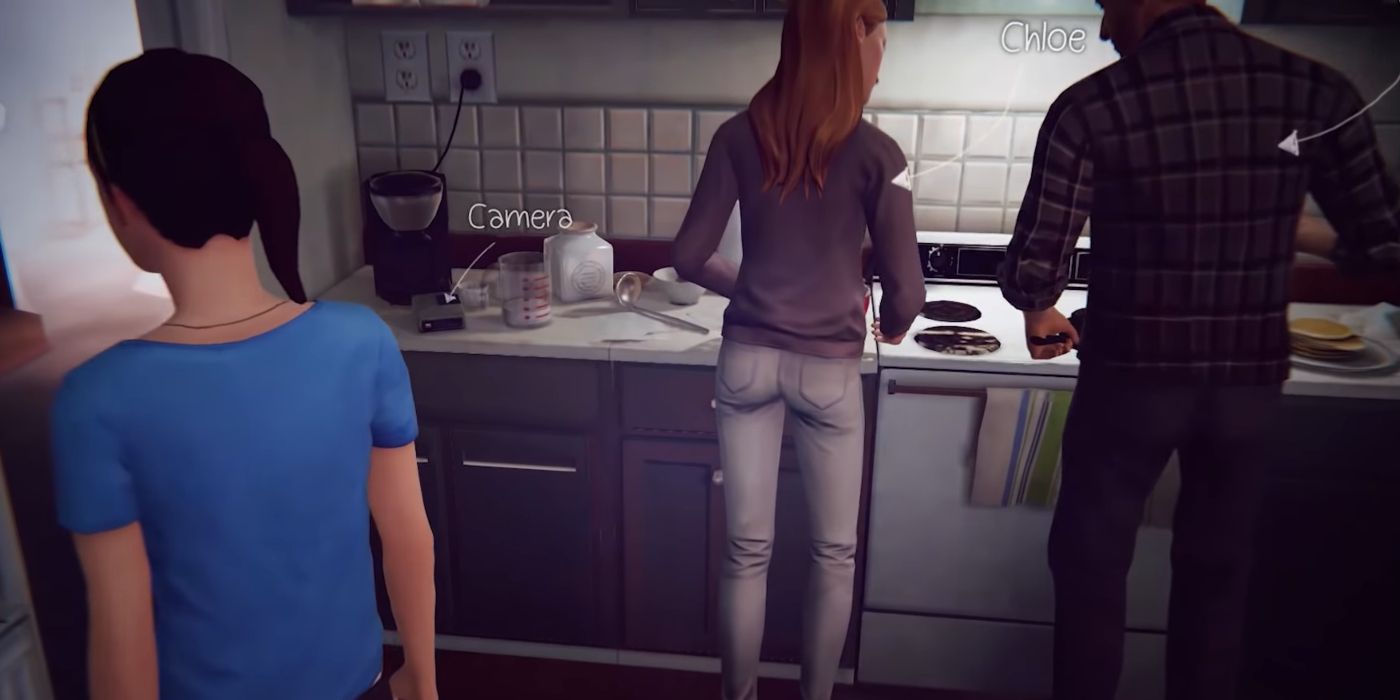
Chloe And William (Optional Photo 10)
At one point during a flashback sequence, Chloe and William will be in the kitchen together. To the left of them is a camera you can interact with to take a photo of the pair. If the phone rings, the opportunity will disappear, but you can just rewind time to get another shot.
Episode 4: Dark Room
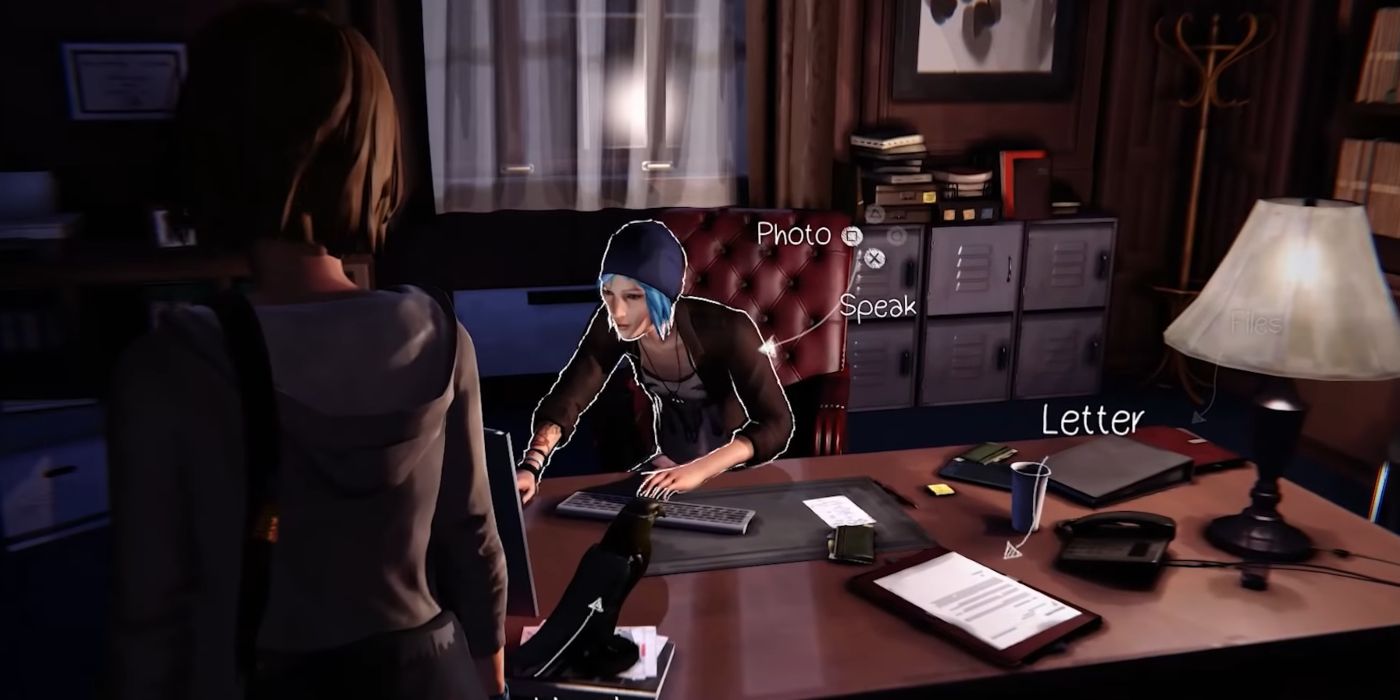
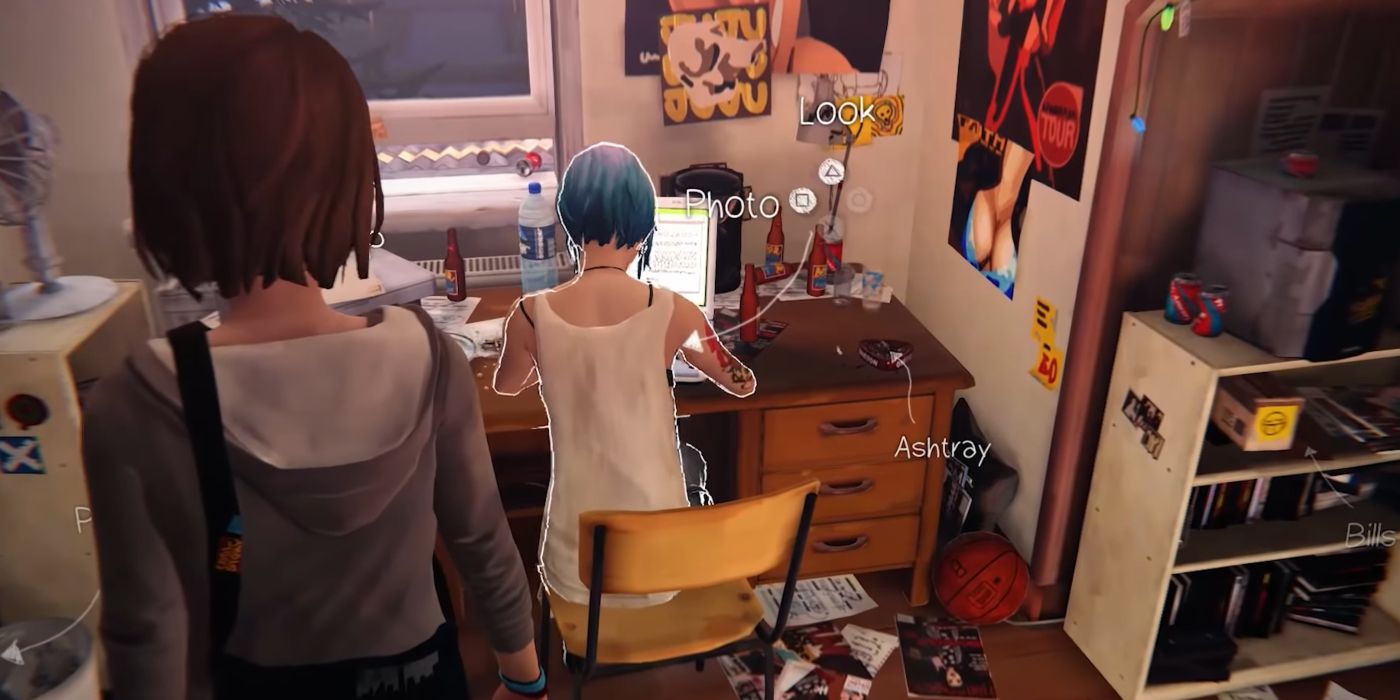
Chloe At Her Desk (Optional Photo 1)
Episode 4's first photo-op doesn't appear until the initial alternate timeline scenes are over. But once you're back in the original Chloe's room, you can take a picture of your blue-haired friend while she's on her laptop.
Bird Nest (Optional Photo 2)
After going downstairs, you'll head into the garage. Next to the garage door is a plank of wood with a nest behind it. Select the 'look' option first, which will allow you to move the plank. With it out of the way, you're free to snap a pic of the nest.
Mysterious Cairn (Optional Photo 3)
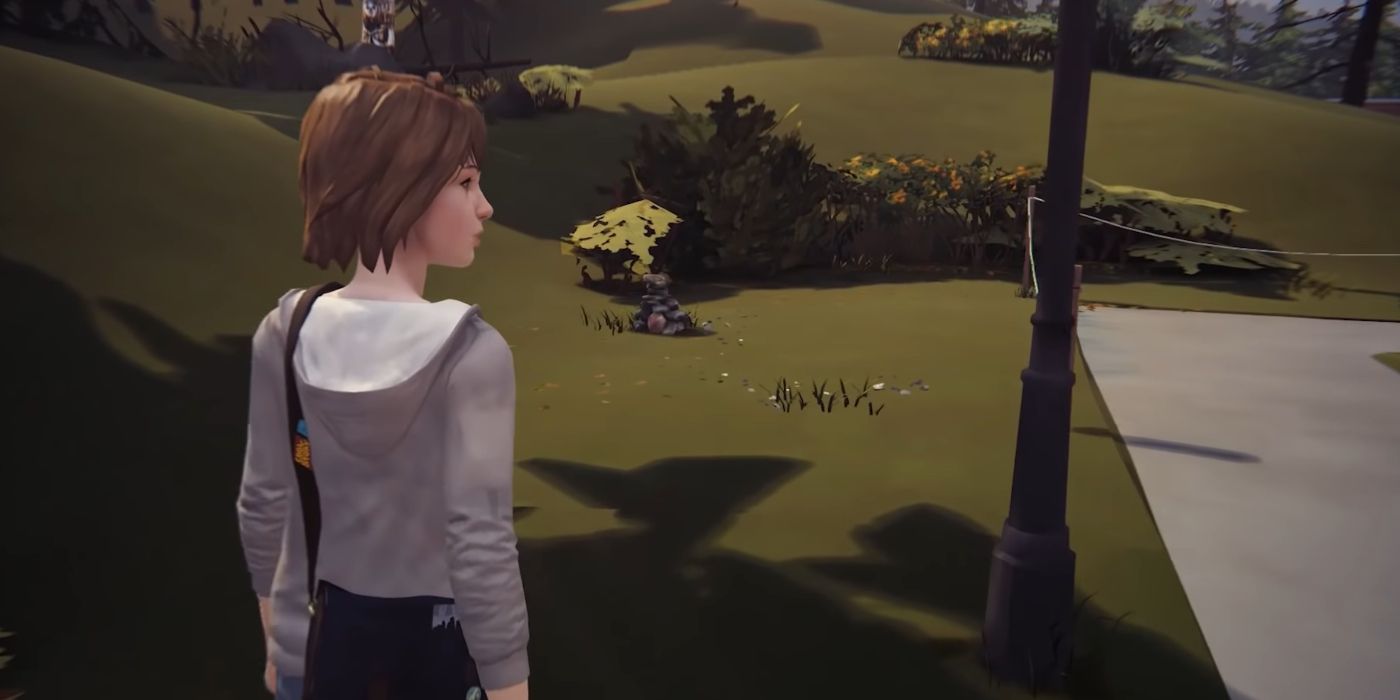
The next subject to shoot is a Cairn, aka a stack of stones. It's located outside, almost directly opposite the entrance to the dorms, and behind a street light. You don't need to do anything special before using your camera.
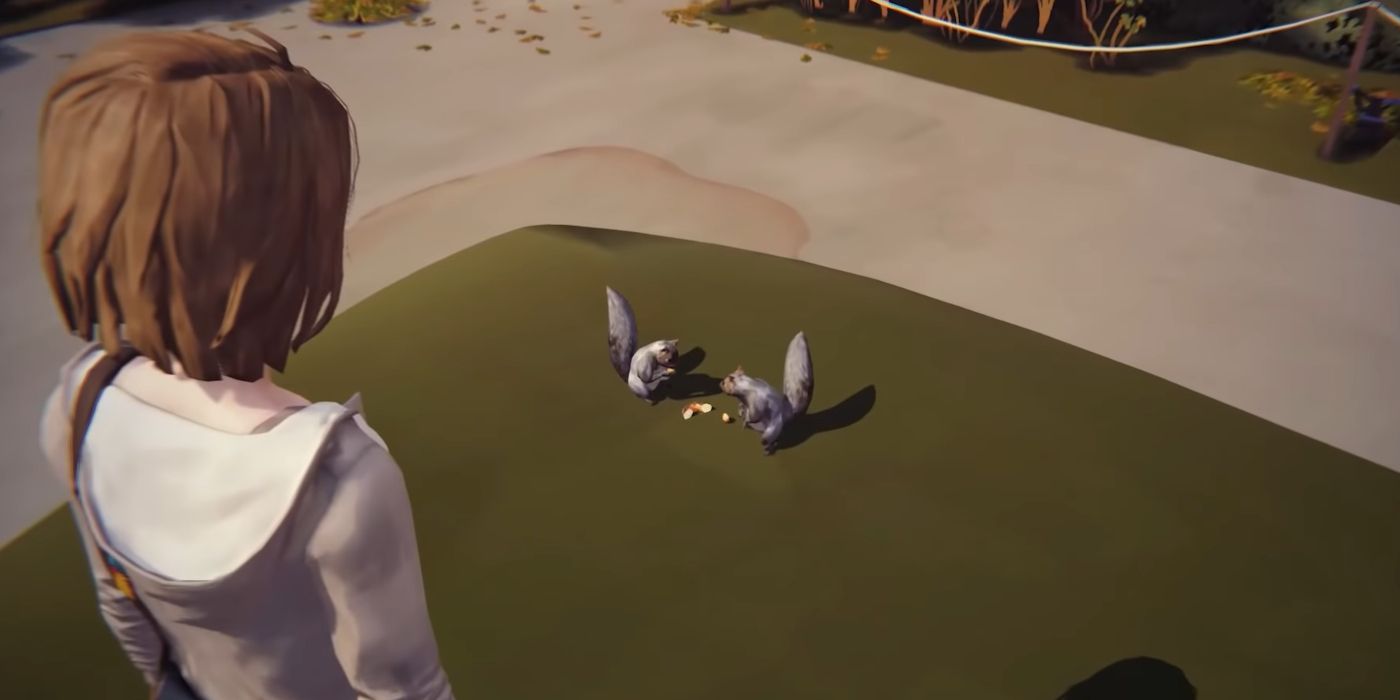
Two Squirrels (Optional Photo 4)
While in that same area, talk to the custodian, who's sat on a bench next to Ms. Grant. Use the following dialogue options on him:
- "Animals"
- "Squirrels"
This will prompt the guy to throw out some food for the critters. Then you must do the same by interacting with the food box beside him. By doing so, another squirrel will be lured over. Wait until the two animals interact for a photo-op.
Inhuman Footprints (Optional Photo 5)
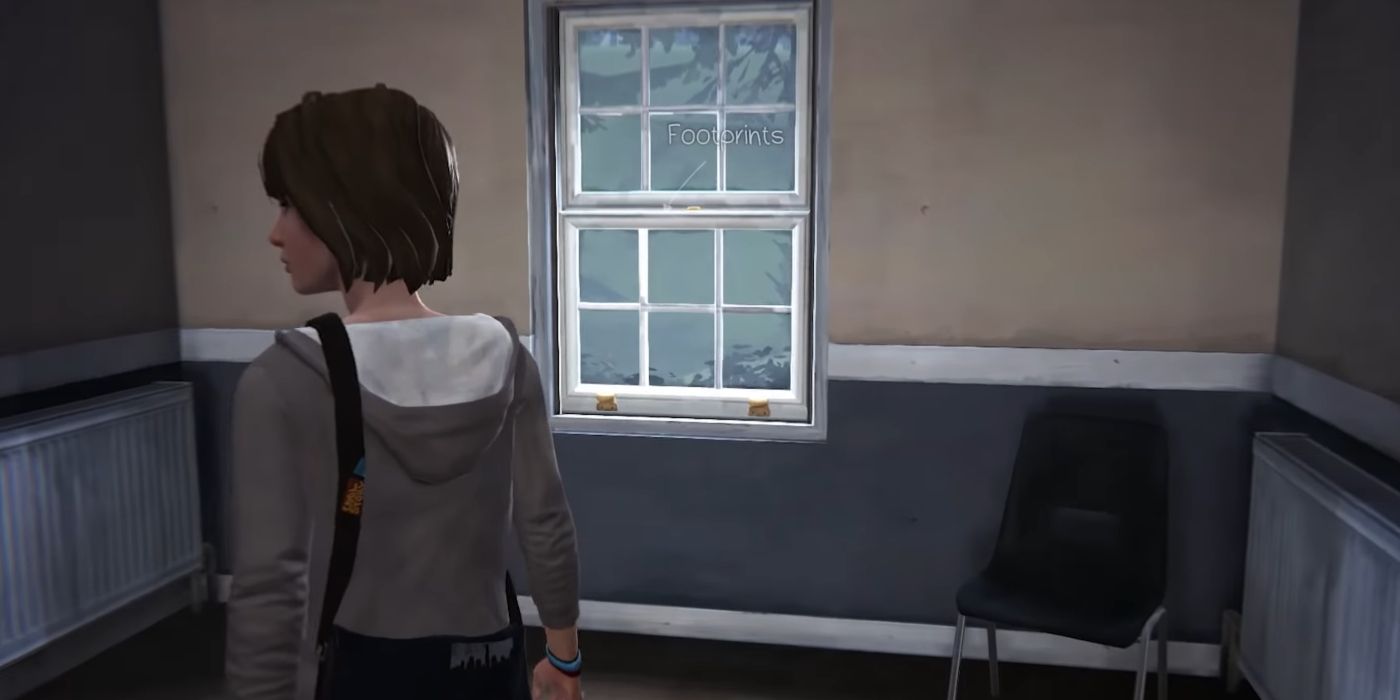
Upon entering the boy's dorm, head to the end of the hall and turn right. Approach the window and get a picture of the footprints outside.
Beached Whale (Optional Photo 6)
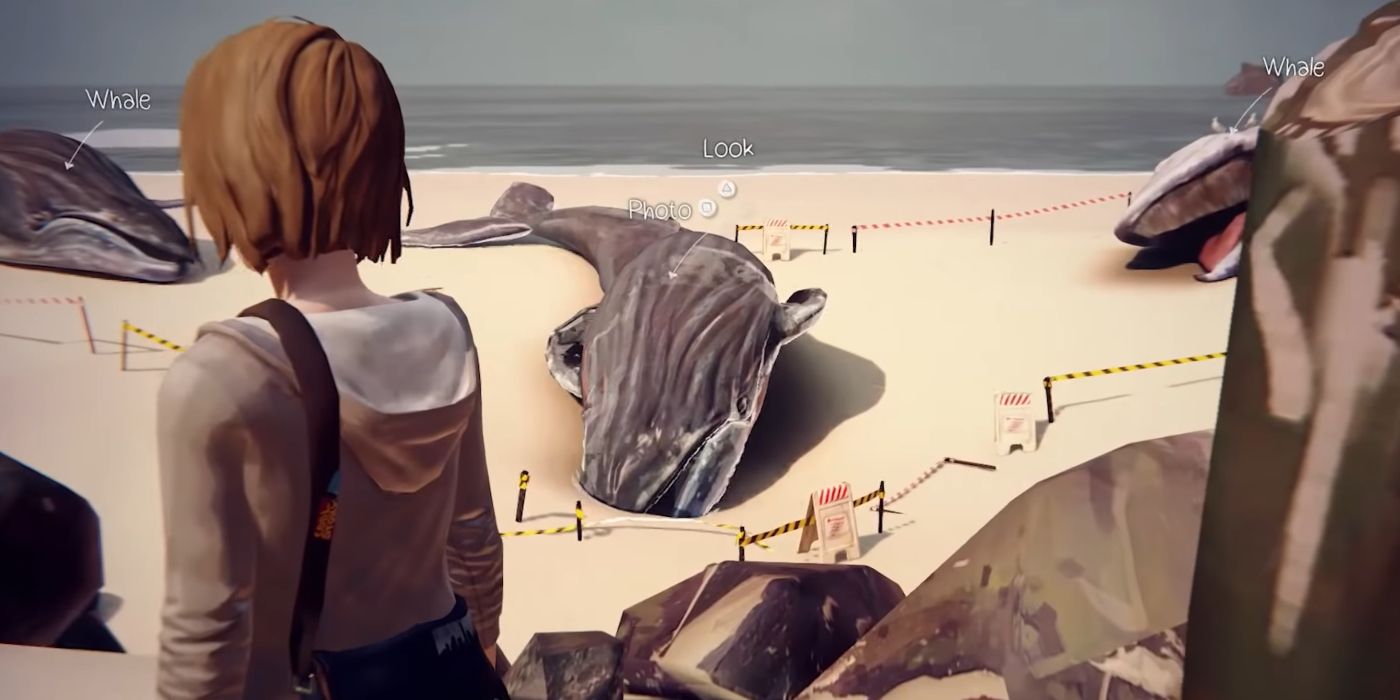
Right before you confront Frank at his RV, head to the right to see all of the beached whales. Take a picture of the one closest to you.
Another Bird On A Fence Post (Optional Photo 7)
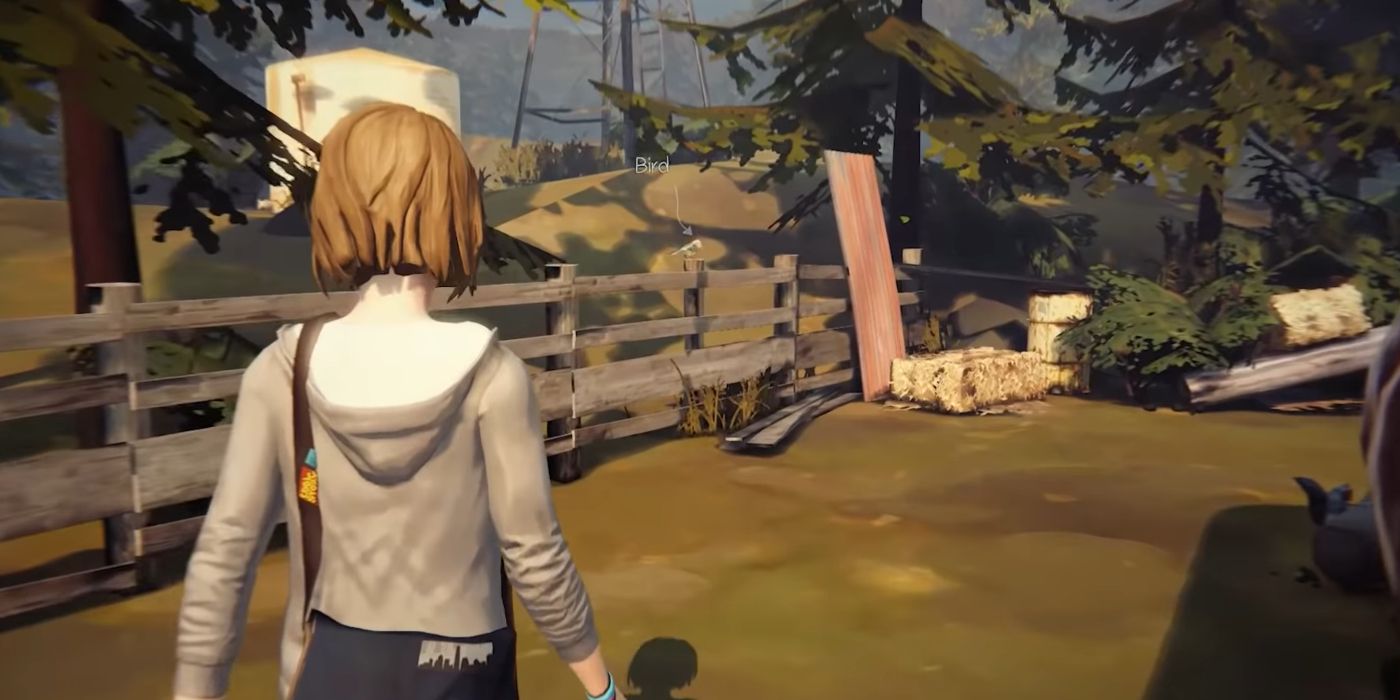
Later you'll end up at the Prescott family's barn. But before entering the place and solving the difficult bunker puzzle, you can get a picture in the area. Simply go to the left side of the barn to see a bird perched on a fence post, ready to be photographed. If it flies away, use your rewind power to bring it back.
An Owl (Optional Photo 8)
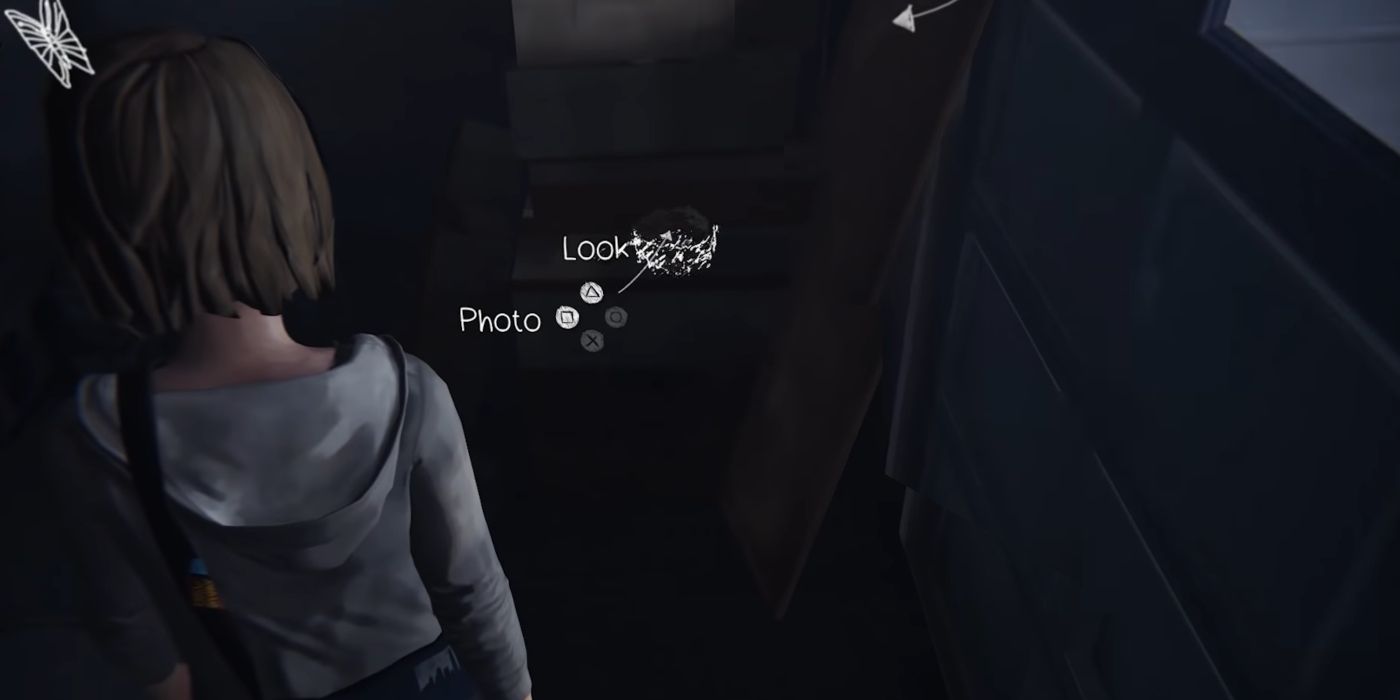
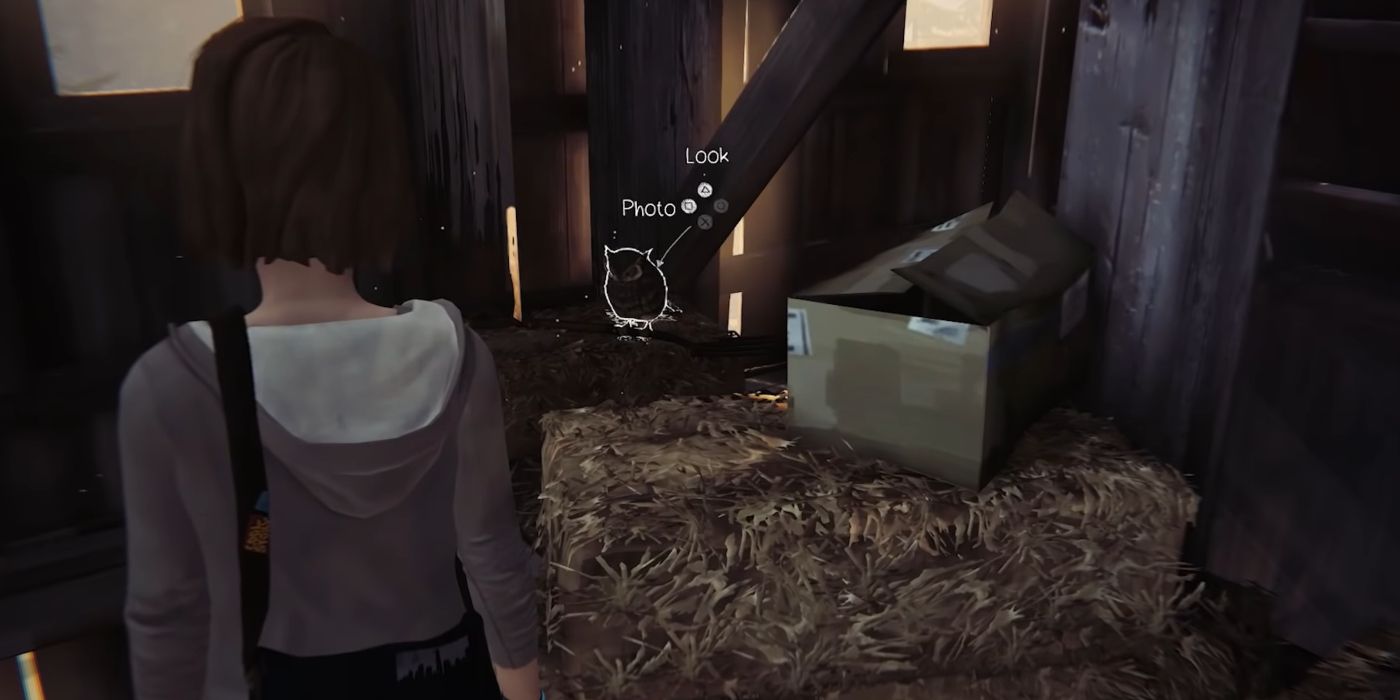
Inside the barn, you uncover a trap door. Try to unlock the padlock with your hands, and when that doesn't work, you can climb up a nearby platform. Then pull the old motor down to get up to the top level. Up there is an owl at the back that you can photograph.
Justin Skeleton (Optional Photo 9)
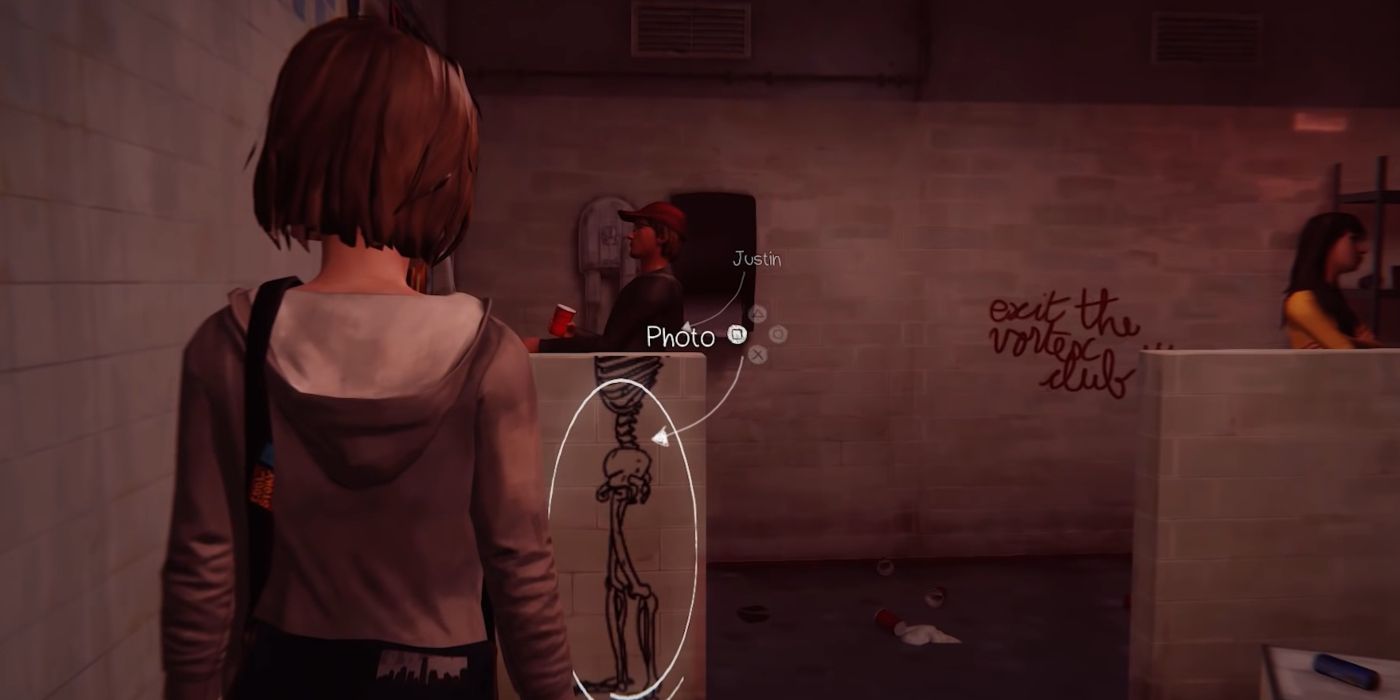
During the Vortex party, you'll head towards the VIP section. But instead of going inside, enter the restroom on your left. Find the skeleton graffiti on the wall in front of Justin. Line him up with the skeleton to get the photo-op.
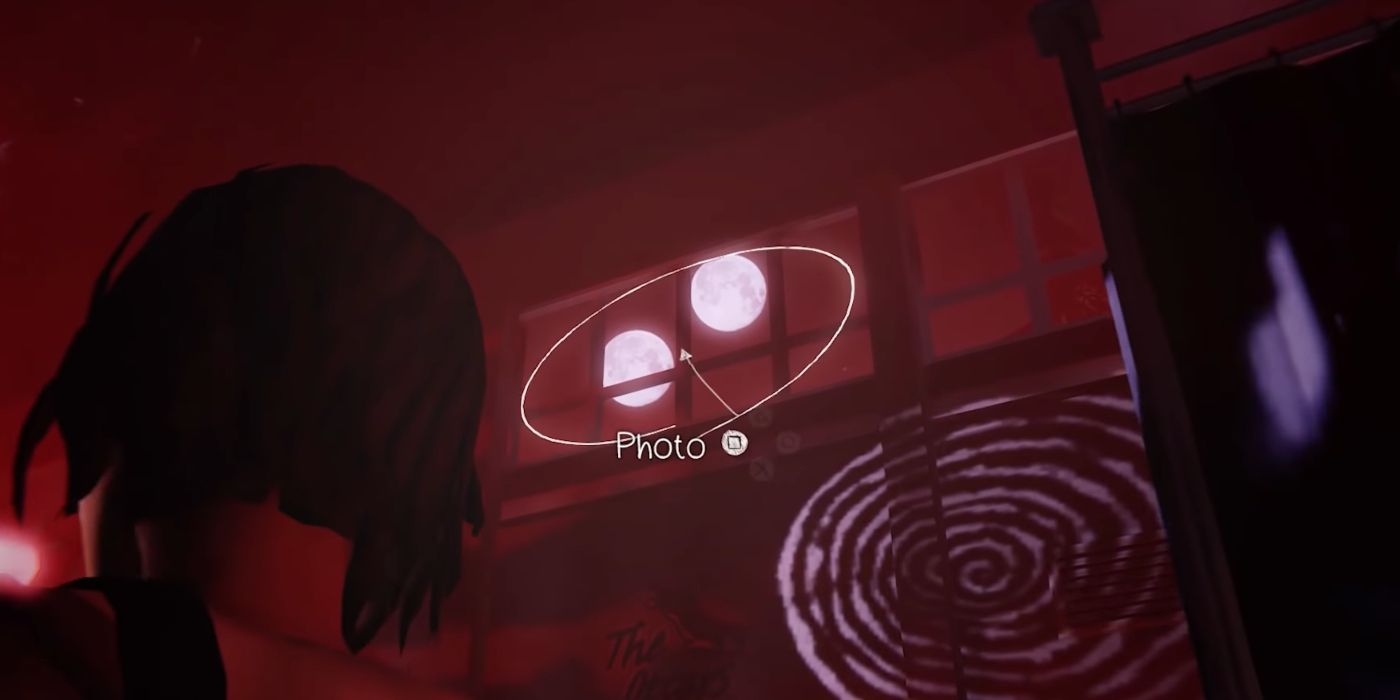
Two Moons (Optional Photo 10)
The game labels this optional picture as the tenth of the episode, but you can actually get it earlier than the Justin skeleton.
This is because it's next to the curtain that serves as an entrance to the party. Look up to the windows behind said curtain to find twin moons to photograph.
Episode 5: Polarized
*Major spoilers ahead*
Kate In Classroom (Optional Photo 1)
Once you return to the classroom, go over to Kate, who's sat on the right side. Comfort her and it'll give the option to take a picture afterward.
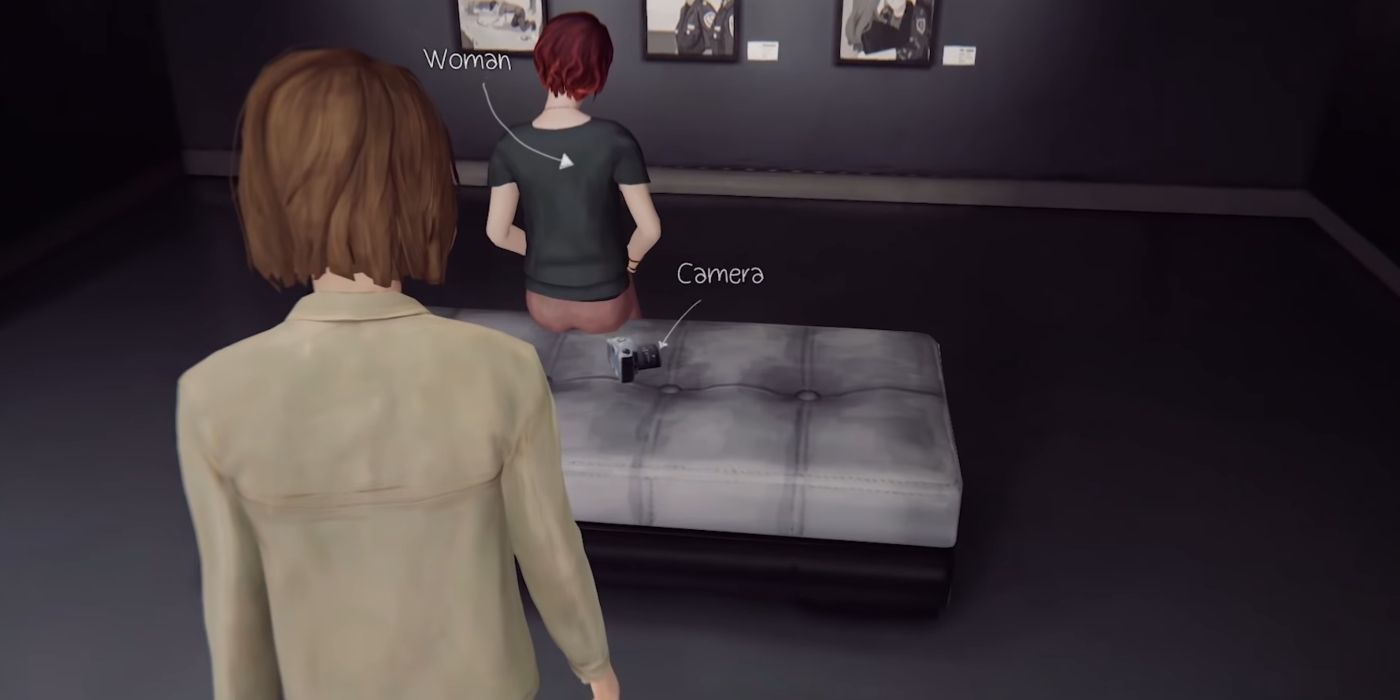
Stranger Admiring Art (Optional Photo 2)
At the art gallery, go down the stairs as soon as your gain control of Max. There'll be someone down there looking at art. Behind the stranger is a camera you can pick up to get a photo.
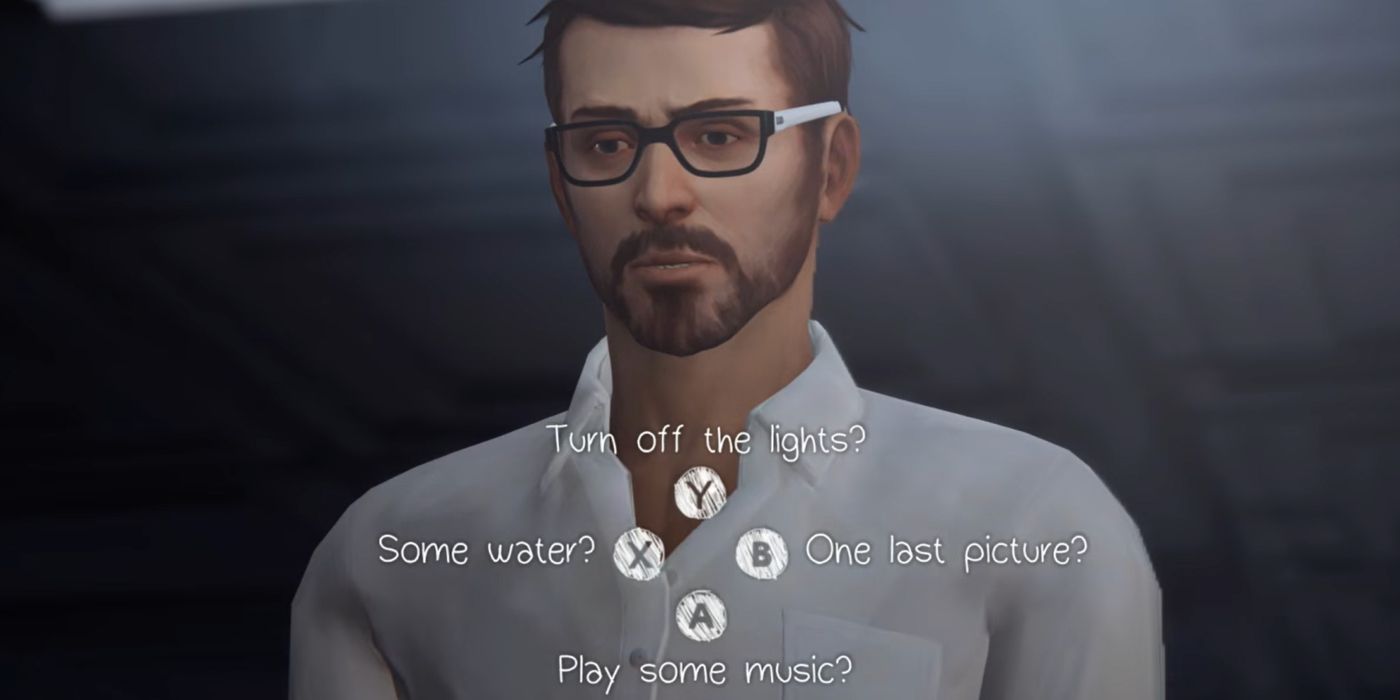
Mark Jefferson's Work (Optional Photo 3)
While in the Dark Room, David Madsen will arrive and get knocked out by Jefferson. So, you'll need to rewind time to save him. Now, you'll get a new dialogue option where you can say, "One last picture?" The villain will oblige, and it'll count as one of the optional photos.
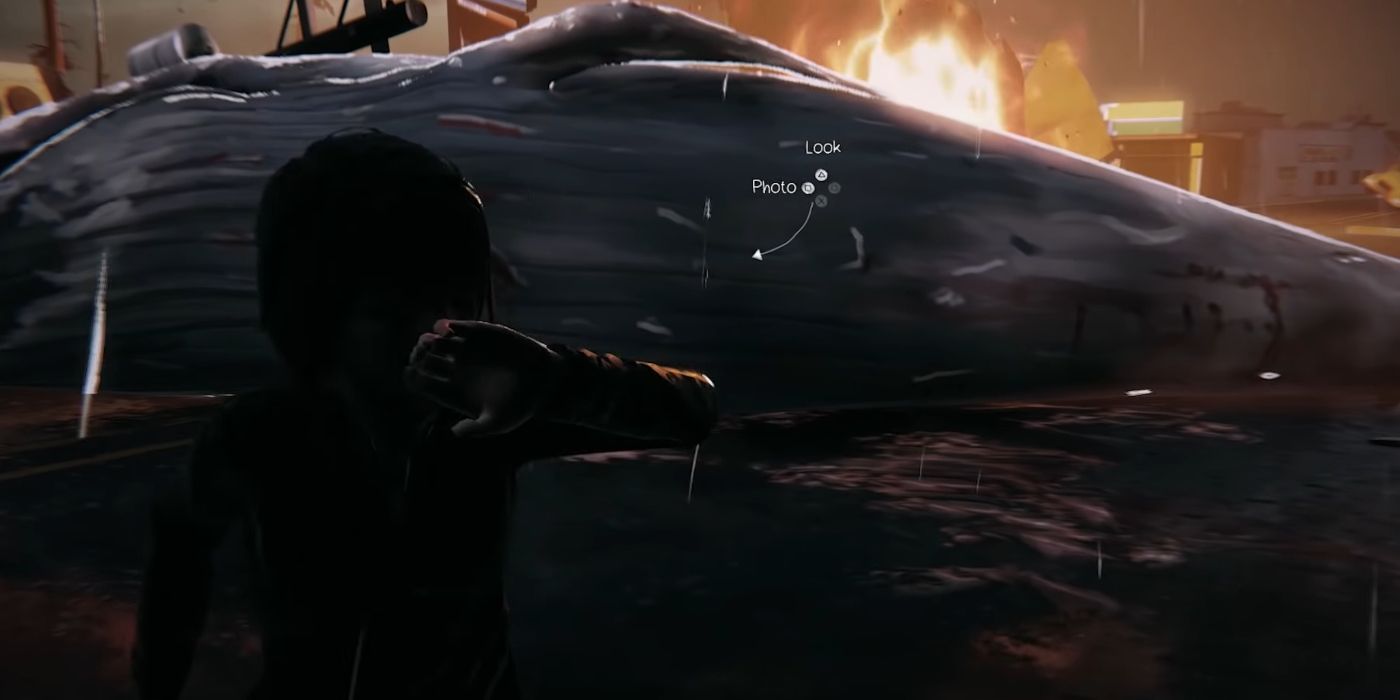
Whale In The Street (Optional Photo 4)
Later on in the episode, you'll be outside the diner once again, this time with the storm raging. Blocking the street will be a giant whale carcass. Positioning yourself exactly like the above image allows you to take a picture.
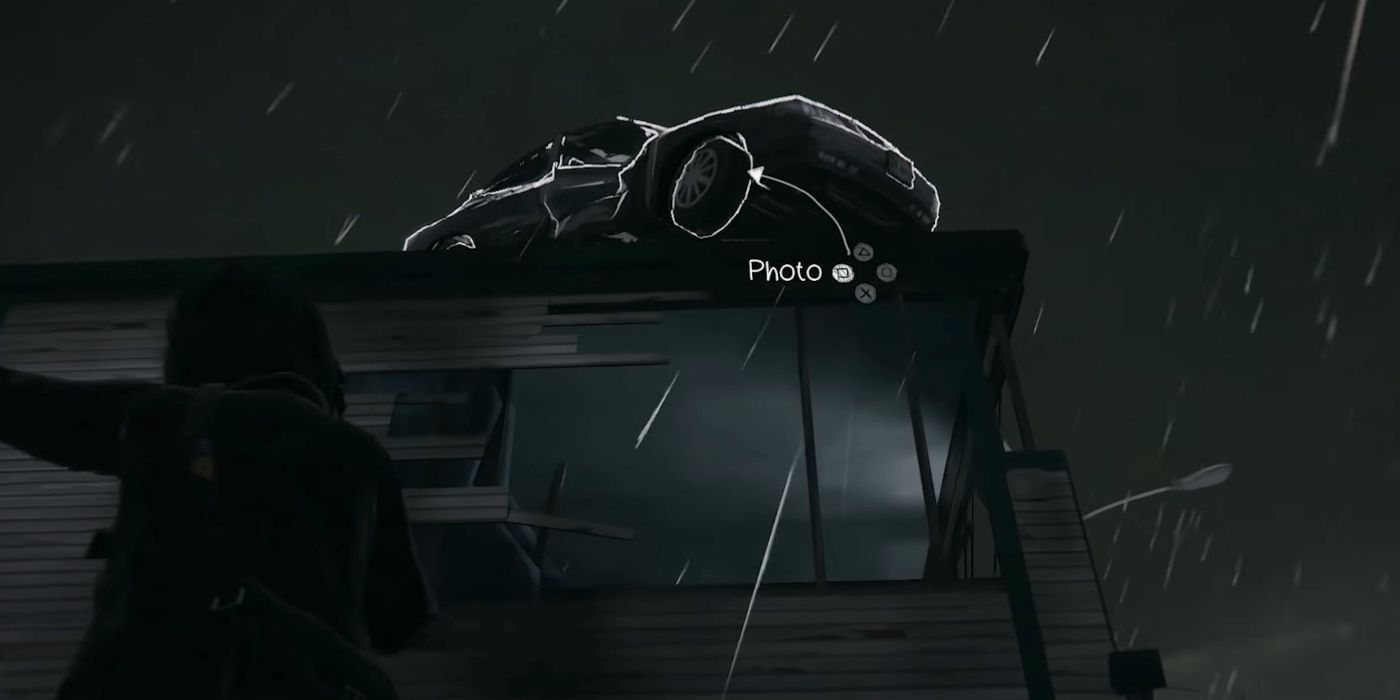
Car On Roof (Optional Photo 5)
After getting a snap of the whale, turn right around to see a car on top of a building. Walk right underneath it to photograph the vehicle.
Warped Version Of First Photo (Optional Photo 6)
The first optional photo in the entire game was on the desk in the middle of Mr. Jefferson's classroom. You come back there in the nightmare sequence, and the etched message returns. Select the 'look' option on it a couple of times until it says "Chloe Price 4Ever," and you'll be able to take a picture.
Giant Squirrels (Optional Photo 7)
During the endless hallway section of the nightmare, you will transform into Victoria before turning back into Max. At this point, turn right partway down the hall and look out of the window to see giant squirrels.
Of course, you must get a photo of them. It's the conclusion of the squirrel photo collection, which is one of the best-hidden details in the game.
Backward Photograph (Optional Photo 8)
When everything is moving backward at Blackwell, you must down the hall past the vending machines and take a hard right. In the corner is a skeleton, who's your next subject.
As everything is going in reverse, you go up to it and press the journal button instead of 'photo.' This triggers Max to shove a photo back into her camera, which still counts.
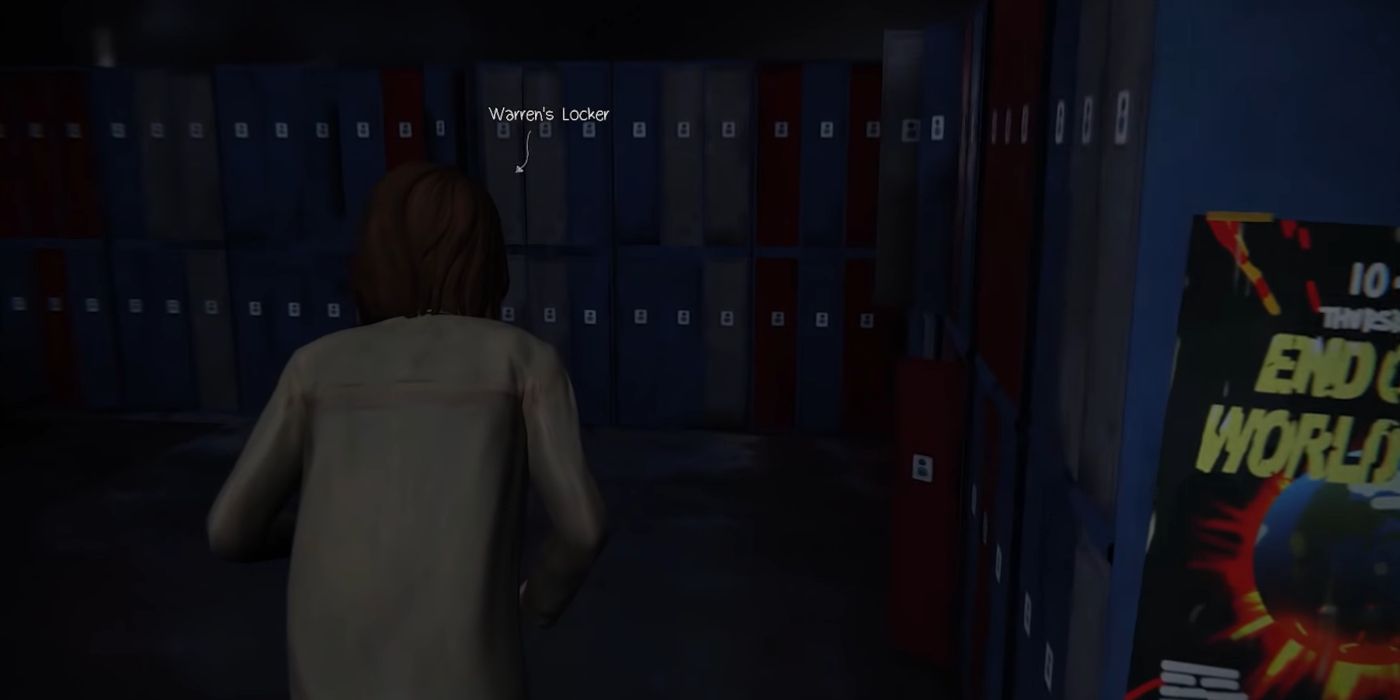
Creepy Locker (Optional Photo 9)
This one is a little tricky to explain, as it's found during the stealth section of the nightmare. When you get to the lockers section of the sequence, follow these instructions to find the one belonging to Warren:
- Head right and across the gap.
- Turn left and cross the next gap.
- Take your next right (where there's a Drama Club poster).
- Keep straight until you can turn right again.
- Take the next right, and the locker will be in front of you.
Open it up to find a lot of creepy stuff, which you can photograph.
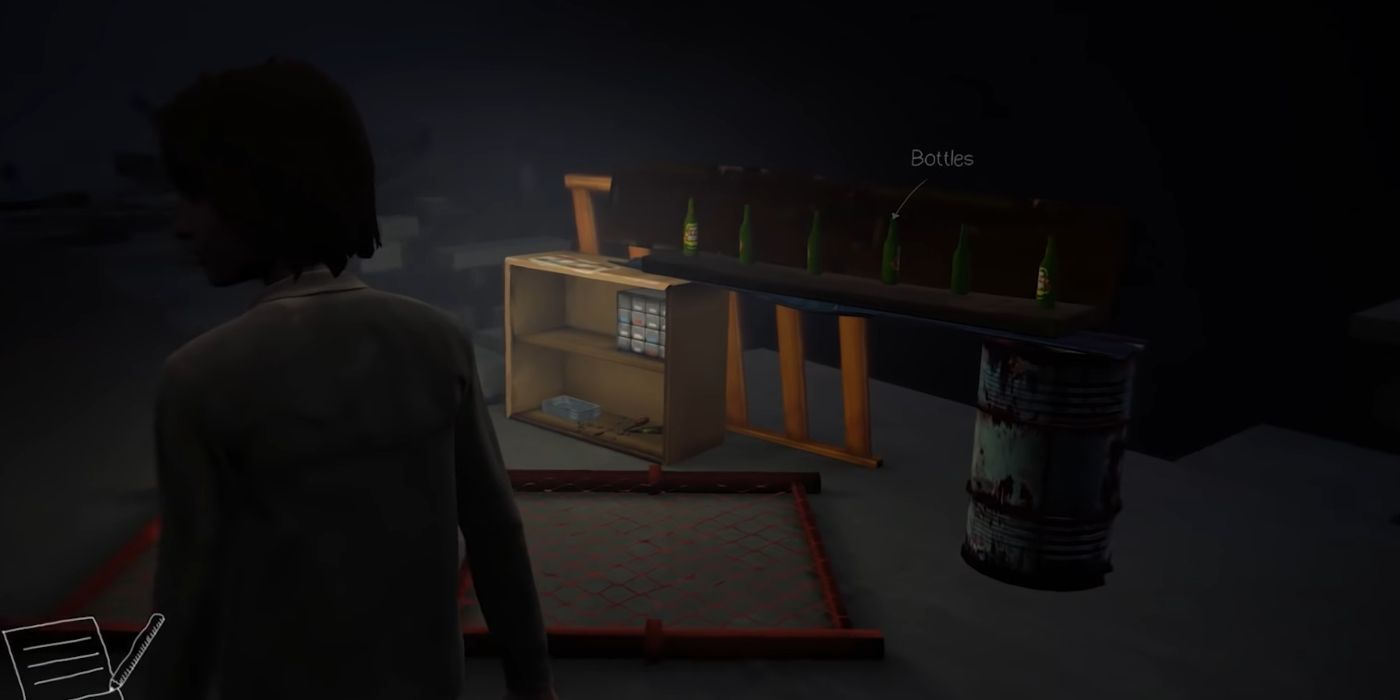
Bottles On The Wall (Optional Photo 10)
Shortly after the last one, you'll need to find a bunch of bottles. Once you do, head towards the lighthouse. But before you get there, look to your right to see a bunch of bottles lined up. They're the final subject for you to shoot with your camera.

