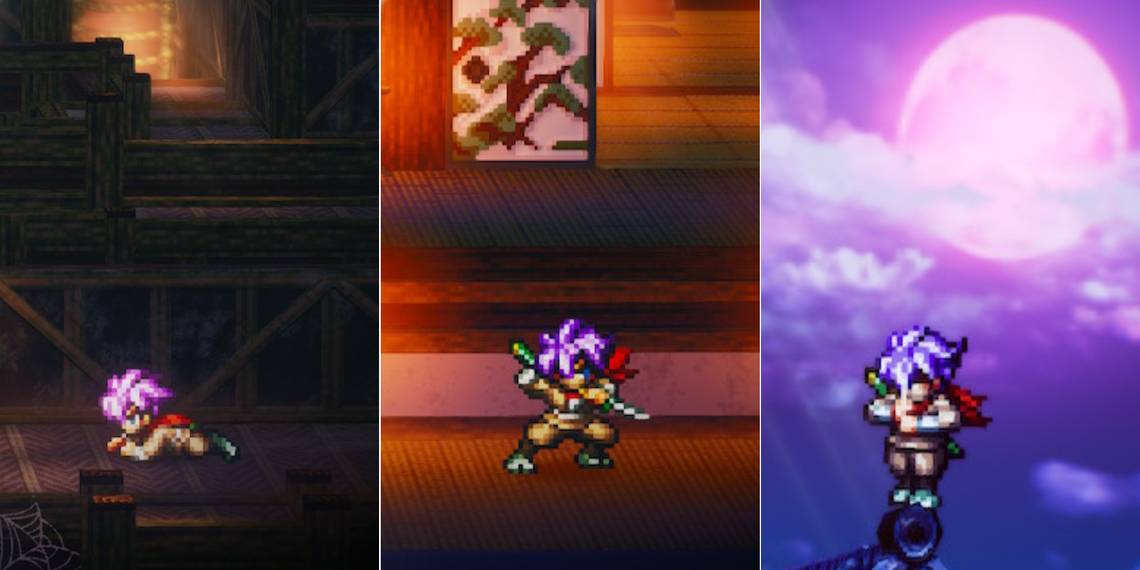
Twilight of Edo Japan is the most complex chapter in Live A Live. As a promising young shinobi of the Enma Clan, you are tasked with infiltrating a large castle and extracting an important prisoner held there. Oboromaru is given permission to perform the rescue however he sees fit, either slipping in and out unseen and unnoticed or slaying as many members of the Ode Clan as possible.
There are one hundred members of the Ode Clan inside the castle, excluding bosses and nonhuman enemies like ghosts and clockwork puppets. There's no point in trying to split the difference - the best strategy is either to kill no one, or to leave no one alive.
This guide contains spoilers for Live A LIve's Twilight Of Edo Japan chapter.
Pacifist Or Vengeful?

Technically, there is no such thing as a truly pacifist run in this chapter. There are a handful of required bosses who must be slain, but killing them won't count against you. It's better to say that a pacifist run requires you to not kill anyone unnecessarily. This means avoiding guards at all costs and fleeing from battle if you're caught.
Every time you kill a human character that you didn't have to, Oboromaru will make a note of how many lives he's taken. If you can keep that number at zero throughout the entire chapter, you'll be rewarded with Mutsunokami, an extremely powerful sword that will serve Oboromaru well in the game's final chapter. There is also a very powerful secret accessory that is available if you don't kill any women in the palace, for which a zero-kill run will naturally qualify.
Cutting a path of blood through Ode Castle is much more expedient, as it allows you to go straight to your objectives without skulking around looking for keys and other necessary items. It also allows Oboromaru to level up much more quickly and collect more loot from defeated foes, potentially making him stronger at the end of the chapter and beyond. However, you will not receive Mutsunokami. Overall, this means it's better to earn the sword via a pacifist run, and then level up Oboromaru afterward in the final chapter. Read on to find out how to complete Twilight Of Edo Japan without bloodying your sword unjustly.
Getting Started

The approach to the castle is protected by two pairs of guards. Walk toward them until exclamation marks appear over their heads, then immediately press Y to use Shadowed Self. You are completely invisible as long as the button is held, but cannot move. The guards will begin walking around - time your movement so that they are facing away from you when you advance.
If a guard catches you and initiates combat, flee to avoid having to kill them.
This is how you will evade most enemies during the infiltration of the castle. You can always use Shadowed Self to disappear, even if an enemy is right on top of you. If you move to a different room while being pursued, the guard(s) will not follow you and will return to their default positions.
Guardhouse

When you enter the first building, you'll see a short cutscene detailing the castle's password system. Oboromaru will note each time the password changes - try not to forget which password is currently active!
After the cutscene, enter the door on the right. Inside is a single guard and a chest containing a set of chainmail. Take and equip the armor so that you'll have protection against stronger enemies should you be caught.
Return to the corridor and take the door on the left. Go through the door at the far end of the hallway and immediately use Shadowed Self to evade the guard there. Continue north to reach the back door leading to the Residential Palace
Residential Palace

Cross the bridge to the left, avoiding the blue-haired guards as needed. When you reach a door guarded by two guards in orange, speak to them and give the current password to enter the Residential Palace. Inside, take the door all the way to the left, avoiding the guard patrolling the corridor.
In the next room, enter the unguarded door. Don't worry about the nobleman kneeling inside - he won't attack unless you speak with him. Instead, walk up to the wall in the upper-right corner to discover a secret passage leading into the attic.
Open the chest on the right and equip the Suijin Tabi you find inside. The rats here are harmless, so don't worry about them and move to the right. You'll see a brief cutscene outlining the fate of two other infiltrators; afterward, open the chests along the southern wall to get a koban (coin) you'll need later.
Instead of descending back to the main area of the palace, go to the northwest corner of the attic and use the passage there to access the rooftops. As you approach the exit, be ready for a shinobi to appear, Use Shadowed Self to slip past him, but be careful - he moves very quickly when pursuing you.
On the rooftops, head south to walk along the wall between the guardhouse and the courtyard. You'll soon see a ladder leading to a secret room; do not enter it, as you'll be forced to fight five shinobi. Instead, proceed as far to the right as you can. Oboromaru will automatically leap from rooftop to rooftop, and at the right-hand edge of the screen you'll enter another attic.
A rat will warn you of a pit trap in the middle of the room - skirt the edges of the attic to avoid it and pass to the other side. Back on the rooftops, head north. There is a secret passage accessible by climbing down a tree just after the construction area, but you should avoid it on this run; Lord Iwama, the giant koi that lives in the castle's moat, is too powerful for you to defeat without Experience gained from fighting guards. Instead, stay on the rooftops and follow the only available path to reach the storehouse attic. Open the chests inside to find the Storehouse Key, then double back to return all the way to the Residential Palace's Entrance.
Storehouses

From the door guarded by the two samurai who demanded a password earlier, go left and then down to find a locked door. Use the Storehouse Key to open it; inside is a single chest containing the Dungeon Key. As you approach, a shinobi will appear and attempt to corner you; be prepared to use Shadowed Self to escape the room without a fight.
Re-enter the Residential Palace and make your way to the rear, slipping out the back door. Take the western path to find the main Storehouse - it's directly below the attic from which you retrieved the key. Unlock the door and enter. Inside is a woman and several ghosts; you can safely fight the Lost Souls to level up, and can even re-enter the Storehouse to make them respawn, but avoid fighting the woman; she's a ghost herself, so won't count against your kill limit, but is much more powerful and will probably defeat you unless you're at least Level 5.
Loot all the chests in the Storeroom, making especially certain that you get the koban you'll need for later. The Shrimp Rice Balls and Izanagi Scroll are some of the only healing items available in the chapter, so use them only when necessary! Return to the attic where you found the Storehouse Key and proceed north to enter the First Floor Attic of the Castle Keep.
Castle Keep - First Floor Attic

Save your game immediately upon entering the Castle Keep Attic. A single misstep can land you in the Dungeon; while this won't end your run, it can force unnecessary backtracking. You'll need to go to the Dungeon eventually, but now is not the time.
Move to the left and pull the lever to reverse the direction of the gears nearby. Use the new direction of the gears to cross to the platform to the north. Open the chest to get a hook and rope set, but don't use it to cross the chasm. Taking the long way saves the tools for later.
Be very careful with your movements here, as there are no walls to keep you from falling into the dungeon if you go over the platform's edge.
Instead, ride the gears south to return to where you started and move left until you hit the wall, then follow it toward the north side of the attic. Do not ride any of the conveyor belts to your right, as they will dump you into the dungeon. Instead, ride the gear at the northernmost edge of the passage to reach the platform on the other side. Follow the path to the right and ride the conveyor belt at the end before continuing north.
You'll find yourself on a narrow platform; ride the middle conveyor belt, which leads to the right, and pull the lever you find on the far side. Ride the gears north to the top-right corner of the room, then use the rightmost set of gears to go back south. Use the conveyor belt to return to the narrow platform then ride the topmost conveyor belt to return the way you came.
There are now two sets of gears that will take you south; ride them both, being careful not to land on a conveyor belt that will send you to the dungeon, and pull the lever that you find. This opens the way for you to go all the way to the northwest corner of the attic by moving along the left-hand wall. Do so to find a second hook and rope set, then pull the nearby lever to open the way back. This also lets you access the final lever without the need of either of your ropes.
Return to the narrow platform; you can now ride the bottom gear to the south, where you'll find the last lever. Pull it, then go north to find a ladder down to the Castle Keep proper.
Before descending the ladder, ride the conveyor belt to the right to find a chest with a Fujin Scroll. You can then use the conveyors and gears in the upper-right corner of the attic as you did before to return to the ladder and continue your quest.
Gennai's Traps
Take the stairs to the second floor. Here, you'll find a ladder leading to another attic. Before climbing it, check the southern wall to find a secret passage out into the main hallways of the castle. You'll come to a long series of sliding doors; go north until you come to another set of stairs and another door leading south. Enter the doorway to find a room with several treasures, including a sword on the wall. Be sure to take the koban here before continuing. You can safely ignore the woman here; she won't try to attack you if you don't interact with her.
Return to the secret passage and climb the ladder to the second floor attic. This time around there are pit traps that regularly open and close. There are chests throughout the area, but none of them are particularly useful; if you'd rather not take the risk of visiting each corner of the attic for a Shinobi Wristguard (southwest), Enma Charm (northeast) and Fuma Shuriken (center-east), you can just use a hook and rope set to cross the gap in the middle of the attic and reach the latter in the southeast corner.
Once again, you'll be able to climb to the next floor and enter a new attic. Here, puppets will attempt to throw you into the dungeon. Use your remaining hood and rope set to cross the central chasm and avoid getting caught. You can return here later to collect the treasure they're guarding after Gennai is defeated, or risk a trip to the Dungeon to get the Genji Helm in the southwest corner.
The fourth floor attic contains nonhuman enemies that you can fight without breaking your pacifist run. In fact, you'll need to unless you were able to save a hook and rope set. The best way to defeat the monsters here is to go back and forth between the two groups, fighting each set of monsters in turn. That way your level will scale with the increasing difficulty of the enemies. If you find you need to level up, return to the Storehouse and fight Lost Souls to grind Experience.
How To Defeat Puppetmaster Gennai

The final rope ladder leads to a room with a tea set. Check the northern wall for a secret passage, and Gennai will invite you to sit down. Doing so will send you straight to the Dungeon, so instead repeatedly speak to Gennai until he asks whether you trust him. Tell him you don't, and he will emerge to do battle.
Use area attacks such as Waterspout and Fireflies' Wake to quickly destroy the Electrodes before they can do too much damage. Try to do so from at least one tile away, as the Electrodes can explode when critically damaged, causing a loss of HP you can't afford. Once they're dispatched, get some damage tiles under Gennai - ideally a mix of Water and Fire so that he takes damage twice - then back off to repeatedly hit him with Shuriken Barrage. Use Shrimp Rice Balls and Castella Cakes to heal as necessary, but save your Izanagi Scroll(s) for later engagements.
Once Gennai is defeated, all the traps and enemies in the attics will disappear. Return to collect any chests you missed, then let yourself fall down a hole to reach the Dungeon.
Dungeon

After you land in the dungeon, the guard will taunt you before resuming his rounds. You should have the Dungeon Key by now, which will let you unlock your own cell door. If not, you can also escape by using Shadowed Self while the guard is looking at you; he will unlock the cell to investigate your disappearance, allowing you to leave. If you need to use this method to escape, return to the Residential Palace to get the Dungeon Key before continuing.
Once you've left your cell, go to the right and find a secret passage in the wall there. This leads to the lower floor of the dungeon. Open the first cell you see to release a ninja named Goemon; tell him to go in peace, and he will replenish several chests throughout the castle. If you're low on supplies, retrace your steps to see if Goemon has left you anything you can use.
Dodge the guard between the two cells and open the second cell in the room. The chest inside contains another koban; by now, you should have four koban. If that's the case, return to the room where you fought Gennai by sneaking through the first and second floors of the castle and returning to the secret passage near the room with the sword on the wall.
How To Get Past The Monks Without Fighting

Enter the secret passage where Gennai was first hiding; inside you'll find a slot on the wall. Save your game, then insert three koban, one by one.
Do not insert the third koban unless you will have one or more left over afterward; otherwise you will not be able to safely get the Mimic Mammet to where it needs to be.
When the third koban is inserted, the room will shake briefly. Do not step on the cushion in the middle of the floor, as it will send you back to the Dungeon. Instead, return through the door by which you entered. Instead of the tearoom, you'll find yourself in a small chamber with a puppet. Install the Mainspring that Gennai dropped in the puppet, and it will attack you.
The Mimic Mammet knows all of your moves, but is very fragile compared to the real Oboromaru. A couple Shuriken Barrages should be all it takes to defeat it. After the battle, the Mimic Mammet will join you.
The Mimic Mammet will break beyond repair if it's defeated in combat, falls to the Dungeon, or gets wet. If any of these happen, load your save file and try again as you will not be able to complete a pacifist run without it.
Return to the room with the koban slot in the wall and insert your last koban. This will return the room to its original position. Use the door next to the koban slot to reach the castle's fifth floor. When you reach a door guarded by three monks, the Mimic Mammet will explode, which eliminates the monks but somehow doesn't count as killing them. Enter the door they were guarding to confront Lord Ode.
How To Defeat Miyamoto Musashi

When you enter Lord Ode's room, you'll be joined by the Prisoner you've been sent to rescue. Ode will make his escape, summoning the ghost of Miyamoto Musashi to fight you. Be aggressive in this fight, using Dustveil and Phantom Butterflies if you've learned them to deal heavy damage while the Prisoner uses Wolf's Fang to keep the boss debuffed. Stopping to heal will give Musashi an opening, so only do so if absolutely necessary.
How To Defeat Yodogimi

Once Musashi's spirit is exorcised, follow Lord Ode down the secret passage to the right. There is only one path to follow, and as you're about to reach the stairs to the sixth floor you'll be stopped by another of Ode's lieutenants, the witch Yodogimi. Compared to Musashi she's hardly a challenge at all; her weakness against wind damage should let you defeat her with one to two Phantom Butterflies.
Despite Yodogimi's weakness compared to other bosses, you should beware of the candles nearby. If any of them are caught in a flame attack like Fireflies' Wake, they will cause a backdraft that deals fire damage to Oboromaru.
How To Defeat Ode Iou And Gamahebi

When you climb the stairs that were guarded by Yodogimi, you'll find a door leading to Lord Ode's secret chamber. Before you enter, a maid from the palace will stop you and give you a Maid's Sash; it's not much of an accessory, but any stat boost is welcome, so accept the gift.
Since you haven't killed anyone on this run, you can wait to receive another (much better) gift. If you don't leave the screen, either by the stairs or the door, for about ten seconds, the maid will return and give you a Lacquered Medicine Box which greatly increases Special Attack. Equip both accessories to Oboromaru and enter Lord Ode's room.
Ode himself isn't very strong, so keep the same aggressive strategy you've been using and defeat him quickly. He will flee to the roof; chase him by leaving the way you came in and using the door at the bottom of the screen in the hallway.
On the roof, Lord Ode will transform into the chapter's true boss, Gamahebi. The giant frog-man will try to cover the board in Poison Tiles, which damage your allies and heals Gamahebi. Fireflies' Wake or Waterspout can be used to neutralize the Poison Tiles and deal damage to Gamahebi instead.
The Lacquered Medicine Box makes Oboromaru's elemental attacks like Firefall, Dustveil, and Phantom Butterflies very powerful. Use them any time you don't need to convert Poison Tiles, or just go for broke and attack relentlessly to offset the boss's healing. If Gamahebi's Charge Meter turns red, have the Prisoner use Warning Shot to interrupt him. Hopefully you still have at least one Izanagi Scroll left - don't be afraid to use it in an emergency, especially if one of your characters is downed!
After the battle, you'll receive the Mutsunokami if you completed the infiltration with no unnecessary kills, which of course won't avail you in the current chapter but will be a big help in the endgame.