Quick Links
Now that you’ve gotten your feet wet with Lonesome Village and the mechanics of solving puzzles to solve trapped villagers, you’re onto Chapter Two. This section of the game sees you exploring new areas not only in the Tower itself but in the village of Ubhora, too.
Three new areas of the map unlock in this chapter: the Desert, the Beach, and the Mountains. Each will have its new resources and its own set of NPC friends to make after you’ve freed everyone from their stony confines, so follow along with our guide to make the most of your time in Lonesome Village.
Finding The Items For Shrine Floor Three

You begin this chapter in Wes’ brand-new (to him) house, a parting gift from Earl as he departed for his scholarly adventures. You’re able to decorate as you see fit, so check out our furniture guide for Lonesome Village to find cool stuff and learn to make it.
You came across the third shrine back in Chapter One, but fixing the bridge in the west part of the Forest with Justin is how you segue into Chapter Two. Once the bridge is fixed, you’re able to cross further into the forest, which features the entrance to the Desert just beyond.
The pyramid is small, and you can see it in the center of a dried-up lake bed just north of where you enter the Desert. Stand on the pedestal and play Dorothy’s rain song to refill the lake, then cross the log bridge to grab the pyramid.
Technically, you’re done with the desert for now, but you’re able to access the Mountain to the north if you’d like. There’s not much going on up there for now, but we won’t stop you from exploring.
When you’re done with your venturing, head back to the forest and send Wes directly south from his tent. There’s no task for getting into the Beach like there was for the Desert, so just head on down when you’re ready. Again, you’re able to explore, but there’s not much here yet – everyone who lives here is still trapped in the Tower, so shake a tree to get a coconut and head back to the Tower to carry on.
Floor 10: Mouse Maze

The overall goal for this puzzle is to collect pieces of cheese to assemble a cheese wheel, which is the item you need for the pedestal outside. They’re littered around this room that’s filled with doors and platforms, but doors with little arrows on the doorframe will make Wes small.
This is a good thing – a lot of the puzzle is only accessible when you’re small. There are three pieces of cheese in the room: one beneath a raised platform at the bottom of the puzzle, one in a small cave within one of the walls on the right, and the last behind the wall to the left.

Collecting all three assembles them into the cheese wheel you need, completing the puzzle.
|
Animals Saved: Tom And Lulu (Mice) |
|---|
Floor 11: Big Bear

In this room, your goal is getting a bear token to the end of a maze. The mazes are segmented by pieces that Wes can rotate. However, the bear token never stops moving, and will bounce between dead ends if you trap it. For the example puzzle, you only need to flip the lever once to create the right path, but the rest won’t be so simple.
For the first real puzzle, send the bear up, right, up, and left, flipping the lever before it arrives at the left-turn so it can carry on. After it turns left, send it up, left, and back down. Before it goes down, though, flip the lever again so the bear bounces off a horizontal green piece. This forces it to backtrack, and with the levers like this, it turns toward the honey to finish this puzzle.

The second maze has many more turns. Send the bear down, right, then down again so it goes back toward the left, flipping the lever before it hits the dead end to allow it to carry on. Send it right and then down before flipping the lever again to create a straight path toward the end.
The third and final puzzle is a bit of a doozy. From the start, send the bear right, down, right, up, right, and down again before quickly flipping the lever so it can carry on. After flipping the lever, go straight down the long section made of two straight green pieces, then right, down, right, and up. When the bear is on its way up, flip the lever a final time to force the bear to turn around and go toward the goal.
|
Animals Saved: Pete, Patty, Ralph, And Rosie (Bears) |
|---|
Floor 12: Golden Nugget

Here, you’ve got to navigate this dog token to collect all the tennis balls on the board, being mindful of the red spikes. If a spike hits the red side of the dog token, you have to start from the beginning of the puzzle you’re on.
When it gets to a darker gray tile, it stops, and you can redirect the token from there, but any dark gray tiles with arrows almost always automatically send the dog token the way shown.
For the first puzzle, go right to the middle tile, then right from there. This sends the dog around the corner, but it stops on the arrow tile in the top-middle. Go down to collect the second ball, then send the dog right again to get back to the top-middle. Go left toward the spikes, which sends you back to the start. From there, send the dog down for the final ball.

Puzzle two is larger and more complicated. Go all the way across the bottom, stopping on the second arrow tile along the right wall. Go left from here, then left again, which sends the dog around to the third arrow on the bottom. Go back to the right wall and go all the way up, stopping along the top wall facing down. Keep going left, then go down when the dog stops.
Go down again, then toward the right. Go up, left, down, down with an automatic right, right, then up around the small loop. With the second ball, go back to the right wall and go all the way back to the top before going down toward the center twisting path when you can. From there, go down with an automatic right, then keep going right to finish the puzzle.
|
Animals Saved: Nedd, Jenny, Jerry, And Sherry (Dogs) |
|---|
Floor 13: Turtle Age

The colorful block you push around this room will need to land on the button with the color shown on said button facing up to unlock the door. This will sometimes involve pushing in a way that seems counterintuitive at first, but trust us!
For the first puzzle, push the block back one so that green is showing on top. Then, push it down one so blue is showing, then push it right until it hits the bottom row of statues with blue on top. Push it up one, then right onto the button.

In the next room, you’ve got a third block to contend with. Push the block back two so that red is facing upward, then up one. Push it right until it hits the top row of statues, then down one and right onto the button.
For the final puzzle in here, the block down one so that red is facing up. Push it to the right until it’s just past the blocks in the center of the room with blue facing up. Push it up one, then push it right onto the button.
|
Animals Saved: Hanzo And Pistachio (Turtles) |
|---|
Shrine Floor Four: Owl Doll

You arrive on this floor to learn you need a small owl doll, which you can get from the village elder you just rescues, Hanzo. He’s a pretty central character, but he also gives you a rather large task.
Go to Hanzo’s house with your shovel for the tutorial on what to do next. Hanzo explains that the Cult took several of his books, but their approximate locations are marked with the eyeball symbol you’ve been seeing around the village.
When you find one of those eyeball markings around the map on your adventures, take out your magnifying glass and examine the area around you for a dig spot. One of the books will be buried within, and there’s one in each area of the map for you to find and collect.
Bring you book you dug up back to Hanzo to receive the quest to find the rest, as well as the owl doll you need. Get the doll from Hanzo and head back to the Tower.
Floor 14: Dog Race

This puzzle is more about your control skills than it is smart. Here, you have to guide Wes along the narrow and twisting path in the room toward the room you can see to your right when you enter, which has the key item waiting.
As you may expect, the blue arrows along the floor make Wes move faster, but also somewhat unpredictably. Though it’s tempting to avoid the faster spots, you will need to hit them in order to reach the end.

Go up toward the top wall, and when you see a branching path that leads along the top wall and further down, take the bottom path to keep going down. The path ahead is rather twisted and features sharp turns, so keep your patience and slide Wes on down along the winding path into the key item room from there.
|
Animals Saved: Mindy Lou (German Shepherd Dog) |
|---|
Floor 15: Eagle Eye

Here, you’ve got to reassemble the shattered pieces of a puzzle to completely fill in the shape shown. It’s far easier to show than tell here, so the images for the completed solutions are below.
|
Board 1 |

|
|---|---|
|
Board 2 |

|
|
Board 3 |

|
|
Board 4 |

|
|
Board 5 |

|
|
Board 6 |

|
|
Board 7 |

|
|
Animals Saved: Jenko (Eagle) |
|---|
Both Mindy Lou and Jenko have tutorials for you next time you leave the Tower. Mindy Lou will teach you to garden, while Jenko offers you a camera. Their locations are in the table below, so make sure to visit them when you leave the Tower.
Floor 16: Xolo Life

In this puzzle, your goal is to get the bright blue sound waves to hit both of the bat ears along the top walls. This is done by dragging and rearranging the speakers in the room. The correct speaker solutions for each room are shown below.
|
FIrst Puzzle |

|
|---|---|
|
Second Puzzle |

|
|
Third Puzzle |

|
|
Animals Saved: Mocty (Xolo Dog) And Timothee (Bat) |
|---|
Shrine Floor Five: Flower Shrine

As we mentioned above, Mindy Lou will teach you about gardening once you rescue her, so in order to get the items needed for this shrine, go to West Village to find her. She’s outside the house near yours with the bouquet on the front, down by all the gardening plots.
Follow Mindy Lou’s tutorial (each plot must be dug, planted, and watered for a crop to grow), then head inside to purchase one sunflower seed, one succulent seed, and one lily seed. Plant each in the garden outside and wait for them to grow (which is a good time to go earn some hearts).
Once the plants have grown, harvest them by walking over them and interacting, then head back to the Tower.
Floor 17: Nu View

Messing with the puzzle in the wall will alter the arrangement of this next room for real, so your goal here is to make a staircase for Wes to climb along the right side of the puzzle to grab the key item.
Click and drag the pieces on the pedestal to rearrange them, keeping in mind that you can’t put a bigger piece on top of a small one.

- Move the middle-size piece to the middle position,
- Put the smallest piece on top of it.
- Move the biggest piece over to the empty right side.
- Leave the smallest piece on the left side for now.
- Put the middle-size piece on top of the big piece on the right.
- Set the smallest piece on top of the stack to finish the puzzle.
|
Animals Saved: Nash (Wildebeest), Natt (Big Cat), And John (Goat) |
|---|
Floor 18: Crow Luxury

While the idea of lighting the torches in the corners of the room seems straightforward enough, you’ll notice that the markings on the floor alter the path through the room when you step on them.
To start, step on the closed-eye path just above where the puzzle begins, then head straight across to the 4x3 section of changeable tiles. Go to the top wall in the room, then step to the left to form a bridge back to the main section. From here, head down to the newly formed bridge to the torch on the bottom-left and light it before walking up straight up to the first platform you hit, triggering it a second time.

This makes a path up to the top-left torch, so light it before getting back to the starting position again. Go back across the 4x3 changeable section, walking down to the bottom-right torch and lighting it. From there, go left back to the first section of solid ground you come to, then go back to the top wall and trigger the buttons just to the left, where you made your first bridge a moment ago. This creates a path to the final torch in the top-right.
|
Animals Saved: Row And Minerva (Crows) |
|---|
Floor 19: Canine Memory

This puzzle is a simple memory card game. It starts you off small, with only three shapes to match, but this simple first puzzle shows you the game’s trick – if you get one match wrong, the entire board flips back over and you have to find everything again.
First Board Layout
|
Top |
|||
|---|---|---|---|
|
Side |
Axe |
Fishing Rod |
Axe |
|
Fishing Rod |
Shovel |
Shovel |
|

Second Board Layout
|
Top |
||||
|---|---|---|---|---|
|
Side |
Flower |
Diamond |
Fish |
Apple |
|
Feather |
Carrot |
Apple |
Diamond |
|
|
Feather |
Carrot |
Fish |
Flower |
|
|
Animals Saved: Matoka (Boston Terrier Dog) |
|---|
Floor 20: Smith Dog

The overall goal of this puzzle is getting the ball onto the button shown on the floor, stopping it using the sword statues in the room. The first room is as simple as just pushing the ball to the right, as it stops automatically to give you a lay of the land before the puzzles grow more challenging. If you should mess up at any point, the lever in the top corners of the rooms will reset the ball to its original starting spot.
For the second room, push the ball down, right, up, and right onto the button.

In the third room, you’re introduced to moveable anvil statues, which can be rearranged if the swords aren’t in helpful spots. In here, push the anvil up against the right sword statue, then push the ball to the right.
You’ve now got two anvils to move into the fourth and final room. Push the right anvil down so that it’s directly in line to the right of the ball, and then push the second anvil on the left to directly below the button. Push the ball to the right and then down to finish the final puzzle of this chapter.
|
Animals Saved: Robert (Dog) |
|---|
Shrine Floor Six

This chapter ends much like the last, with Wes finding a shrine and leaving to go get the item. As with the last chapter, though, this won’t be as easy as going fishing or playing a song.
However, with the waterfall in the Mountain blocked, the river isn’t flowing, and the Swamp where you get the Phoenix Feather you need is currently inaccessible.
NPCs Met In This Chapter

With so many new regions unlocked in Chapter Two, the villagers you rescued tend to live in the new areas. You’ll see what we mean in the table down below.
|
Name |
Occupation |
Location |
|---|---|---|
|
Tom |
Furniture Salesman |
Center Village |
|
Lulu |
N/A |
|
|
Pete |
N/A |
Mountain |
|
Patty |
||
|
Ralph |
||
|
Rosie |
||
|
Nedd |
N/A |
Beach |
|
Jenny |
||
|
Jerry |
||
|
Sherry |
||
|
Hanzo |
Village Elder |
East Village |
|
Pistachio |
N/A |
|
|
Mindy Lou |
Shopkeeper - Gardening Shop |
West Village |
|
Jenko |
Photographer |
Mountain |
|
Mocty |
Cemetery Groundskeepers |
Forest |
|
Timothee |
||
|
Nash |
Milkshake Maker |
Desert |
|
Natt |
N/A |
|
|
John |
||
|
Row |
Shopkeeper - Rare Goods Shop |
Center Village |
|
Minerva |
N/A |
|
|
Robert |
Blacksmith |
Mountain |
Finishing Up

To carry on with ascending the tower, you’ve got to find the next shrine item. Good news: it’s in the Swamp just east of East Village. Bad news: the river feeding the Swamp has dried up, which means you can’t even get in right now. Time to get the water flowing again.
Go to the Mountain and speak to Robert, the blacksmith you rescued right before the shrine floor. He gives you the pickaxe, which allows Wes to break the rocks in front of the local mines. There’s one right next to Robert’s house, so hack it open and dive into the mines to find the family of Moles that live in the northeast corner.
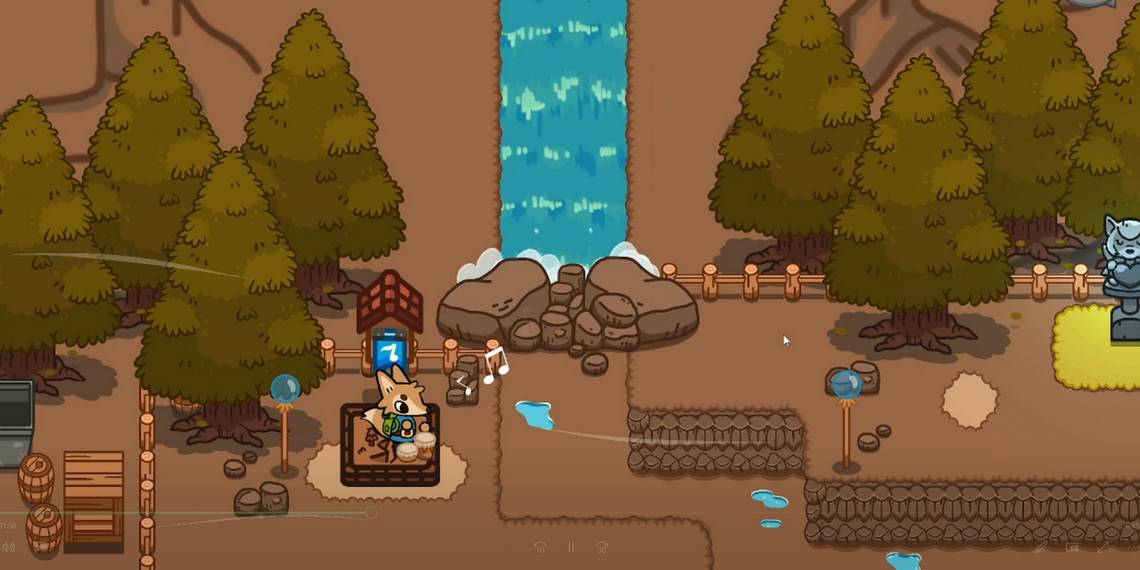
For the small favor of rescuing them, the moles give you a pair of bongos and teach you a song that forces an earthquake. The power is a little extreme to just have, but go to the north-most part of the village and play the earthquake song on the pedestal beside the waterfall blockage.
Freeing the debris clogging the water flow ushers in Chapter Three.