Quick Links
If you’re getting into Marvel Snap, you’ll be starting to see the massive array of combinations you can make with the cards. Each deck you build can only hold 12 cards, and a match is only six rounds. It doesn’t sound like much, but what initially feels restrictive means you can mold tight decks that will work more often than not.
One idea is to build a deck around a concept, such as one of the abilities in the game, such as On Reveal, Ongoing, Discard, or Destroy. Alternatively, it is also fun to create a deck around the power of a specific card, such as Sera, Patriot, or of course, Destroyer.
Updated July 20, 2023, by Sean Murray: Looking to make a Destroyer deck in Marvel Snap? We've got you covered here. We've also refreshed this guide with improved formatting and a few additional notes to make playing Destroyer that much easier.
The Destroyer Card

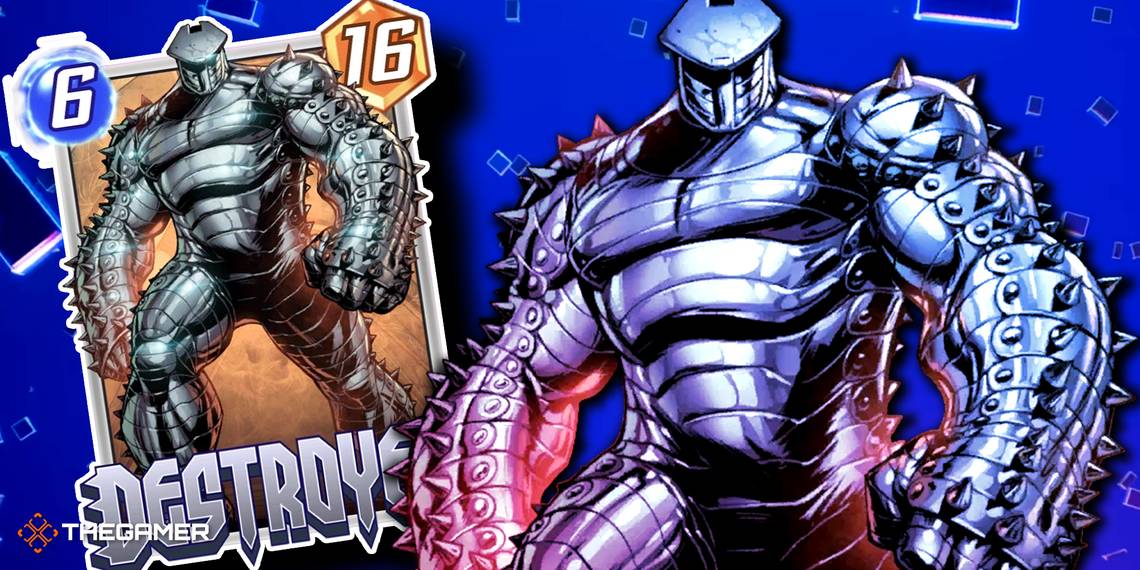
Destroyer is a six-cost card with massive Power. But when you play the card, it triggers its on-reveal ability that rather fittingly, given its name, destroys your other cards.
Destroyer is a Pool Three card, which means you have to have a Collection Level of at least 486 before you have a chance to get him into your collection.
The Destroyer Deck List

This is an example of a Destroyer deck we’ve put together. It should work well as a starting point to get a handle on how the cards synergize with each other.
|
Name |
Cost |
Power |
Ability |
|---|---|---|---|
|
Destroyer |
6 |
16 |
On reveal: Destroy your other cards. |
|
Nova |
1 |
2 |
When this is destroyed, give your cards plus one Power. |
|
Armor |
2 |
3 |
Ongoing: Cards at this location can’t be destroyed. |
|
Bucky Barnes |
2 |
1 |
When this is destroyed, create the Winter Soldier in its place. |
|
Colossus |
2 |
3 |
Ongoing: Can’t be destroyed, moved, or have its Power reduced. |
|
Scorpion |
2 |
2 |
On reveal: Afflict cards in your opponent’s hand with minus one Power. |
|
Killmonger |
3 |
3 |
On reveal: Destroy ALL one-cost cards. |
|
Deathlok |
3 |
5 |
On reveal: Destroy your other cards at this location. |
|
Green Goblin |
3 |
-3 |
On reveal: Your opponent gains control of this. |
|
Warpath |
4 |
5 |
Ongoing: If any of your locations are empty, plus four Power. |
|
Hobgoblin |
5 |
-8 |
On reveal: Your opponent gains control of this. |
|
Professor X |
5 |
3 |
Ongoing: Lockdown this location. (Cards can’t be added, removed, etc.) |
Using The Destroyer Deck

The Destroyer decks goals are twofold: reduce your opponent’s power, while ensuring you have enough Power on your side to survive Destroyer’s ability and win two locations.
The simplest way to do this is with Armor, which makes one location’s cards impervious to destruction. Pairing this with Warpath should give you enough Power to win the location once Destroyer takes out all your other cards when you play it during turn six because clearing a location will give him plus-four power.
Nova and Bucky Barnes can sit at the location you intend to play Destroyer, as they’ll benefit you by being destroyed by it. Hobgoblin, Green Goblin, and Scorpion are in your deck to deal with a strong build-up of Power by your opponent in a non-destroyable location.
Professor X can be used to lock that location down in turn five, to avoid any nasty surprises befalling you in turn six.
Bonuses from destroying Nova still apply to cards at Professor X’s location.
Killmonger works nicely here, as you only have Nova in your deck that costs one – and you’re likely to want it to be destroyed anyway. It can also clear out troublesome cards from your side placed against your will while being a nice way to deal with low-cost meta decks such as Kazoo.
Alternative Destroyer Deck Card Options

If you don’t have all of these cards, or if this deck isn’t quite fitting your play style, here are some alternative cards you can slot into a Destroyer deck.
|
The Hood |
Nice to Destroy with Killmonger or Deathlok, as it drops a 1-6 Demon into your hand. Hopefully, later you can drop the Demon into your Armor location with a spare point of Energy. |
|
Carnage |
Carnage destroys your other cards at a location, gaining plus two Power for each. This can often clear the way for you to lock it with Professor X in coming turns if an opponent’s cards or a location ability have messed up your side of the board. |
|
Daredevil |
This simply allows you to see what your opponent will do on turn five before you have to play. As your turn-six move is hopefully Destroyer, it means you can prep for this in peace and hopefully avoids any nasty surprises. |
|
Hazmat |
Hazmat inflicts all other cards with minus one power, which isn’t really a problem on your side if you’re intending to Destroy the majority of them. A little risky, but way more likely to help than hinder you. |
|
Mojo |
A nice addition for your Armor location if it’s filling up before you get to introduce Professor X. If you can get Warpath in there too, boom. |
|
Cosmo |
Using Cosmo gives you an alternative way to win with Destroyer. Play Cosmo into a location if you feel you can win simply with Destroyer’s Power, rather than wiping out all other cards. Then play Destroyer in the same location. Cosmo’s ability means the other cards will not be destroyed by Destroyer’s ability, but you’ll have his massive 16 Power anyway. |