Quick Links
The need to constantly tend to your crops and animals in Minecraft is one of the more tedious parts of the game, requiring you to regularly step away from your other tasks to harvest, plant, breed, and slaughter in order to not starve to death. Wouldn't it be so nice to be able to stave off starvation without the need to constantly stay on top of your farming and animals? Well, you can, and it is very simple.
This fully automated chicken farm will constantly supply you with pre-cooked chicken, meaning you will not need to worry about using up your fuel supply, nor will you have to worry about breeding or slaughtering. Here's a comprehensive guide on how to make an automatic chicken farm in Minecraft.
Updated July 14, 2023, by Sean Murray: There's no greater way of ensuring your nutritional needs are fulfilled than by creating a contraption that seems to defy the laws of thermodynamics. Everyone should have their own automatic chicken farm, so we've refreshed this guide with improved formatting and some breakout tips to make it easier to get your farm up and running.
Materials Needed For An Automatic Chicken Farm

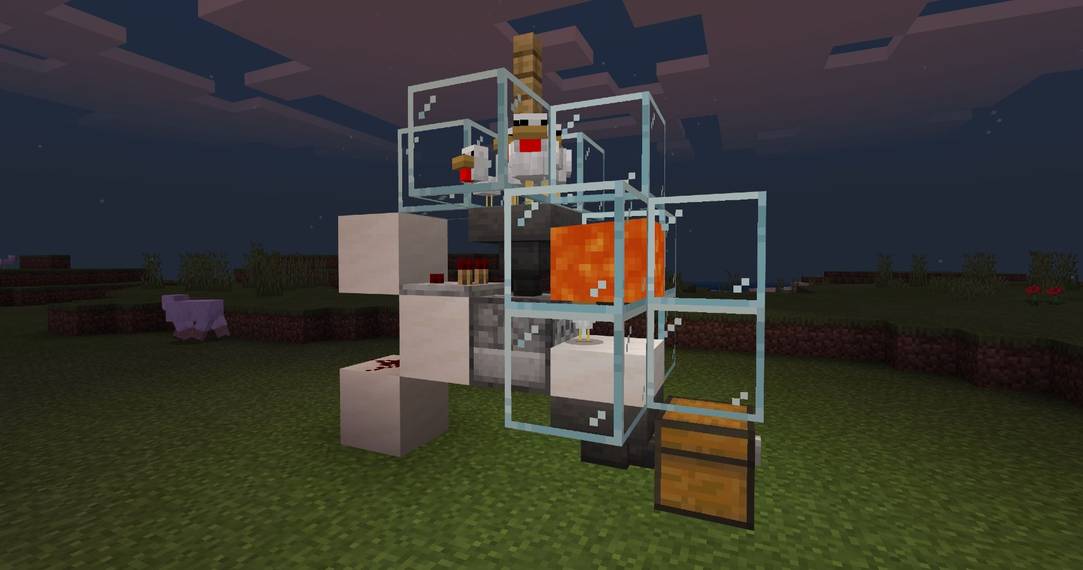
The automatic chicken farm works by taking the eggs that chickens lay and firing them out of a dispenser. When the egg lands, it has a chance of spawning a baby chicken, which will patiently sit underneath a suspended lava source.
After 20 minutes, it will grow up to be an adult chicken and will be tall enough to reach the lava, killing it immediately. It will drop cooked chicken due to its fiery death, which will be collected into a chest.
Here's everything you'll need to create the automatic chicken farm:
- One chest
- One dispenser
- One non-wooden slab
- Two hoppers
- 10 glass blocks
- One bucket of lava
- One piece of redstone dust
- One redstone comparator
- Three building blocks
- One fence post
- Most importantly, some chickens
How To Build The Automatic Cooked Chicken Farm

To begin, place your chest wherever you'd like your collection point to be and attach a hopper to the back of it. To do this, crouch, and face the back of the chest. To know if your hopper is attached to the chest, check the funnel underneath it.
Place a slab on top of the hopper. This slab is what the chickens will be dying on, and because it is only a half-block, items that sit on top of it can be collected through the block.

Place two glass blocks on top of the chest, the dispenser behind the slab, facing into it, then a hopper on top of that dispenser. Don't bother placing the glass to the sides of the slab just yet.

The hopper is where the chickens will be standing, so box it in with some glass to prevent them from running away. Place some more glass around where the lava will be (directly in front of the hopper), then place lava by right-clicking on the top of the slab with the bucket.
How To Wire Redstone For The Automatic Chicken Farm

Behind the hopper and dispenser, set up the redstone contraption shown above, with the redstone comparator's arrow facing away from the lava, and the two redstone torches on it next to the bottom of the hopper. One block underneath it and to the side, place the redstone dust.
Make sure to place your building blocks of choice exactly how the white quartz blocks are placed, too.
When an egg enters the hopper, it will output a signal that will immediately power the dispenser below. Every egg that enters the hopper will fire the egg that last entered the hopper, thus there will always be one in the chamber. This is the "automatic" part of your automatic cooked chicken farm.
How To Lure Chickens Into The Automatic Chicken Farm

Now for the hard part: luring some chickens up into the hole. You may want to place some slabs on top of the glass blocks in order to make the hole deeper so that once the chickens fall in, they can't escape.
Alternatively, you can place the fence post early and then throw eggs into the hole until you get at least two chickens, then breed them.
Regardless, once you have chickens in the hole, block off the top of it with a fence post. This will leave a space open to allow you to breed the chickens with seeds. The more chickens in the hole, the more cooked chicken you will accumulate.
How To Make Your Automatic Chicken Farm Fireproof

Depending on the difficulty of your game, you might want to consider blocking off the top with four slabs like this to prevent the chickens from flying out. You can even place a block on top of the hole to really make sure nothing goes in or out, but it still gives you a bit of leeway to breed any of the chickens already in the hole.
The reason to do this is to prevent the wooden fence post from catching fire through the transparent glass blocks, which sometimes happens. Experiment and see what method works for you, but always keep fire safety in mind.
How The Automatic Chicken Farm Works

Whenever an egg is fired, there is a random chance that baby chickens will spawn on the slab. Because there is nowhere for them to run, they will stand perfectly still in the center of the slab. Twenty minutes later, they will grow into an adult and get cooked by the lava above them.
To finish the build, place the two glass blocks to the sides of the slab to prevent baby chickens from running away.

Because the chickens are dying by fire, they will drop already-cooked chicken for you. This automatic cooked chicken farm will average one cooked chicken per hour, per chicken.
If you have 20 chickens laying eggs up top, you will average 20 cooked chickens per hour, for example.
This incredibly cheap automatic chicken farm is one of the most useful you can make, as it completely eliminates the need to worry about farming for food — an absolute essential for any survival world.