Minecraft is the ultimate creativity game. You have so much choice when it comes to gameplay, whether it's survival, hardcore, creative, or mini-games that you choose to play. As one of the best building games out there, it's no surprise Minecraft also gives you the freedom to choose your very own skin, which you can also make on your own if you know how to make pixel art.
There are tons of different sites to look at for skins, but it's not quite so straightforward to apply those custom skins to your Minecraft avatar. The process is also different depending on which version of the game you typically play on. If you're looking to change your skin from the default Steve or Alex into something more exciting, such as a rare skin, check your edition and follow the steps below.
How To Change Your Minecraft Skin In Java Edition
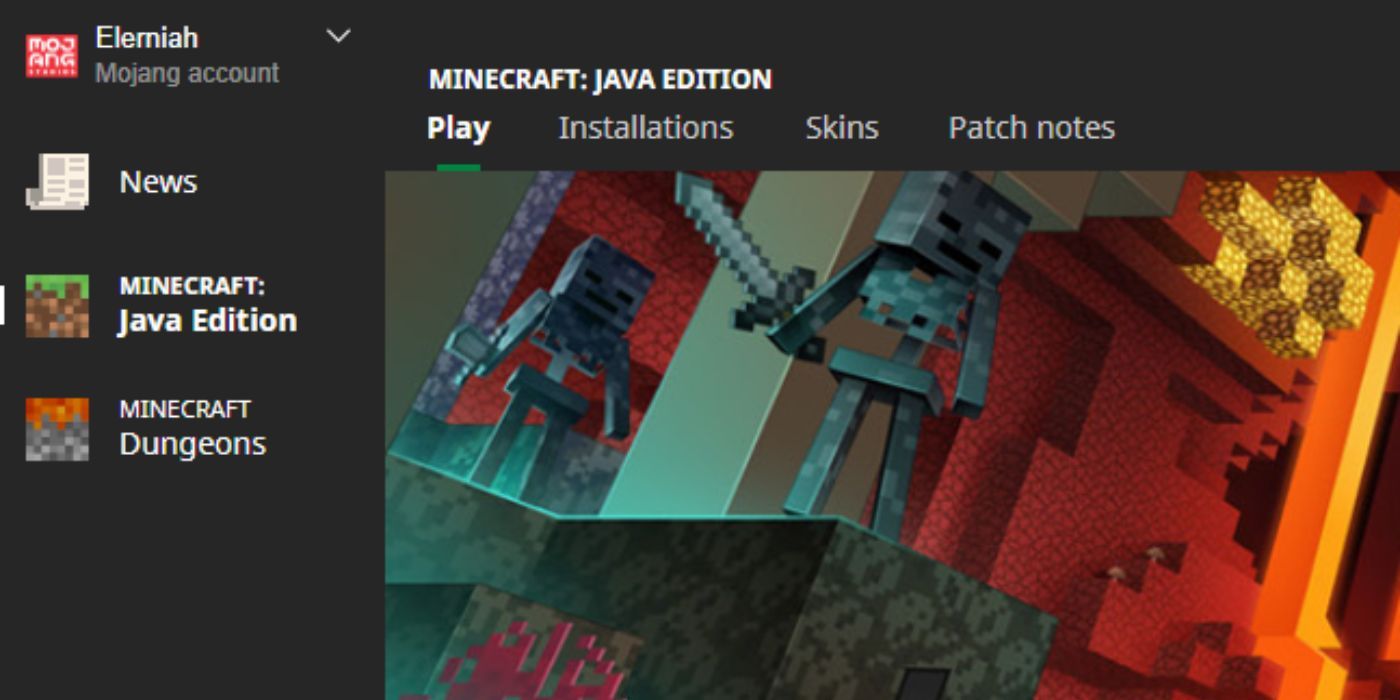
Open up your Minecraft launcher on your desktop as you normally would. Rather than starting the game, look to the top where four tabs are located: Play, Installations, Skins, and Patch Notes. Choose Skins, which is the third option along.
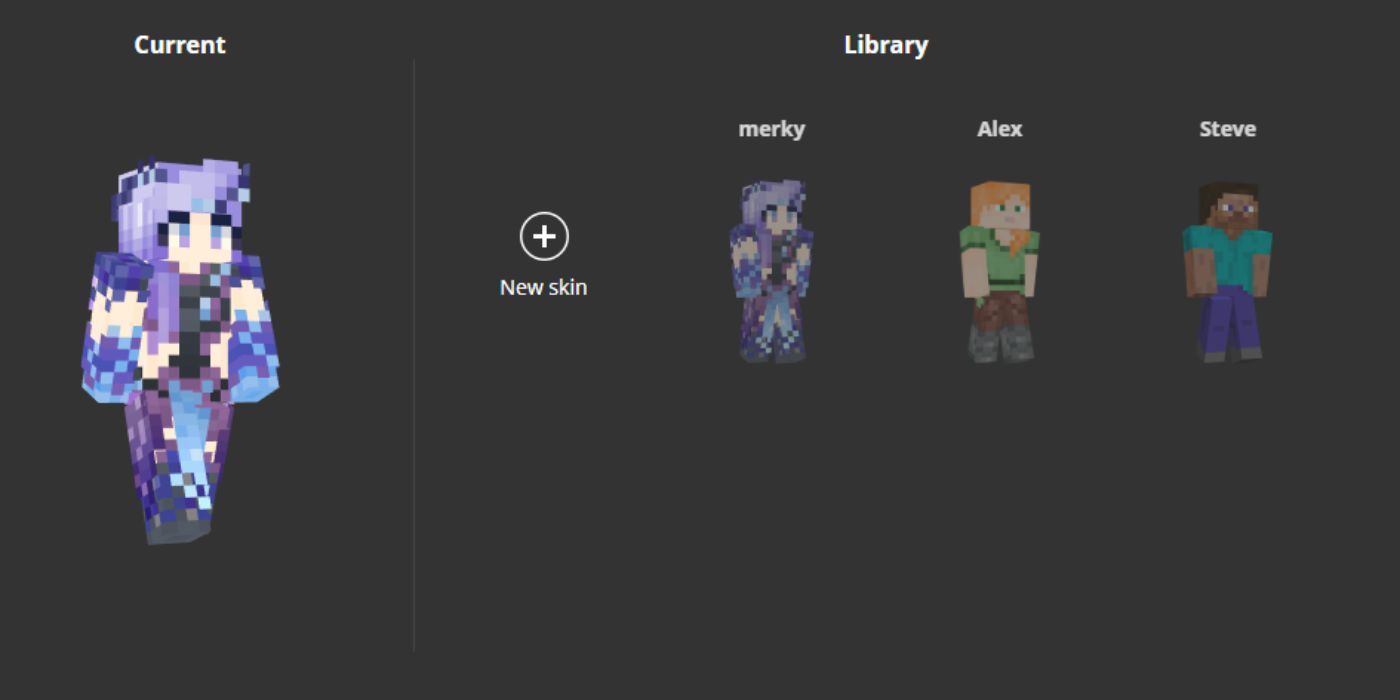
This will bring up your entire skin library. On the left, your current skin is displayed. The two default skins will be available here, as well as any custom skins you may have previously installed.
You can freely switch between any existing skins here, and even rename your skins and edit them if you want.
Uploading A New Minecraft Skin In Java Edition
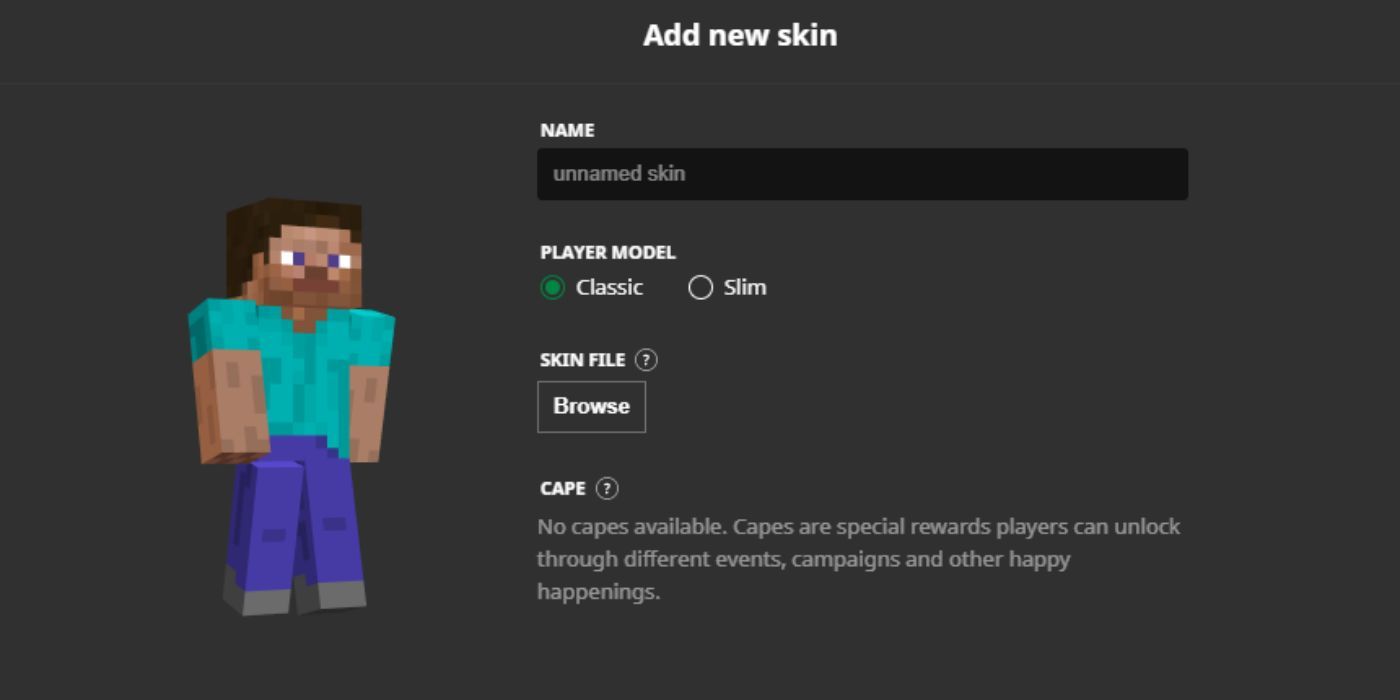
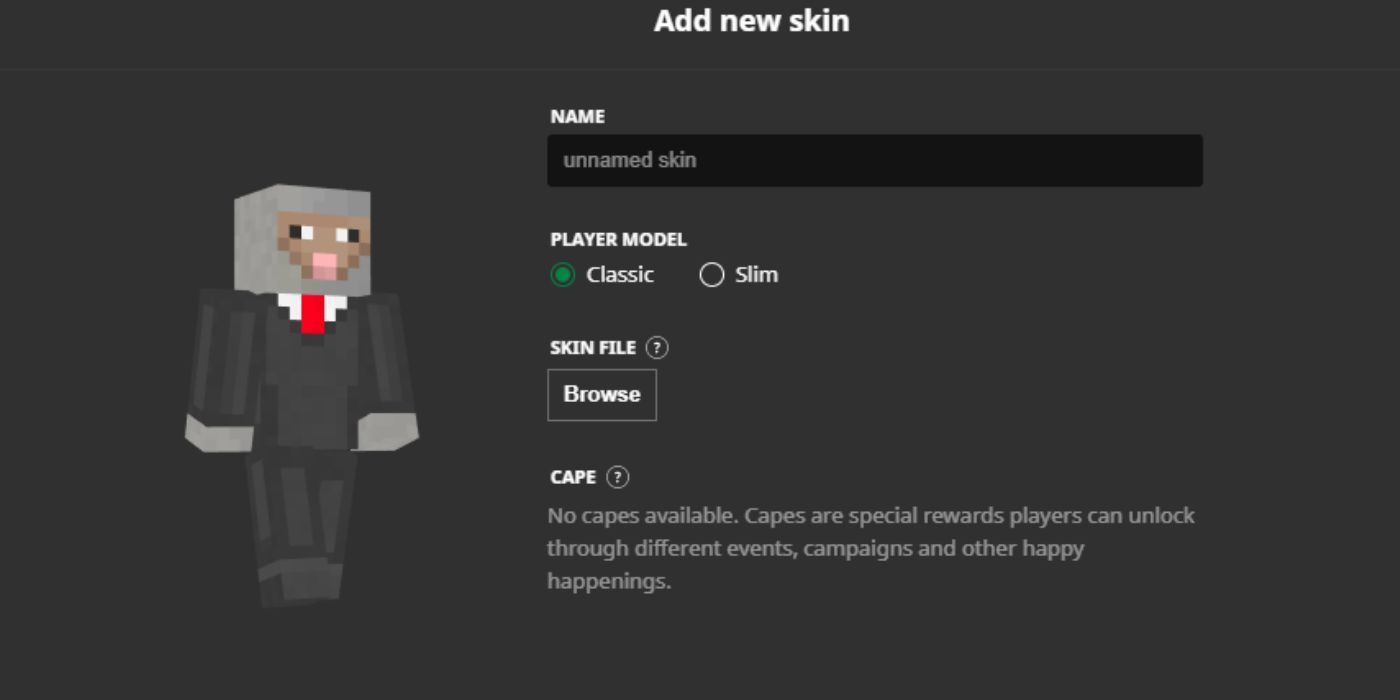
If you want to upload a brand-new skin, click on the large plus icon on the right of your current skin that says "new skin" underneath. You'll see the following window:
This is the new skin window, which allows you to do a number of things. First, give your new skin a custom name to make it easier to recognize.
- Note: Some skins are made with the slim player model, so depending on what type of skin you want to use, select either Classic or Slim.
Once you're done, it's time to upload the actual skin file. Click Browse to open up the file explorer on your PC and locate your skin file.
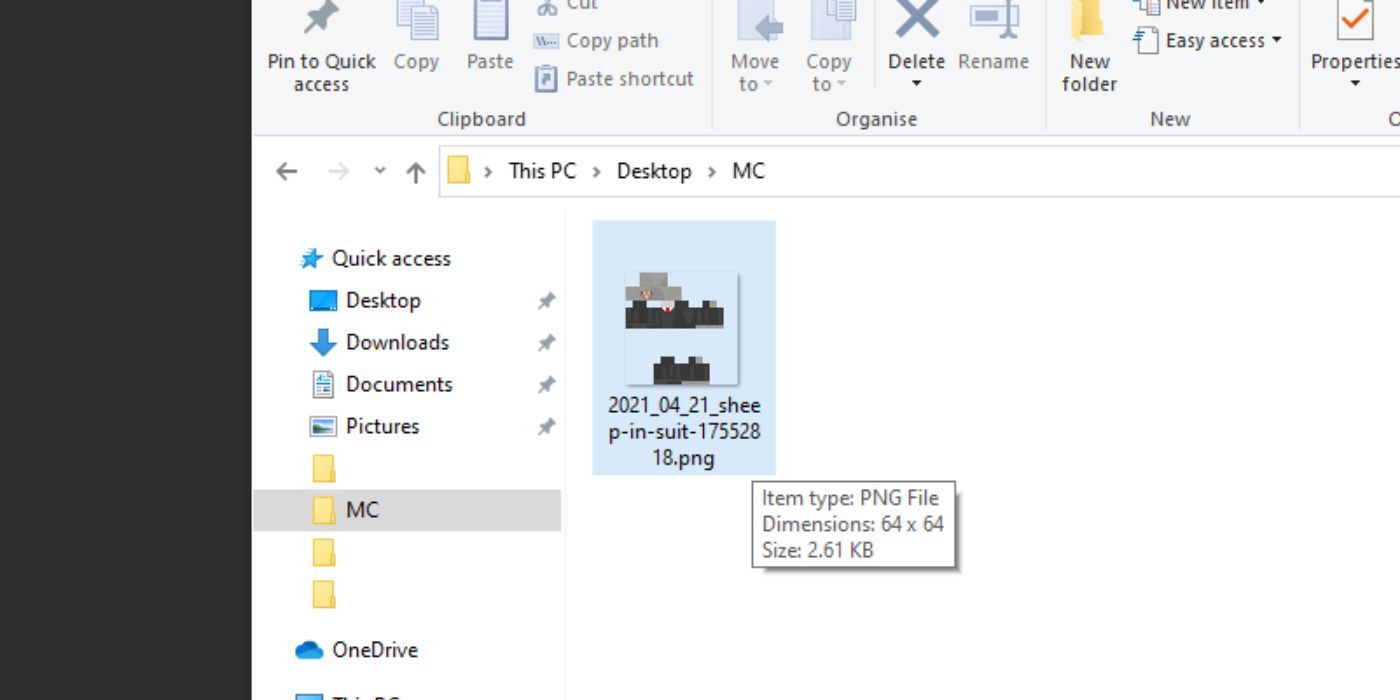
Skin files can be downloaded easily from sites like MinecraftSkins and NameMC. They will typically be downloaded as PNG files, as shown in the picture above.
When downloading make sure to save the PNG file into a folder that's easy for you to find, since you'll need to locate it while browsing for a skin file.
After you've selected and confirmed the skin file, it should appear as a preview on the left side of the new skin window.
Now you can navigate back to your library and select your new skin, which will automatically be updated on your character model the next time you log into the game.
Changing Your Minecraft Skin In Bedrock Edition
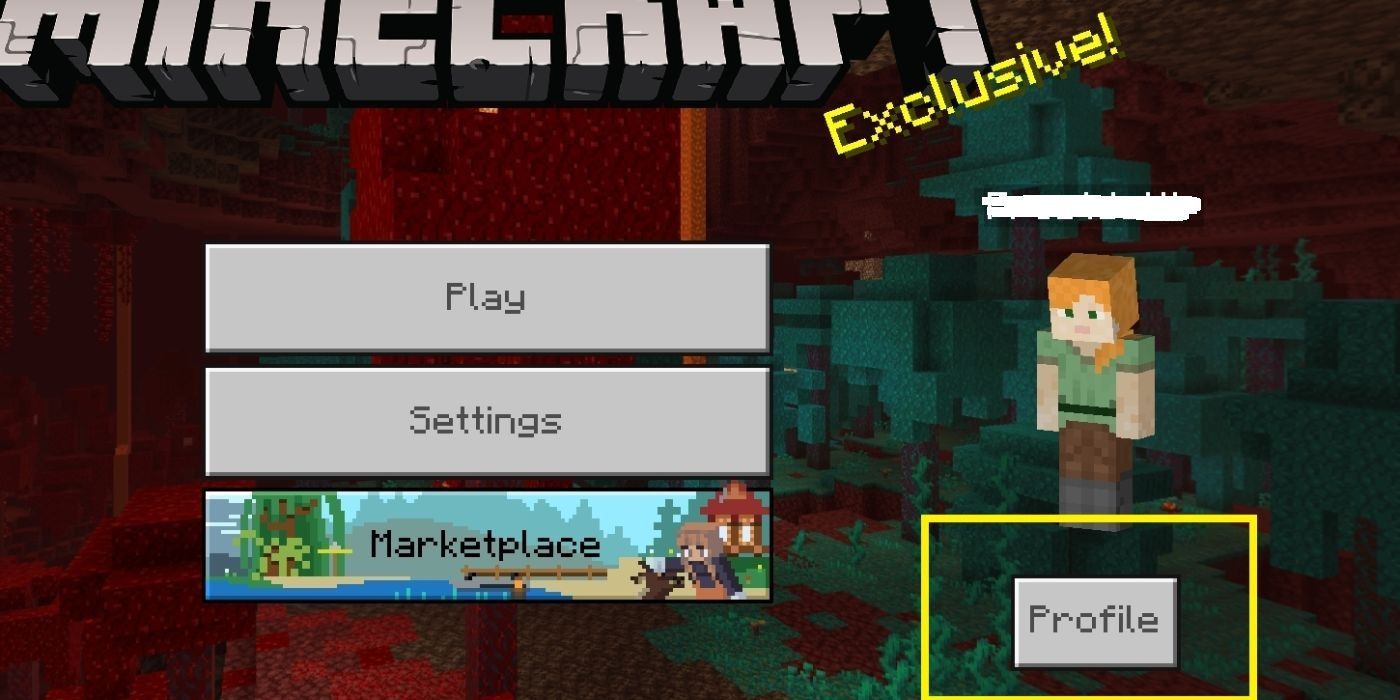
On Bedrock Edition, start Minecraft normally as well, until you arrive at the main menu. You'll want to ignore Play and Settings and rather go to your profile, which is the button located right under your character icon and name on the right side.
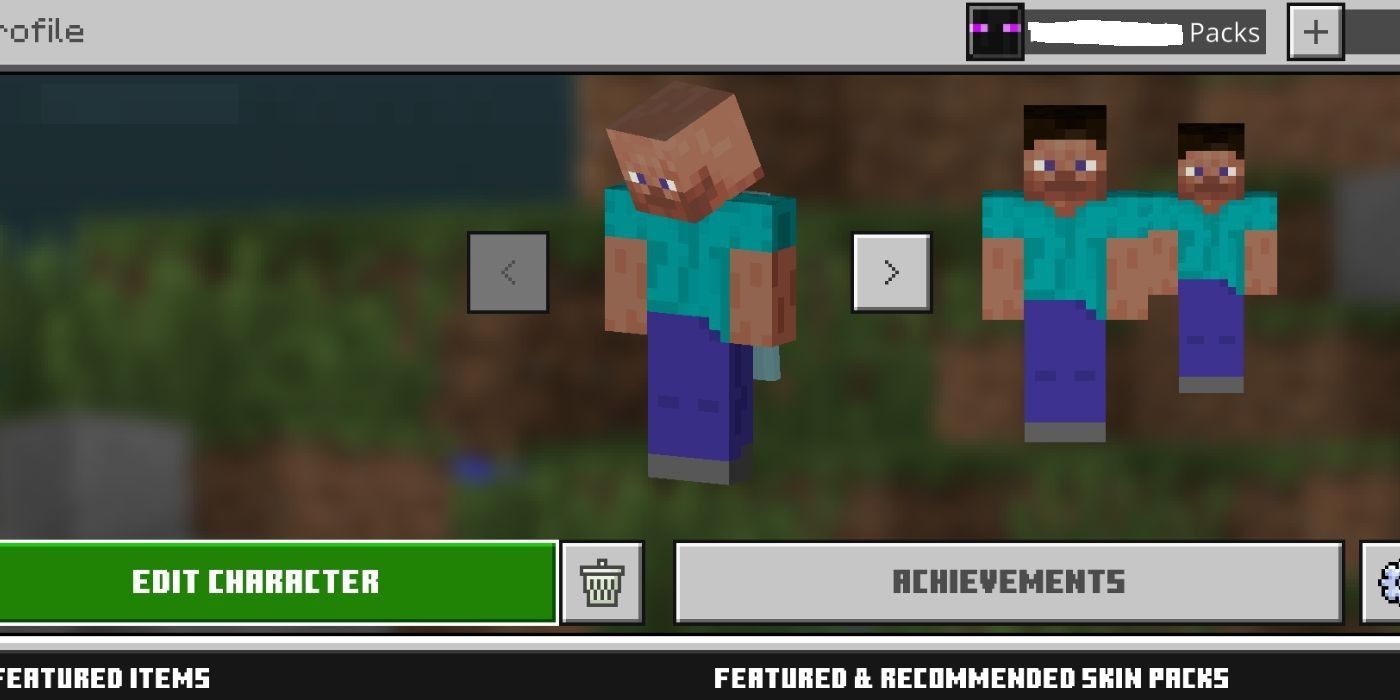
Here you'll see a bunch of your different skins and can scroll through them. You can even find interesting skin packs if you like downloading them.
Pick any of the default skins or custom skins you have and want to replace and then click Edit Character next to the waste bin icon.
Uploading A New Minecraft Skin In Bedrock Edition
In this section, you can create your own skin from scratch by picking through various hairstyles, details, and even clothing. There's a ton of content that can be unlocked from the marketplace, too.
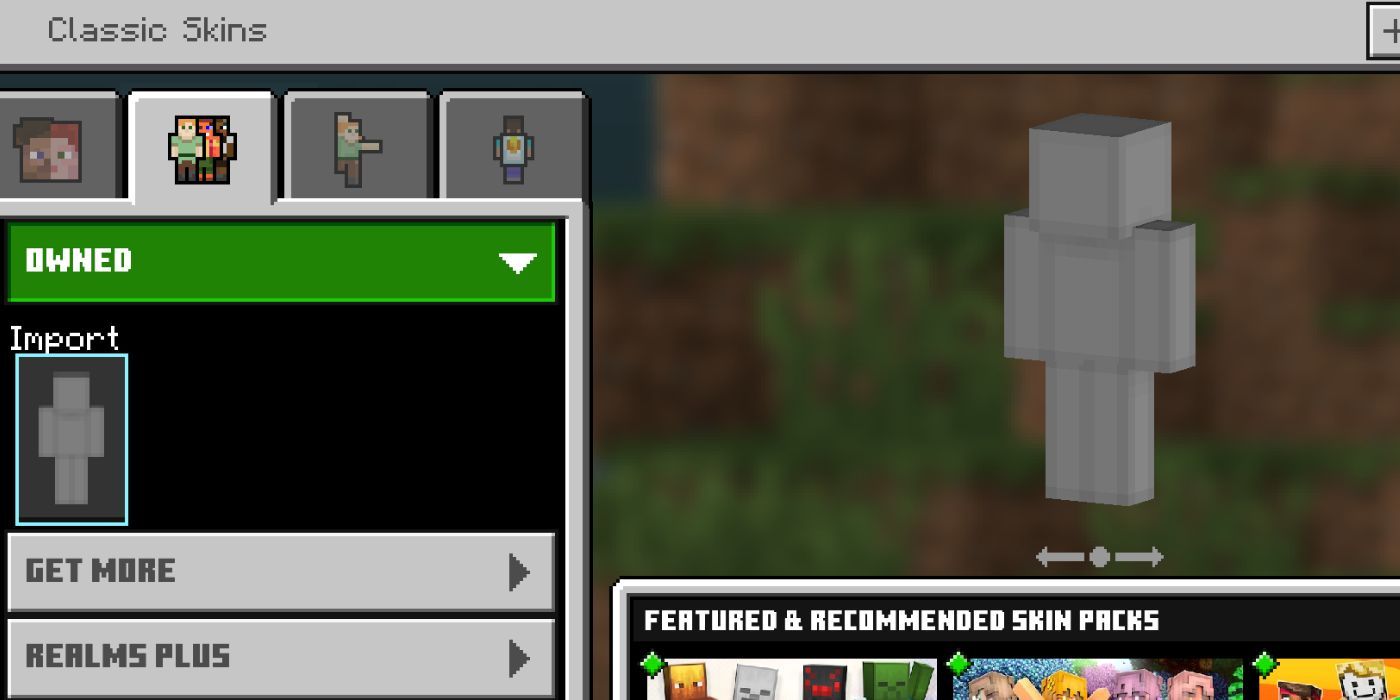
If you just want to upload a custom PNG skin downloaded from a site, go to the second tab on the left and click on the first drop-down menu called Owned. Then click on Import, and look for the PNG file of your new skin.
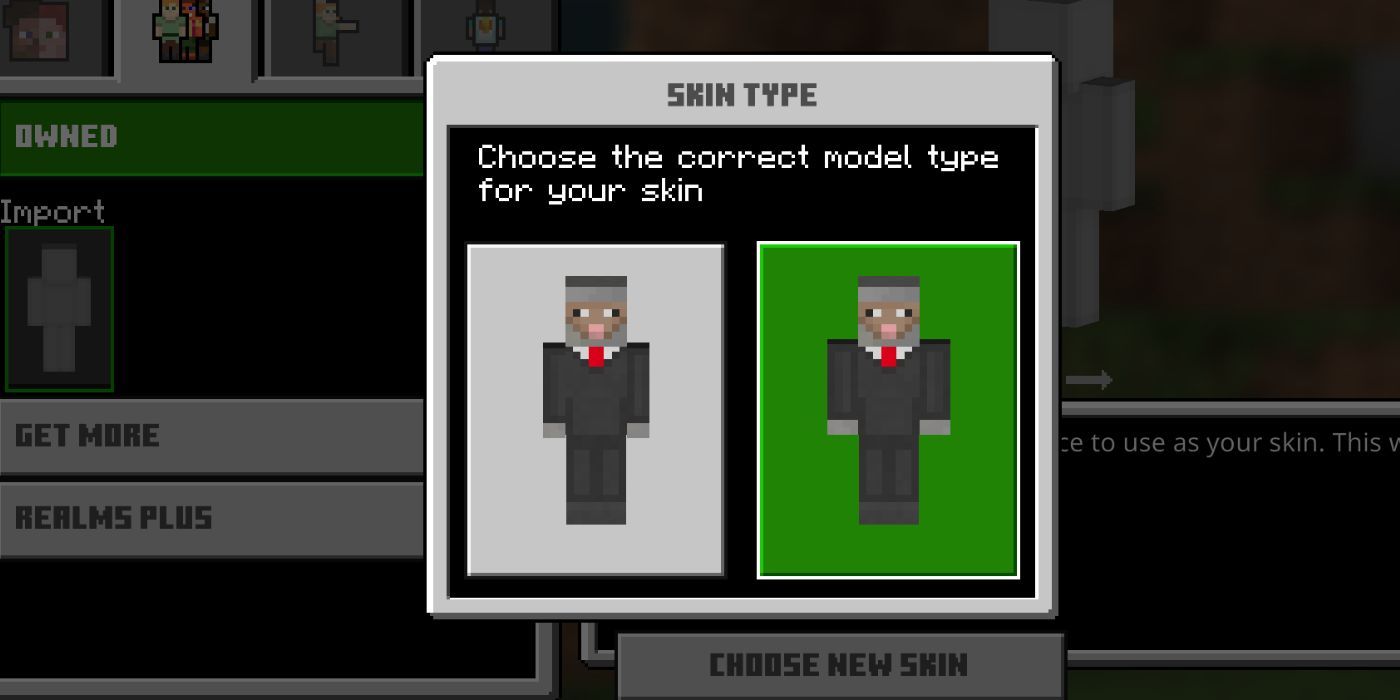
The skin will then appear as two different versions on screen. You can choose either the slim or the regular type, depending on the style of the skin or your preference.
Your skin will be immediately changed after this and you can view it by going into the game.

