One of the most initially confusing aspects of New Pokemon Snap is its star ratings system, particularly the elusive four star photos that are considered to be perfect shots by Professor Mirror. These photos don't even necessarily need to earn high scores - they just need to capture unique behaviour.
There are over 200 Pokemon in New Pokemon Snap, which means getting a four star photo of every single one is no easy feat. Fortunately, we've been playing tons of New Pokemon Snap and have sussed out how to get a four star photo of every Pokemon in the game.
Here's how to get a four star photo of every Pokemon in New Pokemon Snap. This guide is separated into sections representing each of the Lental region's individual areas to make it easier for you to find what you're looking for.
How To Take A Four Star Photo Of Every Pokemon In Florio Nature Park

Dodrio
- When you spawn into Florio Nature Park (Day), give Dodrio a fluffruit.
- It will throw it up into the air for its middle head - snap this in action and you should get a four star shot.
- Alternatively, throw an Illumina orb at a standing Dodrio in Florio Nature Park (Night) and snap it when it jumps into the air and appears to fly for a very brief window.
Pichu
- Head to the meadow of flowers at the end of Florio Nature Park (Day) after interacting with Pichu on every possible occasion (at the start of the map and in the middle in the bushes to the left of Taillow).
- Pichu will be hiding in the grass next to where Grookey is in the meadow.
- Hit it with an Illumina orb and take a snap when it jumps up out of the flowers.
Bouffalant
- Throw an Illumina orb at the Bouffalant in the meadow at the end of Florio Nature Park (Day), which is the one with flowers on its head.
- When it stands up, snap a photo with the Illumina effect still active.
- Alternatively, use Illumina orbs on two Bouffalant at the beginning of the map on your right.
- After they stand up, wait for them to interact with one another by fighting. Take a picture of them while they are locking horns for a four star photo.
Torterra
- In Florio Nature Park (Night), throw a fluffruit at a sleeping Torterra.
- When it opens its eyes, wait for it to yawn.
- Take a photo.
- Alternatively, take a photo of Torterra in the meadow at the end of the map. If it is with Scorbunny and Sylveon, there is a chance for this shot to be four stars, too.
Pidgeot
- In Florio Nature Park (Night), feed the Pidgeot to your right after you spawn.
- Pidgeot will come back halfway through the map, on your left as you pass Bidoof's dam (where Grookey, Pichu, and Shaymin are during the day). Feed it another fluffruit.
- Feeding it fluffruit on both of these occasions will cause it to fly down to you in the meadow.
- Hit it with an Illumina orb and take its photo when it walks up to you.
Comfey
- In Florio Nature Park (Day), play a melody for Comfey.
- Take its photo while its dancing for a four star shot.
Florges
- Load Florio Nature Park (Day).
- At the end of the map, look at Florges in the meadow.
- Throw an Illumina orb at it.
- Take its photo while it conjures a gust of wind around itself.
Ducklett
- On Florio Nature Park (Day), look straight ahead when you turn the corner to your left after the forest with Wurmple in it.
- You should see a Ducklett flying in front of you, above where a group of Taillow are gathered in the center of the path leading to Bidoof's dam.
- Snap Ducklett while it is flying.
Murkrow
- In Florio Nature Park (Night), throw a fluffruit to the first group of Murkrow on your right after you cross the stone bridge.
- Take a photo of Murkrow while it is eating. It doesn't need to be extremely clear to earn four stars - as long as Murkrow is the subject and it's eating, you're fine.
Caterpie
- In Florio Nature Park (Night), go towards the sign before the meadows with Hoothoot on it.
- Play a melody and three Caterpie will crawl on top of the sign. Take their photo.
Grookey
- If you take Grookey the whole way through the map by engaging with it on every occasion it appears, it should do a one-handed handstand in the meadow at the end provided you are at rank two or above. You need to be very quick to capture this.
- Alternatively, you can entice Grookey onto the sign at the start of the map by playing music. This will also award you a four star shot.
Scorbunny
- If you bring it through the whole map, it will laugh in the meadows at the end. When it is lying down and laughing, take its photo for a four star shot.
- Altenrativley, go to the park at night and hit Scorbunny with an Illumina orb when it is standing on the sign to the right of the spawn. Take its photo when it kicks blue flames.
Bidoof
- After they finish their dam, throw a fluffruit through the hole in the top during the day or hit the Bidoof sleeping at the bottom at night in order to make it pop its head out the top of the dam.
- Take a photo for a four star shot.
Tangrowth
- In Florio Nature Park (Night), a Tangrowth will be visible to the right hand side in the intro section.
- Hit it with an Illumina orb and snap it when it launches itself across the screen.
- This is very fast so we recommend not zooming in and spamming the snap button to make sure you get a shot with Tangrowth as the subject in the frame.
Emolga
- In Florio Nature Park (Day), throw a fluffruit at the burnt fruit in the forest across the stone bridge in the intro area.
- This will cause Emolga to fly down and zap the fruit.
- Take a photo of Emolga while it is emitting electricity.
Pinsir
- Go to Florio Nature Park (Night) and throw an orb at the Crystabloom in the forest to wake up Pinsir and make it jump up out of the ground.
- Scan the area and throw a fluffruit towards the trees, particularly the one where Heracross is during the day. Heracross will fall out of the tree.
- This causes another Heracross to spawn on the other side of the map where the second Pinsir usually comes around the corner from Hoothoot's sign.
- Take a photo of Pinsir fighting Heracross for a four star shot.
Heracross
- The above scenario is also a four star shot opportunity for Heracross, so make sure you zoom out and change subjects so you can get four star shots of both of them.
Meganium
- Go to the Florio Nature Park Illumina Spot and take a photo of Meganium after Hoothoot lands on its head. If you're wondering how to make this happen, check out our New Pokemon Snap Meganium's Pal guide.
- Alternatively, hit the second Crystabloom flower in the map with an Illumina orb and take a snap of Meganium when it stands up on its hind legs. You also need Meganium to be in its Illumina state, so be sure to hit it with orbs, too.
Hoothoot
- Also gets a four star shot opportunity from the Meganium interaction mentioned above.
- Alternatively, go to Florio Nature Park (Night) and play a melody for the Hoothoot in the hole in the tree who is asleep during the day.
- This causes more Hoothoot to come out. Snapping them flying while dancing to the music is a four star shot.
Vespiquen
- When you get to the meadow at the end of Florio Nature Park (Night), hit the Crystabloom on your right.
- This will cause Combee to race off and get Vespiquen.
- When Vespiquen arrives, hit it with an Illumina orb.
- This will cause it to do a backflip - quickly take a snap for a four star shot.
- I did this at rank three, I am not sure if it is doable at lower ranks.
Shaymin
- After you finish the game, Shaymin will start appearing in Florio Nature Park.
- Similarly to Scorbunny, Grookey, and Pichu, Shaymin has a unique action at the end of the map if you interact with it at the beginning, in the grass in the middle, and at the end.
- Hitting Shaymin with an Illumina orb at the end after interacting with it the whole way through will set up a four star snap opportunity.
- Alternatively, you can sometimes get a four star snap of Shaymin in the Florio Nature Park Illumina Spot.
- This can be done by throwing Illumina orbs at the cliff above the first Crystabloom to wake Shaymin up.
- When Meganium gets to the cliff, it will let Shaymin jump on its head.
- If you snap Shaymin mid jump - which requires you to use the turbo to get into position - it sometimes awards you four stars, although this is not reliable.
Sylveon
- Go to Florio Nature Park (Night) at rank two.
- When you get to the middle section, you will see several sleeping Torterra,
- The last sleeping Torterra on the left, where Tangrowth usually is during the day, has a Sylveon sleeping next to it.
- Hit Sylveon with an Illumina orb to wake it up.
- When you get to the meadows, Sylveon will be asleep with another Torterra and any starters or baby Pokemon you brought through the map with you.
- Hit the Crystabloom beside it with an Illumina orb and take a snap for a four star shot.
Wurmple
- Go to Florio Nature Park (Day).
- Make your way through the map until you reach the Bidoof dam on your right.
- Continue forward towards the stone bridge before Tangrowth during the day and where Swanna swims with two Ducklett at night.
- Look to the trees ahead and you will see a flock of Taillow.
- Take a photo of them and they will move on to the next area necessary for this shot.
- When you go around the corner where the Hoothoot is asleep in a tree, you will see Taillow bothering Wurmple.
- Hit Wurmple with an Illumina orb and it will use a poison attack against Taillow.
- Make sure to only Illumina Wurmple - if you hit Taillow with the orb too this won't work.
- Take a photo while Wurmple is using the attack to get a four star shot.
Taillow
- If you photograph Taillow in the above scenario while it is being hit with the poison attack, you'll be awarded a four star shot.
How To Take A Four Star Photo Of Every Pokemon In Founja Jungle

Quagsire
- In Founja Jungle (Day), make your way to the final area of the map, right where the waterfall is.
- Watch Quagsire and wait for it to jump into the water.
- Take a photo of it while it is still in mid air.
Pikipek
- In Founja Jungle (Day), keep an eye out for Pikipek's nest hole in a tree.
- This will be pointed out as a scannable prompt from rank two.
- Throw a fluffruit into the hole. This is just before you move towards the ancient ruins, on your left after the swamp with Quagsire (or Swampert at night time).
- Snap Pikipek as it flies out of the hole with the fluffruit in its talons.
Yanmega
- This is a tough one. First you need to get Founja Jungle (Night) to rank two.
- Just before you reach the swamp, where Swampert is asleep underwater, throw a fluffruit at Leafeon when it stops to the right of some long grass.
- This unlocks the Founja Jungle alternate swamp route.
- Now reload Founja Jungle (Night) at rank one.
- Before the swamp, use the music player to cause Yanmega to fly towards the swamp.
- Go into the swamp and use Illumina orbs on the Ariados in front of you.
- Play the melody again immediately to bring Yanmega over.
- A third Ariados will come out of the forest to attack Yanmega.
- Illumina orb this Ariados but make sure you do not use an Illumina orb on Yanmega.
- Ariados will attack Yanmega. If you use an orb on Yanmega, Ariados will run away and you will miss your opportunity.
- Take a photo of Yanmega while it is being attacked by all three Ariados.
Ariados
- The above scenario is also a four star shot opportunity for Ariados.
- Alternatively, wake the Ariados on its web to the left of the spawn point up.
- Take a shot of it as it attacks two Bounsweet and knocks them off the web for another four star shot.
Bounsweet
- The two Bounsweet on Ariados' web mentioned above only appear if you play music to the two Morelull behind you when you spawn.
- If you wake Ariados up, be sure to snap the Bounsweet before it knocks them off the web.
Ledian
- Head to Founja Jungle (Night).
- When you reach the ancient ruins at the halfway point, look down and hit the two Crystabloom flowers below you with Illumina orbs.
- This will cause three Ledian to fly out.
- Keep moving until you reach the sleeping Liepard. Once you pass this, one of the Ledian will land.
- Throw a fluffruit at it and take a snap when it starts eating.
Arbok
- Go to Founja Jungle (Night) rank one.
- When you spawn, look at the trees directly in front of you after going past the branch Liepard runs across.
- Arbok will be asleep in the tree.
- Pelt it with fluffruit until it falls and take a photo of it while it's falling.
Mew
- Go to Founja Jungle (Night) after finishing the game.
- Turn around at the spawn, throw Illumina orbs at the two Morelull behind you, and play music.
- A pink ball of light will emerge - this is Mew.
- Mew will follow you through the map. Every time it appears, you need to burst its bubble with a fluffruit and take its photo when it is dazed.
- If you hit it every time it appears, it will show up on the tree before the waterfall route.
- When it comes right up to the glass of the NEO-ONE, take its picture for a four star shot.
Swampert
- Swampert's four star shot is pretty complex, so we decided to cover it in detail as part of our comprehensive guide on how to wake up Swampert. If you check that guide out, you'll figure out how to get easy four star shots of both Swampert and Leafeon.
Leafeon
- As mentioned in the section above, check out our guide on how to wake up Swampert if you want to get four star shots of both Swampert and Leafeon in one go.
How To Take A Four Star Photo Of Every Pokemon In Sweltering Sands

Skorupi
- Skorupi is one of the easiest four star photos in the game. In the Sweltering Sands (Day) level, simply wait for it to be swept up in the first sandstorm. This is in the area around the corner to the right of the spawn.
- Take a picture of Skorupi while it is flying around the sandstorm.
Cacnea
- At the end of Sweltering Sands (Day), take the left route at the junction. This is the original rank one route that ends with Trapinch, Hippowdon, and Pinsir instead of Onix.
- Watch Cacnea run around the Trapinch crater. It is chasing some sort of debris - snap it doing so and you'll get a four star photo.
- Alternatively, snap the Cacnea flying through the air at the first sandstorm, near the Skorupi shot.
Minior
- Minior is an easy shot to take, but it's difficult to explain. At the end of Sweltering Sands (Night) on the Onix side, make sure you snap Minior while it's in the middle of the shot.
- If it's surrounded by space dust and centered properly, this should theoretically always award a four star shot. Alternatively, try to get more than one Minior in the frame. This appears to be mostly about colour and composition.
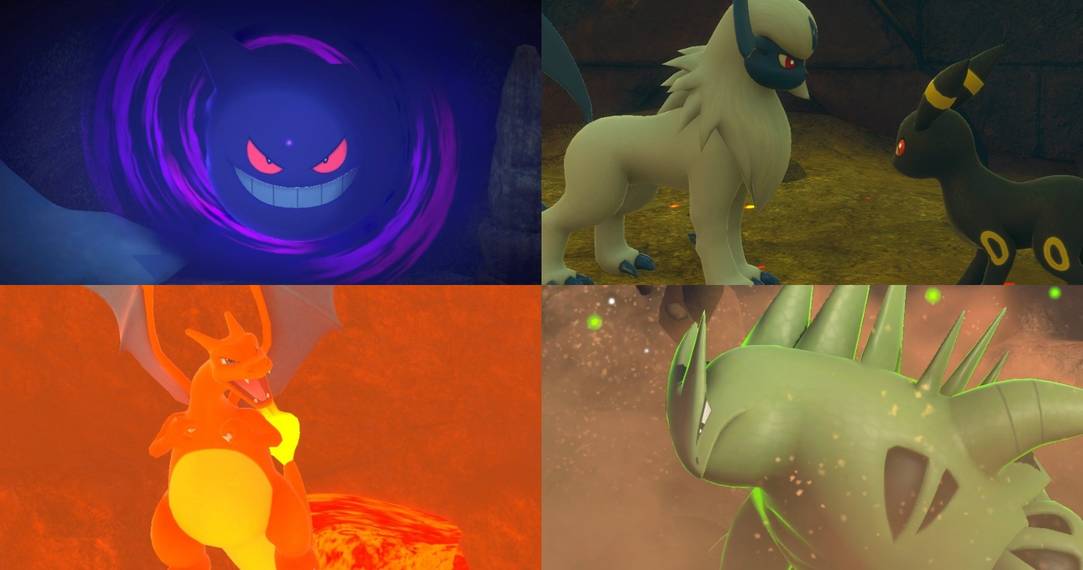
Tyranitar
- Load Sweltering Sands (Day) at rank two or three.
- Take the right route at the junction if playing rank three.
- Tyranitar will be right in front of you. Watch it until Lycanroc comes up and barks at it.
- When Lycanroc runs away, throw an Illumina orb at Tyranitar.
- This will make it smash the rock it is facing. Take a photo of it while it's doing this.
Torchic
- In Sweltering Sands (Day) at rank three, entice Torchic into getting on Hippowdon's back.
- This is done in the pool in the middle of the map by luring Torchic to the water's edge with fluffruit.
- If you Illumina Hippowdon, it should allow Torchic onto its back.
Hippowdon
- Snapping Torchic on Hippowdon's back is a Torchi four star shot, but snapping Hippowdon in this scenario is also four stars. Make sure to zoom out so you can switch subjects and take both shots.
Heliolisk
- Get Sweltering Sands (Day) to rank three.
- Turn left at the junction so that you move towards the end location with Pinsir and Trapinch instead of Onix.
- On your left immediately after you go down the sand hill to the end location, you will see Heliolisk.
- Snap them when they fan out their frills at each other four a four star shot.
- Alternatively you can get the Heliolisk at the beginning of the map to fan out its frills while emitting electricity by hitting it with an Illumina orb, but only at rank three during the day.
Flygon
- At the end of Sweltering Sands (Night) from rank two, you can get a four star shot of Flygon by taking the path to the left (where Pinsir is during the day, not Onix).
- In the crater where Trapinch usually is there will also be a Flygon.
- Wake it up with a fluffruit.
- When it flies up, hit it with an Illumina orb.
- Take a photo while it whizzes around the sky leaving a trail of multicoloured light behind it.
Kanghaskan
- Go to Sweltering Sands (Night) at rank two.
- Take the left route at the junction to where Flygon is, as described above.
- Kanghaskan will be sitting behind the pool. Throw a fluffruit near it but don't hit it - you can't be aggressive.
- You can throw orbs too if you want to help your chances because this action sometimes doesn't happen as a result of RNG. Same goes for the music player - just don't hit it with fluffruit.
- Once Kanghaskan recognizes you as a friendly person, it will take its baby out of its pouch and toss it in the air playfully. Snap this for a four star shot.
How To Take A Four Star Photo Of Every Pokemon In Blushing Beach

Machamp
- Go to Blushing Beach (Day) at rank three.
- When you get to the junction, turn right.
- Machamp will be looking out to sea doing poses.
- Hit it with an Illumina orb and take its photograph as soon as it turns around to face you.
Exeggutor
- In Blushing Beach (Day), look at the sleeping Exeggutor in the bushes Bellossom or Seviper are in depending on whether its day or night. respectively. This is to the left of the first beach area where you spawn.
- There will be a Crabrawler to the right of Exeggutor.
- Lure Crabrawler towards Exeggutor with fluffruit.
- When Crabrawler is close enough, it will punch Exeggutor.
- Take a photo of Exeggutor chasing Crabrawler for a four star snap.
Crabrawler
- The above scenario is also a four star shot opportunity for Crabrawler.
Seviper
- On Blushing Beach (Night), throw fluffruit into the bush at rank two to get Seviper to come out of hiding.
- There is a Crystabloom next to it - hit it and Seviper with an Illumina orb.
- This will cause Seviper to examine the point on its tail. Take a photo.
Octillery
- This requires you to get Seviper out of hiding using the steps above.
- At the junction, take the right route, past the sleeping Alolan Raichu instead of going straight past the sleeping Zangoose.
- When you turn the corner, you will see Octillery getting attacked by Seviper.
- Throw an Illumina orb at the Crystabloom beside Octillery.
- This will cause Octillery to shoot ink at Seviper. Take a photo of this.
Bellossom
- Visit Blushing Beach (Day) and look at the bushes on the left of the first beach area.
- Play a melody to make Bellossom come out of the bushes.
- Hit the Crystabloom beside Bellsossom with an Illumina orb.
- Take a photo of the middle Bellossom while the Illumina orb is lit to get a four star shot.
Pikachu
- Get Blushing Beach (Night) to research level two.
- Immediately after you spawn, you'll see to Pikachu on your right.
- Throw Illumina orbs at them and take a photo of them jumping up and down as they greet each other.
Finneon
- Go to Blushing Beach (Night) and head towards the end of the map.
- In the final section where Alolan Raichu sand surfs on its tail, there will be three Finneon in the sea on the right.
- Throw orbs and fluffruit at them until one of them jumps up into the air.
- Take a photo of it at the apex of its jump for a four star snap.
Zangoose
- Go to Blushing Beach (Night) at research level three.
- Look out to the sea past where the two Pikachu are and you should be able to see a Primarina on a rock.
- Hit the Primarina with an Illumina orb.
- Continue through the map and go left at the junction, towards the sleeping Zangoose and Bellossom.
- Primarina will now be on a platform opposite Zangoose.
- Hit the Crystabloom next to Primarina and it will start singing.
- This will cause Zangoose to nod along to the music.
- Take a photo while it's doing this for a four star shot.
Primarina
- The above scenario also gives you a four star shot opportunity for Primarina if you take a photo of it while it's singing.
How To Take A Four Star Photo Of Every Pokemon In Maricopia Reef

Wingull
- Go to Maricopia Reef (Day) at rank two.
- At the beginning of the map, right after the spawn point, you'll see a small school of Finneon.
- When they bolt in either direction, pay attention to the one in the middle that jumps up.
- Wingull will snatch the Finneon and fly off with it. Take a photo of Wingull with Finneon in its talons.
Pyukumuku
- At the end of Maricopia Reef (Day), you will see several Pelipper relaxing in the water.
- Look closely and you'll see some Pelipper have Pyukumuku in their mouths.
- Hit Pelipper with a fluffruit and snap Pyukumuku as it is spat back into the water.
Pelipper
- Photographing Pelipper in the above scenario also awards a four star shot provided you get its full body in the frame.
Machamp
- On Maricopia Reef (Day) from rank two onward, Sharpedo will start to chase Machamp.
- This is the Machamp on the rock after Wailord.
- Machamp will stop posing and jump in the water before swimming away from Sharpedo.
- It will stop just before the alternate route junction. Sharpedo will repeatedly jump in and out of the water behind it. Snap it while it's doing this for a four star shot.
Vaporeon
- After finishing the game, you will unlock Maricopia Reef (Evening).
- When you go past Primarina, who is on the rock where Machamp is during the day, you will get an environmental prompt. Scanning it will tell you something is beneath the water.
- Play a melody and take Vaporeon's photo as it jumps up out of the water.
Wailord
- In Maricopia Reef (Evening), throw an Illumina orb at the Wailord on the right hand side. Ignore the one directly in front of you.
- Take its photo when it shoots water out of its blowhole.
Alolan Raichu
- Unlock the reef at night by finishing the main story.
- A Raichu will be asleep on your left shortly after you spawn.
- Wake it up, throw an Illumina orb at it, and play a melody to make it breakdance. Snap this action for a four star shot.
Blastoise
- In Maricopia Reef (Evening), throw Illumina orbs into the whirlpool on your right. This will be pointed out by an environmental prompt.
- Continue to spam Illumina orbs until Blastoise jumps out of the whirlpool.
- When it is in mid air it will pop out its arms, legs, and head before using its water cannons to jet off.
- Take a photo of this for a four star shot.
Lapras
- Turn right at the junction after Vaporeon in Maricopia Reef (Evening).
- There will be four Lapras here. Throw Illumina orbs at all four of them and play a melody.
- Take a snap of the adult Lapras dancing with the baby one for a four star snap.
How To Take A Four Star Photo Of Every Pokemon In Lental Undersea

Cradily
- In Lental Undersea from rank two, Cradily will spawn in the seaweed section where Lumineon, Finneon, and Luvdisc are.
- Hit it with a fluffruit to wake it up.
- Play a melody to make it dance.
- Take its photo, but not close up. Make sure you get its full body in the frame while it is dancing and capture it while its neck is extended to the side.
Magikarp
- In Lental Undersea at rank three, go to the ordinary end point. Don't turn in at the Clawitzer boulder - continue towards the seaweed.
- At the end of the map, after the two Clawitzer have their fight, go up the vertical tunnel to the teleportation point.
- There will be several Frillish with Magikarp in their arms. Snap one of the Magikarp.
Qwilfish
- In Lental Undersea at rank three, follow the ordinary route to the end. This is not the deep sea alternate route that leads to Lugia and Golisopod.
- In the cavern with Clawitzer and Qwilfish, wait for the two to fight.
- Throw a fluffruit at Qwilfish at this point to make it shoot spikes.
Lumineon
- In Lental Undersea, take the alternate route to the left after Clawitzer smashes the boulder. This requires rank three but is retroactively applied to earlier ranks after you initially unlock it.
- After you go through the cavern with Chinchou and Inkay, you will reach an open area with Wailmer.
- You will soon see a Sharpedo bothering a Lumineon and two Finneon. Hit the Crystabloom next to Lumineon with an Illumina orb.
- Lumineon will spin around in the pink light to scare off Sharpedo - take its photo when it does this.
Clamperl
- In the next part of the map after the section mentioned above, you will go through a tunnel towards the alternate route teleportation point with Golisopod.
- The tunnel is filled with several Lumineon.
- There are blue shells in the sand beneath you. Draw Lumineon over to one with fluffruit.
- Lumineon will dig up the shell with its fins, causing Clamperl to swim away. Take a photo of it while it's swimming.
Starmie
- In the same tunnel as Clamperl there are also pink gems in the ground.
- Use the same tactic from the previous section to get Lumineon to dig Starmie up.
- Starmie will swim away. As you go into the end area, keep an eye out for a Crystabloom. You should be able to see it at the ancient ruins on your left after passing the stationary Golisopod.
- Hit the Crystabloom with an Illumina orb and take a snap of Starmie when it comes over to it.
Frillish
- Take the alternate Clawitzer route through the cavern with Chinchou and Inkay mentioned above.
- When you see the Sharpedo annoying Lumineon, start looking all around you.
- You will eventually see a Lanturn - hit it with an Illumina orb.
- This will cause it to swim up and then back down.
- Wait until Wailord comes up from the bottom of the tunnel and look straight ahead after it moves past you.
- Two Frillish will be holding Lanturn. Snap them for a four star shot.
Lanturn
- After taking a shot of the Frillish above, hit Lanturn with an Illumina orb.
- This allows it to escape. Take a photo while it is in the process of breaking free for a four star shot.
Wishiwashi
- In the Lental Undersea Illumina Spot, throw orbs at Wishiwashi until it goes into school form.
- When it's in school form, throw more orbs at it to make it go into its Illumina state.
- If you throw enough orbs at it, it will conjure up a whirlpool and start swimming around it.
- Snap it while it's doing this for an easy four star shot.
How To Take A Four Star Photo Of Every Pokemon In Fireflow Volcano

Archeops
- In Fireflow Volcano, make your way to the lava ground before the volcano. This is the area where Tyrantrum chases a bunch of Archeops as Talonflame perches on a pillar to your left, right after the hill where three Graveler roll down.
- Throw a fluffruit in front of one of the Archeops.
- Snap it while it's eating and after it's finished for a four star shot.
Charizard
- Get Fireflow Volcano to rank three.
- Turn left at the junction towards the original end location - the one with Charmander, Slugma, and Torkoal, not Typhlosion and Aerodactyl.
- At rank three there will be a Tyrantrum roaring at a Charizard.
- Charizard will fly down towards it and roar back, staying suspended in the same place.
- Take a photo of it while it is stopped in mid air and roaring at Tyrantrum.
Luxray
- At rank three take the left route towards Charizard.
- When you get to the sleeping Tyrantrum, you will see a Luxray on your right just a few seconds after choosing to turn left.
- Throw an Illumina orb at it and take a snap when its eyes change colour.
Aerodactyl
- Load Fireflow Volcano at rank two.
- At the end of the map, throw fluffruit at the Typhlosion to make them run away.
- Aerodactly will now land at the bottom of the crater.
- Feed it a fluffruit and snap it while it is eating.
Flareon
- Get Fireflow Volcano to rank two or higher.
- When you encounter Flareon in the blue magma chamber on the route to the right of the volcano (the one that leads to the chamber with two Typhlosion in it), feed it a fluffruit.
- Feed it a second fluffruit and it will burn it before eating it. Flareon will then stand up and use Flamethrower - take a photo to get a four star shot.
Typhlosion
- Take the right route so you end up going through the blue magma chamber to the end location with Typhlosion.
- This can be tricky, as Typhlosion sometimes just runs away, but try to throw a fluffruit in front of it without hitting it.
- When it comes over to the fluffruit and conjures flames on its neck, you're on the right track.
- It will use Flamethrower on the fluffruit - snap this action for a four star shot.
Ho-oh
- Ho-oh has a very complex solution for a four star shot, so we've put together a separate guide for how to get Ho-oh and take a four star shot of it.
Volcarona
- Similarly to Ho-oh, the requirements for taking a four star shot of Volcarona are pretty complex, so we've put together a whole separate guide for how to beat Volcarona and take a four star shot of it.
How To Take A Four Star Photo Of Every Pokemon In Elsewhere Forest

Unfezant
- In the standard Elsewhere Forest route at rank one, proceed through the first fog biome without pursuing any alternate routes.
- When you get to the next area, with Shiftry, Pancham, Unfezant, Bulbasaur, and Deerling, focus on the left hand side of the path.
- You will cross a small river before moving back to the fog. There will be an Unfezant in a nest to your left.
- Hit it with a fluffruit and snap it when it gets angry.
Deerling
- In the third part of Elsewhere Forest - the second foggy section - turn right from where you spawn and you will see a Crystabloom.
- Throw an orb at the Crystabloom to make it light up, which will attract Deerling.
- Keep moving forward until you see two more Crystabloom flowers on your right. The first one attracts Espurr but don't hit it because it distracts Deerling. Hit the one further away and make sure Deerling sees it.
- Keep looking to your right until you see more Crystablooms. Light them up and eventually Espeon will jump down. When Deerling arrives at this flower with Espeon, take its photo for a four star shot.
- The most likely time to get a four star shot here is when Deerling is smiling and Sawsbuck has jumped down.
Sawsbuck
- Use the instructions above to light up the Crystablooms and escort Deerling through the fog.
- Take a shot of Sawsbuck as soon as it jumps down for a four star snap.
Espeon
- Go to the Elsewhere Forest Illumina Spot and feed the Espeon on the island next to Serperior a fluffruit.
- Take a photo of it when it's finished eating and stands up for a four star shot.
- Alternatively, play a melody in the first part of Elsewhere Forest so Trevenant moves out of the way and allows you to take the alternate route on the right.
- Throw an Illumina orb when Espeon runs in front of you and take a four star shot of it.
Drampa
- Follow the steps in the Deerling instructions above.
- After you reunite Deerling and Sawsbuck, you'll see another Crystabloom on your right.
- Light this up and you can go a different way. This leads to the multiseason biome instead of the ordinary end section.
- Provided you didn't take other alternate routes, there should be a Drampa playing with Bulbasaur and other small Pokemon at the end of this section.
- Hit the smaller Pokemon with fluffruit and take a snap of Drampa when it gets angry at you.
Kecleon
- In the third area of Elsewhere Forest - the second fog section - keep an eye on your left.
- As you progress along the main path, keep using your scanner to watch out for "???" Pokemon.
- These are Kecleon and you can make them visible by throwing Illumina orbs at them.
- There is one Kecleon on the left hand side who is asleep.
- Hit it with an orb and then hit it with a fluffruit to make it visible and wake it up.
- Take a photo of it in this state for an easy four star shot.
Milotic
- Head to the Elsewhere Forest Illumina spot.
- To get Milotic to raise its head above water, hit it with a fluffruit.
- This allows you to throw orbs at it - two orbs will make it enter its Illumina state.
- After it jumps over the overgrown route into the second part of the lake, it will go around to the right.
- Wait for it to come back down the next river lane and hit it with fluffruit again.
- Illumina it and it will jump up on shore with Trevenant.
- Hit the Crystabloom to the left of Trevenant and Ninetales will come over.
- When Milotic gets back in the water, use fluffruit to make it raise its head one more time.
- Throw Illumina orbs at it.
- Milotic will now swim around in a circle before raising itself up from the water.
- Milotic will jump up into the air and use Twister.
- This is a three star photo - hit it with another orb during Twister and it will propel itself up even further and use it a second time.
- Take a photo of the second Twister for a four star shot.
How To Take A Four Star Photo Of Every Pokemon In Shiver Snowfields

Jynx
- Jynx will occasionally extend its hand to the right as if to point at something while looking at Vanilluxe in the cavern leading to the end of the map. This is a four star pose.
- Alternatively, you can get a much easier four star shot by taking the alternate routes in Shiver Snowfields.
- First, load into Shiver Snowfields (Day) at rank two or above and look to your left.
- Throw an Illumina orb at Alolan Sandslash, who will burrow underground.
- Keep looking to the left and use your scanner to spot Sandslash again. Throw another orb at it.
- This will unlock the first alternate route at the start of the hill Swinub is trying to climb.
- Now come back to Shiver Snowfields at night.
- Take the alternate route and hit Crabominable with an Illumina orb.
- When it dumps snow on Abomasnow, watch the snowstorm it conjures. A Froslass will emerge - take its photo.
- This will reveal a second alternate route.
- Hit the Jynx directly in front of you as you enter an all new area with an Illumina orb and take its photo when it blows you a kiss.
Crabominable
- Take a photo of Crabominable dropping snow on Abomasnow (as mentioned above) for a four star shot.
Abomasnow
- This is also a four star shot opportunity for Abomasnow provided you snap it while the snow is falling on its head.
- This process is the four star window, it won't be four stars if you wait until it gets up, so be sure to snap Crabominable and then quickly move to Abomasnow while the snow is still falling.
Mightyena
- In Shiver Snowfields (Night), take a photo of Mightyena howling on top of the hill where Skarmory usually is. This is in the middle section where a group of Mamoswine hang out during the day, after going up the hill Swinub is climbing.
- Alternatively take the first alternate route mentioned above at night time and a Mightyena will howl in front of you as soon as you go through the snowfall. This is also a four star shot opportunity.
Glalie
- In Shiver Snowfields (Day), load rank three and make your way to the cavern before the normal end area.
- Glalie and Froslass will be on the left hand side of the cavern you go into after progressing through the middle section.
- Throw a fluffruit at Glalie and take a photo when it conjures ice armor.
Skarmory
- You can get a four star shot by snapping it in the cavern during the day if you throw an orb at it and take a photo as it flies away.
- Alternatively, there is also a far easier method: go to Shiver Snowfields (Day) and take both alternate routes mentioned above.
- When you are out by the open sea and moving towards the teleportation point, you will see a hole in the cliff to your left.
- Throw fluffruit at the whole and snap Skarmory as it flies out for a four star shot.
How To Take A Four Star Photo Of Every Pokemon In Outaway Cave

Clefairy
- At rank two or above, look to your left as soon as you enter the middle section of Outaway Cave, where Croagunk and Clefairy are.
- You will see three Clefairy gathered around a Crystabloom.
- Hit the Crystabloom with an Illumina orb and Clefairy should start floating - take a photo of this for a four star shot.
Carbink
- In the plant area at the end of the right route - where Vivillon, Noibat, and Carbink are - throw Illumina orbs at the Carbink on your right.
- There are four of them, all of whom will run out and dance for you if you hit them with Illumina orbs.
- The one I usually have the best luck with is the second one from the right. Snap it when it comes out and dances for you by spinning around.
Gengar
- Go to Outaway Cave and be on the lookout for purple portals.
- If there are Pokemon outside a portal, hit them with an Illumina orb and then throw another Illumina orb into the portal.
- Gengar will come out of the portal and scare the Pokemon - snap this for a four star shot.
- This works best with the two Carbink next to the portal on your right at the end of the intro area, the sleeping Croagunk next to the portal at the top of the middle area, and the last Rampardos in the end location if you take the left route at the junction.
Rampardos
- In the location mentioned above - the end area if you turn left, which has Crobat, Hydreigon, and Rampardos instead of Mawile, Jolteon, and Pumpkaboo - throw an Illumina orb into Gengar's portal.
- Throw an Illumina orb at Rampardos and it will charge at the portal in an attempt to headbutt Gengar.
- Take a photo of the collision.
Geodude
- The collision mentioned above will cause a Geodude to fall of the wall.
- Take its photo four a four star shot.
- Alternatively, go right at the junction and look to your left in the tunnel you enter. There are two Geodude fighting - Illumina the one further away from you and it will punch the Geodude off the ledge.
- Take a snap of the Geodude who fell when it's on the ground for another four star shot.
Jolteon
- Turn right at the junction once Outaway Cave is at rank three.
- When you go through the tunnel mentioned above, you will see a Mawile and two Carbink on the ground below you.
- Throw Illumina orbs at all three of these Pokemon and Diancie will emerge.
- Throw an Illumina orb at Diancie and it will emit a blast of light.
- This calms down the angry Mawile and allows you to take an alternate route to the end of the map.
- When you enter the next area, Jolteon will be on your left.
- Throw fluffruits next to Jolteon to attract a nearby Joltik.
- Joltik will jump on Jolteon's back.
- When Jolteon shrugs it off it will emit sparks of lightning - take a snap for a four star shot.
Mawile
- You can get a four star snap of both Mawile mentioned above.
- After you Illumina the first Mawile, you can snap it dancing for a four star shot.
- Alternatively, take a photo of the second Mawile eating a fluffruit after it calms down.
Diancie
- Take a snap of Diancie while it is emitting the blast of light mentioned above for a four star shot.
Sableye
- Turn right at the junction in the middle section of the map.
- Don't take the alternate route to Jolteon - turn right at the angry Mawile.
- Immediately turn around and look at the platform opposite Mawile.
- There is a sleeping Sableye here. Take a photo or wake it up with a fluffruit and take one - it's four stars either way.
Crobat
- Go to the Outaway Cave Illumina spot.
- In the middle section where you need to throw fluffruit down either side of a narrow bridge to get Steelix to come up from below, look to the left and scan for a Crystabloom.
- When you see it, hit it with an orb to make Crobat come out.
- Throw fluffruit down to Steelix so it jumps up and take a snap of Crobat dodging it for a four star shot.
Noibat
- This is also easiest to do in Steelix's Illumina spot.
- Go past the section mentioned above and do not turn left towards the alternate route.
- When you get to the next room and Steelix erupts out of the ground and chomps on a boulder, make sure it's in its Illumina state.
- This will cause it to rapidly rotate its mid section.
- While it's doing this, focus on the Noibat on its right and take several snaps of it.
- If you get Noibat dodging Steelix or Noibat retreating into its hole, you should be awarded a four star snap.
Vivillon
- While there are several types of Vivillon in the game, Vivillon (Jungle Pattern) in Outaway Cave is the easiest to take a four star photo of.
- When you get to the junction in Outaway Cave, turn right to the end location that has Noibat, Pumpkaboo, and Vivillon.
- At the end location, simply take a snap of two Vivillon in the same frame. This has consistently been awarded four stars for me despite remarkable variation in size, placement, direction, and so on.
Hydreigon
- When you get to the junction, turn left towards the standard end location for Outaway Cave. This is where Hydreigon, Rampardos, Sableye, and Goodra are, as opposed to moving towards Diancie and Mawile.
- Do not take the alternate route to Rimstone. This is supposed to follow the rank one route exactly, although you need to be a higher rank so that Hydreigon actually spawns.
- When you get to the end area where Hydreigon is flying over the water, hit it with an Illumina orb.
- When it starts to fly a small bit lower, throw a fluffruit into the water.
- Take a snap when Hydreigon comes down to get the fluffruit.
Drifloon
- This requires the second alternate route in Outaway Cave.
- Turn left at the junction and immediately start using your scanner.
- This should allow you to see a sleeping Crobat high up on the left. This is before you reach Sableye or Goodra, spam your scanner as soon as you turn left.
- Throw an Illumina orb at Crobat to make it fly away.
- Now look to your right, where you will see another sleeping Crobat hanging from the ceiling next to a Gengar portal.
- Use the melody player to lure Gengar out, who will then scare Crobat.
- This cause Crobat to stop annoying Rampardos, which allows you to take a new alternate route.
- When you take the route, which goes straight and then turns a right corner, look for a Crystabloom around the corner.
- Hit this with an Illumina orb and take a photo of Drifloon.
Croagunk
- When you leave the intro area and enter the main cave, immediately look down to your left.
- You will see a sleeping Croagunk and a Drifloon on the same platform as a Gengar portal.
- Illumina Gengar's portal to lure it out and then Illumina the sleeping Croagunk.
- This will cause Gengar to come over and scare it, which is a four star shot opportunity for Gengar.
- When Croagunk wakes up, take a photo of it throwing a rock at Gengar.
How To Take A Four Star Photo Of Every Pokemon In Ruins Of Remembrance

Natu
- In the Ruins of Remembrance, make your way to the final chamber.
- After the fourth Illumina statue, you will see a Golurk. This is by the gold pillar and just before the Golurk blocking the pedestal.
- Snap the Natu perched on Golurk's right shoulder.
Noivern
- This doesn't appear to always work at higher ranks, so load Ruins of Remembrance rank one.
- After the intro area, look straight ahead when you enter the cavern leading to the main chamber, where Salandit and Houndoom are.
- Throw an Illumina orb at Noivern and take its photo while it uses Boomburst.
Beheeyem
- At rank two, Beheeyem can occasionally be found sleeping next to the Golurk with Natu on its shoulder, mentioned two Pokemon above.
- Take a photo of the resting Beheeyem for a four star shot.
Golurk
- When you spawn, immediately use turbo to get through the narrow path at the beginning of the map. Turbo is unlocked after beating the main story and is used to speed up the NEO-ONE.
- In the first open area with Eldegoss, look at the sky. This is literally the start of the map, before you go down into the cavern.
- Golurk will fly over your head - take its photo for a four star shot.
Umbreon
- Get Umbreon to come out of hiding by using our Umbreon location guide.
- This will cause Umbreon to move further into the map. You can see it again next to the Golurk with the Natu sleeping on its shoulder.
- Wake Umbreon up by using Illumina orbs. This will cause it to get up and go over to have an interaction with Absol - take a photo of this.
Absol
- You can get a four star shot of Absol in the above interaction as well, so be sure to zoom out and take plenty of photos of both subjects to get four star shots for both Umbreon and Absol.
Jirachi
- After beating the game, Jirachi will appear at the start of the map directly in front of you as you approach the first open area.
- Illumina it and it will move further into the ruin.
- Just like you did to get to the Illumina Spot on Aurus island, light up all five Crystablooms in the main chamber with Illumina orbs.
- Jirachi is on the third Illumina pillar - you also need to hit it with three Illumina orbs to make it move again.
- When you get to the final section where you use the Aurus island Illumina orb to hit the central Crystabloom after all of the pillars, hit the Crystabloom.
- If all of the Crystablooms have been lit and you got Jirachi to move twice, Jirachi will appear again.
- Hit it with an Illumina orb to make it do a lap of the gold pillar of light.
- When it comes back, hit it with another Illumina orb and take a snap of it when it makes a wish, during which it is surrounded by gold stars.
How To Take A Four Star Photo Of Every Pokemon In The Research Camp
Cutiefly
- This is best done on the original research route, which goes counterclockwise and starts at the NEO-ONE next to Stoutland as opposed to the opposite side of the map.
- When you pass Sudowoodo, look to the right and you will see some Cutiefly in the flowers.
- Activate them using an Illumina orb and then play music so they dance.
- Take a snap for a four star shot.
Stoutland
- This can only be done on the original research route, which is the one described in the Cutiefly section above.
- When you spawn in, immediately feed Stoutland two fluffruit - this is important, as it has to be two.
- This will cause Stoutland to move to the middle of the map.
- Don't go inside the house.
- When you get to Eevee and Trubbish, hit Trubbish with a fluffruit.
- Eevee will get annoyed at you but Trubbish will accidentally hit it with poison gas.
- This causes Eevee to run over to Stoutland.
- Use fluffruit to lure the two closer together until they see each other.
- When they see each other, hit Stoutland with an Illumina orb.
- Take a photo of Stoutland while it is running around.
Eevee
- You can also get a four star photo of Eevee if you take a photo with it as the subject in the above scenario.
Bunnelby
- This also has to be on the original route, as described in the three entries above.
- When you get around to the far side where Bunnelby is - this will be marked by a scannable prompt - you need to do two things.
- Hit its ears with a fluffruit and then immediately with an Illumina orb.
- This will cause Bunnelby to jump much higher when it springs out of its hole.
- If you don't hit it with the Illumina orb, it won't be a four star shot because the jump will be too low.
- After hitting it with the orb, take a photo of Bunnelby doing the higher jump for a four star shot.